
Related Manuals for Fab Fours S496x


Summary of Contents for Fab Fours S496x
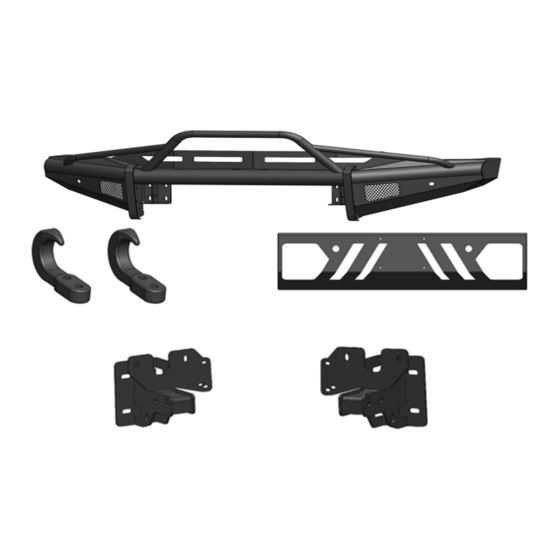
- Page 1 Installation manual Black Steel Front Bumper Product number: S496x Application: 2020 Chevrolet HD...
- Page 2 Use own good judgment and take your time. WARNINGS • Failure to observe the following warnings • Fab Fours, Inc. only approves installing this and instructions provided in this manual product according to these written instructions could lead to severe injury and/or death.
-
Page 3: Table Of Contents
SAFETY / DISCLAIMER TABLE OF CONTENTS A MESSAGE FROM THE OWNER GETTING STARTED PROVIDED MATERIAL DISASSEMBLY INSTALLATION CONTACT... -
Page 4: A Message From The Owner
A message from the owner Fab Fours’ was born out of a passion for customizing vehicles and a love of the outdoors. Our engineering team uses the latest 3D design software to turn new product ideas into reality. In our factory, designs come to life with the combination of cutting edge technology for metal cutting and forming and an American workforce that puts its’... -
Page 5: Getting Started
Getting started Before you begin the installation process of your new Fab Fours product, we suggest laying out all materials and parts on a pad or protective surface. Failure to fully account for all components before beginning installation may leave vehicle... -
Page 6: Provided Material
TOOLS REQUIRED EPOXY • 7mm socket wrench • 18mm socket wrench • 13mm socket wrench • 15mm socket wrench • 7/16” socket wrench S496X-IM 61632 50217-HW • 3/4” socket wrench QTY:2 20260-HW • 7/16” open end wrench • 3/4” open end wrench •... -
Page 7: Disassembly
Disassembly NOTE: Save all OEM parts until installation is complete! 1. Use a T10 star head socket wrench to remove the two (2) bolts from both the passenger and driver side wheel wells. Figure 1. Figure 1 2. Use a body pry tool to carefully remove the front of the fender flare away from the body. - Page 8 4. Use a 10mm socket wrench to remove the two (2) bolts at the base of the grill. Figure 4. Figure 4 5. Use a body pry tool to remove the nine (9) push pins holding the grill cover. Figure 5. Figure 5 6.
- Page 9 7. Use a 10mm socket wrench to remove the four (4) bolts on the top of the grill. Figure 7. NOTE: the factory tow hooks stay in the frame rail while extracting the front bumper from the frame rail ends. Figure 7 8.
- Page 10 10. With the grill gone you can access the bumper mounting bolts on the top deck. Use a 15mm socket wrench to remove the two (2) bolts one of the top (Figure 9) and one on the bottom (Figure 10). The bumper can now be removed from the truck.
- Page 11 13. Use a 15mm socket wrench to take four (4) bolts holding the mounting plates and lower louvers to the frame horns. Figure 14. Figure 14 14. Disconnect the lower louvers from the mounting plates by using a 7mm socket wrench to remove the six (6) bolts.
-
Page 12: Installation
Figure 18. NOTE: Make sure to mark the position of each Figure 18 housing for installing inot the Fab Fours bumper in the same manner as removed. 18. Carefully remove the four sensors and sensor housings from the bumper by spreading the housing clips out and pushing the sensor out simultaneously. - Page 13 19. Remove the sensor housings from the bumper by pressing the retainer clips in on the sides and pushing the housing out. Figure 20. Figure 20 20. Insert both brackets into the frame rail ends and very loosely install two (2) Oem bolts into the frame rail end flange just supporting both brackets.
- Page 14 22. Using the provided four (4) bolt stacks of 1/2”-13 x 4.5” yellow zinc hex bolt, flat washers, lock washer, and hex nut, loosely install them into each frame rail and bracket (22094 & 22095) (50217-HW). Figure 23 23. Using a 15mm socket wrench fully tighten down the four (4) Oem frame end bolts on both brackets (22094 &22095).
- Page 15 27. Route and reconnect the two (2) Oem wiring harness plugs from the factory louver system behind the frame rail end of the driver side fame rail end. If equipped, route the engine heater plug wiring behind the fame rail also. Zip tie and secure the wiring bundles as desired.
- Page 16 30. Using a pair of wire snips, clip off all the push retainers from the factory wiring harness. Figure 28 Figure 28 31. After the epoxy has cured, fully seat all four (4) sensors into the sensor housings being mindful not to distort the rubber sensor isolator that sits around the sensor tip.
- Page 17 32. Use a pair of 3/4” wrenches and the provided six (6) bolt stacks of 1/2”-13 x 1”, yellow zinc hex bolt, flat washers, lock washer, and hex nut, fully install the bumper lower guard(22097 or 22098) into the bumper(22091). (20260-HW) Figure 31 Figure 31 33.
- Page 18 36. Reconnect the factory wiring harness. 37. Install the tow hooks (61366) using the 3/4” socket wrench and two (2) 1/2”-13x2.25” bolts, flat and lock washers with nuts (20260-HW). Figure 35 Figure 35 Figure 36...
- Page 19 Contact information Fab Fours Inc. 2213 Industrial Park Road Lancaster, SC 29720 Phone: (866) 385-1905 Fax: 866-574-1423 Email: support@fabfours.com www.fabfours.com...
- Page 20 “If you’re looking for more of the same, Then you’ve come to the wrong place.” - Greg Higgs...
Need help?
Do you have a question about the S496x and is the answer not in the manual?
Questions and answers