Advertisement
Quick Links
Advertisement

Related Manuals for Fab Fours VC3900


Summary of Contents for Fab Fours VC3900
- Page 1 Installation manual ViCowl Product number: VC3900 Application: 2019 GMC 1500...
- Page 2 All liability for installation and use rests with the user or consumer. • Fab Fours, Inc. Only approves installing this product according to these written instructions with the hardware provided. Failure to install according to these instructions will invalidate the warranty. This includes, but is not limited to, using alternative installation methods, hardware, or materials.
-
Page 3: Table Of Contents
SAFETY / DISCLAIMER TABLE OF CONTENTS A MESSAGE FROM THE OWNER GETTING STARTED PROVIDED MATERIAL DISASSEMBLY HOOD HINGE INSTALLATION HOOD INSTALLATION VICOWL PREASSEMBLY VICOWL INSTALLATION CONTACT... -
Page 4: A Message From The Owner
A message from the owner Fab Fours’ was born out of a passion for customizing vehicles and a love of the outdoors. Our engineering team uses the latest 3D design software to turn new product ideas into reality. In our factory, designs come to life with the combination of cutting edge technology for metal cutting and forming and an American workforce that puts it’s heart and pride into every product. -
Page 5: Getting Started
Getting started Before you begin the installation process of your new Fab Fours product, we suggest laying out all materials and parts on a pad or protective surface. Failure to fully account for all components before beginning installation may leave vehicle... -
Page 6: Provided Material
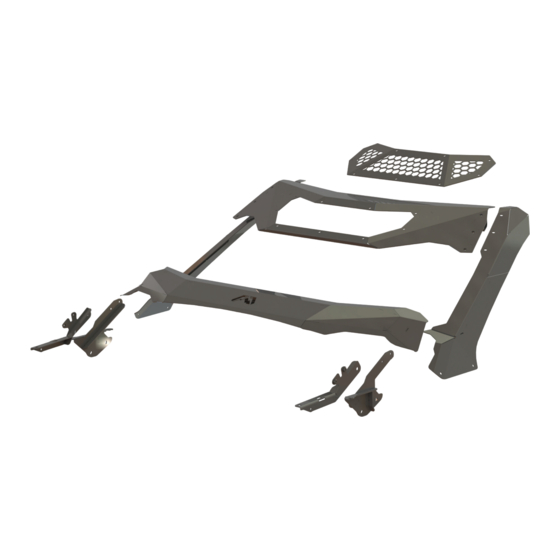
Provided materials 50161-HW VC3900-IM 21766 21765 61724 61720- QTY: 2 61723 21767 21313 21743 21768 21769 21771 21770... - Page 7 TOOLS REQUIRED Hardware kit | 50161 • 3/16” Allen Wrench Fab Fours Component • 7/23” Allen Wrench Identification Description • 9/16” Open end wrench 50161- HW Oil-embedded thrust bearing • 1/2” Open end wrench 50161- HW Oil-embedded flanged sleeve bearing •...
-
Page 8: Disassembly
DISASSEMBLY 1. Apply a small amount of blue painter’s tape across the hood and fender on both driver and passenger side. Mark the tape with a straight-line perpendicular with the hood and fender body seam. Use a knife to cut the tape along the hood and fender seam. - Page 9 8. Remove the splash shield from the fender area and set aside for future reinstallation. 9. Remove the eleven (11) wheel well liner bolts. (Figure 3, #1) 10. Remove retainer from the wheel well liner. (Figure 3, #2) Figure 3 11.
-
Page 10: Hood Hinge Installation
Hood Hinge installation 1. Install the brass bushing into the upper hole in the upper bracket. (Figure 6) 2. Stack the 3/8”-16 Nylock nut on the flat washer and place over the brass bushing. Add the brass thrust washer, followed by the lower bracket, flat washer and 3/8”-16 hex cap screw. - Page 11 5. Insert the passenger side bracket where the OEM bracket was removed. 6. Using the factory fender bolt, hand tighten the front bracket mount. (Figure 8) Figure 8 7. Install and hand tighten the two (2) factory bracket bolts. (Figure 9) 8.
- Page 12 10. Using a 1/2” open ended wrench and 1/2” socket/ratchet, install the ball joint, flat washer and M8 Nylock nut from the provided hardware kit. Snap the OEM air spring to the ball stud on the upper bracket. (Figure 6, Figure Figure 11 11.
-
Page 13: Hood Installation
Hood installation 1. With assistance, lift the hood onto the upper bracket of the hood brackets and hand tighten the four (4) factory nuts. 2. Align the upper bracket with the missing paint marks made under the hood from the factory brackets. -
Page 14: Vicowl Preassembly
vicowl preassembly Note: It’s highly recommended that all weld nuts are chased with the appropriate taps to clean out any powder coat or foreign debris prior to assembly. Tap sizes needed to do this are 1/2”-13 and 3/8"-16. 1. Install and hand tighten the rubber bumpers and 1/2”... - Page 15 4. Loosely install both ViCowl arms to the visor using the six (6) 3/8”-16 yellow zinc, hex cap screws and rubber bonded washers provided in the hardware kit. (Figure 17) Figure 17 5. Install the edge trim with adhesive onto the leading edge of the Cowl.
-
Page 16: Vicowl Installation
vicowl installation 1. With assistance, lift the upper ViCowl assembly up over the hood and slowly lower the arms into position. The arm mounting bracket should rest to the outside of the lower hinge and line up with the rear bolt hole. 2. - Page 17 7. Fully dill out the holes with the 17/32” drill bit. (Figure 23) 8. With the expendable tool threaded into the Rivnut, insert it into one of the holes making sure that it fits in far enough to flush the collar of the Rivnut to fender panel.
- Page 18 15. Check for symmetry of the visor and both arms. Using a 7/32” Allen Wrench, fully tighten the six (6) 3/8” stainless steel button head screws with rubber washers. 16. With assistance, lower the Cowl up on the mounting surface of the arms. The Cowl mounting surface goes to the outside of the bracket mounting surface.
- Page 19 Contact information Fab Fours Inc. 2213 Industrial Park Road Lancaster, SC 29720 Phone: (866) 385-1905 Fax: 970-385-1914 Email: support@fabfours.com fabfours.com...
- Page 20 “If you’re looking for more of the same, then you’ve come to the wrong place.” - Greg Higgs...
Need help?
Do you have a question about the VC3900 and is the answer not in the manual?
Questions and answers