
Related Manuals for Baker Hughes Panametrics Aurora H2O


Summary of Contents for Baker Hughes Panametrics Aurora H2O
- Page 1 Aurora H User’s manual 910-284 Rev. J ATTENTION! This manual is intended for units with S/N 3999 (software v.001.A through v.001.U) or lower only. [For units with S/N above 3999, use manual 910-317.]...
- Page 3 Aurora H Moisture analyzer for natural gas User’s manual 910-284 Rev. J April 2017 ATTENTION! This manual is intended for units with S/N 3999 (software v.001.A through v.001.U) or lower only. [For units with S/N above 3999, use manual 910-317.]...
- Page 4 [no content intended for this page - proceed to next page]...
-
Page 5: Table Of Contents
Contents Product registration ................. . ix Services . - Page 6 Chapter 3. Operation and general programming........23 Using the Aurora H2O .
- Page 7 4.2 Adjust offset values ................37 4.2.1 Adjusting the PPMv offset .
- Page 8 Chapter 6. Maintenance ............. . . 63 Spare parts .
-
Page 9: Product Registration
Product registration Typographical conventions Thank you for purchasing a model Aurora H2O from NOTE: These paragraphs provide information that provides a Panametrics. Please register your product at https://info. deeper understanding of the situation, but is not essential to bakerhughesds.com/New-product-registration-LP the proper completion of the instructions. product support such as the latest software/firmware upgrades, product information and special promotions. -
Page 10: Auxiliary Equipment
Auxiliary equipment Environmental compliance Local safety standards RoHS The Aurora H2O fully complies with RoHS regulations. The user must make sure that he operates all auxiliary equipment in accordance with local codes, standards, Waste Electrical and Electronic Equipment (WEEE) Directive regulations, or laws applicable to safety. -
Page 11: Chapter 1. Features And Capabilities
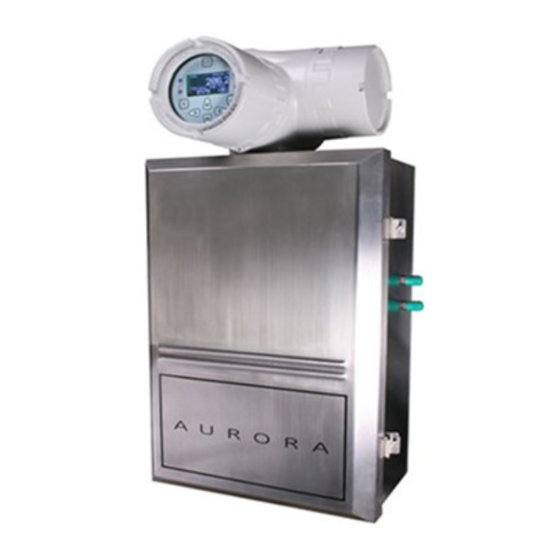
Chapter 1. Features and capabilities Overview Panametrics’ Aurora H2O moisture analyzer for natural gas makes it possible for natural gas processing and transportation facilities to monitor moisture content in real-time with high precision and reliability. The Aurora H2O analyzer uses tunable diode laser absorption spectroscopy (TDLAS) to measure moisture in natural gas at the speed of light. -
Page 12: Theory Of Operation
Theory of operation The Panametrics Aurora H2O (tunable diode laser Since only light comes in contact with the sample of absorption spectroscopy) hygrometer for natural gas is natural gas, and all of the wetted materials are made a system designed to continuously monitor the moisture of non-corrosive and inert materials, this technology content in natural gas. - Page 13 NOTE: Refer to Figure 2 below and Table 1 on page 5 to identify your Aurora components. Figure 2: Aurora H2O system assembly with optional USA/CAN heater...
- Page 14 NOTE: Refer to Figure 3 below and Table 1 on page 5 to identify your Aurora components. Figure 3: Aurora H2O system assembly with optional EU/ATEX heater...
- Page 15 NOTE: Refer to Table 1 on page 5 and either Figure 2 on page 3 or Figure 3 on page 4 to identify your Aurora components. Table 1: Aurora H2O system parts list Description Conduit I/O Display and magnetic stylus keypad Wiring terminals Isolation valve (needle valve) Membrane filter...
- Page 16 For natural gas, a pipeline insertion membrane filter IMPORTANT is recommended as shown in Figure 4 on page 6. The filter installed within the Aurora is designed to function The installation of the insertion filter is described in this as a secondary filter. A primary filter or filter train should manual.
- Page 17 Thermostat Brown 16 awg brown wire (2”) strip 1/4” Customer cable gland Heater connection Line 230 VAC 120 VAC Neutral Ground Blue Green/yellow Figure 5: USA/CAN heater wiring diagram Cable to thermostat Customer cable Cable to heater Cable function Conductor Color J-box terminal Line 1...
-
Page 18: Specifications
Specifications 1.4.1 Power 1.4.6 Temperature Analyzer: Operating 100-240 VAC, 50-60Hz, 10W -20° to +65°C (-4° to 149°F) 18-32 VDC (24 VDC nominal), 10W Storage Optional electrical heater: -20° to +70°C (-4° to 158°F) 120VAC, 120W Optional heater/thermostat setpoint 230VAC, 75W 20°±5°C (68°±9°F) for U.S. -
Page 19: User Interface
1.4.12 User interface 1.4.15 European certification Programmable “through-the-glass” via magnetic stylus Complies with EMC directive 2014/30/EU low voltage directive 1.4.13 Weight and dimensions 2014/35/EU and pressure directive 2014/68/EU for DN<25 Net Weight 1.4.16 Software 45 kg (100 lb) Displays all key parameters. provides time-base graphing, Overall dimensions data logging ability, export data as ASCII text. - Page 20 [no content intended for this page]...
-
Page 21: Chapter 2. Installation
Chapter 2. Installation Introduction The Aurora H2O analyzer provides direct indication of moisture concentration in natural gas. Temperature and pressure sensors are used to provide high precision enhancement. It may be installed in a wide variety of environmental conditions, and meets the requirements for operation in hazardous areas. -
Page 22: Choosing A Site For Installation
2.4 Choosing a site for installation You should have discussed environmental and installation rubber, and ambient moisture can permeate through factors with a Panametrics sales, application or service the tube wall into the sample gas. engineer by the time you receive the analyzer. 5. -
Page 23: Low Voltage Directive
2.5 Low voltage directive 2.7 Optional insertion probe/regulator To comply with the low voltage directive, you must install a switch or circuit breaker on the input power line. For greatest safety, locate the circuit breaker or power 2.7.1 Description switch near the electronics console. For natural gas applications that may have entrained particulate and liquid contaminants (especially TEG IMPORTANT... -
Page 24: Installation
2.7.2 Installation Note that the optional insertion probe/regulator can be 2. Confirm that the pipeline has been unpressurized. Refer installed only on unpressurized lines. There is no hot-tap to Figure 12 below and insert the housing into the pipeline installation for this device. through a ¾”... - Page 25 4. Turn the locking mechanism clockwise until it first 2.7.2b Installing the insertion membrane liquid touches the top of the thread-o-let. separator/pressure regulator assembly 5. Turn the locking mechanism counterclockwise 1. Confirm that the Allen cap screw head’s hex cavity is until the Allen screw is aligned with the thread slot clean and free from foreign material.
- Page 26 3. Refer to Figure 18 below and position the membrane wall. The pins will be in the middle of the second end of the probe above the installed housing. Slowly vertical slot (see Figure 20 below). lower the probe into the housing. Avoid membrane 6.
-
Page 27: Setting The Pressure
2.7.3 Setting the pressure 2.8 Making electrical connections NOTE: Perform these steps only after the entire system Refer to Figure 32 on page 21 for wiring connections. has been plumbed, including the Aurora H2O. 1. Aurora H2O has three ¾” NPT conduit inlet ports for power 1. - Page 28 3. Run the AC power connections to the power terminal NOTE: For an RS-485 Multi-drop network, a terminating resistor must be installed across the Aurora H2O RS-485 block shown in Figure 26 below. It is recommended to use 12-18 AWG (3.3 - 0.82 mm ) power wiring.
-
Page 29: Specific Conditions Of Use
• For operation on RS-232, connect RS-232(TXD) to (+), 8. If the Aurora H2O has been supplied with an optional RS-232(RXD) to GND) to RTN (see Figure 28 below). electrical heater, there are two possible configurations: USA/CAN or EU. Connect the AC power using a separate 6. - Page 30 Figure 31: Aurora H2O outline and mounting (ref. dwg #712-1456)
- Page 31 Figure 32: Aurora H2O electronic assembly wiring diagram (ref. dwg #702-8976)
- Page 32 [no content intended for this page]...
-
Page 33: Chapter 3. Operation And General Programming
Chapter 3. Operation and general programming Using the Aurora H2O Follow the information in this chapter to operate the Aurora H2O system. Class 1 laser product WARNING! Use of controls or adjustments or performance of procedures other than those specified herein may result in hazardous laser exposure. - Page 34 Inlet isolation needle valve Bypass needle valve Pressure regulator Sample/purge Purge inlet 3-way ball valve needle valve Keypad features Figure 33: Aurora H2O sample system (ref. dwg #902-004)
-
Page 35: Keypad Features
3.3 Keypad features Menu Power indicator Main display Fault indicator Laser indicator Information indicator Keypad lock indicator Cancel Enter Up, left, right, down arrows Figure 34 The Aurora H2O has seven keys: a menu key, four arrow keys, The power indicator is normally lit when the instrument a cancel key, and an enter key. -
Page 36: Unlocking The Keypad
3.3.4 Unlocking the keypad After power-on, the Aurora H2O keypad is locked as indicated by the symbol , lit up with a red backlight. It is necessary to enter the keypad unlock sequence to make any changes to the Aurora H2O. Similar to a mobile phone, the Aurora H2O will prompt Figure 38: Main menu the operator to unlock if any key is pressed. -
Page 37: Setting Up The Display
3.4 Setting up the display When the screen is Use the arrow keys to unlocked, touch the menu highlight the desired key and the main menu unit and press enter. appears with several The screen returns to options. To set up the the display menu. -
Page 38: Adjust
3.4.5 Adjust 3.4.6 Reverse NOTE: The display brightness is not adjustable in the current To reverse the text and Aurora design; the brightness adjustment is not available. background shades, from the display menu use the To modify the display arrow keys to highlight contrast and brightness, reverse and press enter. -
Page 39: Setting Up The Outputs
3.5 Setting up the outputs 3.5.1 Selecting an output for setup 3.5.3 Selecting an output type To set up outputs, from To change the output type, the main menu choose from the output menu outputs... and press enter. select type and press The following screen enter. -
Page 40: Changing The Lower Output Span
3.5.5 Changing the lower output span 3.5.6 NAMUR response The Aurora H2O can report measurement failure information To adjust the lower output via the analog outputs. The signal presentation of failure span, from the output information is consistent with by the recommendations menu select lower and established by the “User Association of Automation press enter. -
Page 41: Testing The Output
3.5.6a NAMUR filtering 3.5.7 Testing the output There may be situations where the NAMUR signaling The test menu causes the behavior is undesirable (see Table 4 below). For example, Aurora H2O to generate a process operating at or near the Aurora H2O calibration a 0- or 4-20mA output limits, or when connected to a SCADA or DCS system that at the percent of scale... -
Page 42: Trimming The Outputs
3.5.8 Trimming the outputs The trim menu enables the operator to compensate for differences in measurement of the 0/4-20 mA outputs by connected recorders or SCADA equipment. To trim the output: NOTE: Since you cannot trim 0 mA for negative offsets, trim Select trim from the output for the lower end of the scale is at the 4 mA output level. -
Page 43: Setting Up The Alarms
3.6 Setting up the alarms NOTE: The Aurora H2O is not equipped with alarm relays. The alarm function is useful only when reading the alarm status via modbus. 3.6.1 Selecting an alarm output 3.6.3 Selecting alarm units To set up alarm outputs, To select alarm units, from on the main menu choose the alarm menu select... -
Page 44: Selecting An Alarm Type
3.6.4 Selecting an alarm type 3.6.6 Changing the upper alarm span To change the alarm type, To adjust the upper alarm from the alarm menu span, from the alarm select type and press menu select upper and enter. A screen similar to press enter. -
Page 45: Chapter 4. Programming Advanced Features
Chapter 4. Programming advanced features Comm port settings To access the communication port settings, from the main menu select settings and press enter. The following screen appears: To access the communications port settings, select comms... and press enter. The following screen appears: 4.1.1 Selecting a comm port There are two physical... -
Page 46: Setting The Baud Rate
4.1.2 Setting the baud rate 4.1.4 Selecting protocol To set the baud rate, from To choose the protocol, the comm port menu from the comm port menu select baud rate and select protocol and press press enter. The following enter. The following screen screen appears. -
Page 47: Adjust Offset Values
4.2 Adjust offset values 4.2.2 Adjusting the smoothing filter To adjust offset values, from the settings menu To adjust the smoothing select adjust... and press filter, from the user enter. The following screen adjustments menu select appears. filter and press enter. The following screen appears. -
Page 48: Adjusting The Scan Averaging
4.2.3 Adjusting the scan averaging 4.2.4 Setting the dew point calculation method To adjust the scan • The dew point is the temperature at which the air averaging, from the user is saturated with respect to water vapor over a adjustments menu select liquid surface. -
Page 49: Set Up The Background Gas
4.3 Set up the background gas 4.3.1 Selecting the type of gas The Aurora H2O TDLAS is normally calibrated to a standard From the gas data menu, gas mixture that is representative of “typical” natural gas. select background and The primary components and concentrations of this gas press enter. -
Page 50: Entering A Label
4.3.3 Entering a label Selecting either gas1 or gas2 enables the label menu item. This menu opens a keyboard display that allows the user to change the ‘Gas ½’ label to one of their own choosing. Entering the label menu requires the user passcode (2719). To enter/edit a label: Selecting the label menu item displays the alphanumeric entry control (see Figure 42 below). -
Page 51: Adjusting The Gas Offset
4.3.4 Adjusting the gas offset 4.4 Clock settings The input information for The clock settings are for gas molecular weight is informational purposes. not currently used for any They are used to keep moisture calculations and track of the test analyzer is reserved for future use. -
Page 52: Resetting The Month
4.4.3 Resetting the month 4.4.5 Resetting the year To reset the month, from To reset the year, from the clock menu select the clock menu select month and press enter. year and press enter. The The following screen following screen appears. appears. -
Page 53: Pressure Settings
4.5 Pressure settings 4.5.3 Changing the constant To reset the pressure settings, from the settings If the pressure source menu, select pressure... selected is constant, to and press enter. The reset its value, select following screen appears. constant from the pressure menu and press enter. -
Page 54: Editing Pressure Calibration
4.5.4 Editing pressure calibration Pressure input in this section is used only for equivalent dew point calculations. Equivalent dew point is the dew point of the process gas at the process pressure. Input a “constant” value if the line pressure is at a normal pressure, or use an external pressure transmitter to input a “live”... -
Page 55: Regional Settings
4.6 Regional settings 4.6.2 Setting the decimal format This section enables the setting of regional information, depending on the location of the Aurora H2O. The decimal format option To reset the regional determines whether a settings, from the settings decimal [.] or a comma menu, select locale... -
Page 56: Setting The Unit System
4.6.4 Setting the unit system 4.7 User calibration Beginning with software revision H2O.001.F, the Aurora H2O IMPORTANT supports a two-point user calibration for use in methane/ If the country code (see Setting the country code on page natural gas. This is provided so that a field calibration can 45) has been set to 81 (Japan) the unit system menu is be easily performed to cause the Aurora H2O measurement not available. -
Page 57: Service Settings
NOTE: The user can exit to The user calibration menu is now enabled. the display and return to the user cal menu without affecting the calibration procedure. The selections on the user calibration menu include the following functions: When the reading is stable, select read zero. -
Page 58: Aurora H2O Information
4.9 Aurora H2O information 4.9.3 Checking the software To check the Aurora H2O information, from the main To view the software menu select about and versions being used, from press enter. The following the about menu select screen appears. software versions and press enter. -
Page 59: Checking The Alternate Gas Composition
4.9.5 Checking the alternate gas composition 4.10 Locking/unlocking the display The Aurora H2O TDLAS is normally calibrated to a standard gas mixture that is representative of “typical” natural gas. To lock the Aurora H2O The primary components and concentrations of this gas against any future mixture are as follows: changes, from the main... - Page 60 Figure 45: Programming menu map...
-
Page 61: Chapter 5. Auroraview Interface Software
Chapter 5. AuroraView interface software Capabilities Your Aurora H2O analyzer is shipped with a CD which includes a PC-software application called AuroraView. With AuroraView, you can: • View Aurora H2O configuration Items such as alarms and outputs. • Use the datalog function to copy data to a comma delimited .txt file which can be opened by spreadsheet applications such as Microsoft Excel. -
Page 62: Installing Auroraview
5.3 Installing AuroraView 1. Insert the installation CD into the optical drive on your PC. 4. Exit all other programs before running the installer (see Figure 48 below). 2. The installation program should launch automatically (see Figure 46 below). If it does not, select start 5. - Page 63 6. At the next screen, accept the software license 8. During installation, the screen shown in Figure 52 agreement (see Figure 50 below) and click next. below appears. 7. The next screen (see Figure 51 below) provides 9. The screen shown in Figure 53 below appears when instructions for initiating the installation.
-
Page 64: Starting Auroraview
5.4 Starting AuroraView 1. From the start menu, click programs AuroraView AuroraView (see Figure 54 below). Figure 54: AuroraView in programs menu... - Page 65 2. AuroraView boots up and displays a screen similar to Figure 55 below. Figure 55: AuroraView main screen...
-
Page 66: Using The Main Menus
5.5 Using the main menus 1. Click measurements config (see Figure 56 below). Figure 56: Configuration measurements Unit string: set this value to the value you want to read, plot or datalog. Digits of precision: set a numerical value (typically 0, 1, 2). This sets the resolution of the displayed measurement units to the right of the decimal place (i.e., “20.78 would result from a setting of “2”). - Page 67 2. Click alarms config This window enables the user to configure the alarm status within the AuroraView application. This feature allows you to remotely configure Aurora H2O alarms, which are used only with modbus RTU digital output. The AuroraView alarms are shown in Figure 58 and Figure 59 below and Figure 60 on page 57.
-
Page 68: Datalogging With Auroraview
5. Click comms 6. Click help (see Figure 66 below). This screen indicates the revision level of AuroraView. This window (see Figure 65 below) enables you to configure communication options. If you have more than one Aurora H2O on your network, you will have to establish different network ID’s for each analyzer using the main keypad on the Aurora H2O. -
Page 69: Working With Trend Plots, Trend Tabular Data And Scan Plots
5.7 Working with trend plots, trend tabular data and scan plots 1. Trend plots is a powerful graphing feature in AuroraView. You can graph many parameters at the same time (see Figure 68 below). Figure 68: Using trend plots NOTE: If you use the secondary y-axis, you may see “–“ tick marks preceding the value. These are tick marks from the graphical applet and not an indication of negative values. - Page 70 4. Copying and pasting a trend plot can be done from AuroraView (see Figure 72 and Figure 73 below) One way to do this quickly is to simply right click over the data area and choose copy. In another application, like Microsoft Word, simply paste. Figure 72: Copying a trend plot Figure 73: Pasting a trend plot Another option is to right-click and chose the option export simplified Image (see Figure 74 below).
- Page 71 Figure 74: Exporting a simplified image Figure 75: Selecting enhanced metafile...
- Page 72 Figure 76: Pasting an enhanced metafile Working with trend tabular data, you will be able to see data in tabular format as shown in Figure 77 below. You can adjust column widths to see data more easily with full titles in the header row. Figure 77: Trend data in tabular format...
-
Page 73: Chapter 6. Maintenance
Chapter 6. Maintenance CAUTION! Class 1m invisible laser radiation when open. Do not view directly with optical instruments. WARNING! Use of controls or adjustments or performance of procedures other than those specified herein may result in radiation exposure that is more hazardous than specified. -
Page 74: Cleaning The Mirror
6.2 Cleaning the mirror The Aurora H2O analyzer may provide the message weak NOTE: There are two versions of the Aurora optical signal return - check mirror on the top line of the display, absorption cell assembly (see Figure 78 below), each along with the red light “!”... -
Page 75: Instructions For Optical Absorption Cell Style 1
6.2.1 Instructions for optical absorption cell style 1 IMPORTANT CAUTION! Handle the mirror assembly with extreme Use the instructions in this section only if you have care. Performance of the analyzer is critically identified your optical absorption cell as style 1 in Figure 78 dependent upon the mirror integrity. - Page 76 4. Using a piece of lens tissue, wet a small area with a acetone is used only once to clean off any visible very small amount of analytical grade acetone residue on the mirror surface. (barely wet the lens tissue). Typically, one drop of 8.
-
Page 77: Instructions For Optical Absorption Cell Style 2
12. Loosely reinstall the six retaining bolts by hand. 1. Using a 5/8’ socket wrench to loosen the hex head of the mirror assembly, gently unscrew the mirror assembly 13. Use an Allen wrench to tighten the six retaining bolts in an from the bottom of the absorption cell. - Page 78 4. Make a visual inspection of the mirror surface, and record 9. Repeat steps 6-8 above at least three times, using any observations of gross contamination. If the mirror a new lens tissue each time. Each lens tissue wetted appears to be clean, do not clean it. Instead, reinstall it with acetone is used only once to clean off any visible carefully into the system (go to step 12).
-
Page 79: Replacing The Filter Element
6.3 Replacing the filter element The Aurora H2O uses a membrane filter (see Figure 93 NOTE: Because the O-rings are reused, replacement o-rings below) as the secondary filter. This filter is intended to are not included in the maintenance kit. prevent liquid or particulate contamination from entering the absorption cell. - Page 80 [no content intended for this page]...
-
Page 81: Chapter 7. Troubleshooting
Chapter 7. Troubleshooting Introduction The following are possible Aurora H2O analyzer conditions with details on how to deal with them. 7.2 Blank display 1. Is the green power led lit? a Yes - proceed to step 2. b. No - check the wiring and the fuse 2. - Page 82 The possible status messages and indicators are summarized in Table 6 below. Table 6: Status messages and indicators Message Condition Description Status OK Info Aurora H2O is operating normally, no faults or other indications. Aurora H2O is reading moisture, but cannot detect the presence No CH4 detected Info of methane.
-
Page 83: No Flow Measurement Indicated On Aurora H2O Measurement Cell Outlet
7.5 No flow measurement indicated 7.6.2 Using a moisture standard on Aurora H2O measurement The best moisture standard to use is one generated by a moisture generator as a flowing reference, due to the fact cell outlet that static moisture standards in cylinders have limited capability and reliability. -
Page 84: Background Selection Lockout
Background selection lockout To prevent accidental selection or tampering, the Attempting to access the background gas selection menu background menu option can be disabled using a with the switch in the locked out (down) position will result in mechanical switch located behind the Aurora H2O display. the following message being displayed: Access to the switch requires removal of the cover, and should be performed only in non-hazardous conditions. -
Page 85: Appendix A. Modbus Rtu/Rs485 Communications
Appendix A. MODBUS RTU/RS485 communications A.1 Introduction The Aurora H2O supports digital communications using the modbus/RTU protocol, with 2-wire RS-485 or 3-wire RS-232C as the physical layer. data rate can be specified at rates from 4800 to 115200 bits per second (bps), with selectable parity. -
Page 86: Modbus Registers
A.3 Modbus registers All registers denoted with a bullet (•) in the read-only column are read-only registers and should be read with the function “read input registers.” All other registers can be read and written with “read holding registers” or “write multiple registers.” NOTE: The modbus register address map supported by Aurora H2O is shown in Table 7 below. - Page 87 Table 7: Modbus register map Read Function Parameter Description Range/state Addr Data type only Test % value of output, 0~100 2280 Double/float Output 3 Trim sequence start/ 2300 Integer resume live output Units Reg. address of meas. 2310 Integer Type 0 = 4-20mA, 1 = 0-20mA 2320 Integer...
- Page 88 Table 7: Modbus register map Read Function Parameter Description Range/state Addr Data type only Settings Adjust PPM level offset adjust -25.00 ~ +225.00 5210 Double/float Moisture reading 10 ~ 200 samples 5230 Integer average filter size Clock Hour 0~23 5410 Integer Minutes 0~59...
- Page 89 Table 7: Modbus register map Read Function Parameter Description Range/state Addr Data type only PSIg ------ 9530 Double/float • kg/cm ------ 9540 Double/float • Bars ------ 9550 Double/float • mmHg ------ 9560 Double/float • Internal pressure ------ 9610 Double/float • ------ 9612 Double/float...
-
Page 90: Modbus System Status Codes
A.4 Modbus system status codes Table 8 below lists the system status codes and descriptions. It is possible for multiple status codes to be present. The hexadecimal values represent the bit set for a given condition. Table 8: System status codes Status Description Aurora H2O is operating normally, no faults or other indications. - Page 91 Warranty Return policy Each instrument manufactured by Panametrics is If a Panametrics instrument malfunctions within the warranted to be free from defects in material and warranty period, the following procedure must be workmanship. Liability under this warranty is limited to completed: restoring the instrument to normal operation or replacing 1.
- Page 92 Tel: +1 800 833 9438 (toll-free) E-mail: mstechsupport@bhge.com Tel: +1 978 437 1000 E-mail: mstechsupport@bhge.com Panametrics, a Baker Hughes Business, provides solutions in the toughest applications and environments for moisture, oxygen, liquid and gas flow measurement. Experts in flare management, Panametrics technology also reduces flare emissions and optimizes performance.
Need help?
Do you have a question about the Panametrics Aurora H2O and is the answer not in the manual?
Questions and answers