Table of Contents
Advertisement
Quick Links
Downloaded from:
http://www.usersmanualguide.com/
MODEL
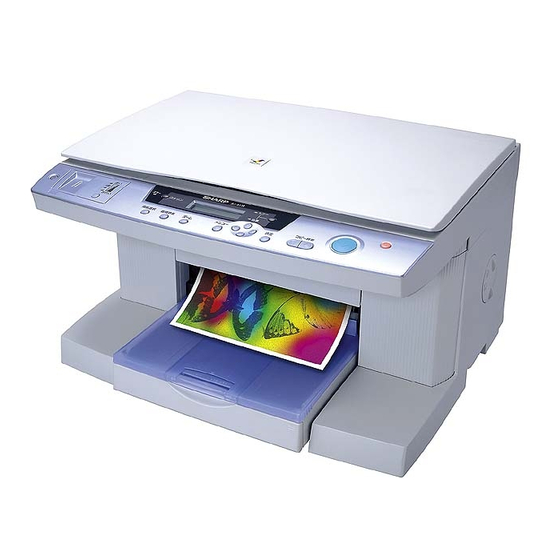
AJ-6110
COLOUR INKJET MULTIFUNCTION
PRINTER
SETUP GUIDE AND
OPERATION MANUAL
USING THIS UNIT WITH
YOUR COMPUTER
USER MAINTENANCE
TROUBLESHOOTING
APPENDIX
Page
4
6
24
31
40
43
54
61
64
71
75
Advertisement
Table of Contents

Related Manuals for Sharp AJ-6110


Summary of Contents for Sharp AJ-6110
-
Page 1: Table Of Contents
MODEL AJ-6110 COLOUR INKJET MULTIFUNCTION PRINTER SETUP GUIDE AND OPERATION MANUAL Page INTRODUCTION SETTING UP THE UNIT LOADING PAPER INSTALLING THE SOFTWARE OPERATION PANEL MAKING COPIES FUNCTIONS SET BY THE USER USING THIS UNIT WITH YOUR COMPUTER USER MAINTENANCE TROUBLESHOOTING... - Page 2 This equipment complies with the requirements of Directives 89/336/EEC and 73/23/EEC as amended by 93/68/EEC. Dieses Gerät entspricht den Anforderungen der EG-Richtlinien 89/336/EWG und 73/23/EWG mit Änderung 93/68/EWG. Ce matériel répond aux exigences contenues dans les directives 89/336/CEE et 73/23/CEE modifiées par la directive 93/68/CEE.
- Page 3 Place the unit on a firm, level surface. Be sure to use genuine SHARP ink tanks. If you get ink spots on your skin, wash with water as soon as possible. Store spare ink tanks out of the reach of children.
- Page 4 LOADING PAPER INTO THE PAPER TRAY ..........24 LOADING THE BYPASS TRAY WITH PAPER ..........28 INSTALLING THE SOFTWARE SOFTWARE FOR THE AJ-6110 ..............31 HARDWARE AND SOFTWARE REQUIREMENTS ........32 INSTALLING THE SOFTWARE ..............32 HOW TO USE THE ONLINE MANUAL ............37 HOW TO PRINT ....................
- Page 5 FUNCTIONS SET BY THE USER SAVING THE USER DEFAULT SETTINGS ..........54 INTRODUCTION RESETTING THE USER DEFAULT SETTINGS ........... 55 PROGRAM TIMEOUT ................... 55 SLEEP MODE....................56 SETTING UP THE UNIT SETTING AUTO POWER OFF MODE............56 SPECIFYING THE PERIOD UNITL THE UNIT ACTIVATES "AUTO POWER OFF"...
-
Page 6: Introduction
Workstation 4.0 (Service Pack 4 or later), Windows 2000 Professional, Windows XP Professional and Windows XP Home Edition. When using SHARP original data with A4/8.5"x11" paper in the fastest mode (copier) or draft mode (printer). By storing the scanned data in memory, this unit can make multiple copies with only scanning once. -
Page 7: Using The Manuals
USING THE MANUALS In addition to this printed manual an Online Manual is also provided. To get full use of all features and functions of this product, be sure to familiarise yourself with both manuals. This printed manual provides all installation and setup instructions as well as instructions in the use of all copier functions. -
Page 8: Setting Up The Unit
SETTING UP THE UNIT SETUP PROCEDURE When using the unit for the first time, setup the unit following the procedure shown below. Setup workflow Reference Open the package, and make sure that all Page 7 the accessories are supplied with the unit. Remove the protective materials. -
Page 9: Confirming The Contents
CONFIRMING THE CONTENTS The following items are packed with the unit in the box. After opening the box, please check if the following are included with the unit. If any of the items are missing, please contact your point of purchase. Colour ink tanks Black ink tank Colour print head... -
Page 10: Part Names And Functions
PART NAMES AND FUNCTIONS The following illustrations show the names and locations of the main machine parts. Front Side Paper knob Original cover When copying or printing onto thick Open this cover to set paper or printing onto an envelope, an original for copying adjust the knob to the setting. - Page 11 PART NAMES AND FUNCTIONS Print heads and Ink tanks Print head latch Colour print head Use this to remove or install Applies ink onto the the print heads. paper. Cyan ink tank Black print head Yellow ink tank Applies ink onto the Magenta ink tank paper.
-
Page 12: Unpacking
UNPACKING Remove tapes shown in the illustrations. Remove the protective material. Open the front cover, and remove the protective material shown in the illustration. Refer to step 4 of "INSTALLING THE PRINT HEADS AND THE INK TANKS" for details on how to open the front cover. (See page 15) Release the scan head locking switch. -
Page 13: Attaching The Trays
ATTACHING THE TRAYS Attach the paper tray and the output tray to the front of the unit. Follow the steps shown below. Attach the paper tray by firmly pushing down both edges. Push here to fix the paper tray securely. Make sure that the paper tray has been securely attached to the body. -
Page 14: Connecting The Interface Cable
CONNECTING THE INTERFACE CABLE This unit includes both USB and parallel interface connectors. Interface cables for connecting the unit to your computer are not included with this unit. Please purchase the appropriate cable for your computer. This unit is equipped with two types of interface connectors, which enables you to connect two computers at a time. -
Page 15: Connecting The Power Cord
CONNECTING THE POWER CORD Insert the power cord into the socket on the rear of the unit. Connect the other end of the power cord to an outlet. The unit will be turned on automatically. Do not connect the unit to other than a local voltage outlet. Plugging the unit into an incompatible power supply may cause irreparable damage. -
Page 16: Selecting The Desired Language For Display Messages
SELECTING THE DESIRED LANGUAGE FOR DISPLAY MESSAGES The following message appears when you turn on the unit for the first time after purchasing. Language 2.English Select the desired language for the display messages. The default setting is "2. English". Follow the steps shown below to select the desired language. For display and button functions, refer to "OPERATION PANEL"... -
Page 17: Installing The Print Heads And The Ink Tanks
INSTALLING THE PRINT HEADS AND THE INK TANKS Installing the Print Heads During ink tank replacement, if the cover is left open for more than 8 minutes, the carriage will automatically return to its home position. To move the carriage to the centre position again, close the front cover and then open it again. - Page 18 INSTALLING THE PRINT HEADS AND THE INK TANKS Open the maintenance cover. Raise the print head latch. Raise the latch until it comes to a complete halt. Lift up firmly as far as it will go. Press the knob in the direction of the arrow to release the lock.
- Page 19 INSTALLING THE PRINT HEADS AND THE INK TANKS Lower the print head latch. Lower the latch until it clicks into the latched position. Make sure that the print head is fixed securely. Failing to do so may generate noise or cause errors. Inserting the ink tanks Unpack the ink tanks from their protective wrapping and slowly remove the tape.
- Page 20 INSTALLING THE PRINT HEADS AND THE INK TANKS Insert each of the ink tanks to the print head of the corresponding number. Match the ink tank number to the print head number. Make sure that each tab securely locks the ink tank by pressing here. Hook the projection on the ink tank here to fix them.
- Page 21 INSTALLING THE PRINT HEADS AND THE INK TANKS The unit will automatically start a sequence to clean the print heads and the following message will appear. Cleaning the Print Head... After the cleaning sequence is complete, the machine will automatically print the alignment patterns while the following message appears.
-
Page 22: Aligning The Print Heads
ALIGNING THE PRINT HEADS The print heads must be aligned after being installed into the unit, or if lines are printed unevenly (See the illustration on page 22). Follow the steps listed below to align the print heads. Set A4 sized paper in the tray. Refer to "LOADING PAPER"... - Page 23 ALIGNING THE PRINT HEADS After printing of the alignment patterns is complete, the following messages will appear. Select A pattern Seventeen block figures with a vertical line on each vertical side ( ) are printed in pattern A. Of the seventeen figures determine which block is most nearly centred between the vertical lines and note the corresponding number.
- Page 24 ALIGNING THE PRINT HEADS After selecting "B pattern", select the best number for "C pattern" in the same way. Thirteen lines are printed in pattern C. Of the thirteen lines determine which line is the straightest and note corresponding number. Example +1 +2 +3 +4 +5 +6 Select C pattern...
- Page 25 ALIGNING THE PRINT HEADS A message will appear asking you to confirm the alignment selections. Use the to select "2. Yes" or "1. No" and then press the "ENTER" button. Are you sure? 2.Yes If "2. Yes" was selected the selected alignment values will be in effect and the following message will appear.
-
Page 26: Loading Paper
LOADING PAPER Follow the steps below to load paper into the paper tray or bypass tray. For detailed information of paper types, see page 77. LOADING PAPER INTO THE PAPER TRAY Remove the output tray , and open the front lid of paper tray Open the guides wide ( , ) enough to allow easy loading of the paper. - Page 27 LOADING PAPER INTO THE PAPER TRAY Move the guides ( , ) to touch the edges of the paper. (For printing only) When loading envelopes 1 Set the paper knob to the "Thick Paper ( )" setting. 2 Load the envelope face down with the flap to the right, and then adjust the paper guides to the width of the envelope.
- Page 28 LOADING PAPER INTO THE PAPER TRAY (For printing only) When loading index cards, postcards or birthday cards 1 Set the paper knob to the "Thick Paper ( )" setting, and then load the card print side down. Be sure to load in portrait direction.
- Page 29 LOADING PAPER INTO THE PAPER TRAY Pull out the output tray extension to the paper size, and then raise the paper stop guide. Be sure that paper is free of rips, dust, wrinkles, and curled or bent edges. Make sure all the paper in the stack is the same size and type. Fan the paper and tap it against a flat surface to ensure it is even before loading into the unit.
-
Page 30: Loading The Bypass Tray With Paper
LOADING THE BYPASS TRAY WITH PAPER If you wish to print on banner paper or another paper type not loaded into the main paper tray, use the bypass feed. Only one sheet of paper (or up to 5 sheets of banner paper (only for printing)) can be placed in the bypass tray at a time. - Page 31 LOADING THE BYPASS TRAY WITH PAPER To use the bypass tray in the printer mode When setting the paper on the bypass tray before printing, follow the steps below. 1) Open the bypass tray by referring the previous page to set the paper. The following message appears when the unit detects that the paper is placed on the bypass tray.
- Page 32 LOADING THE BYPASS TRAY WITH PAPER (For printing only) When loading an envelope Open the bypass tray until it reaches position 2 (the tray has two stop positions), set the paper knob to the "Thick Paper ( )"setting. Load the envelope print side up with the flap to the right, and position against the right edge of the tray as shown bellow.
-
Page 33: Installing The Software
Information on how to use the online manual is also provided. The following term is used in this chapter. CD-ROM Means the supplied CD-ROM with the AJ-6110 software. SOFTWARE FOR THE AJ-6110 The supplied CD-ROM includes software for this unit. To install the software onto your computer, see the next page. -
Page 34: Hardware And Software Requirements
HARDWARE AND SOFTWARE REQUIREMENTS Check the following hardware and software requirements in order to install the software. Computer type IBM PC/AT or compatible computer equipped with a USB bi-directional parallel interface (IEEE 1284) Operating system Windows Me, Windows 98, Windows 95, Windows XP Professional Windows XP Home Edition ,Windows 2000 Professional Windows NT Workstation 4.0 (Service Pack 4 or later) - Page 35 INSTALLING THE SOFTWARE Check if the appropriate language has been selected, and then click the "Next" button. Normally, the correct language is selected automatically. Select the software packages to be installed, and then click the "Next" button. The software packages with checkmark ( ) on the list on the screen will be installed.
- Page 36 INSTALLING THE SOFTWARE Check the contents of the package on the screen, and then click the "Start" button. The software packages to be installed will be displayed on the screen. If inappropriate packages are displayed, click the "Back" button to select appropriate packages again. Once the installation starts, each installer of the selected software packages will run automatically.
- Page 37 INSTALLING THE SOFTWARE If a warning message appears regarding "Windows logo test" in Windows XP, be sure to click the "Continue Anyway" button. If "Digital Signature Not Found" window appears on Windows 2000, be sure to click the "Yes" button. Those windows will not affect your operation.
- Page 38 INSTALLING THE SOFTWARE Sharpdesk 1) After confirming the message in the "Welcome to Sharpdesk installation" window, click the "Next" button. 2) Read the message in the "Information" window, and then click the "Next" button. 3) When the "Choose Destination Location" window appears, click the "Next"...
-
Page 39: How To Use The Online Manual
The Online Manual can be printed out using Acrobat Reader. SHARP recommends printing out the sections which you refer to regularly. Refer to "Help" of Acrobat Reader for more details on the operation and function of Acrobat Reader. -
Page 40: How To Print
Open the document you intend to print, and select "Print" from the application's "File" menu. Make sure that "SHARP AJ-6110" is selected as the current printer. If you intend to change any print setting, click the "Properties" button to open the setting dialog. -
Page 41: Bonus Software
BONUS SOFTWARE To install MGI PhotoSuite 4 SE on the supplied CD-ROM, please refer to the following procedures. After turning on your computer, insert the CD-ROM. Double-click "My Computer" ( ), and then double-click the CD- ROM ( ) icon. On Windows XP, click the "Start"... -
Page 42: Operation Panel
OPERATION PANEL Check the names and function of the parts on the operation panel. PART NAMES AND FUNCTIONS Refer to the illustration of the operation panel on your unit. POWER button ( BRIGHTNESS/INTENSITY button Use to turn the unit on/off. (See page 13) Use to set the brightness and intensity. -
Page 43: Basic Functions And Display Panel
BASIC FUNCTIONS AND DISPLAY PANEL This unit can be used as a copier, a scanner, and a printer. The display panel shows currently selected function. All the three functions are available when the display panel shows the ready message. Ready The ready message is displayed when Ready to Copy the unit is ready for use as a copier,... -
Page 44: How To Change Settings From The Operation Panel
HOW TO CHANGE SETTINGS FROM THE OPERATION PANEL You can change your copier settings for "PAPER SELECT", "BRIGHTNESS/INTENSITY", "ZOOM" and "MENU". To change each setting, press the relevant button once, and press "ARROW" buttons until the desired item name appears on the first line in the display panel. -
Page 45: Making Copies
MAKING COPIES In this chapter, you will learn a variety of copying operations. NORMAL COPYING Make sure that you have completed the initial setup of the unit, and that the power is on. If the power cord is plugged into a power source and the unit is still off, press the "POWER" button ( ) to turn on the unit. -
Page 46: Original Placement
ORIGINAL PLACEMENT Open the original cover, and place the original. When placing the original, place the original face down on the original table against the guides as shown in the illustration. Place the original face down on the original table. Align the corner of the original with the ( ) mark. -
Page 47: Making Selections For Copying
MAKING SELECTIONS FOR COPYING To make selections, follow the steps below. A "Default setting" used in this chapter means a factory default setting. How to set the original type Press the "MENU" button, and repeatedly press the "ARROW" buttons until the "Original Type" setting is displayed on the first line of the display panel. - Page 48 MAKING SELECTIONS FOR COPYING How to set the paper type Press the "PAPER SELECT" button, and repeatedly press the "ARROW" buttons until the "Paper Type" setting is displayed on the first line of the display panel. 1.Paper Type 1.Plain Paper Repeatedly press the "ARROW"...
- Page 49 MAKING SELECTIONS FOR COPYING How to set the paper size Press the "PAPER SELECT" button, and repeatedly press the "ARROW" buttons until the "Paper Size" setting is displayed on the first line of the display panel. 2.Paper Size 3.A4 Repeatedly press the "ARROW"...
- Page 50 MAKING SELECTIONS FOR COPYING During Copying During copying, the copy quantity display will decrease by 1 each time a copy is made. Example: If the number of copies is set to "2". Copying... Copying... Ready to Copy 100% 100% 100% First page Second page completed...
-
Page 51: Reducing/Enlarging The Image Size For Copying
REDUCING/ENLARGING THE IMAGE SIZE FOR COPYING The image size can be reduced/enlarged for copying between 25% and 400%. Functions such as "Poster", "Repeat Image", and "Mirror" are available. Press the "ZOOM" button, and then repeatedly press the "ARROW" buttons until the desired function is displayed. 5.Repeat Image 100% The default settings of reducing/enlarging operation are shown below. - Page 52 REDUCING/ENLARGING THE IMAGE SIZE FOR COPYING Example:"Poster" setting For this example the Original enlargement is set to 200%. In the example, the printable area of the original image is enlarged by 200%. The machine will automatically determine Copy the required number of copy sheets required to contain the composite image.
- Page 53 REDUCING/ENLARGING THE IMAGE SIZE FOR COPYING Example:"Repeat Image" setting The number of repeat image will be determined by the size of the original being used, the selected zoom ratio and the paper size. Original Copy Example:"Mirror" setting Original Copy To change the reduction/enlargement ratio, repeatedly press the "ARROW"...
-
Page 54: Brightness And Intensity Selections
BRIGHTNESS AND INTENSITY SELECTIONS Setting brightness Follow the steps shown below to make the image lighter or darker. Press the "BRIGHTNESS/INTENSITY" button and repeatedly press "ARROW" buttons until "Brightness" is shown on the first line of the display panel. 1.Brightness 3.Normal Repeatedly press the "ARROW"... - Page 55 BRIGHTNESS AND INTENSITY SELECTIONS Quality guaranteed area and printable area This unit can copy onto the following area of the paper. To make a clear copy, it is recommended to fit the original image within the quality guaranteed area. 19mm Printable area Quality guaranteed area Paper size...
-
Page 56: Functions Set By The User
FUNCTIONS SET BY THE USER Depending on your particular needs, you can save regularly used settings, and change the functions of this unit. SAVING THE USER DEFAULT SETTINGS You can save the current settings on the unit as user default settings. Follow the steps shown below. -
Page 57: Resetting The User Default Settings
RESETTING THE USER DEFAULT SETTINGS Press the "MENU" button, and repeatedly press the "ARROW" buttons until "Feature Defaults" is shown on the first line of the display panel. 4.Feature Defaults 1.Save new Repeatedly press the "ARROW" buttons until "Reset" is shown on the second line of the display panel. 4.Feature Defaults 2.Reset Press the "ENTER"... -
Page 58: Sleep Mode
SLEEP MODE When the unit is left idle for a specified period of time, it will automatically enter the sleep mode to save energy. Follow the steps below to set the time to elapse before the sleep mode is entered. Press the "MENU"... -
Page 59: Auto Power Off" Mode
SPECIFYING THE PERIOD UNTIL THE UNIT ACTIVATES "AUTO POWER OFF" MODE Follow the steps shown below to specify the period until the unit activates "Auto Power Off" mode. Press the "MENU" button, and repeatedly press the "ARROW" buttons until "Auto Power Off" is shown on the first line of the display panel. -
Page 60: Changing The Language Setting
CHANGING THE LANGUAGE SETTING Use this function to change the language shown in the display panel. Follow the steps shown below to change the language setting. Press the "MENU" button, and repeatedly press the "ARROW" buttons until "Language" is shown on the first line of the display panel. -
Page 61: Resetting All Setting Values To The Factory Default Values
RESETTING ALL SETTING VALUES TO THE FACTORY DEFAULT VALUES This function will return all current settings and the user defaults to the factory default settings. Follow the steps shown below to return all changed settings to the factory default settings. Press the "MENU"... -
Page 62: How To Use The "Clear/Stop" Button
HOW TO USE THE "CLEAR/STOP" BUTTON "CLEAR/STOP" button functions Function Operation Function Display Description Example: Returns the number of copies to Clears the number Ready to Copy 100% "0" when number of copies set is of copies setting more than "0". Ready to Copy 100% Example:... -
Page 63: Using This Unit With Your Computer
USING THIS UNIT WITH YOUR COMPUTER This unit can be used as a scanner or colour printer when connected to your computer. When using the unit as a scanner or printer, ensure it is correctly connected to your computer, and install the software contained on the Software CD-ROM, which is included with the unit. -
Page 64: Using The Printer Mode
If you cannot scan with an error message on the display panel, activate Button Manager from the "Start" menu of your computer by selecting "Programs" ("All Programs" on Windows XP), "SHARP AJ-6110" and "Button Manager". You may experience slight problems on your computer (e.g. skipping while playing audio CD or DVD, etc.) while "Button Manager"... -
Page 65: Reserving Copy And Scan Jobs
RESERVING COPY AND SCAN JOBS Reserving a copy job While the unit is printing or warming-up, make copy settings and press the "START" button ) to reserve the job. After printing is completed, copying will start. The messages will change as below. Printing... -
Page 66: User Maintenance
USER MAINTENANCE This chapter provides you with maintenance information. Follow the steps to change the ink tanks or print heads and to clean or align the print heads by entering control panel commands. The level of ink remaining for each ink tank can also be determined. When the unit is connected to a computer, the maintenance commands can be made from the computer. - Page 67 THE INK TANK Make sure that the display panel shows the following message. If all the ink tanks have been replaced... The unit automatically cleans both of the print heads. Cleaning the Print Head... If the black ink tank has been replaced... Repeatedly press "ARROW"...
-
Page 68: The Print Head
THE PRINT HEAD Clean the print head If the test page or copies are faint or uneven, first make sure that you are copying on the correct side of the paper, and the ink levels are sufficient. If these items are OK, follow the steps below to clean the print heads. - Page 69 THE PRINT HEAD Changing the print head Even after cleaning and aligning the print head, if copy quality remains poor, you have to change the print head. Follow the steps below to change the print head. Make sure that the power is on. Open the front cover.
- Page 70 THE PRINT HEAD Repeatedly press "ARROW" buttons to display "1. Yes" or "2. No" on the second line of the display panel, and press the "ENTER" button. If all the print heads have been If only the black print head has replaced...
-
Page 71: Printing A Test Page
PRINTING A TEST PAGE After changing an ink tank, aligning or changing the print head, print a test page to check print quality. Follow the steps below to print a test page. Press the "MENU" button, and repeatedly press the "ARROW"... -
Page 72: Cleaning And Storing The Unit
CLEANING AND STORING THE UNIT Refer to the information below to clean the unit or store it for an extended period of time. Before cleaning, be sure to turn off the power using the "POWER" button ( ) and then unplug the power cord. Cleaning the cabinet Wipe it with a soft, clean and dry dust free cloth. -
Page 73: Troubleshooting
Incompatible ink The unit is unable to print as the ink tank inserted is not Page 64 Printer Mode compatible with this machine. Use SHARP ink tanks only. Unable to Print Incompatible ink Shipping Lock is on; The scan head locking switch is not released. -
Page 74: Cancelling An Error Message
CANCELLING AN ERROR MESSAGE To cancel an error message after a problem has been solved, either push the "CLEAR/STOP" button ( ) or the "START" ( ) button. IDENTIFYING UNIT PROBLEMS When an error message appears, or you believe the unit is not operating normally (e.g. copy quality is poor, etc.), refer to the guide below before contacting your nearest service centre. - Page 75 Paper feeding or Is the loaded paper too thick or Only use paper meeting the jamming too thin? SHARP specifications for problems occur. thickness. (See page 77) Is the unit on a flat surface? The unit must be placed on a flat surface in order to operate correctly.
- Page 76 IDENTIFYING UNIT PROBLEMS Take off the output tray to remove the jammed paper. Under certain circumstances, the jammed paper can also be accessed by removing the paper tray. After closing the jam cover and attaching the output tray, press the "START" button ( Make sure the "Clear Paper Jam..."...
-
Page 77: Appendix
Interface IEEE1284-compliant bi-directional parallel interface USB interface (B type) When using SHARP original data with A4/8.5"x11" paper in the fastest mode (copier) or draft mode (printer). When scanning with 600dpi. (Data transmission time is not included.) For the Bypass Tray, the maximum paper size is 5-sheeted A4/8.5"x11" banner. - Page 78 SPECIFICATIONS Paper tray capacity Paper tray* Max. 150 sheets of plain paper* Output tray* Max. 50 sheets of plain paper* 1 sheet Bypass tray Ink life* Black 400 sheets (700 sheets with the optional AJ-T20B) 350 sheets Colour Dimensions (W x D x H) 480mm x 394mm x 277mm (18.9"...
-
Page 79: Supplies
Max. thickness: 0.25mm *Be sure to use Sharp recommended transparent films. As a part of our policy of continuous improvement, SHARP reserves the right to make design and specification changes for product improvement without prior notice. The performance specification figures indicated are nominal values of production units. -
Page 80: Index
INDEX Acrobat Reader ........ 37, 38 Factory default settings ....55, 59 Aligning the print head ......20 Front cover ........8, 15, 18 Appendix ..........75 Front cover locking knob ....8, 15 Attaching the trays ......... 11 Front side ..........8 Arrow button........ - Page 81 INDEX Online Manual ........5, 37 Test page ..........69 Operation panel........8, 40 Thick paper......... 25, 26, 30 Original cover ....... 8, 44, 70 Tray ..........11, 24 Original placement ......... 44 Troubleshooting........71 Original table ........44, 70 Original type ...........
-
Page 82: Software License
(the "Software") and related documentation are licensed to you by SHARP. You own the disk on which the Software is recorded but SHARP and/or SHARP'S Licensors retain title to the Software and related documentation. This License allows you to use the Software on one or more computers connected to a single printer and make one copy of the Software in machine-readable form for backup purposes only. - Page 83 Clause 6. A disk will be replaced when it is returned to SHARP or a SHARP authorized representative with a copy of the receipt. SHARP will have no responsibility to replace a disk damaged by accident, abuse or misapplication.
- Page 84 MEMO Downloaded from: http://www.usersmanualguide.com/...
- Page 85 MEMO Downloaded from: http://www.usersmanualguide.com/...
- Page 86 MEMO Downloaded from: http://www.usersmanualguide.com/...
- Page 87 SHARP CORPORATION PRINTED IN CHINA 2001M Printed on Recycled Paper TINSE0134ESZZ Downloaded from: http://www.usersmanualguide.com/...
- Page 88 This file has been downloaded from: www.UsersManualGuide.com User Manual and User Guide for many equipments like mobile phones, photo cameras, monther board, monitors, software, tv, dvd, and othes.. Manual users, user manuals, user guide manual, owners manual, instruction manual, manual owner, manual owner's, manual guide, manual operation, operating manual, user's manual, operating instructions, manual operators, manual operator, manual product, documentation manual, user maintenance, brochure, user reference, pdf manual Downloaded from:...
Need help?
Do you have a question about the AJ-6110 and is the answer not in the manual?
Questions and answers