
Related Manuals for Welbilt Convotherm maxx pro C4 EB


Summary of Contents for Welbilt Convotherm maxx pro C4 EB
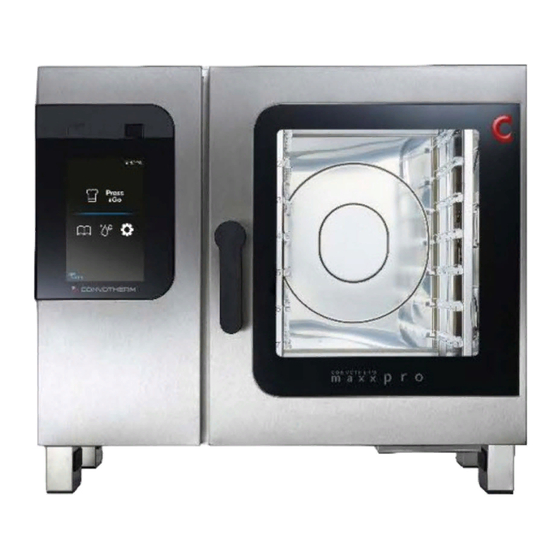
- Page 1 Combi Oven Convotherm maxx pro C4 table-top models Installation Manual UL, USA - Original, ENG Advancing Your Ambitions...
- Page 3 FOR THE INSTALLER, OPERATOR, RESPONSIBLE OWNER FOR YOUR SAFETY Do not store or use gasoline or other flammable vapors or liquids in the vicinity of this or any other unit. WARNING Improper installation, adjustment, alteration, service or maintenance can cause property damage, injury and death. Read the installation, operating and maintenance instructions thoroughly before installing or servicing this equipment.
-
Page 5: Table Of Contents
Table of Contents Table of Contents General Environmental Protection Identifying Your Combi Oven Customer Documentation Structure About This Installation Manual Safety Information That Must Be Read without Exception Configuration and Functions The Combi Oven's Configuration and Functions Operating Panel Layout and Functions For Your Safety Basic Safety Instructions Your Combi Oven's Intended Use... - Page 6 Table of Contents 6.4.1 Water supply 6.4.2 Checking the water quality 6.4.3 Drain Connection Installing the fully automatic oven cleaning system 6.5.1 Components of Fully Automatic Oven Cleaning System 6.5.2 Connecting the Fully Automatic Cleaning System Installing the Grease Collection Canister 6.6.1 Connecting the Grease Collection Canister Placing into operation...
-
Page 7: General
1 General 1 General 1.1 Environmental Protection Policy statement Our customers’ expectations, the legal regulations and standards we have to follow, and our compa‐ ny’s reputation are what drives the quality and service behind all our products. Our environmental management policy is not only designed to ensure that we are always in full com‐ pliance with all environmental laws and regulations, but also reflects our commitment to the environ‐... -
Page 8: Identifying Your Combi Oven
1 General 1.2 Identifying Your Combi Oven Nameplate location The nameplate is found on the left side of the combi oven. Nameplate layout and structure for electrical units Designation Unit name Combi Steamer Trade name Letters Meaning Convotherm maxx pro line of units easyTouch controls easyDial controls xx.yy numbers... - Page 9 1 General Nameplate layout and structure for gas units Designation Unit name Combi Steamer Trade name Letters Meaning Convotherm maxx pro line of units easyTouch controls easyDial controls xx.yy numbers Unit size Gas unit with boiler Gas unit with water injection On units with NSF certification Electrical specifications Marks...
-
Page 10: Customer Documentation Structure
1 General 1.3 Customer Documentation Structure Unit documentation parts Document type Contents Installation manual Describes how to transport, set up, install, and put the unit into opera‐ ■ tion Goes over all the hazards involved in the various installation activities ■ and how to prevent and/or counter them Contains technical specifications ■... -
Page 11: Safety Information That Must Be Read Without Exception
1 General 1.5 Safety Information That Must Be Read without Exception Safety information found in the documentation for the customer Only the installation manual and operating manual provide safety information for the combi oven. The installation manual provides safety information for the transportation, setup, installation, placing- into-operation, and removal-from-service tasks it describes. -
Page 12: Configuration And Functions
2 Configuration and Functions 2 Configuration and Functions 2.1 The Combi Oven's Configuration and Functions Parts and functions (electrical units) The figure below shows a size 6.10 combi oven used as an example representing all electrical mod‐ els: Designation Function Ventilation port Draws in ambient air in order to remove moisture from the oven ■... - Page 13 2 Configuration and Functions Designation Function Side panel Covers the unit's wiring compartment Nameplate Used to identify the unit Network connection Used to connect to a network or the cloud. Parts and functions (gas units) The figure below shows a size 6.10 combi oven used as an example representing all gas models: Designation Function Ventilation port...
- Page 14 2 Configuration and Functions Designation Function Side panel Covers the unit's wiring compartment Nameplate Used to identify the unit Network connection Used to connect to a network or the cloud. Parts and functions for special locking feature (security model only) The figure below shows a special locking feature for enhanced security on a size 6.10 combi oven used as an example representing all unit sizes: Designation...
-
Page 15: Operating Panel Layout And Functions
2 Configuration and Functions 2.2 Operating Panel Layout and Functions Control panel layout and parts in easyTouch Designation Function Unit Used to turn the combi oven on and off ON/OFF switch USB port Used to plug in a USB stick Full-touch dis‐ The unit's central control interface play Used by touching the icons on the full-... -
Page 16: For Your Safety
3 For Your Safety 3 For Your Safety Purpose of this section The purpose of this section is to provide you with all the information you will need in order to safely work with/on the combi oven without putting yourself and others at risk. Read this section very carefully! 3.1 ... - Page 17 3 For Your Safety For more information... Related subjects Your Combi Oven's Intended Use Warning Labels on the Combi Oven Hazards posed by the unit Safety Devices Staff and Work Area Requirements Personal protective equipment Installation Manual...
-
Page 18: Your Combi Oven's Intended Use
3 For Your Safety 3.2 Your Combi Oven's Intended Use The combi oven's intended use The combi oven has been designed and built exclusively for cooking a variety of food in standard- ■ size bakeware (steam table pans, sheet pans, etc.). Steam, convection, and combi-steam (steam superheated without pressure) are used for this purpose. - Page 19 3 For Your Safety Prerequisites for cleaning Only use the cleaning agents approved by the manufacturer. ■ Only use the cleaning tools specified by the manufacturer; please refer to 'Cleaning schedule' in ■ the operating manual. Do NOT use a pressure washer to clean the unit. ■...
-
Page 20: Warning Labels On The Combi Oven
3 For Your Safety 3.3 Warning Labels on the Combi Oven Warning label location The figure below shows a size 6.10 electric combi oven used as an example representing all table-top models: Required warning labels The following warning labels must always be clearly visible on the combi oven at the locations shown in the previous figure. - Page 21 3 For Your Safety Location Warning label Description Bakery model Hazard posed by hot food and hot bakeware Hot food and hot bakeware will pose a burn hazard if the bake‐ ware falls off the shelf levels or if food slides off bakeware that is being held in an inclined position.
-
Page 22: Hazards Posed By The Unit
3 For Your Safety 3.4 Hazards posed by the unit General rules when using the unit The combi oven has been designed in such a way as to ensure that users will be protected from all hazards that can be reasonably prevented using design-based measures. However, the combi oven's intended use entails a series of residual risks that will require you to take precautions in order to avoid them. - Page 23 3 For Your Safety Lack of oxygen Gas units can result in the following hazards in the kitchen: Suffocation hazard due to lack of oxygen Where? At the unit's installation location ■ How can I avoid the hazard? Check the exhaust gas readings and have a certified gas installation engineer from an authorized service company adjust the burner if necessary Make sure that there is a ventilation system that is fully functional and running.
- Page 24 3 For Your Safety Live parts The unit can pose the following hazards during all installation work: Risk of electric shock posed by live parts Where? Under covers ■ Under the operating panel ■ On the power cable ■ How can I avoid the hazard? De-energize all connections Lock out and tag out all switches Wait 15 minutes so that the DC bus capacitors can discharge fully...
-
Page 25: Safety Devices
3 For Your Safety 3.5 Safety Devices Meaning The combi oven features a series of safety devices and guards that protect the user from a variety of hazards. All safety devices and guards must be present, fully functional, and locked properly without exception when the combi oven is being used. - Page 26 3 For Your Safety Guard or safety device Function Check Disconnector Installed close to the unit by Procedure: ■ the customer. Easily visible Trip the disconnector (installed by ■ and accessible, 3-pole, with Check that all three phases ■ a contact gap of at least are de-energized at the customer) 0.12".
-
Page 27: Staff And Work Area Requirements
3 For Your Safety 3.6 Staff and Work Area Requirements Staff requirements The table below specifies the qualifications needed for each role. Provided that they have the required qualifications, a single person can take over more than one role if necessary. Role Required qualifications Tasks... - Page 28 3 For Your Safety Role Required qualifications Tasks Water and waste‐ Qualified staff from an authorized Connecting the unit to the water ■ ■ water installer service company connection at the facilities Has relevant training Uninstalling water connections ■ ■ Connecting the unit to the drain ■...
-
Page 29: Personal Protective Equipment
3 For Your Safety 3.7 Personal protective equipment Transportation and setup Task Tools used Personal Protective Equipment Transporting the unit within the fa‐ Carrying straps Protective gloves ■ ■ ■ cilities Appropriate lifting Safety footwear ■ ■ Setting up the unit on a work table equipment A hard hat (e. -
Page 30: Transportation
4 Transportation 4 Transportation 4.1 Transporting the unit to the installation location Required space during transportation Make sure that the transportation route you will be following has enough space to accommodate the unit's entire width and height at all times. The following table lists the dimensions for the units together with their packaging. This list can be used to figure out the required minimum door width and height required in order to be able to get the unit to its intended installation location: 6.10... -
Page 31: Included Equipment And Parts
4 Transportation 4.3 Included equipment and parts Unit and accessories The unit scope consists of the following parts: One combi oven ■ One left-hand side rack ■ One right-hand side rack ■ Oven racks ■ Three oven racks (sizes 6.10 and 10.10) ■... -
Page 32: Setup
5 Setup 5 Setup 5.1 Adjacent Systems Handling exhaust air During operation, the combi oven will produce heat and moisture, most of which will escape upwards into the ambient air in the form of hot steam coming through the air vent(s). Do not connect any lines or ducts directly to the combi oven's air vent(s)! The manufacturer recommends removing this exhaust air from the combi oven's working area with a range hood or ventilated ceiling. -
Page 33: Installation Location Requirements
5 Setup 5.2 Installation location requirements Meaning This section provides information on how to choose a suitable installation location for the unit. Careful‐ ly check the intended installation location to make sure it is adequate before bringing the unit there and starting with the installation! Setup standards and regulations All national, state, and local standards and regulations concerning commercial kitchen operations must be complied with. - Page 34 5 Setup Supporting surface requirements The supporting surface must have the following characteristics: The supporting surface must be flat and level. ■ The supporting surface must be capable of bearing the unit's weight. ■ The countertop or stand must have a load capacity equal to or greater than the unit's empty weight ■...
- Page 35 5 Setup Required space for units with a right-hinged door – width and depth The following diagrams, as well as the following table, show the space required by the unit for various installation and operating situations, as well as the minimum horizontal clearances required relative to adjacent walls and surfaces.
- Page 36 5 Setup Required space for units with a disappearing door – width and depth The following diagrams, as well as the following table, show the space required by the unit for various installation and operating situations, as well as the minimum horizontal clearances required relative to adjacent walls and surfaces.
- Page 37 5 Setup Required space – height The figure below shows a size 6.10 combi oven used as an example representing all models: The service technician responsible for setting up the unit must take into account the ceiling's proper‐ ties and any adjacent systems being used (air ventilation system, range hood) when determining the actual clearance required between the top of the unit and the ceiling.
-
Page 38: Removing The Unit From The Pallet
5 Setup 5.3 Removing the unit from the pallet Rules for safely lifting the unit Observe the following rules in order to prevent the unit from toppling over: The unit must be carefully lifted and secured in such a way that it will not tip over. ■... -
Page 39: Setting Up The Unit On A Work Table
5 Setup 5.4 Setting up the unit on a work table Rules for safely setting up the unit Observe the following rules in order to ensure that the unit will have the required stability: It must be possible to set up the work table at the installation location in such a way that it will not ■... - Page 40 5 Setup Use the adjusting screw to level the unit. To turn the ad‐ justing screw, use the unit foot tool or water pump pliers. In addition, use a spirit level to make sure that the unit is properly leveled. The unit's absolute inclination during operation must not exceed max.
-
Page 41: Setting Up The Unit On A Stand
5 Setup 5.5 Setting Up the Unit on a Stand Rules for safely setting up the unit Observe the following rules in order to ensure that the unit will have the required stability: It must be possible to set up the stand at the installation location in such a way that it will not topple ■... -
Page 42: Setting Up Units In A Stacking Kit
5 Setup 5.6 Setting Up Units in a Stacking Kit Rules for safely setting up the units in a stacking kit Observe the following rules in order to ensure that the stacking kit with the units will have the required stability: Make sure that the units placed on the top and bottom of the stacking kit are similar in terms of ■... -
Page 43: Installation
6 Installation 6 Installation 6.1 Electrical installation 6.1.1 Planning the Electrical Installation Meaning It is crucial for the unit's electrical system to be carefully and correctly installed in order for the unit to run safely and without any problems. All the rules and specifications specified in this section, as well as the procedures described, must be followed to the letter. - Page 44 6 Installation Recommended ground fault circuit interrupter The unit features a variable frequency drive (VFD), as well as an integrated EMI filter and a power line filter. This equipment can result in a leakage current of more than 3.5 mA per VFD. Use an appropriate ground fault circuit interrupter (GFCI) as required for the relevant rated voltage: Variable frequency drive (single- Variable frequency drive (three-...
-
Page 45: Performing The Electrical Installation
6 Installation 6.1.2 Performing the Electrical Installation Prerequisites Check whether the following prerequisite is met: The unit's connection point has been de-energized and locked and tagged out. ■ Checking the rating data and electrical connections Remove the unit's side panel. The circuit diagram and the spare parts list will be located inside the wiring compartment. -
Page 46: Connecting An Energy Optimization System (For Electrical Units Only)
6 Installation 6.1.3 Connecting an Energy Optimization System (for Electrical Units Only) Purpose of energy optimization system You can connect the combi oven to an energy optimization system (e.g. SICOTRONIC). Energy opti‐ mization system compensate for peak loads that occur while your units are running and can help lower your electricity costs as a result. - Page 47 6 Installation Remove the small pre-perforated knockout on the com‐ ■ bi oven's bottom panel. The knockout's location is shown on the left. Using the cable fitting, guide the energy optimization ■ system's connection cable through the knockout and in‐ to the combi oven's wiring compartment.
-
Page 48: Connecting The Signal Tower
6 Installation 6.1.4 Connecting the Signal Tower Signal tower purpose If a signal tower is electronically connected to the combi oven, the tower will visually and acoustically indicate the combi oven's current operating state using acoustic signals and three indicator lights (green, yellow, red). - Page 49 6 Installation Connect the signal tower's connection cable to the combi oven, observing the following pinout: Signal Wire color BU (blue) Signal: Buzzer GY (gray) Signal: Red light BK (black) Signal: Yellow light WH (white) Signal: Green light BN (brown) Put the combi oven's side panel back in place.
-
Page 50: Connecting The Water Treatment Filter Monitoring System
6 Installation 6.1.5 Connecting the Water Treatment Filter Monitoring System Water treatment filter monitoring system purpose You can electrically connect the combi oven to the remote indicator for a connected water treatment filter. When you do so, the combi oven's software will monitor the water treatment filter's condition. The system will provide a warning when the filter's capacity is down to 10% and the water treatment filter needs to be replaced soon. - Page 51 6 Installation Connect the water treatment filter monitoring system's connection cable to the combi oven, observing the follow‐ ing pinout: Signal Signal Put the combi oven's side panel back in place. Place the combi oven and the water treatment filter moni‐ toring system into operation.
-
Page 52: Gas Installation
6 Installation 6.2 Gas Installation 6.2.1 Planning the Gas Installation Rules for safely installing the unit’s gas system In order to prevent hazards related to improperly installed gas connections, make sure to observe the following rules: The combi oven is designed to work with a specific type of gas (check the unit's nameplate). In or‐ ■... - Page 53 6 Installation Ensuring that there is proper ventilation The unit will produce combustion exhaust gases that need to be discharged into the open through an appropriate flue. Make sure to follow all the instructions and indications in the 'Adjacent Systems' sec‐ tion on page 32 without exception.
-
Page 54: Forced Air Burner And Gas Main Valve Locations
6 Installation 6.2.2 Forced Air Burner and Gas Main Valve Locations Forced air burner location The figure below shows a size 6.10 combi oven with a boiler used as an example representing all unit sizes: Designation Boiler burner exhaust outlet (found in boiler units only, i.e., units with a sprayer will not have this outlet) Convection burner exhaust outlet... -
Page 55: Performing The Gas Installation
6 Installation 6.2.3 Performing the Gas Installation Prerequisites Check whether the following prerequisite is met: A gas shut-off device has been installed on-site. ■ Required tools Leak detector spray / gas detector ■ Performing the Gas Installation Check the type of gas, the gas pressure, and the gas con‐ 'Gas operation specifications' in nection rating against the specifications on the unit's 'Technical Data' on page 76... -
Page 56: Measuring The Supply Flow Pressure
6 Installation 6.2.4 Measuring the Supply Flow Pressure Prerequisites A gas shut-off device has been installed on-site. ■ The gas system must have been installed as indicated in the 'Performing the Gas Installation' on ■ page 55 all the way to the 'Measure the supply flow pressure' step. Required tools Pressure measuring instrument ■... -
Page 57: Measuring The Exhaust Gas Values
6 Installation 6.2.5 Measuring the Exhaust Gas Values Required tools Exhaust gas analyzer ■ Measuring the Exhaust Gas Values Thread the flue gas analyzer's (1) probe (2) into the ex‐ haust outlet (3) for the burner for which you will be per‐ forming the measurement. -
Page 58: Network Connection
6 Installation 6.3 Network Connection 6.3.1 Planning the Network Connection Meaning It is crucial for the unit's network connection to be carefully and correctly installed in order for the unit to run safely and without any problems and to have the connection to the Internet / the cloud (ConvoSense assistance system) required for this purpose. -
Page 59: Making The Network Connection
6 Installation 6.3.2 Making the Network Connection Installation steps To establish an Internet connection, follow the steps below: Use a network cable to connect the combi oven’s network port to the network jack preinstalled and intended for this use by the customer. When placing the combi oven into operation, check wheth‐... -
Page 60: Water Connections
6 Installation 6.4 Water connections 6.4.1 Water supply Water connection standards and regulations Make sure to comply with all national and state laws and regulations that apply to the water connec‐ tion, as well as with all applicable local requirements and regulations set forth by the relevant local wa‐ ter utilities and authorities. - Page 61 6 Installation Connection diagram with water treatment system Connection diagram Unit connections Designation Explanation Water connection for boiler or For water quality information, refer to the 'Technical Data' water injection on page 76 section Water connection for cleaning For water quality information, refer to the 'Technical Data' and recoil hand shower on page 76 section Water line provided by the cus‐...
- Page 62 6 Installation Flush the sediment filter by using the recoil hand shower. Once you are done installing the water connection, close the shut-off device. Inform the user of the maintenance intervals for the filters and for the water treatment system (if any). Installation Manual...
-
Page 63: Checking The Water Quality
6 Installation 6.4.2 Checking the water quality Required tools You will need the following tools: 1 sample jar for getting a sample ■ 1 conductivity meter (part No. 3019007) ■ A general hardness and carbonate hardness analysis kit, including two beakers (part No. 3019010) ■... -
Page 64: Drain Connection
6 Installation 6.4.3 Drain Connection Drain connection standards and regulations Make sure to comply with all national and state laws and regulations, as well as with all applicable lo‐ cal requirements and regulations set forth by the relevant local utilities and authorities, that apply to the drain connection and to the wastewater's properties. -
Page 65: Installing The Fully Automatic Oven Cleaning System
6 Installation 6.5 Installing the fully automatic oven cleaning system 6.5.1 Components of Fully Automatic Oven Cleaning System Cleaning agents and rinse aid Only use the products specified here in order to clean the combi oven. NOTICE! The warranty will be void if there is any damage that can be traced back to the use of incor‐ rect cleaning agents. - Page 66 6 Installation Installation location for cleaning agent and rinse aid canisters Set up the canisters as follows: The canisters should be easily accessibly on a flat, level surface next to the device. ■ The canister's supporting surface must not be higher than the edge where the feet and the unit ■...
-
Page 67: Connecting The Fully Automatic Cleaning System
6 Installation 6.5.2 Connecting the Fully Automatic Cleaning System Connecting the fully automatic oven cleaning system with canisters Mix the included ConvoCare K concentrate with soft wa‐ ter in the empty canister for ConvoCare rinse aid. Make sure to follow the operating manual instructions on mixing ConvoCare rinse aid in canisters. - Page 68 6 Installation Slip the red suction tube (4) for ConvoClean forte or ConvoClean new cleaning agent onto the barbed nipple on the front bulkhead fitting (G) and secure the tube using the wire hose clamp (3) (see 'Cleaning-agent connection' adhesive label on the left unit side). Insert the suction nozzle on the red suction tube (4) into the cleaning agent canister (5).
-
Page 69: Installing The Grease Collection Canister
6 Installation 6.6 Installing the Grease Collection Canister 6.6.1 Connecting the Grease Collection Canister Required accessories ConvoGrill includes the following original accessories, which you will need in order to connect the au‐ tomatic grease management system. Make sure to use these original accessories exclusively: Connection tube with attached rotating canister screw closure ■... -
Page 70: Placing Into Operation
7 Placing into operation 7 Placing into operation 7.1 Working Safely When Putting the Unit Into Operation For your safety when working with/on the combi oven Before placing the combi oven into operation, read and understand the rules, risks, and hazards speci‐ fied in the 'For Your Safety' section and follow all the corresponding instructions without exception. -
Page 71: Procedure For Placing The Unit Into Operation
7 Placing into operation 7.2 Procedure for Placing the Unit into Operation Checks before placing the unit into operation Before putting the combi oven into operation, check whether the prerequisites below are being met: The unit and the accessories being used do not have any obvious damage. ■... - Page 72 7 Placing into operation Turn the combi oven on. Set the following: Date ■ Time ■ Language ■ Placing the unit into operation Start the cooking sequence using the following cooking data: 'Combi-steam' operating mode ■ 300 °F ■ 10 minutes ■...
- Page 73 7 Placing into operation Warranty information Warranty claims involving your combi oven will only be honored if the unit has been installed by a qualified service technician from an authorized service company as per the instructions in this installa‐ tion manual. Please note that warranty claims will only be honored if the manufacturer has a copy of the fully completed checklist from the installation manual.
-
Page 74: Measuring Unit Gaps
7 Placing into operation 7.3 Measuring unit gaps Measuring unit gaps The unit gaps' measured widths must fall within the following tolerance ranges: Designation Measuring condition Tolerance range Door gap at the front of the unit The unit door must be closed. "... -
Page 75: Removing From Service And Disposal
8 Removing from Service and Disposal 8 Removing from Service and Disposal 8.1 Removing from Service and Disposal Rules for working safely and responsibly when removing the unit from service Avoid endangering yourself and others by following the rules below: Always keep the kitchen floor dry in order to reduce the risk of accidents occurring. ■... -
Page 76: Technical Data
9 Technical data 9 Technical data 9.1 Dimensions and weights C4 EB/ES dimensions 6.10 6.20 10.10 10.20 Unit with packaging Width [in] 44.1 53.7 44.1 53.7 Height [in] 41.3 41.3 52.0 52.0 Depth [in] 37.8 45.7 37.8 45.7 Unit without packaging Width of units featuring a right-hinged door [in] 34.45 44.09 34.45 44.09 Width of units with a disappearing door, incl. - Page 77 9 Technical data C4 EB weights 12.20 20.10 20.20 Weight without packaging without ConvoClean / ConvoClean+ - Right-hinged door [lbs] - Disappearing door [lbs] with ConvoClean / ConvoClean+ - Right-hinged door [lbs] - Disappearing door [lbs] Packaging weight Packaging weight [lbs] C4 ES weights 6.10...
-
Page 78: Maximum Permissible Loading Weight
9 Technical data C4 GS weights 6.10 6.20 10.10 10.20 Weight without packaging Without ConvoClean / ConvoClean+, without ConvoSmoker - Right-hinged door [lbs] - Disappearing door [lbs] With ConvoClean / ConvoClean+, without ConvoSmoker - Right-hinged door [lbs] - Disappearing door [lbs] With ConvoClean / ConvoClean+, with ConvoSmoker - Right-hinged door... -
Page 79: Eb/Es Electrical Supply
9 Technical data 9.3 EB/ES Electrical Supply C4 EB (three-phase VFD) 6.10 6.20 10.10 10.20 3~ 208/240V 60Hz (3/PE) Rated power consumption [kW] 9.0 / 11.8 15.9 / 15.9 / 27.4 / 21.0 21.0 36.3 Hot air output [kW] 8.6 / 11.4 15.5 / 15.5 / 27.0 / 20.6... - Page 80 9 Technical data C4 EB (three-phase VFD) 6.10 6.20 10.10 10.20 3~ 440/480V 60 Hz Rated power consumption [kW] 9.2 / 10.9 16.3 / 16.3 / 28.2 / 19.3 19.3 33.4 Hot air output [kW] 8.8 / 10.5 15.9 / 15.9 / 27.8 / 18.9...
- Page 81 9 Technical data C4 EB (three-phase VFD) 6.10 6.20 10.10 10.20 3~ 208V 60Hz (3/PE) Rated power consumption [kW] 15.9 15.9 27.4 Hot air output [kW] 15.5 15.5 27.0 Steam output [kW] 14.7 14.7 22.1 Motor output [kW] 0.35 0.35 0.35 0.35 Rated current...
- Page 82 9 Technical data C4 ES (three-phase VFD) 6.10 6.20 10.10 10.20 3~ 240V 60Hz (3/PE) Rated power consumption [kW] 11.8 21.0 21.0 36.3 Hot air output [kW] 11.4 20.6 20.6 35.9 Motor output [kW] 0.35 0.35 0.35 0.35 Rated current 28.5 50.6 50.6...
-
Page 83: Gs Electrical Supply
9 Technical data 9.4 GB/GS Electrical Supply C4 GB (single-phase VFD) 6.10 6.20 10.10 10.20 1N~ 120V 60 Hz Rated power consumption [kW] Hot air output [kW] Steam output [kW] Motor output [kW] 0.35 0.35 0.35 0.35 Rated current Residual current [mA] Protective conductor current [mA]... -
Page 84: Gas Characteristic Values For Natural Gas (Usa), Propane (Usa)
9 Technical data 9.5 Gas Characteristic Values for Natural Gas (USA), Propane (USA) C4 GB/GS Gas type Natural Gas (USA) Propane (USA) Operating materials Natural gas, propane Gas supply parameters Gas line connection for unit sizes 6.10, 6.20, 1/2" NPT 1/2" NPT and 10.10 Gas line connection for unit sizes 10.20 3/4"... -
Page 85: Heat Loss
9 Technical data 9.6 Heat loss C4 EB/ES 6.10 6.20 10.10 10.20 When the unit door is closed Latent [BTU/h] 2000 3100 2700 4400 Sensible [BTU/h] 2800 4000 3400 4800 C4 GB/GS 6.10 6.20 10.10 10.20 When the unit door is closed Latent [BTU/h] 2000... -
Page 86: Water Quality
9 Technical data 9.8 Water quality C4 EB/GB Water connection (A) for boiler; water connection (B) for cleaning, recoil hand shower General water quality Drinking water Hardness [ppm] 70 - 360 ppm (4 - 21 gpg) TDS (total dissolved solids) [ppm] 70 - 360 Total alkalinity [ppm]... -
Page 87: Boiler
9 Technical data 9.9 Boiler C4 EB/GB 6.10 6.20 10.10 10.20 12.20 20.10 20.20 Steam output [gph] 3.80 7.58 7.58 11.12 13.18 11.36 16.80 Contents [gal] 1.00 1.59 1.59 2.11 2.88 2.17 2.88 9.10 Water consumption during cooking C4 EB/GB 6.10 6.20 10.10 10.20 Hard and soft water Average consumption without cleaning... -
Page 88: Water Consumption During Cooking And Cleaning
9 Technical data 9.11 Water consumption during cooking and cleaning C4 EB/GB 6.10 6.20 10.10 10.20 Hard and soft water Average water consumption with cleaning [gph] C4 ES/GS 6.10 6.20 10.10 10.20 Hard and soft water Average water consumption with cleaning [gph] Installation Manual... -
Page 89: Connection Drawings
10 Connection drawings 10 Connection drawings 10.1 Convotherm 4 6.10 Electrical units 6.10 dimensions and connection points (right-hinged unit door) Front view Connection points, unit floor 34.45 34.45 1.17 32.12 2.65 2.72 3.31 4.49 15.08 20.0 Drain connection detail * The distance depends on how much the feet are extended (max. - Page 90 10 Connection drawings 6.10 dimensions and connection points (disappearing door) Front view Connection points, unit floor 34.45 3.55 34.45 1.17 32.12 2.65 2.72 3.31 4.49 15.08 20.0 Drain connection detail * The distance depends on how much the feet are extended (max. +0.984") View from above with wall clearances Water connections (for boiler or water injec‐...
-
Page 91: Convotherm 4 6.10 Gas Unit With Boiler
10 Connection drawings 10.2 Convotherm 4 6.10 Gas Unit with Boiler C4 6.10 dimensions and connection points (right-hinged unit door) Front view Connection points, unit floor 34.45 34.45 1.17 32.12 2.65 2.72 3.31 4.49 6.07 15.08 20.0 Drain connection detail * The distance depends on how much the feet are extended (max. - Page 92 10 Connection drawings C4 6.10 dimensions and connection points (disappearing door) Front view Connection points, unit floor 34.45 3.55 34.45 1.17 32.12 2.65 2.72 3.31 4.49 6.07 15.08 20.0 Drain connection detail * The distance depends on how much the feet are extended (max. +0.984") View from above with wall clearances Water connections (for boiler or water injec‐...
-
Page 93: Convotherm 4 6.10 Gas Unit With Sprayer
10 Connection drawings 10.3 Convotherm 4 6.10 Gas Unit with Sprayer C4 6.10 dimensions and connection points (right-hinged unit door) Front view Connection points, unit floor 34.45 34.45 1.17 32.12 2.65 2.72 3.31 4.49 6.07 15.08 20.0 Drain connection detail * The distance depends on how much the feet are extended (max. - Page 94 10 Connection drawings C4 6.10 dimensions and connection points (disappearing door) Front view Connection points, unit floor 34.45 3.55 34.45 1.17 32.12 2.65 2.72 3.31 4.49 6.07 15.08 20.0 Drain connection detail * The distance depends on how much the feet are extended (max. +0.984") View from above with wall clearances Water connections (for boiler or water injec‐...
-
Page 95: Convotherm 4 6.20 Electrical Units
10 Connection drawings 10.4 Convotherm 4 6.20 Electrical units C4 6.20 dimensions and connection points (right-hinged unit door) Front view Connection points, unit floor 44.09 44.09 1.17 41.76 2.65 2.72 3.31 4.89 14.61 19.49 Drain connection detail * The distance depends on how much the feet are extended (max. - Page 96 10 Connection drawings C4 6.20 dimensions and connection points (disappearing door) Front view Connection points, unit floor 44.09 3.55 44.09 1.17 41.76 2.65 2.72 3.31 4.89 14.61 19.49 Drain connection detail * The distance depends on how much the feet are extended (max. +0.984") View from above with wall clearances Water connections (for boiler or water injec‐...
-
Page 97: Convotherm 4 6.20 Gas Unit With Boiler
10 Connection drawings 10.5 Convotherm 4 6.20 Gas Unit with Boiler C4 6.20 dimensions and connection points (right-hinged unit door) Front view Connection points, unit floor 44.09 44.09 1.15 41.76 2.65 2.72 3.31 4.89 6.07 14.61 19.49 Drain connection detail * The distance depends on how much the feet are extended (max. - Page 98 10 Connection drawings C4 6.20 dimensions and connection points (disappearing door) Front view Connection points, unit floor 3.55 44.09 44.09 1.17 41.76 2.65 2.72 3.31 4.89 6.07 14.61 19.49 Drain connection detail * The distance depends on how much the feet are extended (max. +0.984") View from above with wall clearances Water connections (for boiler or water injec‐...
-
Page 99: Convotherm 4 6.20 Gas Unit With Sprayer
10 Connection drawings 10.6 Convotherm 4 6.20 Gas Unit with Sprayer C4 6.20 dimensions and connection points (right-hinged unit door) Front view Connection points, unit floor 44.09 44.09 1.17 41.76 2.65 2.72 3.31 4.89 6.07 14.61 19.49 Drain connection detail * The distance depends on how much the feet are extended (max. - Page 100 10 Connection drawings C4 6.20 dimensions and connection points (disappearing door) Front view Connection points, unit floor 3.55 44.09 44.09 1.17 41.76 2.65 2.72 3.31 4.89 6.07 14.61 19.49 Drain connection detail * The distance depends on how much the feet are extended (max. +0.984") View from above with wall clearances Water connections (for boiler or water injec‐...
-
Page 101: Convotherm 4 10.10 Electrical Units
10 Connection drawings 10.7 Convotherm 4 10.10 Electrical units C4 10.10 dimensions and connection points (right-hinged unit door) Front view Connection points, unit floor 34.45 34.45 1.17 32.12 2.65 2.72 3.31 4.49 15.08 20.0 Drain connection detail * The distance depends on how much the feet are extended (max. - Page 102 10 Connection drawings C4 10.10 dimensions and connection points (disappearing door) Front view Connection points, unit floor 34.45 3.55 34.45 1.17 32.12 2.65 2.72 3.31 4.49 15.08 20.0 Drain connection detail * The distance depends on how much the feet are extended (max. +0.984") View from above with wall clearances Water connections (for boiler or water injec‐...
-
Page 103: Convotherm 4 10.10 Gas Unit With Boiler
10 Connection drawings 10.8 Convotherm 4 10.10 Gas Unit with Boiler C4 10.10 dimensions and connection points (right-hinged unit door) Front view Connection points, unit floor 34.45 34.45 1.17 32.12 2.65 2.72 3.31 4.49 6.07 15.08 20.0 Drain connection detail * The distance depends on how much the feet are extended (max. - Page 104 10 Connection drawings C4 10.10 dimensions and connection points (disappearing door) Front view Connection points, unit floor 34.45 3.55 34.45 1.17 32.12 2.65 2.72 3.31 4.49 6.07 15.08 20.0 Drain connection detail * The distance depends on how much the feet are extended (max. +0.984") View from above with wall clearances Water connections (for boiler or water injec‐...
-
Page 105: Convotherm 4 10.10 Gas Unit With Sprayer
10 Connection drawings 10.9 Convotherm 4 10.10 Gas Unit with Sprayer C4 10.10 dimensions and connection points (right-hinged unit door) Front view Connection points, unit floor 34.45 34.45 1.17 32.12 2.65 2.72 3.31 4.49 6.07 15.08 20.0 Drain connection detail * The distance depends on how much the feet are extended (max. - Page 106 10 Connection drawings C4 10.10 dimensions and connection points (disappearing door) Front view Connection points, unit floor 34.45 3.55 34.45 1.17 32.12 2.65 2.72 3.31 4.49 6.07 15.08 20.0 Drain connection detail * The distance depends on how much the feet are extended (max. +0.984") View from above with wall clearances Water connections (for boiler or water injec‐...
-
Page 107: Convotherm 4 10.20 Electrical Units
10 Connection drawings 10.10 Convotherm 4 10.20 Electrical units C4 10.20 dimensions and connection points (right-hinged unit door) Front view Connection points, unit floor 44.09 44.09 1.17 41.76 2.65 2.72 3.31 4.89 14.61 19.49 Drain connection detail * The distance depends on how much the feet are extended (max. - Page 108 10 Connection drawings C4 10.20 dimensions and connection points (disappearing door) Front view Connection points, unit floor 44.09 3.55 44.09 1.17 41.76 2.65 2.72 3.31 4.89 14.61 19.49 Drain connection detail * The distance depends on how much the feet are extended (max. +0.984") View from above with wall clearances Water connections (for boiler or water injec‐...
-
Page 109: Convotherm 4 10.20 Gas Unit With Boiler
10 Connection drawings 10.11 Convotherm 4 10.20 Gas Unit with Boiler C4 10.20 dimensions and connection points (right-hinged unit door) Front view Connection points, unit floor 44.09 44.09 1.17 41.76 2.65 2.72 3.31 4.89 6.07 14.61 19.49 Drain connection detail * The distance depends on how much the feet are extended (max. - Page 110 10 Connection drawings C4 10.20 dimensions and connection points (disappearing door) Front view Connection points, unit floor 44.09 3.55 44.09 1.17 41.76 2.65 2.72 3.31 4.89 6.07 14.61 19.49 Drain connection detail * The distance depends on how much the feet are extended (max. +0.984") View from above with wall clearances Water connections (for boiler or water injec‐...
-
Page 111: Convotherm 4 10.20 Gas Unit With Sprayer
10 Connection drawings 10.12 Convotherm 4 10.20 Gas Unit with Sprayer C4 10.20 dimensions and connection points (right-hinged unit door) Front view Connection points, unit floor 44.09 44.09 1.17 41.76 2.65 2.72 3.31 4.89 6.07 14.61 19.49 Drain connection detail * The distance depends on how much the feet are extended (max. - Page 112 10 Connection drawings C4 10.20 dimensions and connection points (disappearing door) Front view Connection points, unit floor 44.09 3.55 44.09 1.17 41.76 2.65 2.72 3.31 4.89 6.07 14.61 19.49 Drain connection detail * The distance depends on how much the feet are extended (max. +0.984") View from above with wall clearances Water connections (for boiler or water injec‐...
- Page 114 Order No. Additional technical documentation can be found in the download center at : www.convotherm.com Welbilt offers fully-integrated kitchen systems and our products are backed by KitchenCare aftermarket parts and service. Welbilt’s portfolio of award- ® winning brands includes Cleveland™, Convotherm ®...
Need help?
Do you have a question about the Convotherm maxx pro C4 EB and is the answer not in the manual?
Questions and answers