Table of Contents
Advertisement
Quick Links
WEIGHING INDICATOR
INSTRUCTION MANUAL
INSTRUCTION MANUAL
1WMPD4002030B
AD-4405A
OP-03/05/07/08
Visit us at www.TestEquipmentDepot.com
5 Commonwealth Ave
5 Commonwealth Ave
5 Commonwealth Ave
5 Commonwealth Ave
Woburn, MA 01801
Woburn, MA 01801
Woburn, MA 01801
Woburn, MA 01801
Phone 781-665-1400
Phone 781-665-1400
Phone 781-665-1400
Phone 781-665-1400
Toll Free 1-800-517-8431
Toll
Toll
Toll
Free 1-800-517-8431
Free 1-800-517-8431
Free 1-800-517-8431
Advertisement
Table of Contents

Related Manuals for A&D AD-4405A


Summary of Contents for A&D AD-4405A
- Page 1 AD-4405A OP-03/05/07/08 WEIGHING INDICATOR INSTRUCTION MANUAL INSTRUCTION MANUAL 5 Commonwealth Ave 5 Commonwealth Ave 5 Commonwealth Ave 5 Commonwealth Ave Woburn, MA 01801 Woburn, MA 01801 Woburn, MA 01801 Woburn, MA 01801 Phone 781-665-1400 Phone 781-665-1400 Phone 781-665-1400 Phone 781-665-1400...
- Page 2 This Manual and Warning Definitions The warnings described in this manual have the following meanings: Disregarding the caution could result in loss of CAUTION important data or damage to the instrument Provides information useful for the user to operate the Note instrument.
-
Page 3: Table Of Contents
Tare ............................33 7.1. Weighing Tare ........................ 33 7.2. Digital Input (Preset Tare) ....................33 7.3. Clearing Tare........................33 Accumulation.......................... 34 8.1. Preparation and Specifications ..................34 8.2. Display and Operation....................35 AD-4405A Weighing Indicator, Instruction Manual, A&D Company, Limited... - Page 4 16.4. UFC Commands ......................65 17. RS-422/RS-485, Relay Output (OP-03)................67 18. Relay Output and Control Input (OP-05)................69 19. 4-20mA Analog Output (OP-07).................... 70 20. Current Loop Output (OP-08) ....................71 21. Specifications ......................... 73 21.1. Dimensions........................74 Page 2 AD-4405A Weighing Indicator...
-
Page 5: Compliance
This appliance complies with the statutory EMC (Electromagnetic Compatibility) directive 89/336/EEC and the Low Voltage Directive 73/23/EEC for safety of electrical equipment designed for certain voltages. Note: The displayed value may be adversely affected under extreme electromagnetic influences. 1. Compliance Page 3 AD-4405A Weighing Indicator... -
Page 6: Introduction
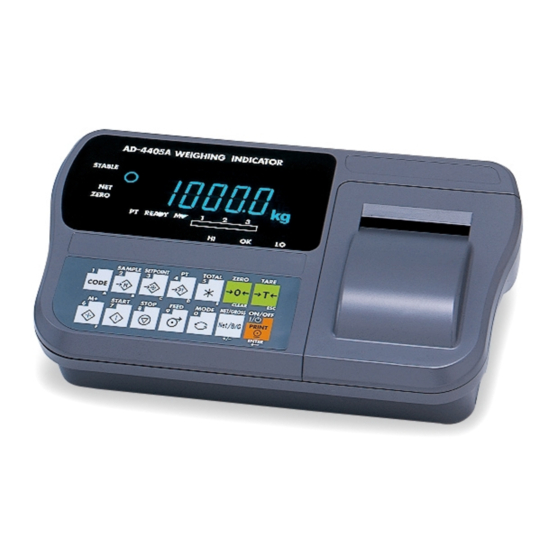
2. Introduction The AD-4405A is a weighing indicator that amplifies the signal from a load cell, converts it to digital data and displays it as a mass value. This indicator has the following performance: Input sensitivity ......0.15 V/division. Maximum display ....... 40000 divisions. -
Page 7: Installation And Precautions
3. Installation and Precautions 3.1. Installation and Precautions The AD-4405A weighing indicator is a precision electronic instrument. Handle it carefully. The operating temperature is -10°C to +40°C (14°F to 104°F). Do not install the scale in direct sunlight. Mis-operation or other problems may be caused by an unstable power source including momentary power failure or instantaneous noise. -
Page 8: Adjustment Of The Load Cell Output
5000 Rated capacity A=750 [kg] Rated output B=3 [mV/V] Therefore, regard the instrument as a Excitation voltage E=5000 [mV] good design. Weighing interval D=0.05 [kg] Weighing capacity 300 [kg] Page 6 3. Installation and Precautions AD-4405A Weighing Indicator... -
Page 9: Installing An Option Board
Step 9 Insert the power cord into the electrical outlet and press the ON/OFF key to turn the display on. Set the F-Function, f30, depending on the option used. OP-03, OP-05, OP-08: f30 2 (Serial output) OP-07: f30 1 (Analog output) Page 7 3. Installation and Precautions AD-4405A Weighing Indicator... -
Page 10: Description Of Panels And Symbols
The key to switch units or setting parameters. 0 – 9 key The key to input any numerical settings. A – F key Used to enter setting values (press NET/GROSS key at a time). Page 8 4. Description of Panels and Symbols AD-4405A Weighing Indicator... -
Page 11: Rear Panel Description
Overload display. Remove any load from the load cell immediately. It may cause damage to the load cell. An example of an error display. Page 9 4. Description of Panels and Symbols AD-4405A Weighing Indicator... -
Page 12: Accessories And Options
(Panel attachment and load cell input terminal block) *Only one interface option can be installed at a time. Consumables sold separately (for printer) Printer Paper AX-PP-156-S (10 rolls) Ink Ribbon AX-EWRC05-S (5 pcs.) 4. Description of Panels and Symbols Page 10 AD-4405A Weighing Indicator... -
Page 13: Calibration
The key to display other parameters. The key to proceed to the next step without changing set values. The key to store new calibration data and proceeds to the next step. ENTER Page 11 AD-4405A Weighing Indicator 5. Calibration... -
Page 14: Calibration Procedure
When Cal5et is displayed, enter the setting mode by pressing the ENTER key. Setting the range and unit. Single Range Select the resolution, decimal point position and format. Specify the weighing capacity. Page 12 5. Calibration AD-4405A Weighing Indicator... - Page 15 ENTER Using the key, regardless of what is displayed, the indicator will proceed to the next step without changing the parameters. 5.2. Calibration Procedure Page 13 AD-4405A Weighing Indicator...
-
Page 16: To Get Stabilized Data
Avoid direct sunshine or the near the outlet of an air conditioner. Do not install the scale (indicator) where there is a strong magnetic field. Step 7 Turn the display on and leave it for several minutes. 5.2. Calibration Procedure Page 14 AD-4405A Weighing Indicator... -
Page 17: Zero Calibration
Weighing a maximum capacity The method to weigh a mass To step 14 mass equivalent to the maximum capacity. The numerical way to enter a load Digital input To step 16 cell output voltage. Page 15 AD-4405A Weighing Indicator 5.2. Calibration Procedure... -
Page 18: Exiting The Calibration Mode
ON/OFF PRINT instead of key. ENTER key ..The key to store the parameters Turn display off temporarily. Proceed to the Cal 0 display. Page 16 AD-4405A Weighing Indicator 5.2. Calibration Procedure... -
Page 19: Weighing Range Function
-40kg to 50kg : The first range, division 0.02kg. 50kg to 60kg : The second range, division 0.1kg. Division = 0.02kg Division=0.1kg -40kg 50kg 60kg Net Tare value 90kg 100kg Gross 40kg Weighing value 5.3. Weighing Range Function Page 17 AD-4405A Weighing Indicator... -
Page 20: Setting The Division And Range
Step 6 If you include a 2nd and 3rd middle point, repeat steps 3, 4, 5 for each point. If you finish this function, proceed to step 7. Step 7 Perform step 11 of "5.2.4. Span Calibration" immediately. Page 18 AD-4405A Weighing Indicator 5.4. Digital Linearization Function... -
Page 21: Gravity Compensation Function
Proceed to step 5. Caloff can be displayed by pressing the key while pressing the key, ON/OFF instead of the CAL key. Step 5 Press the key to turn the display off. ON/OFF Page 19 AD-4405A Weighing Indicator 5.5. Gravity Compensation Function... -
Page 22: Gravity Acceleration Table
9.798 m/s Lisbon 9.801 m/s Vancouver, BC 9.809 m/s London (Greenwich) 9.812 m/s Washington DC 9.801 m/s Los Angeles 9.796 m/s Wellington NZ 9.803 m/s Madrid 9.800 m/s Zurich 9.807 m/s Page 20 5.5. Gravity Compensation Function AD-4405A Weighing Indicator... -
Page 23: Calibration Error Code List
An incorrect mass was selected at the digital linearization function. err 13 Select a mass of the following relation. Lnr 1 < Lnr 2 < Lnr 3. g err An unacceptable value was selected in the gravity acceleration function. Page 21 AD-4405A Weighing Indicator 5.6. Calibration Error Code List... -
Page 24: Functions
ENTER Type2 and Type3 are indicated in TARE the parameter table. Weighing Exiting from the Function Setting Mode Press the key to proceed to the weighing mode when an item number is displayed. Page 22 6. Functions AD-4405A Weighing Indicator... -
Page 25: F-Functions
Three times accumulation timing If Cf00 is 1, then only 2 or 3 can Four times be selected for f03. division (weighing interval) of first range. s: second. Initial settings. Page 23 AD-4405A Weighing Indicator 6.2. F-Functions... - Page 26 17 and the terminal is connected FEED key to the common, all keys are MODE key enabled, regardless of the f12 ZERO key setting. TARE key NET/GROSS key PRINT key ZERO+TARE = CAL Initial settings. Page 24 6.2. F-Functions AD-4405A Weighing Indicator...
- Page 27 Inhibit region for Above 10 d Do not set f21 to 0 when Auto accumulation Above 20 d accumulation (f20=21). Above 50 d division (weighing interval) of first range. Initial settings. 6.2. F-Functions Page 25 AD-4405A Weighing Indicator...
- Page 28 Hold mode Auto hold Manual and Auto hold 0. 0 to Averaging time by 0.1second step Initial setting is 0. 0 . Averaging time 9. 9 (00 : hold at start) Initial settings. Page 26 6.2. F-Functions AD-4405A Weighing Indicator...
- Page 29 Output of the initial setting of f34(19, 2E, 3A 4F E50) is like “ST,GR,+12345.6kg”. 2 The data number *(parameter 3) increments automatically with each serial data output from 1 to 99999 (the next of 99999 is 1). The starting number can be set using the keys. Page 27 AD-4405A Weighing Indicator 6.2. F-Functions...
- Page 30 ** 5 Not output ** 0 No delay Delay for f36=4 2.0 seconds (No delay when f37=0) 600 bps 1200 bps Baud rate ** 2 2400 bps *: Initial settings. bps: bit per second. 6.2. F-Functions Page 28 AD-4405A Weighing Indicator...
- Page 31 Data 7bits, Even parity Data 7bits, Odd parity Data bit, parity Data 8bits, Non parity *: Initial settings. bps: bit per second. Test Equipment Depot - 800.517.8431 - 5 Commonwealth Ave, Woburn, MA 01801 TestEquipmentDepot.com Page 29 AD-4405A Weighing Indicator 6.2. F-Functions...
- Page 32 Right : format 1 before printing 9 lines 0 line Left : format 2 Number of line feed Right : format 1 after printing 9 lines Normal Print direction Inverted *: Initial settings. 6.2. F-Functions Page 30 AD-4405A Weighing Indicator...
- Page 33 1 and 2. The data number automatically increases by one after print out of the data group. The first line is placed at the bottom of the line with the inverted print mode (f65=1). 6.2. F-Functions Page 31 AD-4405A Weighing Indicator...
-
Page 34: Cf-Functions
Power on ZERO (CF02) Cf02=0 After power on, the weight display starts immediately. Cf02=1,2,3 When the zero range is exceeded at power on, ------ is displayed. Press the key to start the weight display. Page 32 6.3. CF-Functions AD-4405A Weighing Indicator... -
Page 35: Tare
7.3. Clearing Tare When pressing the key while gross is zero, tare is cleared and gross is TARE displayed. When zeroing with the key, tare is cleared. ZERO Page 33 AD-4405A Weighing Indicator 7. Tare... -
Page 36: Accumulation
The limitation of accumulation count is 999999. The limitation of total is 999999 ignoring the decimal point. If exceeding these limitations, the data is not accumulated. Example: When the decimal point is set to "0.0", the limitation is "99999.9". 8. Accumulation Page 34 AD-4405A Weighing Indicator... -
Page 37: Display And Operation
3 seconds. ZERO The display blinks once and the accumulated data is cleared. And the data number is initialized (1). Caution External input can not be used. 8. Accumulation Page 35 AD-4405A Weighing Indicator... - Page 38 Step 2 If automatic print is selected, the data is printed out once at that timing. Step 3 If manual print, pressing the key while the accumulated data is displayed, to print PRINT out the data. Page 36 AD-4405A Weighing Indicator 8. Accumulation...
-
Page 39: Code Memory
....The key to input the destination code memory number. key....The key to return to step 1. key .....The key to copy number x's data to the destination “y” and to ENTER return to step 1. 9. Code Memory Page 37 AD-4405A Weighing Indicator... - Page 40 Set f14 and f15 to 18. (OP-08 has only one input; set f15) f13=18 : Inhibit reading EXT.2 and EXT.3 to prevent unintentional reading when switching the codes. EXT.2 (f14) EXT.3 (f15) Code Memory number Page 38 AD-4405A Weighing Indicator 9. Code Memory...
-
Page 41: Comparison
Lo (Lower acceptable tolerance): 2 (kg) not a negative value (3) TG (Target): 50 (kg), Hi (Upper acceptable tolerance): 2 (% of Target), Lo (Lower acceptable tolerance): 4 (% of Target) not a negative value 10. Comparison Page 39 AD-4405A Weighing Indicator... -
Page 42: Condition Formula For Comparison
When the displayed value becomes an underload (negative over), LO (under) is output. This function compares the Hi / HiHi limit value first. This function does not check the relationship between the upper and lower limit values. Page 40 AD-4405A Weighing Indicator 10.1. Weight Check Mode... -
Page 43: Setting The Upper/Lower Limit Values
5 5-stage Setpoint Target HiHi LoLo Class Comparator Triangle 6 5-stage Setpoint Target HiHi LoLo Class Comparator Unit Triangle Test Equipment Depot - 800.517.8431 - 5 Commonwealth Ave, Woburn, MA 01801 TestEquipmentDepot.com 10.1. Weight Check Mode Page 41 AD-4405A Weighing Indicator... -
Page 44: Setpoint Comparison
Relay OK, 2, Net ≧ (Final - Preliminary) Relay LO, 3, Gross < Zero band OVER/UNDER is judged always and the result is output to the LED but not to the relay. Page 42 AD-4405A Weighing Indicator 10.2. Setpoint Comparison... -
Page 45: Simple Batch
: Either the STOP key is pressed or the Batch stop input is on. f23=21 : Stable is detected after reaching Final. Before reaching Final, the key or Batch stop input forces weighing STOP completion even if f23=21. Page 43 AD-4405A Weighing Indicator 10.2. Setpoint Comparison... -
Page 46: Setting The Parameters Of Setpoint Comparison
Batch 1 Class Comparator Triangle 11 Simple Setpoint Final Free fall Preliminary Over Under Batch 2 Class Comparator Triangle 12 Simple Setpoint Final Free fall Full Over Under Batch 3 Class Comparator Triangle Page 44 AD-4405A Weighing Indicator 10.2. Setpoint Comparison... -
Page 47: Hold Function
**, start averaging automatically, release when the weight returns to the inhibit region. f27=3 Both Manual start and Automatic start. *Inhibit region 0 +/- 5 digits **Stable detection Satisfied both f02 and f03 11. Hold Function Page 45 AD-4405A Weighing Indicator... - Page 48 Key input and command in the hold state Release hold and perform key function: Keys: TARE, ZERO, SETPOINT, TOTAL Commands: MT, MZ, HC Continue hold and perform key functions Keys: NET/GROSS, Accumulation, Comparison start/stop Commands: Other commands Page 46 AD-4405A Weighing Indicator 11. Hold Function...
-
Page 49: Counting Function
....The key to set the number of samples. Maximum is 9999. key.....The key to select the number of samples, 5, 10, 20, 50,100. key ....The key to set the zero point. ZERO key....The key to tare (when using a container). TARE Page 47 AD-4405A Weighing Indicator 12. Counting Function... - Page 50 The key to shift the decimal point. MODE Command Input When the unit weight is known, command input via the serial interface is available. For details, refer to “16.3. Command Format”. Page 48 AD-4405A Weighing Indicator 12. Counting Function...
-
Page 51: Calendar / Clock
13. Calendar / Clock The AD-4405A has a built-in calendar/clock backed up by a lithium battery. The calendar/clock continues to operate even after AC power is turned off. Leap years are automatically corrected. The time and date can be added to the output data. -
Page 52: Setting Time And Date
AM and PM when triangle 2 or 3 is blinking. MODE key...The key to return to the time display without changing the time setting. key ..The key to store the time setting and return to the time display. ENTER Page 50 AD-4405A Weighing Indicator 13. Calendar / Clock... - Page 53 Month 2 with day bigger than 28 or 29 (leap year). A leap year is the multiple of 4 of Christian era (00, 04, …, 96). Example: When the following data is entered, ENTER the data will be corrected as follows: 13. Calendar / Clock Page 51 AD-4405A Weighing Indicator...
-
Page 54: Printer (Op-06)
14. Printer (OP-06) A dot matrix type printer (OP-06) can be installed in the AD-4405A. It can print out the result of weighing, accumulated weight, date and time, etc. The print format can be arranged by the F-Function settings or by using the serial interface command. - Page 55 Step 3 Replace with a new ink ribbon. Step 4 Arrange the ribbon using the dial. Step 5 Close the cover. Step 2 Press Ribbon Step 4 Arrange ribbon Step 5 Step 3 Close cover New ink ribbon Page 53 14.Printer (OP-06) AD-4405A Weighing Indicator...
-
Page 56: Common Items For Printer And Data Output
Operation When accumulation (manual or automatic) is performed, data is output or printed automatically with the accumulated data. The serial interface command can be used at f40=4. Page 54 15. Common Items for Printer and Data Output AD-4405A Weighing Indicator... -
Page 57: Data Number
15.3. Interval Data Output / Print The AD-4405A can output or print data with a constant time interval using the internal calendar/clock function. The time intervals for serial data output and for the printer can be set individually from 1 second up to 23 hours and 59 minutes. -
Page 58: Setting The Interval Time
The optional printer prints “Intv. Stop” before printing the data. The optional printer replaces overload data with spaces except for the decimal point. Page 56 15. Common Items for Printer and Data Output AD-4405A Weighing Indicator... -
Page 59: Rs-232C Interface
Signal ground Output Data set ready (RTS) Pin 7 is connected to pin 8 (CTS) Case Shield (Frame ground) Other Not used (male contact) Bit Format Data 7 bits Data 8 bits Page 57 16. RS-232C Interface AD-4405A Weighing Indicator... -
Page 60: Data Format
Unit In case of Cf07=0, the unit length is 2 digits. In case of Cf07=1, the unit length is 3 digits. Depending on circumstances, an A&D printer may not work correctly. 16.3. Page 58 16.2. Data Format AD-4405A Weighing Indicator... -
Page 61: Command Format
Address number Unperformed command reply Unknown command reply @ 2 3 Terminators Terminators Unperformed command Unknown command Address number Memory overflow (for UFC commands) Carriage return(0Dh) Terminators Line feed(0Ah) Memory overflow error Page 59 AD-4405A Weighing Indicator 16.3. Command Format... -
Page 62: Commands To Request Data
Refer to the fixed data format of “8.2. Display and Operation, Output of Accumulated data”. Is the Display Zero When receiving this command, returns “at zero point” or not is returned immediately. Template Command Reply When at ZERO Not at ZERO Page 60 AD-4405A Weighing Indicator 16.3. Command Format... -
Page 63: Commands To Control The Indicator
Reply Display the Net Data Displays the net data. Template Command Reply Accumulation (M+) Accumulates the displayed data. Template Command Reply Clearing the Accumulated data Clears the accumulated data. Template Command Reply Page 61 AD-4405A Weighing Indicator 16.3. Command Format... - Page 64 Enables the key switches that were disabled by the DK command. Not applicable to the keys disabled by F12. Template EK,n n: key switch number (0: all keys, 1 - F: refer to F-Function F12) Command Example: to enable all keys Reply Page 62 AD-4405A Weighing Indicator 16.3. Command Format...
-
Page 65: Commands To Set Parameters
Sets the unit weight value with decimal point. Template UW,m, [ value ] m: code memory number, 0 - 4 Command Reply Test Equipment Depot - 800.517.8431 - 5 Commonwealth Ave, Woburn, MA 01801 TestEquipmentDepot.com Page 63 16.3. Command Format AD-4405A Weighing Indicator... -
Page 66: Commands For The Hold Function
Sets the print out data format. Format 1 (2) data is stored in the same memory area of F70 (F71). Template PFf, [ parameters ] f: Format number, 1 or 2 Command Reply Page 64 AD-4405A Weighing Indicator 16.3. Command Format... -
Page 67: Ufc Commands
ID number specified at F06 Date Time Data number increments with each output automatically CoDe memory number Accumulation count TotaL weight CoMma CR code (0Dh) LF code (0Ah) DElete the last parameter Page 65 AD-4405A Weighing Indicator 16.4. UFC Command... - Page 68 Serial output data format 2, the strings ’ Welcome to A & D’ and line feed, the strings ’Total weight ’ accumulation count, total weight, and 2 sets of line feed. PF2,$DT$TM$LF$AN$SP$TL$LF Date and time Line feed Accumulation count Total weight Line feed Page 66 AD-4405A Weighing Indicator 16.4. UFC Command...
-
Page 69: Rs-422/Rs-485, Relay Output (Op-03)
Relay Output Terminals AC adapter Jack (The AC adapter is provided with the OP-03) Note: Please confirm that the AC adapter type is correct for your local voltage and receptacle type Page 67 AD-4405A Weighing Indicator 17. RS-422/RS-485, Relay Output (OP-03) - Page 70 AD-4405A #32 AD-4405A #32 Address F06=32 Address F06=32 Connect a terminator to the end connection. Internal termination resister is effective when the TRM terminal is connected to the RDB terminal. Page 68 AD-4405A Weighing Indicator 17. RS-422/RS-485, Relay Output (OP-03)
-
Page 71: Relay Output And Control Input (Op-05)
Control input common Adaptable connector JA-TCP0586 (provided with the OP-05) Circuits Control input Relay output +7 to 9V COM(out) EXT3 680 EXT1 680 EXT2 DIN connector (in) 680 of OP-05 Page 69 AD-4405A Weighing Indicator 18. Relay Output and Control Input (OP-05) -
Page 72: 20Ma Analog Output (Op-07)
Press the ENTER key to store the setting value into memory. After this the display returns to selection of the f32 a f33 a f33 b f32 b Weight Function number. Page 70 AD-4405A Weighing Indicator 19. 4-20mA Analog Output (OP-07) -
Page 73: Current Loop Output (Op-08)
Adaptable connector JA-TCP0586 (provided with the OP-08) Circuits Control input Relay output +7 to 9V COM(out) EXT3 680 Current loop output + ~ DIN connector - ~ (in) of OP-08 Page 71 20. Current Loop Output (OP-08) AD-4405A Weighing Indicator... - Page 74 Decimal point (dot or comma) and delimitter (comma or semicolon) can be set by f46. Space code(20h) Carriage return(0Dh) 8-bit data Terminators Line feed(0Ah) Unit Header 1 Header 2 Decimal point : Dot(2Eh) or Comma(2Ch) Cf06=0,1 Cf06=2 Cf07=0 Cf07=1 2 digits 3 digits Page 72 AD-4405A Weighing Indicator 20. Current Loop Output (OP-08)
-
Page 75: Specifications
Comparison mode selection HiHi, Hi, OK, Lo, LoLo output for limit comparison Zero band, preliminary, free fall, final for setpoint comparison Printer Printer 5 x 7 dot matrix type, 16 digits per line Page 73 AD-4405A Weighing Indicator 21. Specifications... -
Page 76: Dimensions
275 (W) x 111 (H) x 158.5 (D) mm Accessories Refer to "4.4. Accessories and Option" 21.1. Dimensions Unit: mm Test Equipment Depot - 800.517.8431 - 5 Commonwealth Ave, Woburn, MA 01801 TestEquipmentDepot.com Page 74 21.1. Dimensions AD-4405A Weighing Indicator...
Need help?
Do you have a question about the AD-4405A and is the answer not in the manual?
Questions and answers