Table of Contents
Advertisement
Advertisement
Table of Contents

Related Manuals for A&D AD-4329A


Summary of Contents for A&D AD-4329A
- Page 1 Weighing Indicator 1WMPD4002801...
- Page 2 This is a hazard alert mark. This mark informs you about the operation of the product. Note This manual is subject to change without notice at any time to improve the product. No part of this manual may be photocopied, reproduced, or translated into another language without the prior written consent of A&D Company, Ltd.
-
Page 3: Table Of Contents
Contents Compliance ................3 1.1.1. Compliance with FCC Rules ............. 3 1.1.2. Compliance with European Directive ..........3 Introduction ................4 Installation and Precautions ........... 5 3.1.1. Installation and Precautions............. 5 3.1.2. The Load Cell Connections .............. 5 3.1.3. Adjustment of the Load Cell Output..........6 3.1.4. - Page 4 Command Format................46 12.1.4. Command to Request Data ............46 12.1.5. Commands to Control the Indicator ..........47 12.1.6. Commands to Set Parameters ............48 12.1.7. Related Functions ................49 Specifications ............... 50 13.1. Dimensions................51 Page 2 AD-4329A Weighing Indicator...
-
Page 5: Compliance
This appliance complies with the statutory EMC (Electromagnetic Compatibility) directive 2004/108/EC and the Low Voltage Directive 2006/95/EC for safety of electrical equipment designed for certain voltages. Note: The displayed value may be adversely affected under extreme electromagnetic influences. Page 3 1. Compliance AD-4329A Weighing Indicator... -
Page 6: Introduction
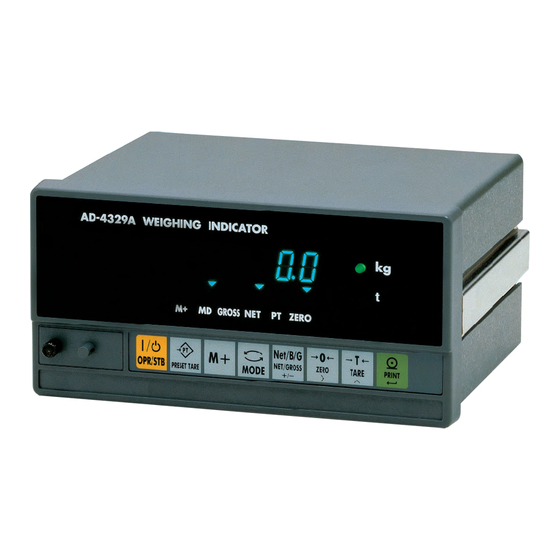
Introduction The AD-4329A is a compact weighing indicator that amplifies the signal from a load cell, converts it to digital data and displays it as a mass value. This indicator has the following performance: Input sensitivity: ......0.15 µV/division. Maximum display: ...... 10000 divisions (or 20000 divisions). -
Page 7: Installation And Precautions
Installation and Precautions 3.1.1. Installation and Precautions The AD-4329A weighing indicator is a precision electronic instrument. Handle the indicator carefully. The operating temperature is -10 to +40 to 104 ). Do not install the scale in direct sunlight. Misoperation or other problems may be caused by an unstable power source including momentary power failrue or instantaneous noise. -
Page 8: Adjustment Of The Load Cell Output
≥ Rated capacity A=750 [kg] 0.15 . Therefore, Rated output B=3 [mV/V] regard the instrument as a good Excitation voltage E=5000 [mV] design. Weighing interval D=0.05 [kg] Weighing capacity 300 [kg] Page 6 3. Installation and Precaution AD-4329A Weighing Indicator... -
Page 9: Installing The Option Board
8 to insert the main board correctly. Step 9 Attach both slide-rails. Fix the rear panel using four screws and four bolts as before. Page 7 3. Installation and Precaution AD-4329A Weighing Indicator... -
Page 10: Description Of Panels And Symbols
The key to select a value while in the setting mode. Print key The key to output data. Enter key, The key to store current data while in the setting mode. Page 8 4. Description of Panels and symbols AD-4329A Weighing Indicator... -
Page 11: Rear Panel Description
Over load display. Remove any load from the load cell immediately. It may cause damage to the indicator. Example of an error display. Page 9 4. Description of Panels and symbols AD-4329A Weighing Indicator... -
Page 12: Accessories And Option Op-02
0.5A or 0.315A time lag fuse FS-EAWK-500MA FS-EAWK-315MA Rubber foot 10-SJ-5023 Caution Please Confirm that the receptacle type and local voltage is correct for your indicator (scale). Comparator relay output OP-02 AD4329A-02 Accessory Cable Page 10 4. Description of Panels and symbols AD-4329A Weighing Indicator... -
Page 13: Calibration
The maximum display is less than or equal to 10000 divisions. This number is calculated from the maximum capacity divided by the minimum division. Check the accuracy of weighing instrument periodically. Recommended mass, use a mass heavier than 2/3 maximum capacity. Page 11 5. Calibration AD-4329A Weighing Indicator... -
Page 14: Calibration Procedure
Step D Weighing range function. Perform this function just before zero calibration and span calibration. Step F Digital linearization function. Perform this function after the zero calibration immediately. And perform the span calibration continuously. Page 12 5. Calibration AD-4329A Weighing Indicator... -
Page 15: Preparation
Press and hold the key and press the NET/GROSS ....All parameters are not changed and the calibration mode is finished. Press the Operate/Standby key to turn the display off after displaying CanCel Page 13 AD-4329A Weighing Indicator 5. Calibration... -
Page 16: Minimum Division (Weighing Interval)
..The key not to change a MODE parameter and proceed to step 7 (of the zero calibration). key ..The key to porceed to "5.3. PRESET TARE Weighing Range Function". Page 14 5. Calibration AD-4329A Weighing Indicator... -
Page 17: Zero Calibration
..The key to select a number. key ..The key to store the zero point parameter and proceed to step 10. key... The key not to change parameter and MODE proceed to step 10. Page 15 5. Calibration AD-4329A Weighing Indicator... -
Page 18: Span Calibration
..The key not to change parameter and proceed to step 17. Caution Do not press the key while the MD mark is lit (detecting motion). Arrange the condition using the F00 filter function. Page 16 AD-4329A Weighing Indicator 5. Calibration... -
Page 19: Exiting The Calibration Mode
Press and hold the key and press the NET/GROSS All parameters are not changed, is displayed and the CanCel calibration mode is finished. Step18 Press the key to turn the display off. Operate/Standby Page 17 5. Calibration AD-4329A Weighing Indicator... -
Page 20: Weighing Range Function
-40kg to -20kg : The second range, division 0.02kg. -20kg to 20kg The first range, division 0.01kg. 20kg to 50kg The second range, division 0.02kg. 50kg to 60kg The third range, division 0.1kg. Page 18 5.3. Weighing Range Function AD-4329A Weighing Indicator... -
Page 21: Setting Division And Range
Press and hold the key and press the NET/GROSS All parameters are not changed and the calibration mode is finished. Press the key to turn the display off Operate/Standby after displaying CanCel Page 19 5.3. Weighing Range Function AD-4329A Weighing Indicator... - Page 22 .. The key not to change the division and MODE proceed to step 5. Step 5 Specify the range of the second range. key..The key to select a figure. key ..The key to select a number. Page 20 5.3. Weighing Range Function AD-4329A Weighing Indicator...
- Page 23 The key to store the value as triple range and proceed to step10. Step10 is displayed. Perform zero calibration Cal 0 and span calibration from step7 at page 15 . Page 21 5.3. Weighing Range Function AD-4329A Weighing Indicator...
-
Page 24: Digital Linearization Function
Step 6 If you add new middle point, proceed step 3, 4, 5. If you finish this function, proceed to step 7. Step 7 Perform step 10 of "5.2.7.Span Calibration" on page 16 immediately. Page 22 5.4. Digital Linearization Function AD-4329A Weighing Indicator... -
Page 25: Gravity Compensation Function
4. Step 4 Now is displayed. Press the key to g1 xxxx store the parameters. The is displayed. Proceed to step5. Step 5 Press the key to turn display off. Operate/Standby Page 23 5.5. Gravity Compensation Function AD-4329A Weighing Indicator... -
Page 26: The Gravity Acceleration Table
9.798 m/s Lisbon 9.801 m/s Vancouver, BC 9.809 m/s London (Greenwich) 9.812 m/s Washington DC 9.801 m/s Los Angeles 9.796 m/s Wellington NZ 9.803 m/s Madrid 9.800 m/s Zurich 9.807 m/s Page 24 5.5. Gravity Compensation Function AD-4329A Weighing Indicator... -
Page 27: Calibration Error Code List
Select mass of the following relation. lnr 1 < lnr 2 < lnr 3. An unacceptable value was selected in the gravity acceleration function. g err Exit this error using the Operate/Standby key. Page 25 AD-4329A Weighing Indicator 5.6. Calibration Error Code List... -
Page 28: Functions
3. (all switch stored at f-06) key. The key not to change the parameter. Proceed to step 3. MODE Step 5 Press the key to exit the mode. Then display turns off. Operate/Standby Page 26 6. Functions AD-4329A Weighing Indicator... -
Page 29: F-Functions
6 or f-02 7 can be 2.0 d/ 1s selected only. (Internal setting 3.0 d/ 1s is 6.) 4.0 d/ 1s d: division (weighing interval) of first range. s: second. *: factory settings (Initial settings). Page 27 6. Functions AD-4329A Weighing Indicator... - Page 30 Accumulation data display when shorting terminal. Over signal. Gross over and display data are output. All keys are enable when shorting terminal. f-11 The same as f-10 EXT2 f-12 The same as f-10 EXT3 Page 28 6. Functions AD-4329A Weighing Indicator...
- Page 31 Delay for continual data f-33 is ineffective. Approximately 2 seconds 600 bps f-34 1200 bps Baud rate 2400 bps bps: bit per second. d: division (weighing interval) of first range. *: factory settings (Initial settings). Page 29 6. Functions AD-4329A Weighing Indicator...
- Page 32 Refer to "12.1.2.Data Format" Data format Format 2 00 to Factory setting is 00. f-46 Address When f-41 4 is not selected, f-46 is ineffective. bps: bit per second. *: factory settings (Initial settings). Page 30 6. Functions AD-4329A Weighing Indicator...
- Page 33 Object Operation This function can be used in the "Auto print mode" and "Manual print mode" When using a non-buffered printer like the AD-8121, set to f-33 1 and f-43 1 . Page 31 6. Functions AD-4329A Weighing Indicator...
-
Page 34: Cf-Functions
1 and Two figures , (comma) Decimal point is effective decimal point Three figures , (comma) at format 1 and 2. Cf-11 Not used (Ineffective) Accumulation function (Effective) CAP : maximum capacity Page 32 6. Functions AD-4329A Weighing Indicator... -
Page 35: Tare
The net is displayed. 7.1.3. Clearing Tare When pressing the key while gross is zero, tare is cleared and gross is TARE displayed. When zeroing with the key, tare is cleared. ZERO Page 33 7. Tare AD-4329A Weighing Indicator... -
Page 36: Accumulation
The limitation of total is 999999 ignoring the decimal point. If exceeding these limitations, data is not accumulated. Example: Setting the decimal point to second a figure like "0.0", the limitation is "99999.9". Page 34 8. Accumulation AD-4329A Weighing Indicator... -
Page 37: Display And Operation
Step 1 Press the key to display and accumulation data. total MODE Step 2 Pressing the key, the count and total of accumulation data are output in order. PRINT Example: Page 35 8. Accumulation AD-4329A Weighing Indicator... -
Page 38: Comparison
Select a parameter of the F-function f-21 for the comprison condition. Specify the upper and lower limit values. When inputting the upper value and lower limit value, it is not necessary to input the F-function f-20 and f-21 again unless changing the F-function. Page 36 9. Comparison AD-4329A Weighing Indicator... -
Page 39: Selecting Upper/Lower Limit Comparison
The upper limit value and lower limit value can be set to a negative value. This function compares the upper limit value first. This function does not check the relation of upper limit value and lower limit value. Page 37 9.2. Upper/Lower Limit Comparison AD-4329A Weighing Indicator... -
Page 40: Setting Upper/Lower Limit Values
Lower linit value: 1000 Result Condition Formula Range HI (Over) OK (GO) LO (Under) 5000 < Display value 5001 5000 1000 Display value 5000 1000 5 < Display value < 1000 Display value Page 38 9.2. Upper/Lower Limit Comparison AD-4329A Weighing Indicator... -
Page 41: Setpoint Comparison
Set a corrective value related to closing the dribble flow gate. SET2 Preliminary Set a begining point to use the dribble flow gate only. SET3 Zero band Set a value to regard as nearly zero. Page 39 9.3. Setpoint Comparison AD-4329A Weighing Indicator... -
Page 42: Setting The Parameters Of Setpoint Comparison
Set the "Preliminary" using the same keys as step3. Step 6 5et 3 is displayed for two seconds. Set the "Zero band" using the same keys as step3. Step 7 Turn the display off using the key. Operate/Standby Page 40 9.3. Setpoint Comparison AD-4329A Weighing Indicator... -
Page 43: External Control Input
DC+5V More than 100ms More than 100ms OFF (Break) EXT.IN PhotoCoupler Relay, Switch Ω 1,3,4,5,6,7,8pin 2pin Common pin The inside of AD-4329A Pin No. F-Function Parameter Description Not used (No function) Zero key Tare key Print key, Operate/Standby key f-10... -
Page 44: Standard Serial Data Output (Ser.out)
Pin No. Signal 3 pin Current loop 5 pin Other pins Not used Case Shield Inside of AD-4329A Related Functions F-Function Description f-30 0 Displayed data f-30 1 Gross data Output Data f-30 2 Net data... -
Page 45: Data Format
In case of Cf-10 0 or 2, the unit length is 2 figures. In case of Cf-10 1, or 3, the unit length is 3 figures. Depending on circumstances, an A&D printer may not work correctly. Page 43 11. Standard Serial Data Output AD-4329A Weighing Indicator... -
Page 46: Rs-232C Interface
Transmission data Input Received data Signal ground 7 pin and 8 pin are connected internally. 1,4,6,9 Not used (No connection) Shell Shield Inside of AD-4329A D-sub 9 pin connector (male) Case Bit Format Page 44 AD-4329A Weighing Indicator 12. RS-232C Interface... -
Page 47: Data Format
In case of Cf-10 0 or 2, the unit length is 2 figures. In case of Cf-10 1 or 3, the unit length is 3 figures. Depending on circumstances, an A&D printer may not work correctly. Page 45 12. RS-232C Interface AD-4329A Weighing Indicator... -
Page 48: Command Format
Sending a command Sending a command with address Unperformed command reply Unknown command reply 12.1.4. Command to Request Data Request Data When receiving this command, Display data is sent back immediately. Templete Command Reply Page 46 AD-4329A Weighing Indicator 12. RS-232C Interface... -
Page 49: Commands To Control The Indicator
The tare value is cleared and the gross value is displayed. Templete Command Reply Display Gross Value The gross value is displayed. Templete Command Reply Display Net Value The net value is displayed. Templete Command Reply Page 47 12. RS-232C Interface AD-4329A Weighing Indicator... -
Page 50: Commands To Set Parameters
S1, [ value ] Command Reply Set Preliminary Value Set the preliminary value of the setpoint comparison. The decimal point is not necessary because of according to display. Templete S2, [ value ] Command Reply Page 48 12. RS-232C Interface AD-4329A Weighing Indicator... -
Page 51: Related Functions
Cf-09 Format of Header Selection of TR, PT, GS, NT, T, G and N Cf-10 Figure number of unit, decimal point Two figures or three figures, dot or comma Cf-11 Accumulation function Effective or ineffective Page 49 12. RS-232C Interface AD-4329A Weighing Indicator... -
Page 52: Specifications
3 point Capacity: 250V AC, 30V DC, maximum current 3A (resistive load) Relay output Comparison mode selection HI, GO, LO output for upper/lower limit comparison Zero band, preliminary, free fall, final for setpoint comparison Page 50 13. Specifications AD-4329A Weighing Indicator... -
Page 53: Dimensions
85% R.H. (no condensation) Mass 1.8 kg approximately Dimensions 192(W) x 96(H) x 165(D) mm Accessories Refer to "4.1.4.Accessories and Option OP-02" 13.1. Dimensions (6) 15.5 (12.5) (5.2) Panel Cutout Size 91.5 +0.8 Unit : mm Page 51 13. Specifications AD-4329A Weighing Indicator... - Page 54 MEMO Page 52 AD-4329A Weighing Indicator...
- Page 56 3-23-14 Higashi-Ikebukuro, Toshima-ku, Tokyo 170-0013, JAPAN Telephone: [81] (3) 5391-6132 Fax: [81] (3) 5391-6148 A&D ENGINEERING, INC. 1756 Automation Parkway, San Jose, California 95131, U.S.A. Telephone: [1] (408) 263-5333 Fax: [1] (408)263-0119 A&D INSTRUMENTS LIMITED Unit 24/26 Blacklands Way, Abingdon Business Park, Abingdon, Oxfordshire OX14 1DY United Kingdom Telephone: [44] (1235) 550420 Fax: [44] (1235) 550485 A&D AUSTRALASIA PTY LTD...
Need help?
Do you have a question about the AD-4329A and is the answer not in the manual?
Questions and answers