
Related Manuals for BWT Perla Hybrid


Summary of Contents for BWT Perla Hybrid
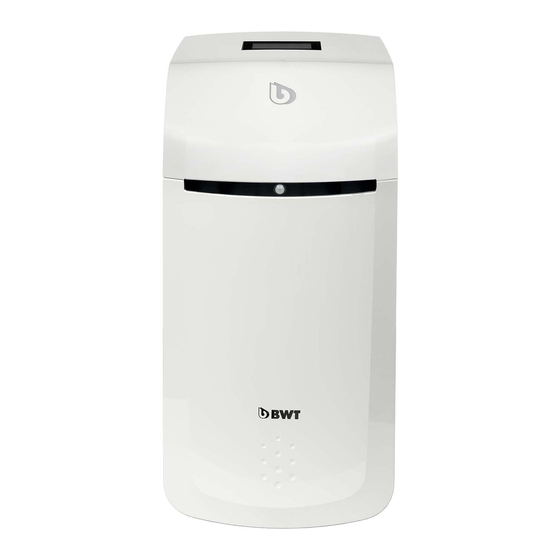
- Page 1 Installation and operating manual EN BWT Perla hybrid Duplex softening unit Subject to change!
- Page 2 Thank you very much for the confidence that you have Table of Contents Page 3 shown in us by purchasing a BWT appliance.
-
Page 3: Table Of Contents
Table of Contents General operation and display Opening the Easy Fill Safety instructions technology cover... . 19 General safety instructions ..5 Device status display ..19 Validity of this documentation . - Page 4 Warranty 15.1 Product returns ... . 72 15.2 Your contact at BWT ..72 Decommissioning and disposal 16.1 Decommissioning ... 73 16.2...
-
Page 5: Safety Instructions
To ensure that the device is installed safely, this work ● Use only accessories, spare parts and consum- must be performed only by a qualified specialist or a trained person under the guidance of a qualified able materials that have been approved by BWT. specialist. ● Adhere to the environmental and operating con- A qualified specialist is someone who can assess ditions specified in the “Technical data” section. -
Page 6: Transport And Installation
Transport and installation Symbols used To avoid damage during transport to the installation The following symbols in this documentation location, do not remove the product from the pack- indicate specific sources of danger or important aging until you have reached the relevant location. information: Then dispose of the packaging in the correct man- General danger to persons, sys-... -
Page 7: How Safety Instructions Are Displayed
How safety instructions are Product-specific safety displayed instructions In this document safety instructions precede any DANGER! sequence of actions that could cause harm to per- sons or damage to property. All hazard prevention Mains voltage! measures must be followed. Risk of death by electric shock! Safety instructions are displayed as follows: ►... -
Page 8: Important Notes On The Product
Important notes on the product Definitions Inflow water: Drinking water quality of the local wa- The product must be installed as ter supplier. Depends on the region and is described described in the installation guide using the degrees of hardness soft, medium or hard. in compliance with the general Softened water: Softened water, usually with water requirements for the supply of... - Page 9 BWT drinking water specialist or fitter. adversely affect the quality of the luxury water. Impurities from inferior regenera- Use of BWT Perla tabs or re- Quality of the regen- tives with insoluble components generatives in accordance with erative cause deposits.
-
Page 10: Scope Of Delivery
► The scope of delivery and illustrations may differ from the total scope specified here depending on the country. Optional components are marked with the * symbol. BWT Perla hybrid simplex water softener with: 1.1 Microprocessor control with multi-info touch display 1.2 Blending valve with actuator 1.3 Multiple-way control valve... -
Page 11: Optional Extras
Optional extras Order no (not on list of supplied parts) BWT Bewasol brine lifting system 11808 AQA Guard Wireless Water Sensor 11772 (required accessories for the AQA Guard function) LTE antenna, cable length of 3 m 1-444528 Fault signal cable ZLT... -
Page 12: Intended Use Proper Use
Intended use Function Proper use The BWT Perla hybrid is a simplex water softener that functions using ion exchange. The product is This product is intended for the partial softening of filled with organic ion exchange material. drinking and service water. It is also designed to... -
Page 13: Regeneration
Regeneration Multi-info touch display ● Exchange of hardness forming substances Ca The product is equipped with a touch display. It and Mg ions for Na ions from the regenerative at can be operated intuitively and provides a quick the ion exchanger. overview of all product parameters. -
Page 14: Interaction
Connectivity protects against water damage caused by rinsing BWT DES (BWT Digital Eco System) water, especially when the rinsing water is being drained by a pump that stops functioning when Various functions may be available depending on the power fails. -
Page 15: Installation Conditions
● Flow rate at least 3 m /h or 50 l/min for products in the Rondomat and BWT Perla Professional series. Installation locations and ● Appropriate larger sizing if the pump is used environment simultaneously for other products. -
Page 16: Functional And Warranty Conditions
A is greater than the diameter of the drain pipe.) softening unit can reduce the concentration of free ● Correct water treatment with BWT Smart Mineral chlorine and chlorine dioxide. In other words, the (3 litres) significantly reduces the corrosiveness concentration in the outflow of a softening unit is and liming tendency of the water. -
Page 17: Installation Diagram
Connecting the product Connection fitting Connect the product to a suitable connection fitting with integrated bypass. NOTE ► The following descriptions are based on the installation and use of the BWT connection fitting. leading away coming from ►Read the separate installation instructions for the connection fitting. Failure to do so will void the warranty in the event of damage. -
Page 18: Establishing A Sewage System Connection
6 2 1 Establishing a sewage system connection ►Connect the overflow hose Ø 24 mm (13) to the product. ►Route the overflow hose with an incline of at least 10 cm to the sewage system connection (drain), or connect it to the included siphon in accordance with the installation instructions and fasten it sufficiently. -
Page 19: General Operation And Display
►Tap lightly on the surface of the housing. The Easy Fill technology cover opens. Device status display The colour of the BWT logo on the technology cover indicates the device status: Lit blue Normal operation Flashing blue Level measurement in progress (regenerative level >... -
Page 20: Inserting The Mineral Substance Container
NOTE ► Observe the safety data sheets of the additives! ► Only original BWT additives may be used. ► Additives must not be transferred from one container to another. ► Damaged or soiled mineral substance containers must not be used. -
Page 21: Closing The Easy Fill Technology Cover
►Ensure that the mineral substance container is correctly inserted and the connection hose and cable(s) are not kinked or twisted. Closing the Easy Fill technology cover ►Press the Easy Fill technology cover down gently until it snaps shut. -
Page 22: Touch Display Controls
Touch display controls The touch display provides important information Menu and can be operated intuitively. It switches on automatically by tapping the display Next / Next page once. If it is not used, it switches off after an adjustable time (energy-saving mode). Back / Previous page Start page / Status overview Regeneration in progress GSM signal strength Wi-Fi signal strength... -
Page 23: Installation Check
Start screen ►Press CONTINUE Installation check The installation check verifies that your product is properly connected. ►Press to begin. START CHECK Installation check 1/4: Waste water connection according to EN1717 ►Check that the waste water hoses are connected properly (see chapter “6.2.1 Establishing a sew- age system connection”, page 18). If all criteria for correct installation are satisfied: ►Press INSTALLED Installation check 2/4: Ports on the connection fitting ►Ensure that the hoses for the inflow and outlet water at the connection fitting are correctly con-... - Page 24 Installation check 3/4: AQA Stop Sensor ►Check the connection and position of the floor sensor (see chapter “6.1 Installation diagram”, page 17). If all criteria for correct installation are satisfied: ►Press CONFIRM Installation check 4/4: Refilling the regenerative ►Press lightly on the Easy Fill technology cover to open it (see chapter “7.1 Opening the Easy Fill technology cover”, page 19).
-
Page 25: Benefits Of Registering
Benefits of registering You can only use all BWT services if you register your product: ● Access to the water hardness database ● Regular software updates ● Troubleshooting ● Use of the BWT Best Water Home app ● Current messages ●... -
Page 26: Connection Wizard
Connection wizard If you perform registration during start-up, the con- nection wizard starts automatically and you can skip the following text section. If you want to register later, you must start the con- nection wizard manually. The connection wizard supports setting up the connection type that the product uses to connect to the Internet. -
Page 27: Checking And Setting The Water Hardness
Entering the postcode Entering the postcode will automatically determine the water hardness from the hydromaps water hardness database for the installation location of your product. ►Tap inside the text box. A keypad is displayed. ►Enter the postcode of the installation location of your product and press Enter to confirm your entry. -
Page 28: Completing The Start-Up Procedure
Completing the start-up procedure Rinsing procedure A rinsing procedure occurs after start-up. If it has not been completed, then the remaining run time is displayed. ►Wait for the rinsing procedure to end. Start-up status The start-up process is complete following the rinsing procedure. -
Page 29: Gsm - Connection Wizard
GSM – connection wizard NOTE ► GSM connectivity is not available for all products. The product can be connected to the Internet inde- pendently of the home network via GSM thanks to an integrated SIM card. This requires a sufficient GSM connection. There are no additional costs. If necessary, start the connection wizard: >... - Page 30 Poor GSM connection If the GSM connection is poor, you can improve it by using an external GSM antenna. ►Contact BWT Customer Service to acquire an external antenna. ►Press and follow CONNECT EXTERNAL GSM ANTENNA the instructions. If you do not have a suitable external GSM antenna,...
-
Page 31: Lan - Connection Wizard
LAN – connection wizard If you have a network connection at the installation location of your product, use the RJ45 interface to establish the Internet connection via your network. If necessary, start the connection wizard: > Settings > General Information > Connec- tion >... - Page 32 Obtaining the network connections automatically The network settings can be obtained automatically via DHCP. ►Press to use your network settings. AUTOMATIC If you do not want to obtain your network settings via DHCP, you can also assign them manually. To do so, you must know your network settings.
-
Page 33: Wi-Fi - Connection Wizard
Wi-Fi – connection wizard To connect the product to the home network via Wi-Fi, you need the name of the Wi-Fi (SSID) and the corresponding password (WPA2 key). If necessary, start the connection wizard: > Settings > General Information > Connec- tion >... - Page 34 Obtaining the network connections automatically The network settings can be obtained automatically via DHCP. ►Press to use your network settings. AUTOMATIC If you do not want to obtain your network settings via DHCP, you can also assign them manually. To do so, you must know your network settings.
-
Page 35: Connection
Wi-Fi connection was not successful If the connection to the home network via Wi-Fi was not successful, you can scan the QR code with an Internet-enabled mobile device to obtain further information. ►Press to attempt to connect again. REPEAT ►Press to exit the connection wizard. -
Page 36: Performing A Connection Test
9 4 2 Performing a connection test The connection test checks the connection of your product to and from the cloud. This ensures that the connection is working from both sides. Requirement: Connection setup via GSM, LAN or Wi-Fi, as well as registration, must have been successfully performed. -
Page 37: Checking The Connection Status
You can only use all of the manufacturer services if you register your product: ● Access to the water hardness database ● Regular software updates ● Troubleshooting ● Use of the BWT Best Water Home app ● Current messages ● Remote operation... -
Page 38: Starting Registration On The Product
10 1 Starting registration on the product Subsequent registration You can begin registration at any time: > Settings > Registration Selecting the connection type ►Select the connection type used by the product to connect to the Internet. ►Refer to the related chapter for more information on the selected connection type: –... - Page 39 Entering the postcode Entering the postcode will automatically determine the water hardness from the hydromaps water hardness database for the installation location of your product. ►Tap inside the text box. A keypad is displayed. ►Enter the postcode of the installation location of your product and press Enter to confirm your entry.
-
Page 40: Completing Registration Online
►Read and confirm the privacy policy. ►Provide information about your product. ►Create a user account. Creating a BWT user account You must create a user account to complete product registration. If you already have a user account, you may use it here. -
Page 41: Operation
Operation You can see current data and information as well as make settings in normal operation. 11 1 Home screen You can see the current status of the product at a glance: ● Current flow rate: Current flow rate of outlet water (softened water plus inflow water) in litres per hour. -
Page 42: Messages
11 2 Messages ►Press Messages on the home screen to display current device messages. NOTE ► If a message is confirmed without fixing the cause, this message appears again after the next regeneration at the latest. Messages are divided into three categories: ●... -
Page 43: Menu Overview
11 3 Menu overview You can open the menu overview either with the Home button from any of the menus, or with the button on the Home screen. ►Open the menu overview: Home > The menu overview is the starting point for all other menus: ●... -
Page 44: General Information
11 4 1 General Information You can set the date, time, language, function times, connection and screen saver in the GENERAL menu. INFORMATION > ►Press for the menu item in which you wish to change the settings. < > ►Press to make the desired settings. -
Page 45: Device Configuration
11 4 3 Device configuration Depending on your product and the installed soft- ware, additional device settings are possible. You can activate/deactivate these settings as required. ►Press the checkbox(es) to activate or deactivate functions. AQA Stop Sensor If the product’s floor sensor detects water on the floor, the water supply in the direction of flow behind the product is shut off and a warning is issued. The floor sensor only responds to drinking water (mini-... - Page 46 AQA Watch Consistently low flow rates indicate problems in the pipeline network. The function AQA WATCH monitors the domestic water network for low flow rates (< 60 l/h) and issues a warning as soon as they persist for more than 10 minutes. Rinse The Rinse function provides an additional rinsing function that is recommended for operation with subsequent reverse osmosis (e.g.
-
Page 47: Registration
Setting the water hardness For registered products, the inflow water hardness is taken from the hydromaps water hardness da- tabase. Check that the database value matches the water hardness at the installation location and adjust the value for the inflow water hardness if necessary. ►If necessary, press ENTER VALUE MANUALLY ►Enter the water hardness at the installation location. -
Page 48: Functions
● Maintenance: Product check and maintenance routine with the cleaning tablet. BWT IOCLEAN 11 5 1 Regeneration/rinsing You can trigger manual regeneration or rinsing at any time while the product is in operation. > ►Press Regeneration/rinsing ►Select whether you want to trigger an additional... -
Page 49: Shut Down/Return To Operation
11 5 2 Shut down/return to operation If you do not need the product for a longer period of time (e.g. you are away), you should shut it down. As long as the product is in operation, the Shutting down menu appears. If the product was shut down, then the Return to operation menu appears. -
Page 50: Substance Container
After a certain defined amount of water has been consumed, the following message appears on the display: Change mineral substance container soon. Place a new mineral substance container (BWT Smart Mineral) at the ready. When the mineral substance is depleted, a mes- sage appears on the screen: Mineral substance container empty. -
Page 51: Holiday Mode
► If you have already gone on holiday and forgotten to activate Holiday mode, use the BWT Best Water Home app or remote opera- tion to switch on Holiday mode. Deactivating Holiday mode > Functions > Holiday mode ►Press the sliding switch to deactivate Holiday... - Page 52 ►Press START You will be guided step-by-step through the main- tenance procedure. Checking for leaks In this step, check the system for leaks. ►Check the product as well as the connections both in front of it and behind it for leaks. NOTE ►...
- Page 53 Measuring water hardness To determine the water hardness, take a water sample at the nearest sampling point at a flow rate of 200 to 300 l/h. ►Press CHECKED ►Check the outlet water hardness with the en- closed luxury water check. NOTE ► Follow the usage instructions enclosed with the luxury water check. If the water hardness is acceptable: ►Press CHECKED...
-
Page 54: Info
Cleaning Cleaning is the last step in the biannual maintenance of your product. Only use the cleaning BWT IOCLEAN tablets for this. ►Open the Easy Fill technology cover of the product. ►Take a cleaning tablet out of the packaging and insert it into the opening provided on the product (see the adjacent image). -
Page 55: Operating Record
● Serial number: Individual serial number ● Start-up data: Time of start-up ● Product Code: Individual product code ● BWT Connect: Version of the installed device software ● PCB: Printed circuit board installed in the product ● Unit: Product designation ►If necessary, swipe your finger upwards from the... -
Page 56: Consumption
11 6 3 Consumption > Info > Consumption > ►Press for detailed information about the flow volume, regenerative or water consumption. Flow volume Information about the current water flow. ►Press to view the flow TODAY MONTH YEAR volume in the respective time period. NOTE ► A maximum flow rate that is too low indi- cates a problem in the pipe system. -
Page 57: Connection Status
11 6 4 Connection status > Info > Connection status In addition to displaying the connection currently being used, you can also view information about the quality, status and IP addresses of all connec- tion types. 11 6 5 Device status >... -
Page 58: Help
FAQs are answered and published on the manu- facturer’s Internet page. ►Use the QR scanner on your mobile device to open the FAQs page. NOTE ► All questions and answers can also be found on the related product page at www.bwt.com. -
Page 59: Additional Functions
For an overview of the ben- efits of registering, see chapter “10 Registration”, page 37. 12 1 BWT Best Water Home app The BWT Best Water Home app offers a clear overview of your products. Features of the BWT Best Water Home app ● Monitoring the regenerative level ● Service information ●... -
Page 60: Remote Operation Of The Product Via A Direct Wi-Fi Connection (Access Point)
NOTE ► You can only be logged in with one account. Always use the same account to activate all your BWT products. Your BWT product is now integrated into the app and can be used. BEST WATER HOME 12 2... - Page 61 Establishing a direct Wi-Fi connection NOTE ► A direct Wi-Fi connection (access point) is only possible within a close vicinity to the product. ► Note the WPA2 key and login code from the e-mail you received when registering your product. ►Activate the function on the ACCESS POINT...
-
Page 62: Remote Operation Of The Product Via The Home Network (Lan / Wi-Fi)
12 3 Remote operation of the product via the home network (LAN / Wi-Fi) You can operate the product remotely if it is connect- ed to the home network via LAN or Wi-Fi. NOTE ► While operating the product via remote connection, you must not change this connection, otherwise access is no longer possible. -
Page 63: Operator Responsibilities
(every 2 months), and routine maintenance (EN 806-5) must be performed by the BWT after-sales service staff or a fitter authorised by BWT to carry out maintenance (every 6 months). The replacement of wearing parts within the pre- scribed intervals is also required for the warranty and proper functioning of the unit. -
Page 64: Inspection
13 3 Inspection (carried out by the operator in accordance with EN 806-5) Performing the inspection is obligatory for you as an operator if you use your outlet water as described in category 1 (see table). Use of outlet water Category Inspection in Maintenance... -
Page 65: Inspection Activities
13 3 1 Inspection activities The scope of required inspection activities is more limited if your product is registered with BWT and you use the available options (see table): ● BWT Best Water Home app ● Download, check and archive device documentation from the app This is the only way to directly detect and act on necessary actions or mechanical/hydraulic/electrical problems. -
Page 66: Maintenance In Accordance With En 806-5
(carried out by BWT after-sales service or an authorised technician in accordance with EN 806-5) In addition to all inspection activities, maintenance work on the assemblies listed below is required every 6 months by BWT after-sales service or a specialist trained by BWT. A detailed maintenance manual can be requested from the qualified fitter at BWT. We recommend that you enter into a maintenance agreement with the BWT after-sales service department or your fitter. -
Page 67: Replacement Of Parts
Replacement of parts The operator must ensure that parts that are subject to wear and ageing during the life of the product are replaced by a qualified fitter. Details of the replacement cycles can be found in the maintenance manual from BWT. 13 6 BWT expert maintenance Regardless of how the outlet water is used, the manufacturer recommends having expert maintenance performed at least every 24 months. -
Page 68: Troubleshooting
2.4 Have you carried out If you have already carried out the activation again, the activation again? but the problem persists, please contact the BWT service hotline (after-sales service). Keep the product code handy for this (Info > Serial no / PNO menu). - Page 69 3.4 User account creation Occasionally, maintenance of the systems must be not possible (mainte- performed. During these periods, activation is not nance message) possible. Try again after the specified maintenance period. 3.5 User account crea- Check that the entries in the mandatory fields are tion not possible (fault correct. message – input) 3.6 User login not pos- Occasionally, maintenance of the systems must be sible (maintenance performed.
-
Page 70: Fault During Operation
(see The product cannot be added chapter “15.1 Product returns”, to the BWT Best Water Home page 72). app. If the fault cannot be remedied by following these instructions, contact our after-sales service department. You will need the serial number and production number, which can be found on the type plate of the Easy Fill technology cover. Keep... -
Page 71: Faults Affecting The Additional Functions
14 3 Faults affecting the additional functions Fault Possible source of Steps to resolve the fault the fault 1 Fault when down- 1.1 Link does not work Check the Internet connection and the availability loading the app of the required app store on your smartphone. Try again. -
Page 72: Warranty
Product returns will not be processed without a return number (RMA no.). In Germany, call our after-sales service in Schriesheim to receive a return number. Unauthorised returns of goods will not be accepted by BWT. Please always contact your contract partner first. -
Page 73: Decommissioning And Disposal
Decommissioning and disposal 16 1 Decommissioning The product may only be shut down and dismantled by qualified specialists. Observe all applicable safety regulations when dismantling the system. 16 2 Disposal NOTE ► This product may not be disposed of in household waste. ► At the end of the product’s life cycle, ensure that it is properly disposed of or recycled. -
Page 74: Technical Data
For the production number, see the label on the title page of this manual and the type plate under the Easy Fill technology cover of the product Mineral substance metering device Unit Amount of water to be treated per BWT Smart Mineral container (3 litres) -
Page 75: Dimensions
17 1 Dimensions Designation BWT Perla hybrid Height Width Depth Water inlet connection height Water outlet connection height Overflow connection height Clearance to allow the technology cover to be opened Min. sewage system connection... -
Page 76: Diagram Of Peak Flow
2800 2600 2400 2200 2000 1800 1600 1400 1200 1000 Peak flow [l/h] Inflow water hardness [mmol/l] 2 bar pressure loss BWT Perla hybrid, max. capacity 1 bar pressure loss BWT Perla hybrid, min. capacity mmol/l °dH mmol/l °dH 19.6 22.4 11.2 25.2 14.0 28.0 16.8... -
Page 77: Standards And Legal Provisions
Standards and legal provisions Standards and legal provisions shall always be applied in the most recent version The following standards and legal regulations must be observed depending on the intended use: ● German ordinance on the quality of water for human consumption (“Trinkwasserverordnung”) ● EN 806, Specifications for drinking water installations ● DIN 1988 standards, specifications for drinking water installations ● DIN EN 1717, protection of drinking water from contaminants in the drinking water supply system ●... -
Page 78: Operating Report
Operating report Section 16 of the German Drinking Water Ordinance requires you to keep an operating report in written or electronic form. Product designation: ____________________________________________________ Installation location of the product: ____________________________________________________ Water hardness up- Date Water meter Increase in sodium content of Regenerative refilled reading up- Water hardness,... -
Page 79: German Drinking Water Ordinance Notice
German Drinking Water Ordinance notice Information in accordance with section 16 and section 21 of the German Drinking Water Ordinance The drinking water in this building is treated as followed: Type of treatment: Partial softening Metering Product designation: Installation location of the product: Metering of silicate substances For minimising the corrosiveness of drinking water and preventing elevated concentrations of heavy metals... -
Page 80: A Appendix
Appendix A 1 Connection set, DN 32/32 DVGW A 1 1 Intended use The corrugated hoses with G 1¼" internal threads may only be used to connect water softeners. Corrugated hoses ensure a strain-free connection to the water softener. They eliminate the time-con- suming process of adapting and fitting metal pipes for this purpose. A 1 2 Installation conditions Corrugated hoses are only suitable for drinking water installations. -
Page 81: Installation
A 1 3 Installation Failure to follow the installation instructions will adversely affect the product life of the hoses and void the warranty in the event of damage. A 1 3 1 Installation instructions The straight path A must measure at least 30 mm. The bending radius R must be at least 50 mm. Never twist or pull the corrugated hoses. -
Page 82: Installation Set For Water Softeners
A 2 Installation set for water softeners The installation set complies with the requirements of standard EN 1717. ►If necessary, put the rubber sleeve (1) on the DN40 pipe as shown. ►Place the coupling nut with the sealing ring (2) on the pipe and screw it to the siphon. - Page 83 BWT Wassertechnik GmbH, Industriestr 7, 69198 Schriesheim (WEEE-Reg.-Nr. DE 80428986) Schriesheim, Dezember 2020 Lutz Hübner Unterschrift (Geschäftsleitung)
- Page 84 Further information: BWT Holding GmbH BWT Wassertechnik GmbH Walter-Simmer-Straße 4 Industriestraße 7 A-5310 Mondsee D-69198 Schriesheim Phone: +43 / 6232 / 5011 0 Phone: +49 / 6203 / 73 0 E-Mail: office@bwt.at E-Mail: bwt@bwt.de www.bwt.com...
Need help?
Do you have a question about the Perla Hybrid and is the answer not in the manual?
Questions and answers