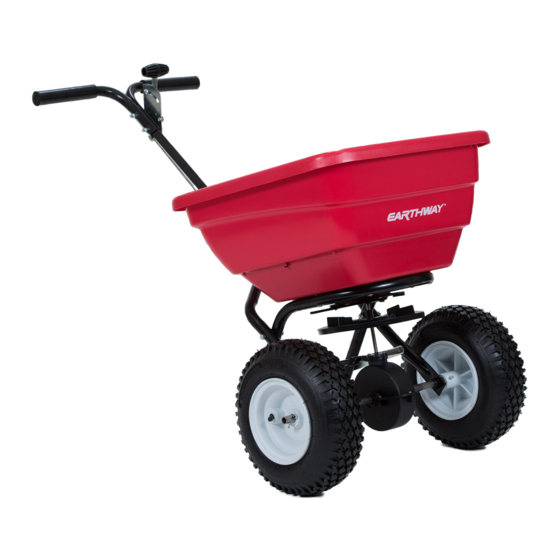
EarthWay FLEX-SELECT Series Assembly Instructions Manual
Broadcast spreader
Hide thumbs
Also See for FLEX-SELECT Series:
- Assembly and operating instructions manual (14 pages) ,
- Assembly instructions manual (11 pages) ,
- Assembly instructions manual (10 pages)
Advertisement
Quick Links
MODEL # F80
Visit our
EarthWay
website to see the
assembly video
HELPFUL HINTS
Read the directions before assembly.
If your spreader does not spread evenly, be sure "FRONT" on the GEARBOX points to the front of the spreader. The
impeller must turn clockwise when pushing forward. Reversing the GEARBOX during assembly will cause issues.
Your spreader is calibrated for three miles per hour, which is a brisk walking speed. Slower or faster speeds will
change the spread pattern. Wet fertilizer will also change the spread pattern and flow rate. Do not use powdered
materials as it will damage the gearbox.
Gears are permanently lubricated at the factory. Do not open the GEARBOX or dirt may enter.
F80_RevJul2021
FLEX-SELECT Series
Broadcast Spreader
ASSEMBLY INSTRUCTIONS
SIDE SPREAD CONTROL
SIDE SPREAD CONTROL
SIDE SPREAD CONTROL
SIDE SPREAD CONTROL
Patent U.S. 10,993,368
Your EarthWay spreader includes a patented
feature to prevent fertilizer from being spread
to the left side. Unlike competitor designs that waste the
fertilizer, side spread control keeps unneeded fertilizer
off sidewalks, driveways, and parking lots. Read
OPERATING INSTRUCTIONS (Page 8) to activate this
feature.
PRIOR TO ASSEMBLY, YOU WILL NEED: : : :
PRIOR TO ASSEMBLY, YOU WILL NEED
PRIOR TO ASSEMBLY, YOU WILL NEED
PRIOR TO ASSEMBLY, YOU WILL NEED
7/16" Wrench
Ratchet
7/16" Socket Pliers
PAGE 1
Advertisement

Summary of Contents for EarthWay FLEX-SELECT Series
- Page 1 SIDE SPREAD CONTROL SIDE SPREAD CONTROL SIDE SPREAD CONTROL Patent U.S. 10,993,368 Visit our Your EarthWay spreader includes a patented EarthWay feature to prevent fertilizer from being spread website to see the to the left side. Unlike competitor designs that waste the...
- Page 2 Assembly and Operation Instructions SPREADER ASSEMBLY INSTRUCTIONS Axle Bearing Remove the spreader and parts from Step 1: the carton and arrange on the floor. Notch Install the bearing into the LOWER Step 2: HANDLES. Note: Notch on BEARINGS and slot in the LOWER HANDLES that the bearing fits into.
- Page 3 Assembly and Operation Instructions Install COAST WHEEL onto the AXLE Step 4: fully, then using outside Cotter Pin hole, insert 1” Cotter Pin through AXLE (not thru the wheel). Bend with pliers to prevent pin from falling out. Now remove the PIVOT BRACKET Step 5: from THE LOWER HANDLES.
- Page 4 Assembly and Operation Instructions Insert the PIVOT ROD into the Step 8: ROD CLIP that is installed in the PIVOT BRACKET. Note: Make sure to ensure that the ROD CLIP is installed as shown to the right. Clip ¼ Hex Nuts Pivot Pivot Control...
-
Page 5: Tray Installation
Assembly and Operation Instructions TO COMPLETE ASSEMBLY Install AGITATOR, bend the AGITATOR up slightly to prevent contact with the STANDARD-OUTPUT tray, and install debris screen. Press over 1/4 turn fasteners to secure This only applies to the RED 3-hole drop STANDARD-OUTPUT Trays. The HIGH-OUTPUT (Blue) and LOW-OUTPUT (Black) Trays do not use the AGITATOR or DEBRIS SCREEN shown below. - Page 6 Assembly and Operation Instructions Step 6: Once the tray is in place check that the tray is sealed and flush against the hopper sides. To check if the tray is properly located, push the tray edges downwards. Step 7: Install the two quarter turn fasteners (see figure) through the two exposed tray holes and push down and twist a quarter turn to secure.
- Page 7 Assembly and Operation Instructions STANDARD-OUTPUT TRAY: Make sure the drop holes in the bottom of the hopper are FULLY OPEN when the RATE CONTROL HANDLE is on #30. If the shut-off is not set correctly, please adjust CONTROL ROD at the PIVOT to position the shut- off for FULLY OPEN hopper position at #30 on the RATE...
-
Page 8: Customer Service
ONE YEAR WARRANTY EarthWay Products, Inc. warrants this product free of defects in original workmanship and materials for a period of one year to the end user with the original purchase receipt. If a manufacturing non-conformance is found, EarthWay Products, Inc. at its discretion will repair or replace the part(s)/product at no charge provided the failure is not the result of incorrect installation, mishandling, misuse, tampering, or normal wear and tear as determined by EarthWay. - Page 9 Assembly and Operation Instructions HOW TO ORDER SPARE PARTS – CALL or EMAIL: TURF DEPOT 800-305-9255 or earthway@turfdepot.com F80_RevNov_21 PAGE 9...
- Page 10 Assembly and Operation Instructions HOW TO ORDER SPARE PARTS – CALL or EMAIL: TURF DEPOT 800-305-9255 or earthway@turfdepot.com (F80) Broadcast Spreader Parts List SERIES PART # DESCRIPTION SERIES PART # DESCRIPTION 12110 IMPELLER 9" ROUND DISHED 60175 UPPER HANDLE SQUARE W/GRIP ea...


Need help?
Do you have a question about the FLEX-SELECT Series and is the answer not in the manual?
Questions and answers