Table of Contents
Advertisement
Advertisement
Table of Contents

Related Manuals for Mitsubishi Electric M70V Series


Summary of Contents for Mitsubishi Electric M70V Series
- Page 2 Introduction This manual covers the items required for installing and connecting the MITSUBISHI CNC M70V Series. Read this manual thoroughly and understand the product's functions and performance before starting to use. This manual is written on the assumption that all optional functions are added, but the actually delivered device may not have all functions.
- Page 3 Refer to the following documents. M700V/M70V/E70 Series PLC Interface Manual ..IB-1500920 MDS-D2/DH2 Series Specifications Manual ..IB-1501124 MDS-D2/DH2 Series Instruction Manual ..IB-1501127 MDS-DM2 Series Specifications Manual ..IB-1501136 MDS-DM2 Series Instruction Manual ..IB-1501139 MDS-DJ Series Specifications Manual ..IB-1501130 MDS-DJ Series Instruction Manual ..
- Page 4 Precautions for Safety Always read this manual and enclosed documents before installation, operation, maintenance and inspection to ensure correct usage. Thoroughly understand the basics, safety information and precautions of the devices before using. This manual classifies the safety precautions into "DANGER", "WARNING" and "CAUTION". DANGER When the user could be subject to imminent fatalities or serious injuries if handling is mistaken.
- Page 5 For Safe Use Mitsubishi CNC is designed and manufactured solely for applications to machine tools. Do not use this product in any applications other than those specified as above, especially those which are substantially influential on the public interest or which are expected to have significant influence on human lives or properties.
- Page 6 3. Items related to prevention of bodily injury or property damage DANGER When transporting or installing a built-in IPM spindle or linear servomotor, be careful so that your hand or property will not be trapped in the motors or other metal objects. Also keep the devices with low magnetic tolerance away from the product.
- Page 7 4. General precautions Always follow the precautions below. Incorrect handling could result in faults, injuries or electric shocks, etc. (1) Transportation and installation CAUTION Correctly transport the products according to the mass. Use motor’s suspension bolts to transport the motor itself. Do not use it to transport the motor after installation onto the machine.
- Page 8 CAUTION Always install the motor with reduction gear in the designated direction. Failure to observe this could result in oil leaks. Always install a cover, etc., over the shaft so that the rotary section of the motor cannot be touched during motor rotation.
- Page 9 (2) Items related to wiring CAUTION Correctly wire this product. Failure to observe this could result in motor runaway, etc. Do not install a phase advancing capacitor, surge absorber or radio noise filter on the output side of the drive unit. Correctly connect the output side (terminal U, V, W).
- Page 10 (3) Adjustments CAUTION Check and adjust programs and each parameter before starting operation. Failure to observe this could result in unpredictable operations depending on the machine. Do not make drastic adjustments or changes as the operation could become unstable. (4) Usage CAUTION Install an external emergency stop circuit so that the operation can be stopped and the power turns OFF immediately when unforeseen situation occurs.
- Page 11 (5) Troubleshooting CAUTION Use a motor with electromagnetic brakes or establish an external brake mechanism for Shut off with motor Shut off with CNC brake the purpose of holding; this serves as brake control output control PLC output countermeasures for possible hazardous situation caused by power failure or product fault.
- Page 12 (6) Maintenance, inspection and part replacement CAUTION Periodically back up the programs, tool data and parameters to avoid potential data loss. Also, back up those data before maintenance and inspections. When replacing the battery on the controller side, the machining programs, tool data and parameters should be backed up with the input/output device beforehand.
- Page 14 Treatment of waste The following two laws will apply when disposing of this product. Considerations must be made to each law. The following laws are in effect in Japan. Thus, when using this product overseas, the local laws will have a priority.
- Page 16 This symbol mark is according to the directive 2006/66/EC Article 20 Information for end- users and Annex II. Your MITSUBISHI ELECTRIC product is designed and manufactured with high quality materials and components which can be recycled and/or reused. This symbol means that batteries and accumulators, at their end-of-life, should be disposed of separately from your household waste.
- Page 18 Trademarks MELDAS, MELSEC, EZSocket, EZMotion, iQ Platform, MELSOFT, GOT, CC-Link, CC-Link/LT and CC-Link IE are either trademarks or registered trademarks of Mitsubishi Electric Corporation in Japan and/or other countries. Ethernet is a registered trademark of Xerox Corporation in the United States and/or other countries.
- Page 20 本製品の取扱いについて ( 日本語 /Japanese) 本製品は工業用 ( クラス A) 電磁環境適合機器です。販売者あるいは使用者はこの点に注意し、住商業環境以外で の使用をお願いいたします。 Handling of our product (English) This is a class A product. In a domestic environment this product may cause radio interference in which case the user may be required to take adequate measures. 본...
-
Page 22: Table Of Contents
Contents 1 System Configuration..........................1 1.1 System Basic Configuration Drawing..................... 2 1.2 General Connection Diagram ........................ 3 1.2.1 Without Touch Panel........................3 1.2.2 With Touch Panel........................... 4 1.3 List of Configuration ..........................5 1.3.1 List of Units ............................ 5 1.3.2 Durable Parts ..........................8 1.3.3 Replacements .......................... - Page 23 4.2.5.3 Connecting with MDS-DJ Series..................110 4.2.6 Connecting with Optical Communication Repeater Unit ............111 4.2.7 Connecting with I/O Devices via CC-Link .................. 113 4.2.8 Connecting with RS-232C Device....................115 4.2.9 Connecting with Skip Signal (Sensor)..................117 4.2.10 Connecting with Synchronous Feed Encoder/ Manual Pulse Generator......... 119 4.2.10.1 Handle Numbers ......................
- Page 24 Appendix 1.30 G071 Cable........................182 Appendix 1.31 G300 Cable........................183 Appendix 1.32 G301 Cable........................184 Appendix 1.33 G380 Cable........................185 Appendix 1.34 G395 Cable........................186 Appendix 1.35 G396 Cable........................187 Appendix 1.36 G460 Cable........................188 Appendix 1.37 MR-BKS1CBL-A1-H / MR-BKS1CBL-A2-H Cable............189 Appendix 1.38 MR-PWS1CBL-A1-H / MR-PWS1CBL-A2-H Cable............
-
Page 26: System Configuration
System Configuration... -
Page 27: System Basic Configuration Drawing
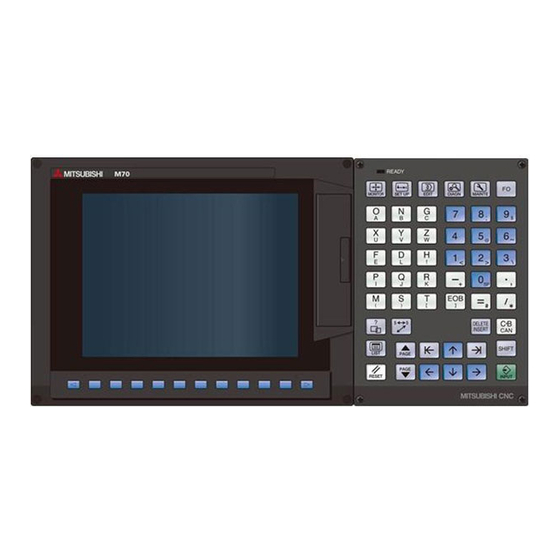
MITSUBISHI CNC 1 System Configuration 1.1 System Basic Configuration Drawing Keyboard unit Display unit Remote I/O unit Control unit Manual pulse generator Operation panel I/O unit Remote I/O unit Manual pulse generator Synchronous feed encoder Servo/Spindle drive units Motors (Note 1) Control unit is mounted on the back side of the display unit. (Note 2) Operation panel I/O unit is mounted on the back side of the keyboard unit. -
Page 28: General Connection Diagram
M70V Series Connection Manual 1.2 General Connection Diagram 1.2 General Connection Diagram 1.2.1 Without Touch Panel Dotted lines indicate the sections prepared by the machine tool builder. <> Angle brackets indicates attached cable of unit. L1 L2 L3 CNC control unit... -
Page 29: With Touch Panel
MITSUBISHI CNC 1 System Configuration 1.2.2 With Touch Panel Dotted lines indicate the sections prepared by the machine tool builder. <> Angle brackets indicates attached cable of unit. L1 L2 L3 CNC control unit No-fuse breaker (NFB) FCU7-MU55x <G098/G492/G499> F120 Main card HN76x <F480>... -
Page 30: List Of Configuration
M70V Series Connection Manual 1.3 List of Configuration 1.3 List of Configuration 1.3.1 List of Units Classification Type Components Remarks [Control unit] NC functions Main control card Export Tarde Control Order and Foreign and display controller FCU7-MU556 Memory card Exchange Order noncompliant unit... - Page 31 MITSUBISHI CNC 1 System Configuration Classification Type Components Remarks [Operation panel I/O unit] DI: 64-points 24V/0V common type DO: 64-points sink type DI 24V/0V common input Base card FCU7-DX710 MPG:2ch DO Sink output Terminator (R-TM) Occupied stations (fixed): 1, 2, 7, 8 RIO3 extensible stations: 3, 4, 5, 6 DI: 96-points 24V/0V common type DO: 80-points sink type...
- Page 32 M70V Series Connection Manual 1.3 List of Configuration Classification Type Components Remarks [External power supply unit] External power supply with power supply Power supply card Input 200VAC PD25 ON/OFF function Case set Output 24VDC (3A) [Manual pulse generator] UFO-01-2Z9 Input 5VDC...
-
Page 33: Durable Parts
MITSUBISHI CNC 1 System Configuration 1.3.2 Durable Parts Durable parts Part type Control unit battery Q6BAT 84LHS06(for MADE IN JAPAN and unit version "*" to "C") Backlight for FCU7-DU120-12(*) 84LHS16(for MADE IN JAPAN and unit version "D" and later) 84LHS16(for MADE IN CHINA) 104LHS39 (for unit version "*") Backlight for FCU7-DU140-12/32(*) 104LHS52 (for unit version "A"... -
Page 34: List Of Cables
M70V Series Connection Manual 1.3 List of Configuration 1.3.4 List of Cables Length (m) of cables provided Max. cable Type Application by Mitsubishi length Motor side PLG cable CNP2E-1-xM Spindle side accuracy detector 2, 3, 4, 5, 7, 10, 15, 20, 25, 30... - Page 35 MITSUBISHI CNC 1 System Configuration Length (m) of cables provided Max. cable Type Application by Mitsubishi length Remote I/O (with terminal block) between remote I/O, FCUA-R211-xM remote I/O - CNC control unit, 0.3, 1, 2, 3, 5, 8, 10, 15, 20 30m (*) remote I/O - Operation panel I/O unit, remote I/O - MITSUBISHI CNC machine operation panel A...
-
Page 36: General Specifications
General Specifications... -
Page 37: Environment Conditions
MITSUBISHI CNC 2 General Specifications 2.1 Environment Conditions Operation panel Machine operation Unit name Control unit Display unit Keyboard unit I/O unit panel Item FCU7-MU556/557/ FCU7-DU120-12/ FCU7-KB024/025/026/ Type FCU7-DX71x/72x/73x FCU7-KB921/926 551/552 140-x2 029/044/046/047/048 During 0 to 55C° operation Ambient temperature During -20 to 60C°... - Page 38 (Note 5) Differs according to the number of machine input operation points and the load and number of points connected to the machine output. The maximum value applies when all points are ON. (Note 6) MITSUBISHI CNC M70V Series, which is an open equipment, must be installed within a sealed metal control panel.
-
Page 39: Control Unit
MITSUBISHI CNC 2 General Specifications 2.2 Control Unit Dimension and names of parts [FCU7-MU556/ FCU7-MU557] (16) (20) (10) (11) (12) (13) (14) (15) (17) (18) (19) - Page 40 M70V Series Connection Manual 2.2 Control Unit [FCU7-MU551 / FCU7-MU552] (16) (20) (10) (11) (12) (13) (14) (15) (17) (18) (19) Connector Connector Function Function name name Front USB memory I/F (11) RIO1 Remote I/O unit I/F Front CF card I/F...
- Page 41 MITSUBISHI CNC 2 General Specifications (3) Display unit backlight inverter I/F or driver I/F (INV) (4) 24VDC input (DCIN) +24V <Cable side connector type> Connector: 2-178288-3 Contact: 1-175218-5 x3 Recommended manufacturer: Tyco Electronics (a) Specifications of power supply Consider the following characteristics when selecting the stabilized power supply (prepared by machine tool builder).
- Page 42 M70V Series Connection Manual 2.2 Control Unit (5) External emergency stop input (EMG) EMG IN +24V * Be sure to connect EMG terminal cable (G123) to the connector when not used. <Cable side connector type> Connector: 005057-9403 Contact: 0016020103 x3...
- Page 43 MITSUBISHI CNC 2 General Specifications (9) Ethernet I/F (LAN) * Connect connector case with FG pattern. * Use cross cable (G300) when directly connecting a device such as a personal computer to the unit. <Cable side connector type> Connector: 5-569550-3 Recommended manufacturer: Tyco Electronics (10) Operation panel I/O unit I/F (CG71) 3.3V...
- Page 44 M70V Series Connection Manual 2.2 Control Unit (11) Remote I/O unit I/F (RIO1) Up to eight remote I/O stations can be connected. TXRX1 TXRX1* <Cable side connector type> Connector: 1-178288-3 Contact: 1-175218-2 x3 Recommended manufacturer: Tyco Electronics (12) Menu key I/F (MENUKEY) (13) Encoder input 1ch/ 5V manual pulse generator input 2ch (ENC) Synchronous feed encoder or 5V manual pulse generator can be connected to this connector.
- Page 45 MITSUBISHI CNC 2 General Specifications (a) Input for synchronous feed encoder <Specification of input part> Three phases (A phase, B phase, a phase difference 90 degrees, Number of pulse phases Z phase) (Refer to the waveform below.) Signal output of the encoder Line driver output Input voltage range 0V to 5.25V...
- Page 46 M70V Series Connection Manual 2.2 Control Unit (c) 5V manual pulse generator input/output circuit Connector pin No. HA1A HA2A Signal input HA1B HA2B Control circuit Power output When using the synchronous feed encoder and the manual pulse generator at the same time, connect the manual pulse generator to the operation panel I/O unit or use a distribution cable made by the machine tool builder.
- Page 47 MITSUBISHI CNC 2 General Specifications (a) Skip signal input conditions Use the input signal within the following condition ranges. 24V common 0V common Input voltage at external contact ON 6V or less 18V or more, 25.2V or less Input current at external contact ON 6mA or more Input voltage at external contact OFF 20V or more, 25.2V or less...
- Page 48 M70V Series Connection Manual 2.2 Control Unit (15) Serial communication (RS-232C) I/F 2ch (SIO) RD1(RXD1) SD1(TXD1) CS1(CTS1) RS1(RTS1) DR1(DSR1) ER1(DTR1) RD2(RXD2) SD2(TXD2) CS2(CTS2) RS2(RTS2) DR2(DSR2) ER2(DTR2) * Connect connector case with FG pattern. <Cable side connector type> Plug: 10120-3000VE Shell: 10320-52F0-008...
- Page 49 MITSUBISHI CNC 2 General Specifications (19) LED Name Name Function At fault Conditions (1) Failure of DC24V input 24VDCIN DC24V input check Not lit (2) Fuse is disconnected near DCIN connector (1) Failure of internal voltage output in control unit DCOUT Internal output voltage check Not lit (2) Short circuit of DC5V output on CG71 or ENC or FAN connector...
-
Page 50: Display Unit
M70V Series Connection Manual 2.3 Display Unit 2.3 Display Unit Outline dimension [FCU7-DU120-12 (8.4-type)] 110( Space required for wiring) (Note 1) The above side view shows the state with the control unit mounted. (Note 2) Consider the minimum radius value of optical communication cable for the bottom space. (Refer to "Connection : Precautions for Using Optical Communication Cable".) - Page 51 MITSUBISHI CNC 2 General Specifications [FCU7-DU140-12 (10.4-type)] 110( Space required for wiring) (Note 1) The above side view shows the state with the control unit mounted. (Note 2) Consider the minimum radius value of optical communication cable for the bottom space. (Refer to "Connection : Precautions for Using Optical Communication Cable".) <Panel cut dimension drawing>...
- Page 52 M70V Series Connection Manual 2.3 Display Unit [FCU7-DU140-32 (10.4-type with touch panel)] 110( Space required for wiring) (Note 1) The above side view shows the state with the control unit mounted. (Note 2) Consider the minimum radius value of optical communication cable for the bottom space. (Refer to "Connection : Precautions for Using Optical Communication Cable".)
-
Page 53: Keyboard Unit
MITSUBISHI CNC 2 General Specifications 2.4 Keyboard Unit Outline dimension [FCU7-KB024 (8.4-type)] 110 ( Space required for wiring (Note) The above side view shows the state with the operation panel I/O unit FCU7-DX720/DX721 mounted. <Panel cut dimension drawing> (Unit outline) 13 0 (Square hole) 4-M3 Screw... - Page 54 M70V Series Connection Manual 2.4 Keyboard Unit [FCU7-KB025 (8.4-type)] 110 (Space required for wiring) (Note) The above side view shows the state with the operation panel I/O unit FCU7-DX721 mounted. <Panel cut dimension drawing> (Unit outline) 13 0 (Square hole)
- Page 55 MITSUBISHI CNC 2 General Specifications [FCU7-KB026 (Clear keys for 8.4-type)] 110 ( Space required for wiring (Note) The above side view shows the state with the operation panel I/O unit FCU7-DX720/DX721 mounted. <Panel cut dimension drawing> (Unit outline) 13 0 (Square hole) 4-M3 Screw...
- Page 56 M70V Series Connection Manual 2.4 Keyboard Unit [FCU7-KB029 (In tandem for 8.4-type)] 110 ( Space required for wiring (Note) The above side view shows the state with the operation panel I/O unit FCU7-DX720/DX721 mounted. <Panel cut dimension drawing> (Unit outline)
- Page 57 MITSUBISHI CNC 2 General Specifications [FCU7-KB044 (10.4-type)] 110 ( Space required for wiring (Note) The above side view shows the state with the operation panel I/O unit FCU7-DX720/DX721 mounted. <Panel cut dimension drawing> (Unit outline) 13 0 (Square hole) 4-M3 Screw...
- Page 58 M70V Series Connection Manual 2.4 Keyboard Unit [FCU7-KB046 (Clear keys for 10.4-type)] 110 ( Space required for wiring (Note) The above side view shows the state with the operation panel I/O unit FCU7-DX720/DX721 mounted. <Panel cut dimension drawing> (Unit outline)
- Page 59 MITSUBISHI CNC 2 General Specifications [FCU7-KB047 (Clear keys for 10.4-type/ QWERTY assignment)] 110 ( Space required for wiring (Note) The above side view shows the state with the operation panel I/O unit FCU7-DX720/DX721 mounted. <Panel cut dimension drawing> (Unit outline) (Square hole) 4-M3 Screw...
- Page 60 M70V Series Connection Manual 2.4 Keyboard Unit [FCU7-KB048 (Clear keys for 10.4-type)] 110 ( Space required for wiring (Note) The above side view shows the state with the operation panel I/O unit FCU7-DX720/DX721 mounted. <Panel cut dimension drawing> (Unit outline)
-
Page 61: Operation Panel I/O Unit
MITSUBISHI CNC 2 General Specifications 2.5 Operation Panel I/O Unit Characteristics of operation panel I/O unit are as follows. (1) Number of DI/DO points that can be mounted on the machine operation panel is 64/64 as standard and 96/96 at the maximum. - Page 62 M70V Series Connection Manual 2.5 Operation Panel I/O Unit Dimension and names of parts [FCU7-DX710/ FCU7-DX711] 110 ( Space required for wiring) (10) (11) (12) (4) (5) (13) <Dimension drawing for installing on the panel> <Installation on the back side of the keyboard>...
- Page 63 MITSUBISHI CNC 2 General Specifications [FCU7-DX720/ FCU7-DX721/ FCU7-DX730/ FCU7-DX731] 110 ( Space required for wiring) (10) (11) (12) (4) (5) (13) (Note) (9) is not available for FCU7-DX731. <Dimension drawing for installing on the panel> <Installation on the back side of the keyboard> 116 ( Unit outline Operation panel I/O unit can be installed on the back side...
- Page 64 M70V Series Connection Manual 2.5 Operation Panel I/O Unit (1) Machine input (CG31) Digital input 32 points (1st station) (2) Machine input (CG33) Digital input 32 points (2nd station) (3) Machine input (CG35) Digital input 32 points (3rd station) (Note) This is not available for FCU7-DX710/FCU7-DX711.
- Page 65 MITSUBISHI CNC 2 General Specifications (a) Outline of digital signal input circuit Both 24V common and 0V common connections are allowed in the digital signal input circuit. Follow the wiring diagram below for each type. Input circuit 0V common 24V common CG31/CG33/CG35 CG31/CG33/CG35 (Machine side)
- Page 66 M70V Series Connection Manual 2.5 Operation Panel I/O Unit (4) Machine output (CG32) Digital output 32 points (1st station) (5) Machine output (CG34) Digital output 32 points (2nd station) (6) Machine output (CG36) FCU7-DX730/DX731: Digital output 32 points (3rd station)
- Page 67 MITSUBISHI CNC 2 General Specifications (a) Outline of digital signal output circuit The digital signal output circuit uses a sink type (DX7x0) or source type (DX7x1). Use within the specification ranges shown below. Output circuit CG32/CG34/CG36 (Macine side) 24VDC(+) Control Circuit Sink type (DX7x0)
- Page 68 M70V Series Connection Manual 2.5 Operation Panel I/O Unit (7) Keyboard I/F (NCKB) (8) FG terminal (FG) (9) Analog output 1ch (AO) (Note) This is not available for FCU7-DX731. * Connect connector case with FG pattern. <Cable side connector type>...
- Page 69 MITSUBISHI CNC 2 General Specifications (10) Manual pulse generator input 2ch (5V and 12V) (MPG) 5V manual pulse generator and 12V manual pulse generator can be connected to this connector. Connect the synchronous feed encoder to the ENC connector of the control unit. reserve reserve HA2A...
- Page 70 M70V Series Connection Manual 2.5 Operation Panel I/O Unit <Input/output circuit> Connector pin No. HA1A HA2A Signal input HA1B HA2B Control unit +12V +12V Power output Power output (11) Remote I/O unit I/F (RIO3) TXRX3 TXRX3* 0V(GND) <Cable side connector type>...
- Page 71 MITSUBISHI CNC 2 General Specifications (13) LED Name Function At fault Conditions 3VON DC3V input check Not lit (1) Disconnection between control unit and operation panel I/O unit (1) Disconnection between control unit and operation panel I/O unit 5VON DC5V input check Not lit (2) Short circuit of manual pulse generator cable RIO communication...
-
Page 72: Remote I/O Unit
M70V Series Connection Manual 2.6 Remote I/O Unit 2.6 Remote I/O Unit The following eight types of signals can be input/output from the remote I/O unit (FCUA-DX1xx) according to the type and No. of contacts. Use serial link connections to connect the unit with the control unit or the operation panel I/O unit. - Page 73 MITSUBISHI CNC 2 General Specifications Dimension and names of parts [Front view] (11) (11) (11) (DX10x) (DX11x/DX12x) (DX14x) [Bottom view] [Side view] (Front) (10) (Rear) <Installation dimension drawing> Mounting hole 2-M5 screw Bottom...
- Page 74 M70V Series Connection Manual 2.6 Remote I/O Unit (1) Machine input (DI-L) (2) Machine input (DI-R) Both 24V common and 0V common connections are allowed in the digital signal input circuit. Follow the wiring diagram below for each type. Input circuit...
- Page 75 MITSUBISHI CNC 2 General Specifications (3) Machine output (DO-L) (4) Machine output (DO-R) The digital signal output circuit uses a sink type (DX1x0) or source type (DX1x1). Use within the specification ranges shown below. Output circuit (Machine side) DO-L/DO-R 24VDC(+) Control circuit Sink type (DX1x0)
- Page 76 M70V Series Connection Manual 2.6 Remote I/O Unit [Analog signal input/output (AIO)] The analog signal output circuit can be used only for FCUA-DX120/DX121. Output circuit 0V(RG) Output conditions Output voltage 0V to ± 10V ( ± 5%) Resolution 12bit ( ± 10V × n/4096) (Note) Load conditions 10kΩ...
- Page 77 MITSUBISHI CNC 2 General Specifications (5) Analog signal input/output (AIO) (a) Outline of analog signal output circuit The analog signal output circuit can be used only for FCUA-DX140/DX141. Output circuit 0V(RG) Output conditions Output voltage 0V to ± 10V ( ± 5%) Resolution 12bit ( ±...
- Page 78 M70V Series Connection Manual 2.6 Remote I/O Unit (6) Transfer speed changeover switch (DS) Not used Not used (7) Station No. changeover switch (CS) Selection of station No. (8) Remote I/O unit I/F #1 (RIO1) (9) Remote I/O unit I/F #2 (RIO2)
-
Page 79: Scan I/O Unit
MITSUBISHI CNC 2 General Specifications 2.7 Scan I/O Unit The HR347/357 card is the machine operation panel input/output card. It has a digital input/output and scan input/output, and is connected to the machine operation panel and other devices. Item HR347 HR357 Number of points 64 points... - Page 80 M70V Series Connection Manual 2.7 Scan I/O Unit Dimension and names of parts [HR347/ HR357] SCAN2 SCAN1 (Scan DI/DO : 64/64) CF35 RIO3 DCIN CF33 CF31 (DO : 32) (DO : 32) 4-C2...
- Page 81 MITSUBISHI CNC 2 General Specifications (1) Scan type input/output (CF35) CF35 LC3B LC3A LC2B LC2A LC1B LC1A LC0B LC0A LD7B* LD7A* LD6B* LD6A* LD5B* LD5A* LD4B* LD4A* LD3B* LD3A* LD2B* LD2A* LD1B* LD1A* LD0B* LD0A* KYC7* KYC6* KYC5* KYC4* KYC3* KYC2* KYC1* KYC0*...
- Page 82 M70V Series Connection Manual 2.7 Scan I/O Unit (a) Scan input An example is shown of a scan input circuit manufactured by the machine manufacturer. CF35 KYCO* KYC1* KYC2* KYC3* KYC4* KYC5* KYC6* KYC7* KYD7* KYD6* KYD5* KYD4* KYD3* KYD2*...
- Page 83 MITSUBISHI CNC 2 General Specifications (b) Scan output An example is shown of a scan output circuit manufactured by the machine manufacturer. CF35 CF35 LC3A LC3B LC2A LC2B LC1A LC1B LC0A LC0B LD0B* LD0A* LD1B* LD1A* LD2B* LD2A* LD3B* LD3A* LD4B* LD4A* LD5B*...
- Page 84 M70V Series Connection Manual 2.7 Scan I/O Unit (2) LED Status Function Color Remedy Normal At fault 24IN 24VDC input check Green Not lit 24VDC voltage check 5OUT Internal output voltage check Green Not lit Contact the MITSUBISHI service dept.
- Page 85 MITSUBISHI CNC 2 General Specifications (4) Machine input (CF31) Digital input CF31 24VDC 0V(RG) 24VDC 0V(RG) <Cable side connector type> Connector: 7940-6500SC Strain relief: 3448-7940 Recommended manufacturer: 3M * This is an example when SCAN1 is set to "0", SCAN2 to "1", and DIO to "2". Refer to "PLC Interface Manual"...
- Page 86 M70V Series Connection Manual 2.7 Scan I/O Unit Input conditions The input signals must be used within the following condition ranges. 24V common 0V common Input voltage at external contact ON 6V or less 18V or more, 25.2V or less...
- Page 87 MITSUBISHI CNC 2 General Specifications (5) Machine output (CF33) Digital output CF33 24VDC 0V(RG) 24VDC 0V(RG) <Cable side connector type> Connector: 7940-6500SC Strain relief: 3448-7940 Recommended manufacturer: 3M * This is an example when SCAN1 is set to "0", SCAN2 to "1", and DIO to "2". Refer to "PLC Interface Manual"...
- Page 88 M70V Series Connection Manual 2.7 Scan I/O Unit The HR357 output circuit is a source type (source output). Source type FCU6-HR3x7 CF33 24VDC (Machine side) Control circuit 0V(RG) CAUTION 1. Do not apply any voltage to the connector other than that specified in this manual. Failure to observe this could cause bursting, damage, etc.
- Page 89 MITSUBISHI CNC 2 General Specifications (6) 24VDC input (DCIN) +24V <Cable side connector type> Connector: 2-178288-3 Contact: 1-175218-5 x3 Recommended manufacturer: Tyco Electronics (7) Remote I/O unit I/F (RIO3A) (8) Remote I/O unit I/F (RIO3B) TXRX1 TXRX1* <Cable side connector type> Connector: 1-178288-3 Contact: 1-175218-2 x3 Recommended manufacturer: Tyco Electronics...
-
Page 90: External Power Supply Unit
M70V Series Connection Manual 2.8 External Power Supply Unit 2.8 External Power Supply Unit Item PD25 200 to 230VAC Input power voltage +10%-15% 50/60Hz ± 1Hz Output current Dimension 130mm × 65mm × 230mm Mass 1.5kg Output holding time 300ms (Note 1) PD25 will not be turned ON by the ON/OFF switch immediately after the power OFF. - Page 91 MITSUBISHI CNC 2 General Specifications (1) AC power input (ACIN) ACIN N ACIN H <Cable side connector type> Connector: 2-178128-3 Contact: 1-175218-5 × 3 Recommended manufacturer: Tyco Electronics (2) ON/OFF switch (ON/OFF SW) Switch ON (upward): 24VDC output Switch OFF (downward): 24VDC output OFF (3) ON/OFF input (ON/OFF) P-OFF P-ON...
-
Page 92: Manual Pulse Generator
M70V Series Connection Manual 2.9 Manual Pulse Generator 2.9 Manual Pulse Generator [UFO-01-2Z9] 5V Manual Pulse Generator (100 pulse/rev) <Outline dimension drawing> Gasket 3- M4 stud Index Panel cut diameter 72 at equal pitch Above size only <Panel cut drawing>... - Page 93 MITSUBISHI CNC 2 General Specifications [HD60C] 12V Manual Pulse Generator (25 pulse/rev) Packing t 2.0 3-M4 stud bolt L10 Installation of screws other than M3 x 6 8.89 7.60 not possible 24 27 0.5 <Panel cut dimension drawing> 4. 8 (Divide equally by three) 120°...
-
Page 94: Synchronous Feed Encoder
M70V Series Connection Manual 2.10 Synchronous Feed Encoder 2.10 Synchronous Feed Encoder Dimension and names of parts [OSE-1024-3-15-68] Caution plate 5. 4 hole 19. 5 14. 3 - 0. 11 - 0. 006 - 0. 012 - 0. 017 - 0. 042 +0. -
Page 95: Optical Communication Repeater Unit (Fcu7-Ex022)
MITSUBISHI CNC 2 General Specifications 2.11 Optical Communication Repeater Unit (FCU7-EX022) When the distance of the optical communication cable between NC control unit and drive unit is over 30m, the communication can be performed by relaying the optical signal. Using up to two units, relay of the total length of up to 90m can be performed. <Product features>... - Page 96 M70V Series Connection Manual 2.11 Optical Communication Repeater Unit (FCU7-EX022) (1) Optical communication I/F (OPT1IN, OPT1OUT, OPT2IN, OPT2OUT) <Cable side connector type> (PCF type) Connector : CF-2D101-S Recommended manufacturer: Japan Aviation Electronics (POF type) Connector :PF-2D101 Recommended manufacturer: Japan Aviation Electronics...
- Page 97 MITSUBISHI CNC 2 General Specifications (4) Power OFF input (CF01) ACFAIL <PCB side connector type> Connector: 53103-0230 Recommended manufacturer: MOLEX <Cable side connector type> connector: 005057-9402 Contact: 0016020103 Recommended manufacturer: MOLEX (5) FG terminal (FG) <Cable side faston terminal type name> Type name : 175022-1(For AWG20-14 250 series) Recommended manufacturer: Tyco Electronics Terminal protection tube: 174817-2 (Yellow)
-
Page 98: Mitsubishi Cnc Machine Operation Panel
M70V Series Connection Manual 2.12 MITSUBISHI CNC Machine Operation Panel 2.12 MITSUBISHI CNC Machine Operation Panel 2.12.1 MITSUBISHI CNC Machine Operation Panel A Outline dimension [FCU7-KB921 (MITSUBISHI CNC machine operation panel A)] (Space required for wiring) <Panel cut dimension drawing>... - Page 99 MITSUBISHI CNC 2 General Specifications Connector No. Connector name Function No. Connector name Function DCIN 24VDC input FG terminal DCOUT 24VDC output Relay wiring Mahine operation panel B RIOIN Remote I/O SUBP switch (1)(2) 24VDC input/output (DCIN/DCOUT) I/O +24V <Cable side connector type> Connector: 2-178288-3 Contact: 1-175218-5 x3 Recommended manufacturer: Tyco Electronics...
- Page 100 M70V Series Connection Manual 2.12 MITSUBISHI CNC Machine Operation Panel (3) Remote I/O connected connector (RIOIN) I/O TXRX I/O TXRX* <Cable side connector type> Connector: 1-178288-3 Contact: 1-175218-2 x3 Recommended manufacturer: Tyco Electronics (4) FG terminal (FG) (5) Relay wiring (EXT)
- Page 101 MITSUBISHI CNC 2 General Specifications Machine operation panel B switch (SUBP) Relay EMGCOM Relay EMG Relay 6 Relay 5 Relay 4 Relay 3 Relay 2 Relay 1 Spare SW(X75) Spare SW(X74) Spare SW(X73) Selector SW(X72) G(X71) F(X6D) E(X6F) D(0V) C(X70) B(X6E) A(X6C) G(X6B)
- Page 102 M70V Series Connection Manual 2.12 MITSUBISHI CNC Machine Operation Panel Wiring of machine operation panel B <Wiring of rotary switch (SUBP)> Machine Operation Panel I/F PCB HN232 Machine operation panel B 1kΩ [SUBP] (FCU7-KB926) Rotary Switch (RSW1) (For cutting override)
- Page 103 MITSUBISHI CNC 2 General Specifications <Wiring of other switches (SUBP)> Machine Operation Panel I/F PCB HN232 [SUBP] Machine operation panel B 1kΩ (FCU7-KB926) Selector Switch (For memory protection) 2 notch Key shape 2c Manual return type Switch input spare (3 points) [EXT] Spare for signal relay Push down switch...
- Page 104 M70V Series Connection Manual 2.12 MITSUBISHI CNC Machine Operation Panel <Connection when the selector SW has 3 notches> [SUBP] Selector SW 3 notch 2a2b Manual return type <Connection when relaying wiring to control panel> [EXT] P-ON PONCOM Connection with (0V)
-
Page 105: Mitsubishi Cnc Machine Operation Panel B
MITSUBISHI CNC 2 General Specifications 2.12.2 MITSUBISHI CNC Machine Operation Panel B Outline dimension [FCU7-KB926 (MITSUBISHI CNC machine operation panel B)] (Space required for wiring) <Panel cut drawing> (Unit outline) (Square hole) 4-M3 Screw... - Page 106 M70V Series Connection Manual 2.12 MITSUBISHI CNC Machine Operation Panel Connector Switch Switch (1) Memory protection switch (3) Spindle override (RSW2) (2) Emergency stop button (4) Cutting override (RSW1) (1) Memory protection switch <Contact configuration> Contact 2 Contact 1 Contact 1(Common)
- Page 107 MITSUBISHI CNC 2 General Specifications (2) Emergency stop button Contact 1(A contact) Contact 1(A contact) Contact 2(B contact) Contact 2(B contact) Contact 3(A contact) Contact 3(A contact) Contact 4(B contact) Contact 4(B contact) <Switch type> Switch: XA1E-BV422MR Recommended manufacturer: IDEC Connection: Thread terminal (M3) (3) Spindle override (RSW2) Output signal 1...
- Page 108 M70V Series Connection Manual 2.12 MITSUBISHI CNC Machine Operation Panel (4) Cutting override (RSW1) Output signal 1 Output signal 3 Output signal 5 Common terminal Output signal 4 Output signal 2 Output signal 6 <Switch type> Switch: AC09-GY0/20L3B02 Recommended manufacturer: Fuji Electric Connection: Connector <Switch side connector type>...
-
Page 109: Exclusive Cf Cards For Mitsubishi Cnc
MITSUBISHI CNC 2 General Specifications 2.13 Exclusive CF Cards for MITSUBISHI CNC Item FCU7-CF256M FCU7-CF002G Capacity 256MB Operation-guaranteed -40 ℃ to +85 ℃ temperature NAND Flash SLC (Note) (Note) SLC stands for Single Level Cell, and it stores one bit data in each memory cell. This provides longer life span and high product reliability in comparison with MLC (Multi Level Cell), which is commonly applied to CF cards. -
Page 110: Installation
Installation... -
Page 111: Heat Radiation Countermeasures
MITSUBISHI CNC 3 Installation 3.1 Heat Radiation Countermeasures Please refer to the following method for heat radiation countermeasures. Example of heat radiation countermeasures <Hypothetical conditions> (1) Average internal temperature of operation panel: T ≤ 55°C (2) Peripheral temperature of operation panel : Ta ≤ 0°C to 45°C (3) Internal temperature rise value : ΔT = T - Ta (max) = 10°C Procedures for heat design and verification Calculate total heat radiation of each... - Page 112 M70V Series Connection Manual 3.1 Heat Radiation Countermeasures The following shows an example of calculation applied to heat radiation countermeasures for the operation panel when 8.4-type display unit is used. Because heat will accumulate in the upper portions of the unit, install an agitating fan as required.
- Page 113 MITSUBISHI CNC 3 Installation Calculation example of panel internal heating value (1) Calculation of unit heating value Heating value (W) Total heating value of units (W): 28W (= control unit + display unit + keyboard unit + operation panel I/O unit) Total heating value (W) by machine input (D1): 5.6W (=24V (total heating value when the 32 points are simultaneously turned ON) ×...
-
Page 114: Noise Countermeasures
M70V Series Connection Manual 3.2 Noise Countermeasures 3.2 Noise Countermeasures 3.2.1 Connection of FG (Frame Ground) The frame should basically be grounded at one ground point. Connect the control unit and operation panel I/O unit's 0V (RG) to the FG on the +24V stabilized power supply. -
Page 115: Shield Clamping Of Cables
MITSUBISHI CNC 3 Installation 3.2.2 Shield Clamping of Cables The shield cables connected to the units must be properly connected to the ground with clamp fittings and the like in order to stabilize the system's operation while preventing malfunctioning due to exogenous noise. (Refer to "EMC Installation Guidelines: EMC Countermeasure Parts: Shield Clamp Fitting".) 3.2.3 Connecting Spark Killers Connect a spark killer on the coil or the contact in parallel for noise countermeasures. -
Page 116: Unit Installation
M70V Series Connection Manual 3.3 Unit Installation 3.3 Unit Installation 3.3.1 Display Unit Mount the display unit with four fixing screws. (Note) Refer to "General Specifications: Display Unit" for the panel cut dimension drawing and the screw hole position. Fixing screws (4) -
Page 117: Keyboard Unit
MITSUBISHI CNC 3 Installation 3.3.2 Keyboard Unit Mount the keyboard unit with four fixing screws. (Note 1) Refer to "General Specifications: Keyboard Unit" for the panel cut dimension drawing and the screw hole position. (Note 2) A clear protective film covers the sheet keys of the keyboard at the time of shipment. Make sure to remove the sheet before use. -
Page 118: Control Unit Battery
M70V Series Connection Manual 3.3 Unit Installation 3.3.4 Control Unit Battery A lithium battery in the control unit battery holder retains parameter settings, machining programs and the like, which requires to be backed up at the power OFF. Battery Q6BAT Battery cumulative data holding time 45,000 hours (At 0 to 45°C. -
Page 119: Optional Unit (Memory Expansion Unit / Function Expansion Unit)
MITSUBISHI CNC 3 Installation 3.3.5 Optional Unit (Memory Expansion Unit / Function Expansion Unit) (Note) For details on how to install the optional unit, refer to the installation procedure sheet attached to the optional unit. This chapter explains how to install optional unit alone as an example. If installing memory expansion unit as a second optional unit, refer to the installation procedure sheet. -
Page 120: Connection
Connection... -
Page 121: Precautions For Wiring
MITSUBISHI CNC 4 Connection 4.1 Precautions for Wiring 4.1.1 Precautions when Connecting/Disconnecting Cables If the cable is connected/disconnected without turning the power OFF, the normal unit or peripheral devices could be damaged, and risks could be imposed. Disconnect each cable with the following procedures. (a) For the following type of connector, press the tabs with a thumb and forefinger in the direction of the arrow, and pull the connector off. - Page 122 M70V Series Connection Manual 4.1 Precautions for Wiring (b) For a flat cable type connector with latches, open the latches in the directions of the arrows, and pull the connector off. Open Pull For a flat cable type connector without latches, hold the connector with a thumb and forefinger, and pull the connector off.
- Page 123 MITSUBISHI CNC 4 Connection (e) For the optical cable connector, pull off while holding down the lock button. Press Pull For the Ethernet connector, pull off while holding down the locked latch. (1) Press Pull CAUTION 1. Do not connect or disconnect the cables between units while the power is ON. 2.
-
Page 124: Precautions For Using Optical Communication Cable
M70V Series Connection Manual 4.1 Precautions for Wiring 4.1.2 Precautions for Using Optical Communication Cable An optical communication cable is used for communication between the control unit and the drive unit. Special precautions, differing from the conventional cable, are required when laying and handling the optical communication cable. -
Page 125: Precautions For Laying Optical Communication Cable
MITSUBISHI CNC 4 Connection 4.1.2.3 Precautions for Laying Optical Communication Cable (1) Do not apply a force exceeding the cable's tolerable tension. Binding the cables too tight with tie-wraps could result in an increased loss or a disconnection. Use a cushioning material such as a sponge or rubber when bundling the cables and fix so that the cables do not move. -
Page 126: Connection Of Control Unit
M70V Series Connection Manual 4.2 Connection of Control Unit 4.2 Connection of Control Unit The method for connecting to each unit and device from the control unit is explained in this section. 4.2.1 Control Unit Connection System Drawing Control unit... -
Page 127: Connecting With Power Supply
F170 cable FAN ALARM POWER DCOUT ON/OFF switch (Note) MITSUBISHI CNC M70V series does not employ ACFAIL function. (CF01 is not connected.) <Related items> Cable drawing: "Cable: F110 Cable", "Cable: F170 Cable" Connector pin assignment: "General Specifications: Control Unit" (DCIN connector) -
Page 128: Connecting With Emergency Stop Signal
M70V Series Connection Manual 4.2 Connection of Control Unit 4.2.3 Connecting with Emergency Stop Signal Connect the emergency stop switch to EMG connector by F120 cable. Emergency stop switch F120 NC control unit Emergency stop switch NC control unit +24V... - Page 129 MITSUBISHI CNC 4 Connection <Drive unit (MDS-DJ-V1) external emergency stop: Example> NC control unit Stabilized power supply +24V 0V(LG) Emergency MDS-DJ stop switch NC control unit F120 +24V EMGIN MDS-DJ-V1 Emergency stop input circuit <Caution> (1) External emergency stop cannot substitute the emergency stop signal which is input to NC. It is a function which helps the NC emergency stop.
-
Page 130: Connecting With Operation Panel I/O Unit
M70V Series Connection Manual 4.2 Connection of Control Unit 4.2.4 Connecting with Operation Panel I/O Unit Connect the operation panel I/O unit to the connector CG71. Operation panel Control unit I/O unit CG71 G011 cable CG71 <Related items> Cable drawing: "Cable G011 Cable"... -
Page 131: Connecting With Drive Unit
MITSUBISHI CNC 4 Connection 4.2.5 Connecting with Drive Unit Connect the optical communication cables from the NC to the each drive unit so that they run in a straight line from the NC to the drive unit that is a final axis. Up to 11 axes can be connected per system. Note that the number of connected axes is limited by the NC. -
Page 132: Connecting With Mds-D2/Dh2 Series
M70V Series Connection Manual 4.2 Connection of Control Unit 4.2.5.1 Connecting with MDS-D2/DH2 Series CAUTION 1. Connect the NC and the drive units by the optical communication cables. The distance between the NC and the final drive unit must be within 30m and the bending radius within 80mm. - Page 133 MITSUBISHI CNC 4 Connection (2) When using two or more power supply units within a single NC communication bus system Two or more power supply units may be required within a single NC communication bus system if the spindle drive unit capacity is large.
-
Page 134: Connecting With Mds-Dm2 Series
M70V Series Connection Manual 4.2 Connection of Control Unit 4.2.5.2 Connecting with MDS-DM2 Series CAUTION 1.Connect the NC and the drive units by the optical communication cables. The distance between the NC and the final drive unit must be within 30m and the bending radius within 80mm. -
Page 135: Connecting With Mds-Dj Series
MITSUBISHI CNC 4 Connection 4.2.5.3 Connecting with MDS-DJ Series CAUTION 1. Connect the NC and the drive units by the optical communication cables. The distance between the NC and the final drive unit must be within 30m and the bending radius within 80mm. 2. -
Page 136: Connecting With Optical Communication Repeater Unit
M70V Series Connection Manual 4.2 Connection of Control Unit 4.2.6 Connecting with Optical Communication Repeater Unit CAUTION Optical Communication Repeater Unit cannot be used to connect between two Servo Drive Units. (1) Connection example Connect the control unit to OPT1IN and the drive unit to OPT1OUT. - Page 137 MITSUBISHI CNC 4 Connection (2) Power Supply Sequence The diagram below shows the timing of power ON/OFF of the drive unit 200VAC (400VAC), the optical communication repeater unit, and the control unit. [Power ON] Turn the power ON in the following order; drive unit -> optical communication repeater unit -> control unit If the control unit is powered ON before the optical communication repeater unit, the initial communication with the drive unit may fail and cause an alarm.
-
Page 138: Connecting With I/O Devices Via Cc-Link
M70V Series Connection Manual 4.2 Connection of Control Unit 4.2.7 Connecting with I/O Devices via CC-Link CC-Link unit (FCU7-HN746) works as master station or local station of CC-Link (Ver.2 mode). Mount the CC-Link unit on the control unit's expansion card slot. - Page 139 MITSUBISHI CNC 4 Connection Wiring the cables to the CC-Link terminal block (1) Remove the sheath of the cable and isolate each internal wire from the shield mesh. (2) Remove the shield mesh and the coat of each internal wire. Twist the core wires. Shield mesh Approx.
-
Page 140: Connecting With Rs-232C Device
M70V Series Connection Manual 4.2 Connection of Control Unit 4.2.8 Connecting with RS-232C Device (1) Connect the RS-232C device to the connector SIO. Control unit F035 cable RS-232C device Cable name F034 cable General-purpose cable F035 cable See (2) SD1(TXD1) - Page 141 MITSUBISHI CNC 4 Connection (2) Example of wiring connections to the RS-232C device When connecting to the RS-232C device, refer to the following diagrams and cross the wiring for the transmission signals. Hand shaking No hand shaking upon RS/CS, ER/DR signals upon RS/CS, ER/DR signals SD(TXD) SD(TXD)
-
Page 142: Connecting With Skip Signal (Sensor)
M70V Series Connection Manual 4.2 Connection of Control Unit 4.2.9 Connecting with Skip Signal (Sensor) Connect skip signals to the connector SKIP. Skip signals are used for processing high-speed signals. Always shield the cable. Control unit FCUA-R030 SKIP (Note) Connecting the skip signal cable to a wrong connector causes a damage on the control unit when turning ON the skip signal power supply. - Page 143 MITSUBISHI CNC 4 Connection <24V connection at COM terminal> Control unit SKIP R030 cable Stabilized power supply 24VDC(+) 1,5,11,15 24V connection at COM terminal (Note 1) NC recognizes input signals of 2ms or more as the valid skip signals. If machine contacts (relay, etc.) are used, malfunctions will occur due to chattering.
-
Page 144: Connecting With Synchronous Feed Encoder/ Manual Pulse Generator
M70V Series Connection Manual 4.2 Connection of Control Unit 4.2.10 Connecting with Synchronous Feed Encoder/ Manual Pulse Generator Synchronous feed encoder (1ch) or 5V power supply type manual pulse generator (2ch) can be connected. Synchronous feed encoder OSE1024-3-15-68 R054 cable <Right angle>... -
Page 145: Connecting With Safety Observing I/O Device
MITSUBISHI CNC 4 Connection 4.2.11 Connecting with Safety Observing I/O Device Safety observing functions follow "IEC61800-5-2/EN61800-5-2", and safety of the functions complies with "EN ISO13849-1:2008 (PL d, Category 3)". However, make sure to check the safety of the machine by using "risk assessment". -
Page 146: Connection Diagram Using The Sto-Compatible Drive System
M70V Series Connection Manual 4.2 Connection of Control Unit 4.2.11.2 Connection diagram using the STO-compatible drive system STO (Safe Torque Off) is a function to execute the gate shutdown by drive unit's internal circuit. This function can be substituted for one of the two contactors that were used for the redundant power shutdown. -
Page 147: Connection Of Operation Panel I/O Unit
MITSUBISHI CNC 4 Connection 4.3 Connection of Operation Panel I/O Unit 4.3.1 Operation Panel I/O Unit Connection System Drawing Operation panel I/O unit Control unit CG71 G011 cable CG71 R211 cable Remote I/O unit, scan I/O unit card RIO3 MITSUBISHI CNC Machine operation panel F351 cable Machine control panel, switchboard, etc. -
Page 148: Connecting With Keyboard Unit
M70V Series Connection Manual 4.3 Connection of Operation Panel I/O Unit 4.3.2 Connecting with Keyboard Unit Connect the keyboard unit to the connector NCKB. The cable comes with the keyboard unit. Operation panel Keyboard unit I/O unit (Rear view) NCKB (Note) Firmly insert the connection cable until it is locked. -
Page 149: Connecting With Manual Pulse Generator (Mpg)
MITSUBISHI CNC 4 Connection 4.3.3 Connecting with Manual Pulse Generator (MPG) Both 5V power supply type (UFO-01-2Z9) and 12V power supply type (HD60C) manual pulse generator can be used. Take the maximum cable length, etc. into consideration when selecting. (Note) Set one of the following parameters which is suitable for your manual pulse generator. -
Page 150: Handle Numbers
M70V Series Connection Manual 4.3 Connection of Operation Panel I/O Unit 4.3.3.1 Handle Numbers Unit configuration decides handle Nos. "ENC": Connector on control unit "MPG": Connector on operation panel I/O unit Operation panel I/O unit (FCU7-DX71x/ DX72x/ DX73x/DX621) 1st handle... -
Page 151: Wiring For 24V Common Input
MITSUBISHI CNC 4 Connection 4.3.4.1 Wiring for 24V Common Input (Machine side) CG31/CG33/CG35 3.3kΩ 0V(RG) 3.3kΩ 0V(RG) 3.3kΩ 0V(RG) 3.3kΩ 0V(RG) 3.3kΩ 0V(RG) Control unit 24VDC(+) A3,B3 Sink type For connection details, refer to the descriptions on machine input connector pin assignment in "(1) Machine input (CG31)", "(2) Machine input (CG33)", and "(3) Machine input (CG35)"... -
Page 152: Wiring For 0V Common Input
M70V Series Connection Manual 4.3 Connection of Operation Panel I/O Unit 4.3.4.2 Wiring for 0V Common Input (Machine side) CG31/CG33/CG35 24VDC(+) 3.3kΩ 24VDC(+) 3.3kΩ 24VDC(+) 3.3kΩ 24VDC(+) 3.3kΩ 24VDC(+) 3.3kΩ Control unit A3,B3 0V(RG) Source type For connection details, refer to the descriptions on machine input connector pin assignment in "(1) Machine input (CG31)", "(2) Machine input (CG33)", and "(3) Machine input (CG35)"... -
Page 153: Wiring For Sink Type Output (Fcu7-Dx710/Dx720/Dx730)
MITSUBISHI CNC 4 Connection 4.3.4.3 Wiring for Sink Type Output (FCU7-DX710/DX720/DX730) Operation panel I/O unit Machine side (Card name : HN341/HN361/HN362) CG32 (CG34,CG36) *1 additional wiring 24VDC 24VDC 24VDC Y200 Y201 Y202 Y203 Y204 Y205 Y206 Y207 Y208 Y209 Y20A Y20B Y20C Y20D... -
Page 154: Wiring For Source Type Output (Fcu7-Dx711/Dx721/Dx731)
M70V Series Connection Manual 4.3 Connection of Operation Panel I/O Unit 4.3.4.4 Wiring for Source Type Output (FCU7-DX711/DX721/DX731) Operation panel I/O unit (Card name : HN351/HN371/HN372) Machine side CG32 (CG34,CG36) *1 Additional wiring 24VDC 24VDC 24VDC 24VDC 24VDC 24VDC 24VDC... -
Page 155: Outline Of Analog Signal Output Circuit
MITSUBISHI CNC 4 Connection 4.3.4.5 Outline of Analog Signal Output Circuit Operation Panel I/O unit The analog signal output circuit can be used only for the FCU7-DX720/DX721. -
Page 156: Connection Of Remote I/O Unit
M70V Series Connection Manual 4.4 Connection of Remote I/O Unit 4.4 Connection of Remote I/O Unit This chapter describes the connection of the remote I/O unit and machine control signals. 4.4.1 Connection and Station No. Setting on Remote I/O Unit... - Page 157 MITSUBISHI CNC 4 Connection When connecting to the operation panel I/O unit Control unit Remote I/O unit Operation panel I/O unit FCUA-DX1xx FCU7-DX710/711 Occupies Station No.3 - 6 the station No. 1, 2, 7, 8 CG71 Remote I/O 3ch FCUA-R211 RIO3 G011 Max.
-
Page 158: Station No. Setting When Using Multiple Remote I/O Units
M70V Series Connection Manual 4.4 Connection of Remote I/O Unit 4.4.2 Station No. Setting when Using Multiple Remote I/O Units Multiple remote I/O units can be used, as long as the total No. of occupied stations connected with serial links is eight or less. - Page 159 MITSUBISHI CNC 4 Connection Setting example 3 FCUA-DX110/111 or FCUA-DX120/121 + + + + Number of occupied stations: 2 Total number of occupied stations: 8 (Maximum configuration)
- Page 160 M70V Series Connection Manual 4.4 Connection of Remote I/O Unit When connecting to the operation panel I/O unit Station No. 1, 2, 7, 8 (or 1, 2, 3, 7, 8) are occupied by the operation panel I/O unit. (Station No. 7 and 8 are reserved for manual pulse generator.)
- Page 161 MITSUBISHI CNC 4 Connection Setting example 3 FCU7-DX720/721 FCUA-DX110/111 /730/731 or FCUA-DX100/101 FCUA-DX120/121 + + Number of occupied stations: 1 Total number of occupied stations: 3 (Maximum configuration)
-
Page 162: Connecting Fcua-Dx10X/14X Unit With Machine Control Signal
M70V Series Connection Manual 4.4 Connection of Remote I/O Unit 4.4.3 Connecting FCUA-DX10x/14x Unit with Machine Control Signal Input Output Type of machine input/output signal and number of points 32 points 32 points FCUA-R300 / FCUA-DX10x FCUA-R301 DI-L FCUA-DX14x Machine... - Page 163 MITSUBISHI CNC 4 Connection <Signal assignment> FCUA-DX10x /14x <CAUTION> Machine side DI-L When using two or more remote I/O units or control panel, etc. when connecting to the operation panel I/O unit, the signal assignment will differ. Refer to the "PLC Interface Manual" for details. The I/O assignment shows an example when the units are connected to the control unit and the station No.
-
Page 164: Connecting Fcua-Dx14X Unit With Analog Input/Output Signal
M70V Series Connection Manual 4.4 Connection of Remote I/O Unit 4.4.4 Connecting FCUA-DX14x Unit with Analog Input/Output Signal For the analog input/output signal, connect the FCUA-R031 cable to "AIO". Up to four input points and one output point can be connected for the analog input/output signal. When manufacturing the FCUA-R031 cable, use the FCUA-CS000 connector set (optional, with both ends). -
Page 165: Connecting Fcua-Dx11X Unit With Machine Control Signal
MITSUBISHI CNC 4 Connection 4.4.5 Connecting FCUA-DX11x Unit with Machine Control Signal Input Output Type of machine input/output signal and number of points 64 points 48 points FCUA-DX11x FCUA-R300 / FCUA-R301 DI-L Machine signal DI-R FCUA-R300 / FCUA-R301 DC IN DO-L Machine signal R IO2 ... - Page 166 M70V Series Connection Manual 4.4 Connection of Remote I/O Unit <Signal assignment> <CAUTION> When using two or more remote I/O units or when FCUA-DX11x connecting to the operation panel I/O unit, the DI-L DI-R signal assignment will differ. Refer to the "PLC Interface Manual"...
-
Page 167: Connecting Fcua-Dx12X Unit With Machine Control Signal
MITSUBISHI CNC 4 Connection 4.4.6 Connecting FCUA-DX12x Unit with Machine Control Signal Analog Input Output Type of machine input/output signal and output number of points 64 points 48 points 1 point FCUA-DX12x FCUA-R300 / FCUA-R301 DI-L Machine signal DI-R FCUA-R300 / FCUA-R301 DC IN ... - Page 168 M70V Series Connection Manual 4.4 Connection of Remote I/O Unit <Signal assignment> <CAUTION> When using two or more remote I/O units or when FCUA-DX12x connecting to the operation panel I/O unit, the signal assignment will differ. Refer to the "PLC Interface...
-
Page 169: Connection Of Mitsubishi Cnc Machine Operation Panel
MITSUBISHI CNC 4 Connection 4.5 Connection of MITSUBISHI CNC Machine Operation Panel (Note) In this chapter "MITSUBISHI CNC Machine operation panel" is shorten to Machine operation panel. Connect Machine operation panel A to the remote I/O unit I/F of control unit or operation panel I/O unit. - Machine operation panel A (RIOIN) - cable (FCUA-R211 or SH41) - control unit (RIO1) - Machine operation panel A (RIOIN) - cable (FCUA-R211 or SH41) - operation panel I/O unit (RIO3) When supplying power to control unit from Machine operation panel A, the following connection is necessary. - Page 170 M70V Series Connection Manual 4.5 Connection of MITSUBISHI CNC Machine Operation Panel <Software Interface> Machine operation panel occupies RIO station No. 4 to 6. The device numbers for switch and LED on operation panel are fixed as listed below. The following lists the devices for using the RIO 1st channel.
- Page 171 MITSUBISHI CNC 4 Connection (b) Spindle override (6bit) 8 position code list Device No. Setting value X66 X67 X68 X69 X6A Not used (c) Memory protection switch (1bit) Memory protection switch X6C Spare X6D - X6F (2) Machine operation panel A (Key switch/LED) Machine operation panel A is equipped with 55 switches and 55 LEDs.
-
Page 172: Connection Of Scan I/O Card
M70V Series Connection Manual 4.6 Connection of Scan I/O card 4.6 Connection of Scan I/O card (1) External power supply (DCIN) 24VDC is required for the HR347/HR357 card operation. Prepare a stabilized power supply that satisfies the following specifications. Output: 24VDC±5% Ripple: ±5%(P-P) - Page 173 MITSUBISHI CNC 4 Connection...
-
Page 174: Appendix 1 Cable
Appendix 1 章 付録 Cable... - Page 175 MITSUBISHI CNC Appendix 1 Cable (Note) Symbols for writing cable drawings indicates twisted pair. indicates the shield sheath. indicates shield clamping to the grounding plate. (4) In the cable drawings, the partner of the twisted pair cable is given a priority, so the pin No. of the connectors at both ends are not necessary in number of order.
-
Page 176: Appendix 1.1 Cable Wire And Assembly
M70V Series Connection Manual Appendix 1.1 Cable Wire and Assembly Appendix 1.1 Cable Wire and Assembly (1) Cable wire The specifications of the wire used for each cable, and the machining methods are shown in this section. When manufacturing the detector cable and battery connection cable, use the recommended wires shown below or equivalent products. - Page 177 MITSUBISHI CNC Appendix 1 Cable (2) Cable assembly Assemble the cable with the cable shield wire securely connected to the ground plate of the connector. Core wire Connect with a ground plate of connector. Shield Sheath (external conductor)
-
Page 178: Appendix 1.2 Cnp2E-1 Cable
M70V Series Connection Manual Appendix 1.2 CNP2E-1 Cable Appendix 1.2 CNP2E-1 Cable Max. cable length: 30m Application: Motor side PLG cable Spindle side accuracy detector TS5690 cable Spindle drive unit side connector (3M) Spindle motor side connector Receptacle: 36210-0100PL... -
Page 179: Appendix 1.3 Cnp3Ez-2P/Cnp3Ez-3P Cable
MITSUBISHI CNC Appendix 1 Cable Appendix 1.3 CNP3EZ-2P/CNP3EZ-3P Cable Max. cable length: 30m Application: Spindle side detector cable OSE-1024 cable CNP3EZ-2P (Straight) CNP3EZ-3P (Angle) Spindle drive unit side connector Spindle motor side connector (3M) (DDK) Receptacle: 36210-0100PL Connector: MS3106A20-29S (D190) Shell kit: 36310-3200-008 Back shell: CE02-20BS-S (straight) (MOLEX) -
Page 180: Appendix 1.4 Cnv22J-K1P / Cnv22J-K2P Cable
M70V Series Connection Manual Appendix 1.4 CNV22J-K1P / CNV22J-K2P Cable Appendix 1.4 CNV22J-K1P / CNV22J-K2P Cable Max. cable length: 0.3m Application: For HF-KP (Servo) Motor side detector relay cable (motor side) Compatible with only IP65 CNV22J-K1P (load side angle) CNV22J-K2P (reverse load side angle) -
Page 181: Appendix 1.5 Cnv2E-6P/Cnv2E-7P Cable
MITSUBISHI CNC Appendix 1 Cable Appendix 1.5 CNV2E-6P/CNV2E-7P Cable Max. cable length: 30m Application: Motor side detector cable (for A51/A74N(/A74))/ Ball screw side detector cable CNV2E-6P (Straight) CNV2E-7P (Angle) Motor detector/ Drive unit side connector (3M) Ball screw side detector side connector Receptacle: 36210-0100PL (DDK) Shell kit: 36310-3200-008... -
Page 182: Appendix 1.6 Cnv2E-8P/Cnv2E-9P Cable
M70V Series Connection Manual Appendix 1.6 CNV2E-8P/CNV2E-9P Cable Appendix 1.6 CNV2E-8P/CNV2E-9P Cable Max. cable length: 30m Application: For HF/HF-H, HF-KP (Tool spindle) Motor side detector cable (for A48/A51/A74N(/A74)) / For HF-KP (Servo) Motor side detector relay cable (Drive unit side) (CNV2E-8P) -
Page 183: Appendix 1.7 Cnv2E-D Cable
MITSUBISHI CNC Appendix 1 Cable Appendix 1.7 CNV2E-D Cable Max. cable length: 30m Application: MDS-B-SD unit cable Drive unit side connector (3M) Receptacle: 36210-0100PL MDS-B-SD unit side connector Shell kit: 36310-3200-008 (3M) (MOLEX) Connector: 10120-3000VE Connector set: 54599-1019 Shell kit: 10320-52F0-008 0.5mm P5(+5V) 0.5mm... -
Page 184: Appendix 1.8 Cnv2E-Hp Cable
M70V Series Connection Manual Appendix 1.8 CNV2E-HP Cable Appendix 1.8 CNV2E-HP Cable Max. cable length: 30m Application: MDS-B-HR unit cable Drive unit side connector (3M) MDS-B-HR unit side connector Receptacle: 36210-0100PL (Hirose Electric) Shell kit: 36310-3200-008 (MOLEX) Plug: RM15WTP-8S Connector set: 54599-1019 Clamp: RM15WTP-CP (10) 0.5mm... -
Page 185: Appendix 1.9 Cnv2E-K1P / Cnv2E-K2P Cable
MITSUBISHI CNC Appendix 1 Cable Appendix 1.9 CNV2E-K1P / CNV2E-K2P Cable Max. cable length: 10m Application: For HF-KP (Servo) Motor side detector cable Compatible with only IP65 CNV2E-K1P (load side angle) CNV2E-K2P (reverse load side angle) Servo drive unit side connector Servo motor detector connector (3M) (Tyco Electronics AMP) -
Page 186: Appendix 1.10 Dg21 Cable
M70V Series Connection Manual Appendix 1.10 DG21 Cable Appendix 1.10 DG21 Cable Max. cable length: 5m Application: Battery cable (For drive unit - battery unit) Drive unit side connector Battery unit side connector (Hirose Electric) (3M) Connector: DF1B-2S-2.5R Connector: 10120-3000VE... -
Page 187: Appendix 1.11 Dg22 Cable
MITSUBISHI CNC Appendix 1 Cable Appendix 1.11 DG22 Cable Max. cable length: 10m Application: Battery cable (For drive unit - drive unit) (Note) This cable is required to supply the power from the battery unit to multiple drive units. Drive unit side connector Drive unit side connector (Hirose Electric) (Hirose Electric) -
Page 188: Appendix 1.12 Dg23 Cable
M70V Series Connection Manual Appendix 1.12 DG23 Cable Appendix 1.12 DG23 Cable Max. cable length: 10m Application: Battery cable (For drive unit - battery box) (Note) The battery box side is connected using a bare conductor or a terminal bar. -
Page 189: Appendix 1.13 Dg24 Cable
MITSUBISHI CNC Appendix 1 Cable Appendix 1.13 DG24 Cable Max. cable length: 10m Application: 5V spply/DO output cable (For drive unit - battery box) (Note) The battery box side is connected using a bare conductor or a terminal bar. Drive unit side connector Battery box side Connector :10120-3000VE... -
Page 190: Appendix 1.14 F023/F024 Cable
M70V Series Connection Manual Appendix 1.14 F023/F024 Cable Appendix 1.14 F023/F024 Cable Max. cable length: 20m Application: Manual Pulse Generator (5V spec) HANDLE HANDLE HA1A HA1B HA2A HA2B [HANDLE] Wire material: UL1061-2464 [1ch][2ch] AWG22 × 6P Connector: 10120-3000VE Crimp terminal: V1.25-3... -
Page 191: Appendix 1.15 F034/F035 Cable
MITSUBISHI CNC Appendix 1 Cable Appendix 1.15 F034/F035 Cable Max. cable length: 15m (the maximum length of the cable when connected to the control unit via other units) Application: RS232C I/F cable (for control unit) SD1(TXD1) RD1(RXD1) RS1(RTS1) CS1(CTS1) ER1(DTR1) DR1(DSR1) Reserved Reserved... -
Page 192: Appendix 1.16 F070 Cable
M70V Series Connection Manual Appendix 1.16 F070 Cable Appendix 1.16 F070 Cable Max. cable length: 30m Application: 24VDC power cable DCIN DCIN +24V +24V [DCIN] Wire material: B-18(19)U × 2SJ-1 × 9 Connector: 2-178288-3 Crimp terminal: V1.25-3 or V1.25-4 × 2 Contact: 1-175218-5 ×... -
Page 193: Appendix 1.17 F110 Cable
MITSUBISHI CNC Appendix 1 Cable Appendix 1.17 F110 Cable Max. cable length: 15m Application: 24VDC power cable for PD25/PD27 DCIN DCOUT CF01 DCOUT DCIN AWG16 +24V +24V CF01 AWG22 ACFAIL ACFAIL [DCIN] Connector: 2-178288-3 [DCOUT] Contact: 1-175218-5 × 3 Connector: 3-178127-6 Recommended manufacturer: Contact: Wire material:... -
Page 194: Appendix 1.18 F120 Cable
M70V Series Connection Manual Appendix 1.18 F120 Cable Appendix 1.18 F120 Cable Max. cable length: 30m Application: Emergency stop cable B22-9 EMG IN EMG IN [EMG] Wire material: B-22(19)U × 2SJ-1 × 9 Crimp terminal: V1.25-3 × 2 Connector: 005057-9403 Recommended manufacturer: Contact: 0016020103 ×... -
Page 195: Appendix 1.19 F170 Cable
MITSUBISHI CNC Appendix 1 Cable Appendix 1.19 F170 Cable Max. cable length: 15m Application: ON/OFF switch cable for PD25/PD27 ON/OFF PD25 ON/OFF OFF-1 P-OFF OFF-2 ON-1 ON-2 P-ON [ON/OFF] Connector: 1-178288-5 Wire material: DPVVSB 3P × 0.3mm Crimp terminal: V1.25-3 or V1.25-4 Contact: 1-175218-5 Recommended manufacturer: Recommended manufacturer: JST... -
Page 196: Appendix 1.20 F221 Cable
M70V Series Connection Manual Appendix 1.20 F221 Cable Appendix 1.20 F221 Cable Max. cable length: 30m Application: Analog output [AO] Wire material: B-22(19) × 2SJ-1 × 9 Connector: 10120-3000VE Crimp terminal: V1.25-3 Recommended manufacturer: Contact: 10320-52F0-008 Recommended manufacturer: JST Sumitomo Electric Industries Recommended manufacturer: 3M (Note 1) Follow the instruction of the machine side in connecting the shield. -
Page 197: Appendix 1.21 F320/F321 Cable
MITSUBISHI CNC Appendix 1 Cable Appendix 1.21 F320/F321 Cable Max. cable length: 50m Application: Manual Pulse Generator (12V spec) HANDLE HANDLE HA1A HA1B HA2A HA2B [HANDLE] Wire material: UL1061-2464 [1ch][2ch] AWG22 × 6P Connector: 10120-3000VE Crimp terminal: V1.25-3 Case: 10320-52F0-008 Recommended manufacturer: Recommended manufacturer: JST Recommended manufacturer: 3M... -
Page 198: Appendix 1.22 F351 Cable
M70V Series Connection Manual Appendix 1.22 F351 Cable Appendix 1.22 F351 Cable Max. cable length: 50m Application: DI/DO CG31,CG32,CG33,CG34,CG35,CG36 [CG31, CG32, CG33, CG34, CG35, CG36] Wire material: B40-S Connector: 7940-6500SC Recommended manufacturer: Strain relief: 3448-7940 Oki Electric Cable Recommended manufacturer: 3M (Note) This cable is used to connect the operation panel I/O unit. -
Page 199: Appendix 1.23 Fcua-R030 Cable
MITSUBISHI CNC Appendix 1 Cable Appendix 1.23 FCUA-R030 Cable Max. cable length: 20m Application: SKIP input cable SKIP SKIP SKIP0 SKIP0 SKIP1 SKIP1 SKIP2 SKIP2 SKIP3 SKIP3 SKIP4 SKIP4 SKIP5 SKIP5 SKIP6 SKIP6 SKIP7 SKIP7 [SKIP] Wire material: UL1061-2464 AWG22 × 6P Crimp terminal: V1.25-4 ×... -
Page 200: Appendix 1.24 Fcua-R031 Cable
M70V Series Connection Manual Appendix 1.24 FCUA-R031 Cable Appendix 1.24 FCUA-R031 Cable Max. cable length: 30m Application: Analog input/output (for remote I/O unit) [AIO] Wire material: UL1061-2464 AWG24 × 6P Crimp terminal: V1.25-3 × 10 Connector: 10120-3000VE Case: 10320-52F0-008 Recommended manufacturer:... -
Page 201: Appendix 1.25 Fcua-R050/R054 Cable
MITSUBISHI CNC Appendix 1 Cable Appendix 1.25 FCUA-R050/R054 Cable Max. cable length: 30m Application: Synchronous encoder - control unit FCUA-R050 FCUA-R054 ENC1 ENC1A (ENC2A) ENC1A*(ENC2A*) ENC1B (ENC2B) ENC1B*(ENC2B*) ENC1Z (ENC2Z) ENC1Z*(ENC2Z*) [FCUA-R050 cable] Connector: MS3106B20-29S Cable clamp: MS3057-12A [ENC1] Wire material: UL1061-2464 Recommended manufacturer: AWG24 ×... -
Page 202: Appendix 1.26 Fcua-R211 Cable
M70V Series Connection Manual Appendix 1.26 FCUA-R211 Cable Appendix 1.26 FCUA-R211 Cable Max. cable length: 30m (the maximum length of the cable when connected to the control unit via other units) Application: Remote I/O (with terminal block) between remote I/O,... -
Page 203: Appendix 1.27 Fcua-R300/Fcua-R301 Cable
MITSUBISHI CNC Appendix 1 Cable Appendix 1.27 FCUA-R300/FCUA-R301 Cable Type: FCUA-R300 Max. cable length: 50m Application: DI/DO cable (one side connector) (for remote I/O unit) DI-L/DO-L, DI-R/DO-R [DI-L/DO-L,DI-R/DO-R] Wire material: B40-S Connector: 7940-6500SC Recommended manufacturer: Recommended manufacturer: 3M Oki Electric Cable Type: FCUA-R301 Max. - Page 204 M70V Series Connection Manual Appendix 1.27 FCUA-R300/FCUA-R301 Cable Machine control panel, electric cabinet, etc. FCUA-R300 FCUA-R301 RA : Relay PL : Pilot lamp Connector pin correspondence Terminal FCUA- Terminal FCUA- block BX1F DX1xx block BX1F DX1xx...
-
Page 205: Appendix 1.28 G011 Cable
MITSUBISHI CNC Appendix 1 Cable Appendix 1.28 G011 Cable Max. cable length: 0.5m Application: Connection between NC unit and operation panel I/O unit G011 3.3V KBCS0* KBCS1* KBCS2* KBAD0 KBAD1 KBAD2 KBD0 KBD1 KBD2 KBD3 KBRES* RDYOUT* BUZOUT* 3.3V TXRX3 TXRX3* SCAN36 SCAN36... -
Page 206: Appendix 1.29 G023/G024 Cable
M70V Series Connection Manual Appendix 1.29 G023/G024 Cable Appendix 1.29 G023/G024 Cable Max. cable length: 20m (the maximum length of the cable when connected to the control unit via other units) Application: Manual Pulse Generator cable (5V) (for connection to control unit) -
Page 207: Appendix 1.30 G071 Cable
MITSUBISHI CNC Appendix 1 Cable Appendix 1.30 G071 Cable Max. cable length: 0.5m Application: 24VDC relay cable for MITSUBISHI CNC machine operation panel DCOUT DCIN R : Red W : White G : Green [DCOUT] [DCIN] Connector: 2-178288-3 Connector: 2-178288-3 Wire material: UL1264 AWG16 Contact: 1-175218-5 x 3 Contact: 1-175218-5 x 3... -
Page 208: Appendix 1.31 G300 Cable
M70V Series Connection Manual Appendix 1.31 G300 Cable Appendix 1.31 G300 Cable Max. cable length: 10m Application: LAN cross cable (Shielded cable is recommended when the length will be 1m or more) G300 White White Green Green Green Green White... -
Page 209: Appendix 1.32 G301 Cable
MITSUBISHI CNC Appendix 1 Cable Appendix 1.32 G301 Cable Max. cable length: 1m Application: LAN straight cable (Shielded cable is recommended when the length will be 1m or more) G301 White White Green Green Green Green White White Orange Orange Orange Orange Blue... -
Page 210: Appendix 1.33 G380 Cable
M70V Series Connection Manual Appendix 1.33 G380 Cable Appendix 1.33 G380 Cable Max. cable length: 30m Application: Optical communication cable for wiring between drive units (outside panel) for optical communication repeater unit Use when the cable length is 10m or more to 30m or less. -
Page 211: Appendix 1.34 G395 Cable
MITSUBISHI CNC Appendix 1 Cable Appendix 1.34 G395 Cable Max. cable length: 10m Application: Optical communication cable for wiring between drive units (outside panel) for wiring between NC-drive units Use when wiring outside of the panel with a cable of 10m or less. Section with reinforced sheath Section without reinforced sheath... -
Page 212: Appendix 1.35 G396 Cable
M70V Series Connection Manual Appendix 1.35 G396 Cable Appendix 1.35 G396 Cable Max. cable length: 10m Application: Optical communication cable for wiring between drive units (inside panel) Use when wiring in the panel with a cable of 10m or less. -
Page 213: Appendix 1.36 G460 Cable
MITSUBISHI CNC Appendix 1 Cable Appendix 1.36 G460 Cable Max. cable length: 0.5m Application: Cable between MITSUBISHI CNC machine operation panel A and MITSUBISHI CNC machine operation panel B RSW1 SUBP RSW2 SW-NO SW-NO SW-C SW-C [RSW1][RSW2] 1 : Purple 2 : Blue 3 : Green 4 : Yellow... -
Page 214: Appendix 1.37 Mr-Bks1Cbl-A1-H / Mr-Bks1Cbl-A2-H Cable
M70V Series Connection Manual Appendix 1.37 MR-BKS1CBL-A1-H / MR-BKS1CBL-A2-H Cable Appendix 1.37 MR-BKS1CBL-A1-H / MR-BKS1CBL-A2-H Cable Max. cable length: 10m Application: <200V Series> Brake cable for HF-KP MR-BKS1CBL-A1-H (load side angle) MR-BKS1CBL-A2-H (reverse load side angle) Servo motor brake connector... -
Page 215: Appendix 1.38 Mr-Pws1Cbl-A1-H / Mr-Pws1Cbl-A2-H Cable
MITSUBISHI CNC Appendix 1 Cable Appendix 1.38 MR-PWS1CBL-A1-H / MR-PWS1CBL-A2-H Cable Max. cable length: 10m Application: <200V Series> Power cable for HF-KP MR-PWS1CBL-A1-H (load side angle) MR-PWS1CBL-A2-H (reverse load side angle) Servo motor power supply connector (Japan Aviation Electronics) Connector: JN4FT04SJ1 Hood, Socket insulator, Bushing and Grand nut Contact:... -
Page 216: Appendix 1.39 R-Tm Terminator Connector
M70V Series Connection Manual Appendix 1.39 R-TM Terminator Connector Appendix 1.39 R-TM Terminator Connector Application: Terminator for OPI interface R-TM R-TM TXRX* TXRX [R-TM] Connector: 1-178288-3 (X type) Contact: 1-175216-2 × 2 Recommended manufacturer: Tyco Electronics Resistor: 100Ω 1/4W (Note 1) The parts used shall be Mitsubishi recommended parts. Equivalent parts may be used providing they are compatible with the specifications. -
Page 217: Appendix 1.40 Sh21 Cable
MITSUBISHI CNC Appendix 1 Cable Appendix 1.40 SH21 Cable Max. cable length: 30m Application: Power supply communication cable Power backup unit communication cable Cable for Auxiliary axis/Servo drive units SV1, SV2 SVTXD SVTXD SVTXD* SVTXD* SVALM SVALM SVALM* SVALM* SVRXD SVRXD SVRXD4 SVRXD4... -
Page 218: Appendix 1.41 Sh41 Cable
M70V Series Connection Manual Appendix 1.41 SH41 Cable Appendix 1.41 SH41 Cable Max. cable length: 1m (the maximum length of the cable when connected to the control unit via other units) Application: Remote I/O cable between remote I/O, remote I/O-CNC control unit,... -
Page 219: Appendix 1.42 List Of Cable Connector Sets
MITSUBISHI CNC Appendix 1 Cable Appendix 1.42 List of Cable Connector Sets Type Application Package contents Connector (3M) Shell kit (3M) 10120-3000VE x 2pcs. 10320-52F0-008 x 2pcs. FCUA-CS000 Control unit - General I/O units Strain relief (3M) Connector (3M) 3448-7940 x 2pcs. 7940-6500SC x 4pcs. -
Page 220: Appendix 2 Emc Installation Guidelines
Appendix 2 章 付録 EMC Installation Guidelines... -
Page 221: Appendix 2.1 Introduction
MITSUBISHI CNC Appendix 2 EMC Installation Guidelines For details of the drive section (servo/spindle drive unit), refer to the "EMC Installation Guidelines" of instruction manuals for each drive unit. Appendix 2.1 Introduction EMC Directives became mandatory as of January 1, 1996. The subject products must have a CE mark attached indicating that the product complies with the Directives. -
Page 222: Appendix 2.3 Emc Measures
M70V Series Connection Manual Appendix 2.3 EMC Measures Appendix 2.3 EMC Measures The main items relating to EMC measures include the following. (1) Store the device in a sealed metal panel. (2) Ground all conductors that are floating electrically. Decrease the impedance. -
Page 223: Appendix 2.4.2 Measures For Door
MITSUBISHI CNC Appendix 2 EMC Installation Guidelines Appendix 2.4.2 Measures for Door (1) Use metal for all members configuring the panel. (2) When joining the door, use a gasket to lower the impedance of the contacting sections, or use a structure with a large contact area as shown below. -
Page 224: Appendix 2.5 Measures For Wiring In Panel
M70V Series Connection Manual Appendix 2.5 Measures for Wiring in Panel Appendix 2.5 Measures for Wiring in Panel Cables act as antennas to propagate unnecessary noise, and thus must be appropriately shielded and treated. The following measures must be sufficiently considered for the cables (SH21/G018/F012/FCUA-R211) that carry out high-speed communication. -
Page 225: Appendix 2.5.2 Shield Treatment Of Cables
MITSUBISHI CNC Appendix 2 EMC Installation Guidelines Appendix 2.5.2 Shield Treatment of Cables Use shielded cables for the cables wired outside the panel. Use a shield clamp within 10cm of the lead-out port from the panel. (Refer to "EMC Countermeasure Parts: Shield Clamp Fitting".) (1) DC power supply cable [F110/F070 cable] Shield clamp... - Page 226 M70V Series Connection Manual Appendix 2.5 Measures for Wiring in Panel (3) Servo communication cable [SH21 cable] Shield clamp Control panel Control panel Control unit Drive section unit SH21B cable Ferrite core Use a shield clamp within 10cm from the panel's inlet/outlet.
-
Page 227: Appendix 2.6 Emc Countermeasure Parts
MITSUBISHI CNC Appendix 2 EMC Installation Guidelines Appendix 2.6 EMC Countermeasure Parts Appendix 2.6.1 Shield Clamp Fitting The effect can be improved by directly connecting the cable's shield sheath to the grounding plate as shown below. Install the grounding plate near the outlet (within 10cm) of each panel, and press against the grounding plate with the clamp fitting. -
Page 228: Appendix 2.6.2 Ferrite Core
M70V Series Connection Manual Appendix 2.6 EMC Countermeasure Parts Appendix 2.6.2 Ferrite Core The ferrite core is mounted integrally with the plastic case. This can be installed with one touch without cutting the interface cable or power supply cable. This ferrite core is effective against common mode noise, allowing measures against noise without affecting the quality of the signal. -
Page 229: Appendix 2.6.3 Surge Absorber
MITSUBISHI CNC Appendix 2 EMC Installation Guidelines Appendix 2.6.3 Surge Absorber Make sure that the surge does not directly enter the AC line of the general-purpose stabilized power supply (user- prepared) supplying power to the control unit and DIO. Select the following product or equivalent for the surge absorber. Refer to the manufacturer catalog for detailed characteristics, outline and connection methods of the surge absorber. - Page 230 M70V Series Connection Manual Appendix 2.6 EMC Countermeasure Parts (3) Example of surge absorber installation An example of installing the surge absorber in the machine control panel is shown below. A short-circuit fault will occur in the surge absorber if a surge exceeding the tolerance is applied. Thus, install a circuit protection breaker in the stage before the surge absorber.
-
Page 231: Appendix 2.6.4 Selection Of Stabilized Power Supply
MITSUBISHI CNC Appendix 2 EMC Installation Guidelines Appendix 2.6.4 Selection of Stabilized Power Supply Consider the following characteristics when selecting the stabilized power supply (prepared by machine manufacturer). Use a power supply that complies with CE Marking or that follows the safety standards given below. Stabilized power supply selection items Item Standard setting... -
Page 232: Appendix 3 Restrictions For Lithium Batteries
Appendix 3 章 付録 Restrictions for Lithium Batteries... -
Page 233: Appendix 3.1 Restriction For Packing
MITSUBISHI CNC Appendix 3 Restrictions for Lithium Batteries Appendix 3.1 Restriction for Packing The United Nations Dangerous Goods Regulations "Article 12" became effective from 2003. When transporting lithium batteries with means subject to the UN Regulations, such as by air transport, measures corresponding to the Regulations must be taken. -
Page 234: Appendix 3.1.1 Target Products
M70V Series Connection Manual Appendix 3.1 Restriction for Packing Appendix 3.1.1 Target Products The following Mitsubishi NC products use lithium batteries. If the lithium metal content exceeds 1g for battery cell and 2g for battery, the battery is classified as dangerous good (Class9). -
Page 235: Appendix 3.1.2 Handling By User
MITSUBISHI CNC Appendix 3 Restrictions for Lithium Batteries Appendix 3.1.2 Handling by User The following technical opinion is solely Mitsubishi's opinion. The shipper must confirm the latest IATA Dangerous Goods Regulations, IMDG Codes and laws and orders of the corresponding export country. These should be checked by the company commissioned for the actual transportation. -
Page 236: Appendix 3.1.3 Reference
M70V Series Connection Manual Appendix 3.1 Restriction for Packing (2) When packaged by user The user must follow UN Regulations when packing, preparing for shipping and preparing the indications, etc. (a) Packing a lithium battery falling under Class 9 Consult with The Ship Equipment Inspection Society of Japan for details on packaging. -
Page 237: Appendix 3.2 Products Information Data Sheet (Er Battery)
MITSUBISHI CNC Appendix 3 Restrictions for Lithium Batteries Appendix 3.2 Products information data sheet (ER battery) MSDS system does not cover the product used in enclosed state. The ER battery described in this section applies to that product. This description is applied to the normal use, and is provided as reference but not as guarantee. This description is based on the lithium battery's (ER battery) hazardous goods data sheet (Products information data sheet) which MITSUBISHI has researched, and will be applied only to the ER batteries described in the previous section "Restriction for Packing". - Page 238 M70V Series Connection Manual Appendix 3.2 Products information data sheet (ER battery) (7) Stability and reactivity Stability Stable under normal handling condition. Do not mix multiple batteries with their terminals uninsulated. This may cause a short- Condition to avoid circuit, resulting in heating, bursting or ignition.
-
Page 239: Appendix 3.3 Issuing Domestic Law Of The United States For Primary Lithium Battery Transportation
MITSUBISHI CNC Appendix 3 Restrictions for Lithium Batteries Appendix 3.3 Issuing Domestic Law of the United States for Primary Lithium Battery Transportation Federal Aviation Administration (FAA) and Research and Special Programs Administration (RSPA) announced an additional regulation (interim final rule) for the primary lithium batteries transportation restrictions item in "Federal Register" on Dec.15 2004. -
Page 240: Appendix 3.4 Restriction Related To Eu Battery Directive
This symbol mark is according to the directive 2006/66/EC Article 20 Information for end-users and Annex II. Your MITSUBISHI ELECTRIC product is designed and manufactured with high quality materials and components which can be recycled and/or reused. This symbol means that batteries and accumulators, at their end-of-life, should be disposed of separately from your household waste. - Page 241 MITSUBISHI CNC Appendix 3 Restrictions for Lithium Batteries...
-
Page 242: Appendix 4 Precautions For Compliance To Ul/C-Ul Standards
Appendix 4 章 付録 Precautions for Compliance to UL/c-UL Standards... - Page 243 MITSUBISHI CNC Appendix 4 Precautions for Compliance to UL/c-UL Standards Observe the following matters to comply with UL/c-UL Standards. Refer to "Instruction Manual for Compliance with UL/c-UL Standard"(BNP-B2429-003) for details. (1) Selection of external 24VDC power supply unit (The unit shall be prepared by the machine tool builder.) This NC system complies with the UL Standards on the condition that the stabilized power supply unit supplying 24VDC to each unit is a UL-approved part.
- Page 244 Revision History Date of revi- Manual No. Revision details sion Mar. 2010 IB(NA)1500956-A First edition created. "Handling of our product" was added. Following units are added. - FCU7-MU556/MU557 (Control unit) - FCU7-EX022 (Optical repeater unit) - FCU7-HN721/HN722 (Function expansion unit) Following cables are added.
- Page 245 Date of revi- Manual No. Revision details sion The construction of chapters and sections were revised. - "5 EMC Installation Guidelines" to Appendix 2. - "6 Restrictions for Lithium Batteries" to Appendix 3. Dec. 2013 IB(NA)1500956-D - "7 Precautions for Compliance to UL/c-UL Standards" to Appendix 4. - "8 Cable"...
- Page 247 Global Service Network AMERICA EUROPE MITSUBISHI ELECTRIC AUTOMATION INC. (AMERICA FA CENTER) MITSUBISHI ELECTRIC EUROPE B.V. Central Region Service Center GOTHAER STRASSE 10, 40880 RATINGEN, GERMANY 500 CORPORATE WOODS PARKWAY, VERNON HILLS, ILLINOIS 60061, U.S.A. TEL: +49-2102-486-0 / FAX: +49-2102-486-5910...
- Page 248 MITSUBISHI ELECTRIC AUTOMATION (CHINA) LTD. (CHINA FA CENTER) Singapore Service Center China (Shanghai) Service Center 307 ALEXANDRA ROAD #05-01/02 MITSUBISHI ELECTRIC BUILDING SINGAPORE 159943 1-3,5-10,18-23/F, NO.1386 HONG QIAO ROAD, CHANG NING QU, TEL: +65-6473-2308 / FAX: +65-6476-7439 SHANGHAI 200336, CHINA...
- Page 249 Every effort has been made to keep up with software and hardware revisions in the contents described in this manual. However, please understand that in some unavoidable cases simultaneous revision is not possible. Please contact your Mitsubishi Electric dealer with any questions or comments regarding the use of this prod- uct.
Need help?
Do you have a question about the M70V Series and is the answer not in the manual?
Questions and answers