
Related Manuals for Dell EMC Edge 3200


Summary of Contents for Dell EMC Edge 3200
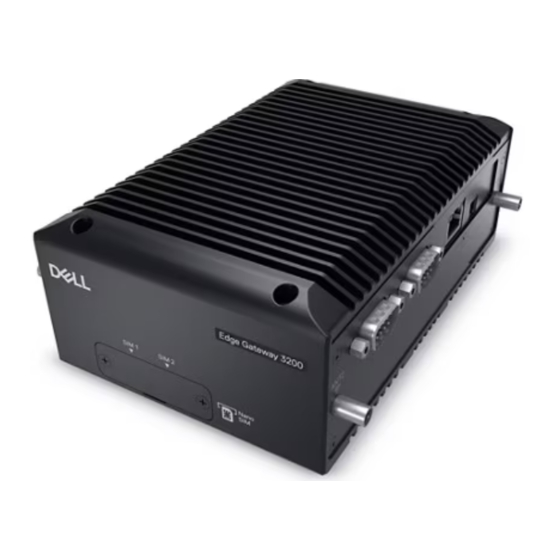
- Page 1 Dell EMC Edge Gateway 3200 User's Guide Regulatory Model: EGW-3200 Regulatory Type: EGW-3200-NA August 2022 Rev. A00...
- Page 2 A WARNING indicates a potential for property damage, personal injury, or death. © 2022 Dell Inc. or its subsidiaries. All rights reserved. Dell Technologies, Dell, and other trademarks are trademarks of Dell Inc. or its subsidiaries. Other trademarks may be trademarks of their respective owners.
-
Page 3: Table Of Contents
Contents Chapter 1: Introduction......................... 5 Overview....................................5 Features....................................5 Packing list.................................... 5 Optional accessories................................6 Chapter 2: Specifications......................7 EGW-3200 system specifications............................7 EGW-3200 system block diagram........................... 9 Matrix of expansion modules............................10 Mechanical dimensions..............................10 Chapter 3: System Layout......................13 I/O overview..................................13 Power button................................ - Page 4 Advanced.....................................33 CPU Configuration..............................34 Power Management..............................36 System Management..............................38 Thermal Management..............................39 Watchdog Timer................................40 Super IO Configuration............................... 41 Serial Console Redirection............................44 Network Stack Configuration...........................46 Intel Ethernet Controller (3) I225-IT........................47 Chipset....................................48 Memory Configuration............................... 49 PCI Express Configuration............................50 SATA Configuration..............................55 USB Configuration..............................
-
Page 5: Chapter 1: Introduction
Before unpacking, check the shipping carton for any damage. If the shipping carton or contents are damaged, inform your dealer immediately. Retain the shipping carton and packing materials for inspection. Obtain authorization from your dealer before returning any product to Dell Technologies. Ensure that the following items are included in the package. ● EGW-3200 fanless embedded computer ●... -
Page 6: Optional Accessories
Optional accessories ● AC/DC adapter ○ 120 W for EGW-3200 system ● 4G module ● 5G module ● uFM modules ○ 2x Isolated COM (RS-422/485) ○ 2x Isolated COM (RS-232) ○ 2x GbE with PoE out ○ 2x Isolated GbE LAN ○... -
Page 7: Chapter 2: Specifications
Specifications Topics: • EGW-3200 system specifications • EGW-3200 system block diagram • Matrix of expansion modules • Mechanical dimensions EGW-3200 system specifications Table 1. EGW-3200 system specifications EGW-3200 CPU and chipset ® Processor Intel Atom x6425RE, 1.9 GHz base frequency Elkhart Lake SoC Memory DDR4 SO-DIMM socket, supporting up to 32 GB 3200 MHz... - Page 8 Table 1. EGW-3200 system specifications (continued) EGW-3200 Physical Dimensions 162 mm (W) x 108 mm (D) x 60 mm (H) Weight Net: 1.2 kg; Gross: 1.7 kg Mounting Desktop, operational: wall mount / DIN rail supported Antenna hole 6x D-shape antenna holes Power supply DC input 9–36 VDC...
-
Page 9: Egw-3200 System Block Diagram
The temperature at the center of the exposed base surface must not exceed 75°C with 0.6 m/s air flow. NOTE: For the nanoSIM card, Dell Technologies suggests using a USIM card with industrial temperature specifications. EGW-3200 system block diagram Figure 1. EGW-3200 system block diagram... -
Page 10: Matrix Of Expansion Modules
Matrix of expansion modules Table 2. Expansion modules Module Connection WiFi AX210 - default M.2 Socket 1 M.2 Socket 2 M.2 Socket 2 M.2 2242 SSDs M.2 storage uFM - 2x isolated COM RS-422/485 mPCIe uFM - 2x isolated COM RS-232 mPCIe uFM - 2x GbE with PoE out mPCIe... - Page 11 Figure 3. EGW-3200 bottom view (including wall-mount brackets) Figure 4. EGW-3200 side view Specifications...
- Page 12 Figure 5. EGW-3200 front view Figure 6. EGW-3200 rear view 136 ± 2 110.9 ± 2 Figure 7. WiFi antenna (dimensions in mm) Specifications...
-
Page 13: Chapter 3: System Layout
System Layout Topics: • I/O overview • Internal I/O connectors • Antenna connectors I/O overview The EGW-3200 provides the following I/O access features. Figure 8. Front panel I/O Table 3. Front panel I/O legend Letter Description Letter Description Power button (with LED) DC power input 2x DisplayPort 4x USB 3.1 Gen1 Type-A... -
Page 14: Power Button
Figure 9. Rear panel I/O Table 4. Rear panel I/O legend Letter Description Letter Description Configurable COM ports (RS232/422/485) Removable panel for expansion module I/O Figure 11. Side panel I/O Table 6. Side panel I/O legend Letter Description Letter Description USIM slot 1 USIM slot 2 Power button... -
Page 15: Digital I/O Connector
Table 7. DisplayPort pin definitions Signal Signal CN_DDPx0+ CN_DDPx3– CN_DDPx0– CN_DDPx_AUX_SEL CN_DDPx1+ CN_DDPx_CONFIG2 CN_DDPx_AUX+ CN_DDPx1– CN_DDPx2+ CN_DDPx_AUX– CN_DDPx_HPD CN_DDPx2– CN_DDPx3+ +V3.3_DDPx_PWR_CN Digital I/O connector The EGW-3200 provides six channels of non-isolation digital input and six channels of non-isolation digital output circuits, with specifications and circuits as follows. -
Page 16: Remote Power Button Connector
Figure 14. Digital input circuit Figure 15. Digital output circuit Remote power button connector An external header is provided for the remote power button, with pin definitions as detailed in the following figure and table. These pins are normally open (NO). Figure 16. -
Page 17: Dc Power Input
DC power input The power supply connector consists of three pins: V+, GND, and V– from left to right, respectively. V+ and V– pins provide DC power input. The DC power input for the EGW-3200 allows a voltage input range from 9 to 36 VDC. Figure 17. -
Page 18: Led Indicators
Table 12. LAN specifications LAN port Chip Speed PSE OOB/TSN LAN 1 Intel i225 10/100/1000/2500 Base-T Not supported LAN 2 Marvell 88E1512 10/100/1000 Base-T Supported Figure 18. LAN Ethernet ports LAN 1 and LAN 2 behave differently when used with different operating systems and at different speeds. See the following table for details. -
Page 19: Com Port Connectors
Table 14. Front panel LED indicators LED indicator Color Description Power button Blue When illuminated continuously, indicates the system in S0. When blinking, indicates the system in S3. Watchdog (WD) Yellow Indicates watchdog timer status. When watchdog timer starts, the LED flashes. -
Page 20: Internal I/O Connectors
Figure 20. USIM card slots Internal I/O connectors Internal connector locations Figure 21. Mainboard top connector locations Table 16. Mainboard top connector legend Letter Description Letter Description Internal power button MDI connection 2x DP 2x COM, 2x Canbus, 6x DI/O C1: 2.5G LAN, C2: 1G LAN Fan (for future expansion) System Layout... - Page 21 Table 16. Mainboard top connector legend (continued) Letter Description Letter Description 2x USB 3.1 Type A Gen1 supporting up to 1.6 A PWRBTN/RSTBTN connector current; 2x USB 3.1 Type A Gen1 supporting up to 1 A current Mini PCIe Clear CMOS header (1–2: clear CMOS, 2–3: NA default) M.2 B key I2C connector for PD or I/O board...
-
Page 22: M.2 Connectors
Table 17. Mainboard bottom connector legend (continued) Letter Description Letter Description Reset button Humidity/temperature sensor Figure 23. Isolated DI/O board connector locations Table 18. Isolated DI/O board connector legend Letter Description Letter Description External D-SUB 6DI/6DO Internal I2C connector NOTE: The Isolated DI/O board is part of the Isolated DI/O Expansion Module. -
Page 23: Clear Cmos Jumper
Clear CMOS jumper Upon encountering an abnormal condition preventing the device from booting, the jumper can clear the BIOS content stored in CMOS and restore default settings. To clear CMOS, short pin #1 to pin #2 for a minimum of three seconds, and then remove the jumper to return to normal mode (replace to pins #2 and #3, default). -
Page 24: Antenna Connectors
Antenna connectors Table 20. Antenna connectors Antenna Function Location ANT1 WiFi Back panel ANT2 WiFi/Bluetooth Back panel ANT3 4G aux, 5G Tx/Rx Front panel ANT4 4G main, 5G Tx/Rx Front panel ANT5 5G Rx Left panel ANT6 4G GNSS, 5G Rx Left panel System Layout... -
Page 25: Chapter 4: Getting Started
Getting Started WARNING: Before setting up your system, follow the safety instructions included in the Safety, Environmental, and Regulatory Information document that is shipped with the system. Topics: • Attach the WiFi antennas • Attach DC power connector • Power on and start up the operating system •... -
Page 26: Attach Dc Power Connector
Attach DC power connector Prerequisites CAUTION: Before providing DC power, ensure the voltage and polarity provided are compatible with the DC input. Improper input voltage and/or polarity can be responsible for system damage. Steps 1. Locate the DC power connector that is included in the Accessory Box, as shown in the following figure. Figure 28. -
Page 27: Power On And Start Up The Operating System
Tighten the set screws above the left and right holes to clamp down on the wires and secure them to the connector. Power on and start up the operating system All the drivers are preloaded, and if there is a need for a driver update, download it from the EGW-3200 page of the Dell Technologies Support Site. -
Page 28: Mount The Device
Mount the device About this task The EGW-3200 can be mounted in two ways: as a wall mount, or mounted to a DIN rail using the DIN rail kit (offered separately). Each is described in the following tasks. Mount the device to a wall Steps 1. -
Page 29: Mount The Device To A Din Rail
COM RS-232, 2x isolated GbE with PoE out, 2x isolated GbE LAN, 2x isolated Canbus, 8x isolated DI/O, 4G, and 5G modules. For information about safety and proper installation, go to the EGW-3200 page of the Dell Technologies Support Site. -
Page 30: Appendix A: Power Consumption
Power consumption Power consumption as follows is based on lab data in which 24 V DC is applied and current is measured by the DC power supply. The power consumption (W) is calculated as the product of applied voltage (V) and the current (A). Platforms tested for this data have available external I/O interfaces, and are attached to supported devices such as HDMI and DP monitors, USB keyboard/mouse, USB dummy load, COM loopback, and audio loopback, and an internal hard disk driver is installed. -
Page 31: Appendix B: Bios Setup
● Displayed material may reflect only the BIOS version corresponding to the initial release and may differ from that of the purchased motherboard. ● Users can download the latest BIOS version from the EGW-3200 page of the Dell Technologies Support site, under the Drivers &... -
Page 32: Main
Main Figure 36. BIOS screen - Main tab BIOS Setup... -
Page 33: Advanced
Advanced Figure 37. BIOS screen - Advanced tab BIOS Setup... -
Page 34: Cpu Configuration
CPU Configuration Figure 38. CPU Configuration (top of screen) Figure 39. CPU Configuration (bottom of screen) BIOS Setup... - Page 35 Table 24. CPU Configuration Parameter Settings Description Active Processor Cores All, 1, 2, 3 Number of cores to enable in each processor package. Intel SpeedStep Disabled, Enabled Enabled Allows more than two frequency ranges to be supported. Intel Speed Shift Technology Disabled, Enabled Speed Shift Technology support.
-
Page 36: Power Management
Power Management Figure 40. Power Management Table 25. Power Management Parameter Settings Description Enable Hibernation Disabled, Enabled Enables or disables system ability to hibernate (OS/S4 Sleep State). This option may not be effective with some operating systems. ACPI Sleep State Suspend Disabled, S3 Select the highest ACPI sleep state the system will enter (Suspend to RAM) - Page 37 Power Consumption Figure 41. Power Consumption BIOS Setup...
-
Page 38: System Management
System Management Figure 42. System Management BIOS Setup... -
Page 39: Thermal Management
Thermal Management Figure 43. Thermal Management Table 26. Thermal Management Parameter Settings Description Passive Trip Point Disabled, 71 C, 79 C, 87 C, This value controls the temperature of the ACPI Passive Trip 95 C Point - the point in which the OS will begin throttling the processor. -
Page 40: Watchdog Timer
Watchdog Timer Figure 44. Watchdog Timer Table 27. Watchdog Timer Parameter Settings Description BIOS POST Watchdog Disabled, Second Mode, 1. Disabled: Disable watchdog timer; 2. Second Mode: Enable Minute Mode watchdog timer in second mode; 3. Minute Mode: Enable watchdog timer in minute mode. BIOS Watchdog Timer Set watchdog timer for BIOS POST process. -
Page 41: Super Io Configuration
Super IO Configuration Figure 45. Super IO Configuration BIOS Setup... - Page 42 Serial Port 1 Configuration Figure 46. Serial Port 1 Configuration Table 28. Serial Port 1 Configuration Parameter Settings Description Serial Port Disabled, Enabled Enable or disable serial port (COM) Device Settings IO=3F8h; IRQ=4; — COM1 Control RS232, RS422, RS485 Select COM1 mode. RS232, RS422, or RS485 BIOS Setup...
- Page 43 Serial Port 2 Configuration Figure 47. Serial Port 2 Configuration Table 29. Serial Port 2 Configuration Parameter Settings Description Serial Port Disabled, Enabled Enable or disable serial port (COM) Device Settings IO=2F8h; IRQ=3; — COM2 Control RS232, RS422, RS485 Select COM2 mode. RS232, RS422, or RS485 BIOS Setup...
-
Page 44: Serial Console Redirection
Serial Console Redirection Figure 48. Serial Console Redirection Table 30. Serial Console Redirection Parameter Settings Description Console Redirection Disabled, Enabled Enable or disable console redirection BIOS Setup... - Page 45 Figure 49. Console Redirection COM1 Settings Table 31. Console Redirection COM1 Settings Parameter Settings Description Terminal Type VT100, VT100+, VT-UTF8, Emulation: ANSI: Extended ASCII char set. VT100: ASCII char set. ANSI VT100+: Extends VT100 to support color, function keys, and so on. VT- UTF8: Uses UTF8 encoding to map Unicode chars onto 1 or more bytes.
-
Page 46: Network Stack Configuration
Network Stack Configuration Figure 50. Network Stack Configuration Table 32. Network Stack Configuration Parameter Settings Description Network Stack Disabled, Enabled Enable/disable UEFI network stack. Ipv4 PXE Support Disabled, Enabled Enable/disable IPv4 PXE boot support. If disabled, IPv4 PXE boot support is not available. Ipv4 HTTP Support Disabled, Enabled Enable/disable IPv4 HTTP boot support. -
Page 47: Intel Ethernet Controller (3) I225-It
Intel Ethernet Controller (3) I225-IT Figure 51. Intel Ethernet Controller (3) I225-IT BIOS Setup... -
Page 48: Chipset
Chipset Figure 52. Chipset BIOS Setup... -
Page 49: Memory Configuration
Memory Configuration Figure 53. Memory Configuration Table 33. Memory Configuration Parameter Settings Description MAX TOLUD Dynamic, 1 GB, 1.25 GB, 1.5 Maximum value of TOLUD. Dynamic assignment automatically GB, 1.75 GB, 2 GB, 2.25 GB, adjusts TOLUD, based on the largest MMIO length of the 2.5 GB installed graphic controller. -
Page 50: Pci Express Configuration
PCI Express Configuration Figure 54. PCI Express Configuration BIOS Setup... - Page 51 PCI Express Root Port 3 Figure 55. PCI Express Root Port 3 Table 34. PCI Express Root Port 3 Parameter Settings Description PCI Express Root Port 3 Disabled, Enabled Control the PCI Express root port. PCIe Speed Auto, Gen1, Gen2, Gen3 Configure the PCIe speed.
- Page 52 PCI Express Root Port 4 Figure 56. PCI Express Root Port 4 Table 35. PCI Express Root Port 4 Parameter Settings Description PCI Express Root Port 4 Disabled, Enabled Control the PCI Express root port. PCIe Speed Auto, Gen1, Gen2, Gen3 Configure the PCIe speed.
- Page 53 PCI Express Root Port 5 Figure 57. PCI Express Root Port 5 Table 36. PCI Express Root Port 5 Parameter Settings Description PCI Express Root Port 5 Disabled, Enabled Control the PCI Express root port. PCIe Speed Auto, Gen1, Gen2, Gen3 Configure the PCIe speed.
- Page 54 PCI Express Root Port 7 Figure 58. PCI Express Root Port 7 Table 37. PCI Express Root Port 7 Parameter Settings Description PCI Express Root Port 7 Disabled, Enabled Control the PCI Express root port. PCIe Speed Auto, Gen1, Gen2, Gen3 Configure the PCIe speed.
-
Page 55: Sata Configuration
SATA Configuration Figure 59. SATA Configuration Table 38. SATA Configuration Parameter Settings Description SATA Controller(s) Enabled, Disabled Enable or disable SATA device. SATA ATA Port 0 TS64GMTS565TI- (64.0GB) Software Preserve SUPPORTED Port 0 Disabled, Enabled Enable or disable SATA port. BIOS Setup... -
Page 56: Usb Configuration
USB Configuration Figure 60. USB Configuration Table 39. USB Configuration Parameter Settings Description USB3 Link Speed Selection GEN1, GEN2 This option is to select USB3 link speed GEN1 or GEN2. USB Port Disable Override Disabled, Select Per-Pin Selectively enable/disable the corresponding USB port from reporting a device connection to the controller. -
Page 57: Security Configuration
Table 39. USB Configuration (continued) Parameter Settings Description USB HS Physical Connector #2 Disabled, Enabled Enable/disable this USB physical connector (physical port). Once disabled, any USB devices plug into the connector will not be detected by BIOS or OS. USB HS Physical Connector #3 Disabled, Enabled Enable/disable this USB physical connector (physical port). -
Page 58: Pse Configuration
PSE Configuration Figure 62. PSE Configuration Table 41. PSE Configuration Parameter Settings Description PSE Controller Disabled, Enabled Enables/disables Programmable Service Engine (PSE) device. Disabled, Enabled Enable/disable PSE OOB service. Disabled, Enabled Enable/disable PSE GBE WoL. I2C0 None, PSE owned with pin mixed, Host If I2C0 is not set to host-owned, I2C 1–6 could also not be set owned with pin mixed to host-owned, as they share the same function. -
Page 59: Tsn Gbe Configuration
TSN GBE Configuration Figure 63. TSN GBE Configuration Table 42. TSN GBE Configuration Parameter Settings Description PSE TSN GBE 0 Multi-Vc Enabled, Disabled Enable will lock bytes 38h–3Fh in the lower/upper 128-byte bank of RTC RAM. PSE TSN GBE 0 SGMII Enabled, Disabled Enable/disable the PCH BIOS lock enable feature. -
Page 60: Security
Security Figure 64. Security BIOS Setup... -
Page 61: Secure Boot Menu
Secure Boot Menu Figure 65. Secure Boot Menu Table 43. Secure Boot Menu Parameter Settings Description Secure Boot Control Disabled, Enabled The Secure Boot feature is active if Secure Boot is enabled,Platform Key (PK) is enrolled, and the system is in user mode. - Page 62 Key Management Figure 66. Key Management Table 44. Key Management Parameter Settings Description Factory Key Provision Disabled, Enabled Install factory default Secure Boot keys after the platform is reset and while the system is in Setup mode. BIOS Setup...
-
Page 63: Media Sanitization
Media Sanitization Figure 67. Media Sanitization Table 45. Media Sanitization Parameter Settings Description Method Type Clear, Purge Clear write zero into HDD or SSD and purge write random pattern inverted random pattern and zeros sequentially. BIOS Setup... -
Page 64: Boot
Boot Figure 68. BIOS screen - Boot tab Table 46. Boot Configuration Parameter Settings Description Setup Prompt Timeout Number of seconds to wait for setup activation key. 65535 (0xFFFF) means indefinite waiting. Bootup NumLock State On, Off Select the keyboard NumLock state. Quiet Boot Disabled, Enabled Enables or disables the Quiet Boot option. -
Page 65: Save And Exit
Save and Exit Figure 69. Save and Exit BIOS Setup... -
Page 66: Event Logs
Event logs Figure 70. Event logs BIOS Setup... -
Page 67: Change Smbios Event Settings
Change Smbios Event Settings Figure 71. Change Smbios Event Settings Table 47. Change Smbios Event Log Settings Parameter Settings Description Enabling/Disabling Options Smbios Event Log Disabled, Enabled Change this to enable or disable all features of Smbios Event Logging during boot. Erasing Settings Erase Event Log No, Yes, Next reset, Yes,... -
Page 68: View Smbios Event Log
Table 47. Change Smbios Event Log Settings (continued) Parameter Settings Description Convert EFI Status Disabled, Enabled Enable or disable the converting of EFI Status Codes to standard Codes to Standard Smbios types (not all may be translated). Smbios Type NOTE: All values changed here do not take effect until the computer is restarted. -
Page 69: Appendix C: Wireless Specifications
Wireless Specifications Topics: • Wireless frequencies • Conducted Rx sensitivity and Tx power • 5G features • Antenna interface specification Wireless frequencies Table 48. LTE frequency bands Band Frequency (Tx) Frequency (Rx) 1920–1980 MHz 2110–2170 MHz 1850–1910 MHz 1930–1990 MHz 1710–1785 1805–1880 MHz 1710–1755... - Page 70 Table 49. LTE bandwidth support Band 1.4 MHz 3 MHz 5 MHz 10 MHz 15 MHz 20 MHz ✘ ✘ ✔ ✔ ✔ ✔ ✔ ✔ ✔ ✔ ✔ ✔ ✔ ✔ ✔ ✔ ✔ ✔ ✔ ✔ ✔ ✔ ✔...
-
Page 71: Conducted Rx Sensitivity And Tx Power
Conducted Rx sensitivity and Tx power NOTE: Values in the following tables are preliminary, pending transceiver matching/testing. Table 51. Conducted Rx (receive) sensitivity - LTE bands LTE bands Conducted Rx sensitivity (dBm) Primary (Typ) Secondary (Typ) SIMO (Typ) SIMO (Worst case) Full RB on –97.5... -
Page 72: 5G Features
Table 52. Conducted Rx (receive) sensitivity - UMTS bands (continued) UMTS bands Conducted Rx sensitivity (dBm) Primary (Typ) Secondary (Typ) Primary/secondary (Worst case) –111.2 –110.4 –104.7 –110.1 –110.6 –106.7 –111.4 –113.5 –104.7 –111.2 –113.5 –106.7 –111.4 –113.4 –103.7 –110.1 –111.3 –105.7 –111.1 –113.4... -
Page 73: Antenna Interface Specification
Table 54. 5G features (continued) Feature Implementation Category 3GPP Rel 15 Output power FR1 (Sub 6G): n41, n77, n78, n79: 26 dBm +2/–3 dB all other bands: 23 dBm ±2 dB Bands FDD: B1, B2, B3, B4, B5, B7, B8, B12, B13, B14, B17, B18, B19, B20, B25, B26, B28, B29, B30, B32, B66, B71 TDD: B34, B38, B39, B41, B42, B48 LAA: B46 (DL only) Band combinations For supported carrier aggregations (CA) - Page 74 Table 55. RF antenna interface LTE/5G NR (continued) Conditions PRX MIMO DRX MIMO Unit LTE 800 Band 26 23.8 –99.5 –101 LTE 800 Band 28 23.0 –99.5 –99.5 LTE 700 Band 29 –99.5 –101 LTE 2300 Band 30 22.2 –96.5 –97 –97.5 –96.5...
-
Page 75: Appendix D: Important Safety Instructions
Important Safety Instructions For user safety, please read and follow all instructions, Warnings, Cautions, and Notes marked in this document, in the Safety, Environmental, Regulatory, and Legal Information document that shipped with the device, and on the associated device before handling/operating the device, to avoid injury or damage. -
Page 76: Appendix E: Compliance
La información que se proporciona a continuación se mostrará en los dispoitivos que se describen en este documento, en conformidad con los requisitos de la Norma Oficial Mexicana (NOM): Importador: Dell Mexico S.A. de C.V. AV Paseo de la Reforma No 2620 Piso 11 Col. Lomas Altas... -
Page 77: Agency Compliance
Agency compliance The Dell EMC Edge Gateway 3200 complies with the following safety and agency requirements: USA Federal Communications Commission statement CAUTION: The use of external signal amplifiers in-line with the transceiver antennas is strictly prohibited. CAUTION: Use only the antenna(s) which have been approved by the applicant. Non-approved antenna(s) may produce unwanted spurious or excessive RF transmitting power which may lead to a violation of FCC/IC limits and is prohibited. - Page 78 This is a Class A product. In a domestic environment, this product may cause radio interference in which case the user may be required to take adequate measures. Brasil - Aviso da Anatel Este equipamento opera em caráter secundário, isto é, não tem direito a proteção contra interferência prejudicial, mesmo de estações do mesmo tipo, e não pode causar interferência a sistemas operando em caráter primário.
- Page 79 EEE on the environment and human health due to the potential presence of hazardous substances in EEE. Dell products, which fall within the scope of the WEEE, are labeled with the crossed-out wheelie-bin symbol, as shown above, as required by WEEE.
Need help?
Do you have a question about the EMC Edge 3200 and is the answer not in the manual?
Questions and answers