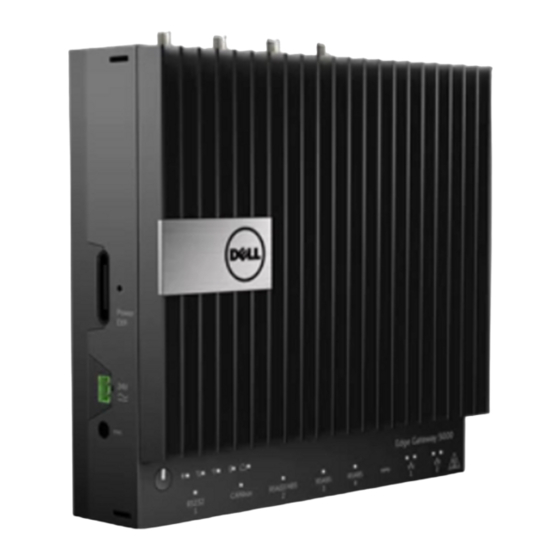
Dell Edge Gateway 5000 Series Service Manual
Hide thumbs
Also See for Edge Gateway 5000 Series:
- Installation and operation manual (64 pages) ,
- Quick start manual (2 pages)

Related Manuals for Dell Edge Gateway 5000 Series


Summary of Contents for Dell Edge Gateway 5000 Series
- Page 1 Dell Edge Gateway 5000 Series Service Manual Computer Model: Dell Edge Gateway 5000 Regulatory Model: N01G Regulatory Type: N01G001...
- Page 2 WARNING: A WARNING indicates a potential for property damage, personal injury, or death. Copyright © 2016 Dell Inc. All rights reserved. This product is protected by U.S. and international copyright and intellectual property laws. Dell and the Dell logo are trademarks ™...
-
Page 3: Table Of Contents
Contents Before working inside your computer........6 ....................6 Before you begin ....................6 Safety instructions ..................7 Recommended tools After working inside your computer........9 Technical overview..............10 ................10 System-board components Removing the top cover............12 ......................12 Procedure Replacing the top cover............14 ......................14 Procedure Removing the solid-state drive.......... - Page 4 Removing the wireless card............ 22 .....................22 Prerequisites ......................22 Procedure Replacing the mobile broadband card........24 ......................24 Procedure ....................24 Post-requisites Removing the coin-cell battery..........25 .....................25 Prerequisites ......................26 Procedure Replacing the coin-cell battery..........27 ......................27 Procedure ....................27 Post-requisites Removing the base frame............28 ....................
- Page 5 Removing the status-light board..........37 .....................37 Prerequisites ......................37 Procedure Replacing the status-light board..........39 ......................39 Procedure ....................39 Post-requisites Removing the system board........... 40 ....................40 Prerequisites ......................40 Procedure Replacing the system board............45 ......................45 Procedure ....................45 Post-requisites ........46 Entering the Service Tag in the BIOS setup program BIOS setup program..............47 ......................
-
Page 6: Before Working Inside Your Computer
Before working inside your computer NOTE: The images in this document may differ from your computer depending on the configuration you ordered. Before you begin Save and close all open files and exit all open applications. Shut down your computer. –... -
Page 7: Recommended Tools
CAUTION: You should only perform troubleshooting and repairs as authorized or directed by the Dell technical assistance team. Damage due to servicing that is not authorized by Dell is not covered by your warranty. See the safety instructions that shipped with the product or at www.dell.com/regulatory_compliance. - Page 8 • Flat-head screwdriver • Plastic scribe • Hex screwdriver...
-
Page 9: After Working Inside Your Computer
After working inside your computer CAUTION: Leaving stray or loose screws inside your computer may severely damage your computer. Replace all screws and ensure that no stray screws remain inside your computer. Connect any external devices, peripherals, and cables you removed before working on your computer. -
Page 10: Technical Overview
Before working inside your computer. After working inside your computer, follow the instructions in After working inside your computer. For more safety best practices, see the Regulatory Compliance home page at www.dell.com/regulatory_compliance. System-board components mobile broadband connector wireless card connector (MINI_CARD2) - Page 11 CMOS reset jumper (CMOS) password reset jumper (PASSWORD) solid-state drive slot (NGf_SSD) Dip Switch board connector (SWITCH_CON) status-light board (LED_CON) coin-cell battery socket (3V LITHIUM BATTERY)
-
Page 12: Removing The Top Cover
After working inside your computer. For more safety best practices, see the Regulatory Compliance home page at www.dell.com/regulatory_compliance. Procedure Place the system on a clean and flat surface. Loosen the captive screw that secures the top cover to the system base. - Page 13 Lift the top cover off the system base. top cover system base...
-
Page 14: Replacing The Top Cover
After working inside your computer. For more safety best practices, see the Regulatory Compliance home page at www.dell.com/regulatory_compliance. Procedure Slide the tabs on the top cover into the slots on the system base and snap the top cover into place. -
Page 15: Removing The Solid-State Drive
After working inside your computer. For more safety best practices, see the Regulatory Compliance home page at www.dell.com/regulatory_compliance. CAUTION: Solid-state drives are fragile. Exercise care when handling the hard drive. CAUTION: To avoid data loss, do not remove the solid-state drive while the computer is in sleep or on state. - Page 16 Lift the solid-state drive heat shield of the system board. screws (4) solid-state drive heat shield system board Using a plastic scribe, remove the screw that secures the solid-state drive to the computer base.
- Page 17 Slide and remove the solid-state drive from the solid-state drive slot. plastic scribe screw solid-state drive slot...
-
Page 18: Replacing The Solid-State Drive
After working inside your computer, follow the instructions in After working inside your computer. For more safety best practices, see the Regulatory Compliance home page at www.dell.com/regulatory_compliance. CAUTION: Solid-state drives are fragile. Exercise care when handling the hard drive. Procedure Slide the solid-state drive into the solid-state drive slot. -
Page 19: Removing The Wireless Card
Before working inside your computer. After working inside your computer, follow the instructions in After working inside your computer. For more safety best practices, see the Regulatory Compliance home page at www.dell.com/regulatory_compliance. Prerequisites Remove the cover. Procedure Remove the screws that secures the wireless-card and bracket to the system board. - Page 20 Slide and remove the wireless card out of the wireless-card slot. wireless-card bracket screws (2) antenna cables (2) wireless card...
-
Page 21: Replacing The Wireless Card
After working inside your computer, follow the instructions in After working inside your computer. For more safety best practices, see the Regulatory Compliance home page at www.dell.com/regulatory_compliance. Procedure CAUTION: To avoid damage to the wireless card, do not place any cables under it. -
Page 22: Removing The Wireless Card
Before working inside your computer. After working inside your computer, follow the instructions in After working inside your computer. For more safety best practices, see the Regulatory Compliance home page at www.dell.com/regulatory_compliance. Prerequisites Remove the cover. Procedure Remove the screws that secures the mobile broadband card and bracket to the system board. - Page 23 Slide and remove the mobile broadband card out of the mobile broadband card slot. mobile broadband card screws (2) bracket antenna cables (2) mobile broadband card...
-
Page 24: Replacing The Mobile Broadband Card
After working inside your computer, follow the instructions in After working inside your computer. For more safety best practices, see the Regulatory Compliance home page at www.dell.com/regulatory_compliance. Procedure CAUTION: To avoid damage to the wireless card, do not place any cables under it. -
Page 25: Removing The Coin-Cell Battery
After working inside your computer. For more safety best practices, see the Regulatory Compliance home page at www.dell.com/regulatory_compliance. CAUTION: Removing the coin-cell battery resets the BIOS setup program’s settings to default. It is recommended that you note the BIOS setup program’s settings before removing the coin-cell battery. -
Page 26: Procedure
Procedure Press the battery-release lever away from the coin-cell battery until the coin-cell battery pops up. battery-release lever coin-cell battery Lift the coin-cell battery out of its socket. -
Page 27: Replacing The Coin-Cell Battery
After working inside your computer. For more safety best practices, see the Regulatory Compliance home page at www.dell.com/regulatory_compliance. Procedure With the positive-side facing up, snap the coin-cell battery into the battery socket on the computer base. -
Page 28: Removing The Base Frame
Before working inside your computer. After working inside your computer, follow the instructions in After working inside your computer. For more safety best practices, see the Regulatory Compliance home page at www.dell.com/regulatory_compliance. Prerequisites Remove the cover. Remove the wireless card. - Page 29 Remove the screws that secures the bottom cover to the base frame. screws (4) base frame Turn the system the over.
- Page 30 Remove the screw from the system grounding port. base frame system grounding port screw Remove the wireless card cables and mobile broadband card cables from the routing guides.
- Page 31 Disconnect the Dip Switch board cable and status-light board cable from the system board. mobile broadband card routing guide (2) cables (2) Dip Switch board cable status-light board cable...
- Page 32 Remove the base frame off the bottom cover. base frame...
-
Page 33: Replacing The Base Frame
After working inside your computer. For more safety best practices, see the Regulatory Compliance home page at www.dell.com/regulatory_compliance. Procedure Place the base frame on the bottom cover. Connect the Dip Switch board cable and status-light board cable from... -
Page 34: Removing The Dip Switch Board
Before working inside your computer. After working inside your computer, follow the instructions in After working inside your computer. For more safety best practices, see the Regulatory Compliance home page at www.dell.com/regulatory_compliance. Prerequisites Remove the cover. Remove the solid-state drive. - Page 35 Lift the DIP switch board assembly of the status-light board. base frame status-light board DIP switch board assembly screws (2) Remove the screws that secure that DIP switch board to the metal frame. Remove the DIP switch board of the metal frame. metal frame screws (2) DIP switch board...
-
Page 36: Replacing The Dip Switch Board
After working inside your computer. For more safety best practices, see the Regulatory Compliance home page at www.dell.com/regulatory_compliance. Procedure Place the DIP switch board on the metal frame. Replace the screws that secure the DIP switch board to the metal frame. -
Page 37: Removing The Status-Light Board
Before working inside your computer. After working inside your computer, follow the instructions in After working inside your computer. For more safety best practices, see the Regulatory Compliance home page at www.dell.com/regulatory_compliance. Prerequisites Remove the cover. Remove the solid-state drive. - Page 38 Lift the status-light board of the base frame. screws (3) status-light board base frame...
-
Page 39: Replacing The Status-Light Board
After working inside your computer. For more safety best practices, see the Regulatory Compliance home page at www.dell.com/regulatory_compliance. Procedure Place the status-light board. on the base frame Replace the screws that secure the status-light board to the base frame. -
Page 40: Removing The System Board
After working inside your computer. For more safety best practices, see the Regulatory Compliance home page at www.dell.com/regulatory_compliance. NOTE: Your computer’s Service Tag is stored in the system board. You must enter the Service Tag in the BIOS setup program after you replace the system board. - Page 41 Remove the heat shield of the system board. base frame system board heat shield screws (4) Remove the screws that secure the I/O port covers to the base frame.
- Page 42 Remove the I/O port covers of the system board. I/O port covers (2) screws (3) system board...
- Page 43 Using a paper-clip or sim-card ejection tool, remove the sim-card tray from the system board. sim-card tray paper clip Remove the screws that secure the system board to the base frame.
- Page 44 Lift the system board and remove it off the base frame. screws (6) system board...
-
Page 45: Replacing The System Board
After working inside your computer. For more safety best practices, see the Regulatory Compliance home page at www.dell.com/regulatory_compliance. NOTE: Your computer’s Service Tag is stored in the system board. You must enter the Service Tag in the BIOS setup program after you replace the system board. -
Page 46: Entering The Service Tag In The Bios Setup Program
Entering the Service Tag in the BIOS setup program Turn on the computer. Press F2 when the DELL logo is displayed to enter the BIOS setup program. Navigate to the Main tab and enter the Service Tag in the Service Tag... -
Page 47: Bios Setup Program
Entering BIOS setup program Turn on (or restart) your computer. During POST, when the DELL logo is displayed, watch for the F2 prompt to appear and then press F2 immediately. NOTE: The F2 prompt indicates that the keyboard has initialized. -
Page 48: Clearing Cmos Settings
"Before You Begin." For additional safety best practices information, see the Regulatory Compliance Homepage at dell.com/ regulatory_compliance. NOTE: The computer must be disconnected from the electrical outlet to clear the CMOS setting. - Page 49 Locate the password reset jumper (PASSWORD) on the system board. See "System-board components”. Remove the jumper plug. Wait for approximately five seconds to clear the password setting. Replace the jumper plug. Replace the cover.
Need help?
Do you have a question about the Edge Gateway 5000 Series and is the answer not in the manual?
Questions and answers