Sony VPL-CS1 Service Manual
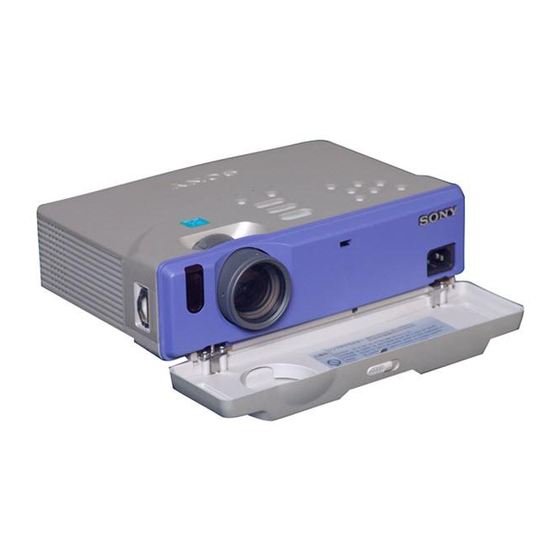
Lcd video projector
Hide thumbs
Also See for VPL-CS1:
- Operating instructions manual (120 pages) ,
- Brochure & specs (4 pages)

Related Manuals for Sony VPL-CS1


Summary of Contents for Sony VPL-CS1
- Page 1 SERVICE MANUAL MODEL MODEL DEST. DEST........... VPL-CS1 RM-PJM1 WORLD WORLD LCD VIDEO PROJECTOR...
- Page 2 LES SCHÉMAS DE PRINCIPE, LES VUES EXPLOSÉES ET LES CRITICAL TO SAFE OPERATION. REPLACE THESE COMPO- LISTES DE PIECES SONT D’UNE IMPORTANCE CRITIQUE NENTS WITH SONY PARTS WHOSE PART NUMBERS APPEAR POUR LA SÉCURITÉ DU FONCTIONNEMENT. NE LES AS SHOWN IN THIS MANUAL OR IN SUPPLEMENTS PUB- REMPLACER QUE PAR DES COMPOSANTS SONY DONT LE LISHED BY SONY.
-
Page 3: Table Of Contents
Signal Level Adjustment ............3-6 3-5-2. White Balance Adjustment ............3-6 3-5-2-1. HIGH Mode of INPUT-A ..........3-6 3-5-2-2. LOW Mode of INPUT-A ..........3-6 3-5-2-3. HIGH Mode of VIDEO ..........3-6 3-5-2-4. LOW Mode of VIDEO..........3-6 3-6. Memory ....................... 3-7 VPL-CS1... - Page 4 B (1/4) ..................... 8-10 B (2/4) ..................... 8-11 B (3/4) ..................... 8-12 B (4/4) ..................... 8-13 C (1/5) ....................8-15 C (2/5) ....................8-16 C (3/5) ....................8-17 C (4/5) ....................8-18 C (5/5) ....................8-19 H ......................8-21 GA ......................8-23 VPL-CS1...
- Page 5 GBA ......................8-24 GBB ......................8-24 Printed Wiring Boards NF, QA ...................... 8-4 BA ......................8-7 B ........................ 8-9 C ......................8-14 H ......................8-21 GA ......................8-22 GBA ......................8-24 GBB ......................8-24 VPL-CS1...
-
Page 7: Operating Instructions
4-074-278-11 (1) LCD Data Projector Operating Instructions Mode d'emploi Manual de instrucciones VPL-CS1 © 1999 Sony Corporation... - Page 8 Declaration of Conformity Trade Name: SONY Model No.: VPL-CS1 Responsible Party: Sony Electronics Inc. Address: 1 Sony Drive, Park Ridge, NJ.07656 USA Telephone No.: 201-930-6970 This device complies with Part 15 of the FCC Rules. Operation is subject to the...
- Page 9 Table of Contents Troubleshooting ....... 31 Overview Warning Messages ..... 33 Precautions .........6 Caution Messages ...... 33 Features ..........7 Location and Function of Controls ... 8 Other Front/Left Side/Bottom ....8 Rear/Right Side ......8 Notes on Installation ......34 Control Panel ......10 Unsuitable Installation ....
- Page 10 Overview control the projector by using the supplied On preventing internal heat build- Features Precautions application software from a computer. Using this application software, you can After you turn off the power with the I / 1 open a file you want to use for your key, do not disconnect the unit from the wall presentation with the supplied Remote High portability...
- Page 11 1 Lock button q q q q f f f f Security lock Location and Connects to an optional security cable 2 Front cover (Kensington’s). Function of Controls Slide the lock button to open the front The security lock corresponds to cover.
- Page 12 5 Indicators 6 ENTER key Note Control Panel • LAMP/COVER: Lights up or flashes Enters the settings of items in the menu If you connect video equipment to both the under the following conditions: system. S VIDEO and VIDEO jacks, the signal –...
- Page 13 Notes on batteries For details, see the README file and Remote Commander the HELP file supplied with the • Make sure that the battery orientation is application software. correct when inserting batteries. The keys that have the same names as those •...
- Page 14 Installing the Projector Connecting the Projector When making connections, be sure to do the following: This section describes how to install the projector. The distance between the lens and the screen varies depending on the size of • Turn off all equipment before making any connections. the screen.
- Page 15 To connect an IBM PC/AT compatible computer When you use a PS/2 mouse port When you use a USB mouse and USB equipment Rear side AUDIO MOUSE VIDEO S VIDEO INPUT A Rear side AUDIO MOUSE VIDEO S VIDEO INPUT A Computer HD D-sub 15-pin cable...
- Page 16 To connect a 15k RGB/Component equipment Selecting the Menu Language Rear side AUDIO MOUSE VIDEO S VIDEO INPUT A You can select one of seven languages for displaying the menu and other on- screen displays. The factory setting is English. Stereo audio connecting SMF-402 Signal Cable (not supplied)
- Page 17 Press the M or m key to select the SET SETTING menu, then press the , Projecting or ENTER key. The selected menu appears. INPUT-A SET SETTING STATUS: INPUT-A: KEYSTONE MEMORY: OFF DIGITAL KEYSTONE: OFF LANGUAGE: ENGLISH POWER SAVING: SIRCS RECEIVER: FRONT&REAR LAMP TIMER: 00010h Rear remote...
- Page 18 To turn off the power Turn the zoom ring to adjust the size of the picture. Turn the focus ring to adjust the focus. Press the I / key. “POWER OFF? Please press I / 1 key again.” appears to confirm that you Caution want to turn off the power.
- Page 19 • When changing the adjustment level: COLOR The PICTURE CTRL Using the MENU To increase the number, press the Adjusts color intensity. The higher the key. Menu setting, the greater the intensity. The lower To decrease the number, press the m the setting, the lower the intensity.
- Page 20 Macintosh 21" 1456 the color of the picture becomes strange or the MENU Items picture is not displayed. Note Sony News 1708 When SVGA, XGA or SXGA signal is input, PC-9821 1600 KEYSTONE MEMORY this item will not be displayed.
- Page 21 DIGITAL KEYSTONE Note Maintenance For safety sake, do not loosen any other Adjusts trapezoidal distortion of the picture screws. that may occur depending on the projection angle. Replacing the Lamp Loosen the screw on the lamp unit with the Phillips screwdriver. Pull out When the upside of the trapezoid is longer When it is time to replace the lamp, replace than the downside...
- Page 22 Connect the power cord and turn the projector to standby mode. If the projector appears to be operating erratically, try to diagnose and correct the problem using the following instructions. If the problem persists, consult with qualified Sony personnel. Press the following keys on the Power...
- Page 23 The FAN/TEMP indicator • The fan is broken. c Adjust the contrast or brightness in the PICTURE CTRL menu flashes. c Consult with qualified Sony personnel. properly (see page 25). The FAN/TEMP indicator • The internal temperature is unusually high.
- Page 24 Blocking the ventilation holes Very dusty Notes on Installation Specifications Avoid installing the unit in a location where there is a lot of dust; otherwise, the air filter will be obstructed. The dust blocking the air Optical characteristics Unsuitable Installation through the filter may cause raising the Projection system internal heat of the projector.
- Page 25 1) VPS-50C may not be available in some areas. terminated) Mass Approx. 2.9 kg (6 lb 6 oz) For details, please consult your nearest Sony S VIDEO: Y/C mini DIN 4-pin (without strap) office. type (male) Power requirements Y (luminance): 1 Vp-p ±2 dB...
- Page 26 Input signals and adjustable/ Preset signals setting items Memory Preset signal fH (kHz) fV (Hz) Sync SIZE PICTURE CTRL menu Video 60 Hz 15.734 59.940 Item Input signal Video 50 Hz 15.625 50.000 Video Com- RGB B&W 15k RGB/Component 60 Hz 15.734 59.940 S on G/Y or...
- Page 27 Memory Preset signal fH (kHz) fV (Hz) Sync SIZE Index KEYSTONE MEMORY 27 Remote Commander 1280 × 1024 battery installation ..12 SXGA VESA 43 Hz 46.433 43.436 H-pos, V-pos 1696 location and function of SGI-5 53.316 50.062 S on G 1680 controls ....
-
Page 28: Quick Reference Card
VIDEO S VIDEO INPUT A VPL-CS1 MONITOR OUT Sony Corporation © 1999 Printed in Japan MOUSE Connections / Connexions / Conexiones / Anschlüsse / Collegamenti AUDIO OUT Stereo audio connecting cable / Câble de connexion audio stéréo / Cable de conexión de audio estéreo / Stereo- Audioverbindungskabel / Cavo di collegamento audio stereo HD D-sub 15-pin cable / Câble HD D-sub à... - Page 29 Basic Operation / Opération de base / Operación básica / Grundfunktion / Operazione di base English Italiano Español RESET MENU POWER Open the front cover, plug the AC power cord Aprire il coperchio anteriore, inserire Abra la tapa frontal, enchufe el cable de into the wall outlet, then connect all l'alimentatore CA nella presa a muro, quindi INPUT...
-
Page 31: Service Informations
XC (A-1391-008-A) For: B, C Boards For : QA, B Boards For: C Board 50P (1-900-251-17) For: X3, X4 X4 (A-1391-024-A) X2 (A-1391-010-A) 32P (1-900-251-18) For: B, C Boards For: QA, B Boards For: B Board 24P (1-900-251-19) For: XC VPL-CS1... -
Page 32: Cover Removal
2-4. Front Panel Assy and NF Board Removal 4 Lamp power 6 Screw (+BVTP3 x 10) CN806 7 NF board CN071 1 Four screws (+PS2 x 8) Unhook the two snaps. 5 Front panel assy 2 Lock switch 3 Front cover VPL-CS1... -
Page 33: C Board Removal
2-6. Optics Unit Assy Removal 6 Two screws (+P4 x 8) • Remove the C Board (Refer to 2-5.). 7 Optics unit assy 4 Lamp 5 Screw (+P4 x 8) 3 Screw (M3) 2 Lamp door 1 Screw (M3) VPL-CS1... -
Page 34: Ga, Gba And Gbb Boards Removal
7 B board • Remove the optics unit assy (Refer to 2-6.). 4 Two screws CN402 2 Two screws (+PS3 x 5) CN401 1 BA board 5 Two screws (+PS2 x 8) CN201 6 Plate(QA) CN101 3 QA board CN102 VPL-CS1... -
Page 35: Lens Removal
LCD, and conductive section of the flexible cable in particular. 5 Screw (+B2.5) 2 Prism block 6 In-polarizer panel 3 Screw (+B2.5) (G)assy Hold with fingers. 4 In-polarizer panel (R)assy 7 Screw (+B2.5) 8 In-polarizer panel (B)assy 1 Two screw (+PSW3 x 8) VPL-CS1... -
Page 37: Electrical Adjustments
9. Tighten the adjusting plate fixing screws. 10. Secure the six adjusting plate fixing screws using a torque screwdriver. Tightening torque: 8 kgf/cm 11. Make sure that the deviation of the lighting range is within the specific range. VPL-CS1... -
Page 38: Adjustment Item Initialize Data
DOT PHASE, SIZE H, SHIFT H/V, SCAN CONV, ASPECT, and BLANKING in the “INPUT SETTING” menu have an initial value respectively in accordance with the input signal (PRESET MEMORY No.). : There are nonadjustable items in accordance with the input signal. Note VPL-CS1... - Page 39 DOT PHASE, SIZE H, SHIFT H/V, SCAN CONV, ASPECT, and BLANKING in the “INPUT SETTING” menu have an initial value respectively in accordance with the input signal (PRESET MEMORY No.). ** : It differs in accordance with the resolution of the input signal. Note : There are nonadjustable items in accordance with the input signal. VPL-CS1...
- Page 40 DOT PHASE, SIZE H, SHIFT H/V, SCAN CONV, ASPECT, and BLANKING in the “INPUT SETTING” menu have an initial value respectively in accordance with the input signal (PRESET MEMORY No.). ** : It differs in accordance with the resolution of the input signal. Note : There are nonadjustable items in accordance with the input signal. VPL-CS1...
-
Page 41: Service Kowhow
GAIN G GAIN B There are no need to perform the adjustment. BIAS R BIAS G BIAS B When down the data befor replacement, and then write in the data after the board replacement. Need adjustment Value: See description. VPL-CS1... -
Page 42: White Balance Adjustment On Servicing
± 0.002, y ± 0.003 (The x and y are the values 4. Adjust the chromaticity (x, y) to the values measured in step 2 by the V-AMP/SUB CONT R and B of the measured in step 3.) P. DRV. VPL-CS1... -
Page 43: Memory
When the power plug is connected to the power line (Standby status), all data inside the internal ROM are Memory structure of VPL-CS1 series is based on the 600 written into the NVM (Nonvolatile Memory). When the series, and it is composed of the following seven memory power is turned to on, required data for the current picture, blocks. - Page 45 2SA1213Y-TE12L 2SA1462 2SC2712-YG-TE85L DTA144EKA-T146 DTC144EKA-T146 BA12FP-E2 TOP222Y-BB IP00C711 TOP223Y-BB D10SC9M (TOP VIEW) 2SC2873Y-TE12L M52749FP-TP CXA1846BN 74VHC14MTCX FCQ20A06 TC74LCX04FT(EL) 2SD2114S-TP-V TC74LCX74FT TC74VHCT04AFT Letter Side TC74VHCT04MTCX TC74VHC125MTCX PQ05SZ1U CXA2112R-T6 2SK3013F-02 RD8.2ES-T1B2 74VHC221AMTCX CXA1875AM-T4 MAX4066CEE-TE2 RS-140-T CXA1839Q-T6 RD24M-T1B2 CXD2064Q-T6 RD8.2M-T1B1 74VHC240MTCX MB88346BPFV-EF VPL-CS1...
- Page 46 SEC1801C SEC2422C SEC2422C TF861S 1SS355TE-17 D2FS6-TA DTZ-TT11-5.1 RB501V-40TE-17 RD5.6SB-T1 RD9.1SB2-T1 UDZ-TE-17-3.9B VPL-CS1...
- Page 47 * 4-074-627-01 COVER, BACK * A-1375-195-A H COMPL * X-4037-461-1 PANEL ASSY, FRONT including 11 1-529-544-11 SPEAKER (3.6CM) 3-704-176-51 EMBLEM (NO.6), SONY * 4-074-273-01 COVER, SIDE * A-1390-984-A NF MOUNT 4-074-264-01 SHAFT * 4-074-442-01 CATCHER (FC) * 4-074-253-01 HOLDER (L), B...
- Page 48 * 4-074-914-01 COVER, SWITCH 4-066-202-01 SCREW, M3 * 4-074-664-01 LEVER, SWITCH * X-4037-460-1 DOOR ASSY, LAMP including 76 * 4-074-982-01 SPRING (VIDEO), EARTH 4-066-202-01 SCREW, M3 * 4-074-246-01 SLEEVE, VIDEO * 4-074-263-01 FILTER, REAR * 4-074-260-01 PLATE (QA) 1-763-474-11 VPL-CS1...
- Page 49 SPRING, TOSION * 4-074-247-01 * 4-074-729-01 PLATE (RF) * 4-074-257-01 CASE (B), L * 4-074-726-01 LEVER (RF) * 4-074-724-01 CASE (RF) * 4-074-267-01 FOOT, REAR * 4-075-060-01 SPRING, COMPRESSION 4-074-250-01 RUBBER, FOOT (R) * 4-074-725-01 SLIDER (RF) * 4-074-274-01 BASE VPL-CS1...
- Page 50 FASTENER (OPT), MIRROR * 4-074-415-01 MIRROR, B-CHANNEL (OPT) * 4-074-475-01 STOPPER, FLY EYE * 4-074-430-01 STOPPER, MAIN CONDENSER” * 4-074-429-11 STOPPER, RELAY LENS-2 * 4-074-428-01 STOPPER, P/S * 4-074-426-11 CUSHION (FLY EYE) * 4-074-412-01 MIRROR, R-CHANNEL-2(OPT) * 4-075-039-01 SPACER (C) (OPT) VPL-CS1...
- Page 51 HOLDER, P/S * 4-074-426-11 CUSHION (FLY EYE) A-1484-705-A PRISM ASSY, 4P A-1501-632-A LENS, PROJECTION * 4-074-448-01 FLY EYE LENS-2 4-066-309-01 SCREW, MACHINE, (+) P M4X8 * 4-074-457-01 SPRING, FLY EYE * 4-074-701-01 BRACKET, WINDOW 4-066-309-01 SCREW, MACHINE, (+) P M4X8 VPL-CS1...
- Page 53 1-163-021-91 CERAMIC CHIP 0.01µF <FERRITEBEAD> C284 1-163-021-91 CERAMIC CHIP 0.01µF C285 1-163-021-91 CERAMIC CHIP 0.01µF FB201 1-414-235-22 INDUCTOR CHIP 0µH C286 1-163-021-91 CERAMIC CHIP 0.01µF FB202 1-500-245-11 INDUCTOR CHIP 0µH FB271 1-414-235-22 INDUCTOR CHIP 0µH C287 1-163-021-91 CERAMIC CHIP 0.01µF VPL-CS1...
- Page 54 R314 1-216-049-91 RES,CHIP 1/10W R222 1-216-081-00 RES,CHIP 1/10W R315 1-216-049-91 RES,CHIP 1/10W R223 1-216-065-91 RES,CHIP 4.7K 1/10W R316 1-216-061-00 RES,CHIP 3.3K 1/10W R225 1-216-043-91 RES,CHIP 1/10W R317 1-216-069-00 RES,CHIP 6.8K 1/10W R227 1-216-049-91 RES,CHIP 1/10W R318 1-216-017-91 RES,CHIP 1/10W VPL-CS1...
- Page 55 1-107-826-91 CERAMIC CHIP 0.1µF C521 1-107-826-91 CERAMIC CHIP 0.1µF C451 1-107-826-91 CERAMIC CHIP 0.1µF C522 1-107-826-91 CERAMIC CHIP 0.1µF C452 1-110-563-11 CERAMIC CHIP 0.068µF 10% C523 1-107-826-91 CERAMIC CHIP 0.1µF C453 1-162-970-11 CERAMIC CHIP 0.01µF C524 1-107-826-91 CERAMIC CHIP 0.1µF VPL-CS1...
- Page 56 * 1-793-797-21 CONNECTOR, BOARD TO BOARD CN404 1-569-577-41 CONNECTOR, D-SUB 15P CN405 1-774-932-21 CONNECTOR, FF C/FPC (ZIF) 32P <COIL> CN406 * 1-691-551-11 PIN, CONNECTOR (SMD) 8P L401 1-412-057-21 INDUCTOR CHIP 6.8µH L402 1-500-451-11 FERRITE 0µH L403 1-414-752-11 INDUCTOR 2.2µH L404 1-414-752-11 INDUCTOR 2.2µH VPL-CS1...
- Page 57 1-216-805-11 RES,CHIP 1/16W R527 1-216-809-11 RES,CHIP 1/16W R456 1-216-801-11 RES,CHIP 1/16W R528 1-216-809-11 RES,CHIP 1/16W R458 1-216-801-11 RES,CHIP 1/16W R529 1-216-833-91 RES,CHIP 1/16W R459 1-216-833-91 RES,CHIP 1/16W R530 1-216-833-91 RES,CHIP 1/16W R460 1-216-833-91 RES,CHIP 1/16W R531 1-216-809-11 RES,CHIP 1/16W VPL-CS1...
- Page 58 RB410 1-233-576-11 RES, CHIP NET WORK 10 0 C121 1-164-004-11 CERAMIC CHIP 0.1µF RB411 1-233-576-11 RES, CHIP NET WORK 10 0 C122 1-117-681-11 ELECT CHIP 100µF RB412 1-233-576-11 RES, CHIP NET WORK 10 0 C123 1-119-667-11 CERAMIC CHIP 22µF VPL-CS1...
- Page 59 8-719-158-37 DIODE RD9.1SB2 D106 8-719-158-37 DIODE RD9.1SB2 J101 1-794-014-11 PIN, JACK D107 8-719-055-30 DIODE D1FS4A-TA J102 1-566-822-21 JACK D108 8-719-055-30 DIODE D1FS4A-TA J121 1-793-994-21 CONNECTOR, USB D109 8-719-988-61 DIODE 1SS355TE-17 J122 1-779-677-11 CONNECTOR, USB (B) D121 8-719-058-24 DIODE RB501V-40TE-17 VPL-CS1...
- Page 60 1-767-340-11 VIBRATOR, CRYSTAL (4MHz) R138 1-216-089-91 RES,CHIP 1/10W R139 1-216-025-91 RES,CHIP 1/10W X103 1-781-163-11 VIBRATOR, OSCILLATOR (24MHz) R140 1-216-025-91 RES,CHIP 1/10W R141 1-216-089-91 RES,CHIP 1/10W R142 1-216-114-00 RES,CHIP 510K 1/10W ************************************************************* R143 1-216-073-00 RES,CHIP 1/10W R144 1-216-025-91 RES,CHIP 1/10W VPL-CS1...
- Page 61 1-215-903-11 METAL OXIDE D607 8-719-059-23 DIODE P6KE200AG23 D608 8-719-961-04 DIODE RGP10J R611 1-220-270-11 RES,CHIP 1/2W D609 8-719-510-41 DIODE D10SC9M R613 1-249-389-11 CARBON 1/4W F D610 8-719-300-33 DIODE RU-3AM R615 1-216-671-11 METAL CHIP 6.8K 0.50% 1/10W R617 1-220-337-11 RES,CHIP 270K 1/2W VPL-CS1...
- Page 62 0.50% 1/10W 1-533-223-11 HOLDER, FUSE (F601) R720 1-216-675-91 METAL CHIP 0.50% 1/10W * 4-074-436-01 INSULATION PLATE (B) * 4-074-437-01 INSULATION PLATE (A) R721 1-216-675-91 METAL CHIP 0.50% 1/10W * 4-374-846-01 COVER, CAPACITOR,CAP TYPE 4-382-854-01 SCREW (M3X8), P, SW (+) 6-10 VPL-CS1...
- Page 63 C870 1-128-400-11 ELECT CHIP 47µF ************************************************************* C871 1-164-004-11 CERAMIC CHIP 0.1µF C873 1-164-004-11 CERAMIC CHIP 0.1µF C874 1-164-004-11 CERAMIC CHIP 0.1µF C877 1-164-004-11 CERAMIC CHIP 0.1µF C878 1-164-004-11 CERAMIC CHIP 0.1µF C879 1-163-227-11 CERAMIC CHIP 10PF 0.5PF 50V VPL-CS1 6-11...
- Page 64 1-163-021-91 CERAMIC CHIP 0.01µF FB819 1-414-234-22 INDUCTOR CHIP 0µH C955 1-124-779-00 ELECT CHIP 10µF FB820 1-414-234-22 INDUCTOR CHIP 0µH C958 1-117-370-11 CERAMIC CHIP 10µF FB821 1-414-234-22 INDUCTOR CHIP 0µH C959 1-117-370-11 CERAMIC CHIP 10µF FB822 1-414-234-22 INDUCTOR CHIP 0µH 6-12 VPL-CS1...
- Page 65 1-216-049-91 RES,CHIP 1/10W Q811 8-729-230-49 TRANSISTOR 2SC2712-YG R865 1-216-295-91 SHORT Q812 1-801-806-11 TRANSISTOR DTC144EKA0 R866 1-216-025-91 RES,CHIP 1/10W Q813 1-801-806-11 TRANSISTOR DTC144EKA0 R867 1-216-017-91 RES,CHIP 1/10W Q814 8-729-112-65 TRANSISTOR 2SA1462-Y33 Q815 8-729-112-65 TRANSISTOR 2SA1462-Y33 R868 1-216-025-91 RES,CHIP 1/10W VPL-CS1 6-13...
- Page 66 1-216-057-00 RES,CHIP 2.2K 1/10W R1007 1-216-057-00 RES,CHIP 2.2K 1/10W R938 1-216-298-00 RES,CHIP 1/10W R1008 1-216-057-00 RES,CHIP 2.2K 1/10W R941 1-216-017-91 RES,CHIP 1/10W R1009 1-216-631-11 METAL CHIP 0.50% 1/10W R942 1-216-017-91 RES,CHIP 1/10W R1010 1-216-631-11 METAL CHIP 0.50% 1/10W 6-14 VPL-CS1...
- Page 67 R071 1-216-017-91 RES,CHIP 1/10W D006 8-719-914-43 DIODE DAN202K R072 1-216-025-91 RES,CHIP 1/10W D007 8-719-914-43 DIODE DAN202K D008 8-719-045-51 DIODE SEC2422C (POWER/STBY) D009 8-719-914-44 DIODE DAP202K D010 8-719-914-44 DIODE DAP202K ************************************************************* D011 8-719-914-44 DIODE DAP202K D012 8-719-914-44 DIODE DAP202K VPL-CS1 6-15...
- Page 68 ! 1-782-929-11 CORD, POWER SUPPLY (BS 3P) (10A/250V) 1-418-804-11 REMOTE COMMANDER (RM-PJM1) 1-790-081-21 CABLE, USB 4-074-278-11 OPERATING, INSTRUCTIONS (ENGLISH/FRENCH/SPANISH) 4-074-278-21 OPERATING, INSTRUCTIONS (GERMAN/ITALIAN) 4-074-279-01 QUICK REFERENCE CARD (ENGLISH/ FRENCH/SPANISH/GERMAN/ITALIAN/ CHINESE) * 4-074-444-01 BAG, CARRY 4-074-717-01 FILTER 9-885-000-19 BATTERY COVER (FOR RM-PJM1) 6-16 VPL-CS1...
- Page 69 IC071 IC123 SIRCS-NF SIRES REMOTE RECEIVER IC121 SIRCS RECEIVER USB5V IC127 USB HUB CTRL IC122 CN122 MOUSE DS2+,DS2- DAT/R1 CONT. J122 US+,US- IC128 USB POWER SUPP J121 DS1+,DS1- LAMPC IC125 DS3+,DS3- USB PJ CTRL IC124 FANC RESET OVERALL BLOCK VPL-CS1...
- Page 70 USBDP 32 DS3+ 8 RESET 2 OSCOUT CN105 X102 X103 4MHz 24MHz USB REQ OSCIN 3.3V-1 Q106,107 J121 A TYPE DS1- IC124 DS1+ RESET J102 TO B BOARD PAL-V CN402 AUDIO IN A-GND 15K-CS V-HD V-VD V-CLP NF, QA BLOCK VPL-CS1...
- Page 71 10 SW3 DAC 4 S-IN NTPL1 VEH 3 DAC 0 7 20 VEH 3 VEH 2 DAC 1 21 VEH 2 VEH 1 DAC 2 22 VEH 1 14 SDA F-DA 26 NTPL1 F-CL IC202 F+5V SCL 6 BA BLOCK VPL-CS1...
- Page 72 LAMP SENS IC420 IC418 Q403,404 AN4/P44 3.3V-1 RESET F-CL FAN PROT AN5/P45 CPU RES F-DA FAN CONT1 DA0/AN6/P46 FAN CONT2 DA1/AN7/P47 F+5V SCLK IC419 SCK3 5V-1 RESET SDAT TXD3 2 VDD APA CS SC CS SC RST USB REQ VPL-CS1...
- Page 73 78 SDIN APA CS SCLK 80 SCSIN SCLK 12 4A 4Y 11 79 SCLK DAC CS AUDIO CS AUDIO MUTE LAMP SENS C BOARD FAN PROT CN801 FAN CONT1 FAN CONT2 LAMP ON POWER ON EXT SW B BLOCK VPL-CS1...
- Page 74 RA2 30 I/O16 6 RC6 RA3 32 I/O19 34 RA4 33 I/O11 9 13 6A G DA IC822(5/6) IOG 32 IC822(1/6) TP817 9 RA- I/O25 42 B DA 10 RA+ B DA IOB 28 RCLK- RCLK- RCLK+ RCLK+ IC807 VREF VPL-CS1...
- Page 75 MCLK SDAT D-SCLK R VCON B VCOM PSIG A08 7 DALD G VCON B VCON A010 POS-CON1 IC801 A011 POS-CON2 +15V REG A012 SCEN +16.5V +15.5V DLY-CON IC802 SCEN INV-CON +12V REG IC822(2/6) +12V PB DIR C, H BLOCK VPL-CS1...
- Page 76 D621 +6V RECT RECT CN707 GND2 GND2 IC604 PWM CONTROL GND2 GND2 +16.5V PH603 ISOLATER GND2 GND2 AUDIO+B GND2 GND2 GND2 IC671 SHUNT REG Q671 GND2 REF 8 GND2 TO QA BOARD GND2 CN102 GND2 GA, GBA, GBB BLOCK VPL-CS1...
- Page 77 PANEL PANEL FAN2 FAN1 CN7106 :S-MICRO CN676 CN674 CN001 CN675 :SMD :S-MICRO :S-MICRO :S-MICRO CN671 CN7107 CN7102 :S-MICRO TO QA BOARD CN102 BALAST CN604 CN606 LAMP CN601 CN672 :VH-B TO QA BOARD CN101 AC IN 100V-120V 220V-240V B-SS1697<08.>-KESSEN-P2 50/60Hz VPL-CS1...
- Page 78 FRAME (2/2) FRAME (2/2) TO C BOARD CN803 TO C BOARD CN801 FLASH CN406 :SMD CN405 CN403 CN401 CN402 CN105 CN103 CN104 CN123 CN101 CN102 :SMD TO GBB BOARD CN7107 TO GA BOARD CN674 CN201 CN071 :SMD B-SS1697<08.>-KESSEN-P1 VPL-CS1...
- Page 79 COIL LF-8L : MICRO INDUCTOR Ne les remplacer que par une pièce portant le numéro spécifié. CAPACITOR : TANTALUM : STYROL : POLYPROPYLENE : MYLAR : METALIZED POLYESTER : METALIZED POLYPROPYLENE : BIPOLAR : HIGH TEMPERATURE : HIGH RIPPLE VPL-CS1...
- Page 80 ∗ D-2 Q107 TP101 TP102 X101 X102 X103 *:B Side mount – B SIDE – – A SIDE – SUFFIX ; -11 SUFFIX ; -11 – B SIDE – – A SIDE – SUFFIX ; -11 SUFFIX ; -11 VPL-CS1...
- Page 81 BK2125HM601 R128 JL121 B:CHIP :CHIP RD5.6SB-T1 :CHIP C137 R131 100p R140 CH:CHIP :CHIP DAT/RI :CHIP FB130 JL129 QA(1/2) C127 R133 BK2125HM601 C125 R134 FB137 C126 D128 100p 100p CH:CHIP :CHIP RD5.6SB-T1 :CHIP :CHIP CH:CHIP B:CHIP (VIDEO INPUT,MOUSE CONNECTOR) B-SS1697<08.>-QA.-P1 VPL-CS1...
- Page 82 BK2125HM601 D126 RD5.6SB-T1 FB128 BK2125HM601 B TYPE USB FB125 D124 D125 J122 FBMH3216HM501NT UDZ-TE-17-3.9B UDZ-TE-17-3.9B FB126 FB132 BK2125HM601 :CHIP JL130 D129 D130 D136 UDZ-TE-17-3.9B UDZ-TE-17-3.9B FB131 R126 FBMH3216HM501NT FB134 QA(2/2) FB133 :CHIP :CHIP (A/B USB CONNECTOR) B-SS1697<08.>-QA.-P2 S-80842ANNP (IC124) VPL-CS1...
- Page 83 R G B ROUT VBLK D-Color Picture GOUT VTIM Bright Clamp BOUT SSCP ABL-REQ Clamp Clamp ABL-MUTE BA Board Waveforms – A SIDE – SUFFIX ; -11 0.6 Vp-p 0.6 Vp-p 0.6 Vp-p TP271 [V-R] TP272 [V-G] TP273 [V-B] VPL-CS1...
- Page 84 0.01 R288 R298 R290 0.01 :CHIP R280 B:CHIP B:CHIP C296 R291 :CHIP :CHIP :CHIP :CHIP 0.01 :CHIP B:CHIP :CHIP C295 C292 C293 R294 0.01 C297 B:CHIP COLOR,DECORDER 0.01 0.01 B:CHIP B:CHIP :CHIP R,G,B,DECORDER B:CHIP C294 D.COMB 0.01 B:CHIP B-SS1697<08.>-BA. VPL-CS1...
- Page 85 SN74CBTD3306PWR (IC410) TC74LCX04FT (IC421) ∗ E-2 X401 ∗ E-3 X402 ∗ G-2 X403 10E 1 8 VCC *:B Side mount 1A 2 1B 3 7 2OE GND 4 6 2B – A SIDE – 5 2A SUFFIX ; -11 VPL-CS1...
- Page 86 LAMP TEMP LAMP TEMP D410 D411 D412 RD5.6SB-T1 RD5.6SB-T1 RD5.6SB-T1 KEY0 KEY0 FROM (4/4) KEY1 KEY1 PSAVE LED PSAVE LED LAMP LED LAMP LED B(1/4) TEMP LED TEMP LED POWER LED POWER LED (R,G,B INPUT,SYNC SEP.) B-SS1697<08.>-B..-P1 8-10 8-10 VPL-CS1...
- Page 87 :RN-CP B:CHIP B:CHIP APA CS B:CHIP SCLK R473 1/16W RB412 :CHIP 100*4 RB411 C471 C475 C474 C472 C473 100*4 0.01 0.22 B:CHIP B:CHIP B:CHIP B:CHIP B:CHIP B(2/4) FROM (1/4) B AD COAST TO (3/4) (A/D CONVERTER) B-SS1697<08.>-B..-P2 8-11 8-11 VPL-CS1...
- Page 88 C514 +3.3V TO (4/4) B:CHIP C525 B:CHIP IC428 TC7S04FU B(3/4) C569 FROM (4/4) SCLK C526 C527 C530 C533 SCAN CONVERTER, B:CHIP C528 C529 C532 C531 SDRAM, B:CHIP B:CHIP B:CHIP B:CHIP B:CHIP B:CHIP B:CHIP B:CHIP LVDS RECEIVER B-SS1697<08.>-B..-P3 8-12 8-12 VPL-CS1...
- Page 89 TO (1/4) F-CL JL474 JL463 JL475 R502 5V-2 R528 R527 R526 R501 1/16W :CHIP 1/16W 1/16W 1/16W 1/16W :CHIP :CHIP :CHIP :CHIP R555 2.2k R556 1/16W 2.2k :CHIP 1/16W JL466 :CHIP TO (1/4),(2/4) JL469 B(4/4) (MAIN CPU) B-SS1697<08.>-B..-P4 8-13 8-13 VPL-CS1...
- Page 90 ∗ A-3 Q814 ∗ A-3 Q815 Q816 ∗ A-3 Q817 Q819 TP801 TP802 TP803 TP804 TP805 TP806 TP807 TP808 TP809 TP810 TP811 TP812 TP813 TP814 TP815 TP816 *:B Side mount – A SIDE – SUFFIX ; -11 8-14 8-14 VPL-CS1...
- Page 91 R852 100 :CHIP D813 C852 DTZ-TT11-5.1 0.001 B:CHIP D814 D812 DTZ-TT11-5.1 DTZ-TT11-5.1 IC805 THC63LVDF84A LVDS RECEIVER C850 C851 0.01 B:CHIP B:CHIP TO P2 R1019 R1018 C(1/5) :CHIP :CHIP LCD DRIVER, R830 TO P2 AUDIO AMP :CHIP B-SS1697<08.>-C..-P1 8-15 8-15 VPL-CS1...
- Page 92 BLM21B750S INVERTER :CHIP R877 C861 C860 R876 :CHIP R878 B:CHIP B:CHIP :CHIP FL806 :CHIP FROM (1/5) C862 R879 :CHIP B:CHIP C863 B:CHIP IC822(4/6) IC822(6/6) IC822(3/6) TC74VHCT04AFT TC74VHCT04AFT TC74VHCT04AFT C(2/5) INVERTER INVERTER INVERTER LCD DRIVER, AUDIO AMP B-SS1697<08.>-C..-P2 8-16 8-16 VPL-CS1...
- Page 93 R947 TO (4/5) Q809 C895 JL856 HN1B01FU-T RB DIR TO (2/5),(4/5) VVDD :CHIP :CHIP BUFF IC822(2/6) C894 B:CHIP R948 TC74VHCT04AFT 0.47 2.2k INVERTER :CHIP F:CHIP TO (2/5) FROM (2/5) TO (2/5) C(3/5) LCD DRIVER, AUDIO AMP B-SS1697<08.>-C..-P3 8-17 8-17 VPL-CS1...
- Page 94 MODE1 MODE2 FROM (3/5) MODE1 HCK1B HCK1 HCK2B HCK1R HCK2 HCK1 HCK2R FROM (3/5) HCK2 TO (2/5) FROM (2/5) VVDD C933 VVDD 0.47 F:CHIP C934 0.47 F:CHIP FROM (2/5) FROM (2/5) C(4/5) LCD DRIVER, AUDIO AMP B-SS1697<08.>-C..-P4 8-18 8-18 VPL-CS1...
- Page 95 :AL-CP :CHIP :CHIP R990 R991 R989 :CHIP :CHIP :CHIP R993 3.3k :CHIP Q811 2SC2712 MUTE C955 R994 100k AUDIO-MUTE :CHIP R995 :AL-CP :CHIP FROM (1/5) C(5/5) APCE APCE A-SCLK LCD DRIVER, A-SCLK SDAT AUDIO AMP SDAT B-SS1697<08.>-C..-P5 8-19 8-19 VPL-CS1...
- Page 96 (DIGITAL) Sync On 8bit SOG INPUT Green B SUB CONT 8bit G SUB CONT 8bit SOG Sep OUT R SUB CONT 8bit 25 26 27 28 29 Clamp Pulse IN OSD Blanking DAC output for cut-off Adj 8-20 8-20 VPL-CS1...
- Page 97 SIRCS NR S009 S010 S011 S012 DAP202K DAP202K DAP202K DAP202K JL010 PROTECT PROTECT PROTECT PROTECT VOL+ VOL- RESET C001 D008 R016 R013 R014 R015 B:CHIP 1.8k SEC2422C 2.7k 2.2k 1.5k :CHIP :CHIP :CHIP :CHIP POWER/STBY (CONTROL PANEL) B-SS1697<08.>-H.. 8-21 8-21 VPL-CS1...
- Page 98 IC671 ∗ A-3 IC672 Q601 ∗ E-1 Q601 – B SIDE – Q602 ∗ F-3 Q602 SUFFIX ; -11 ∗ C-3 Q603 ∗ G-1 Q604 VD602 VD604 *:B Side mount – A SIDE – SUFFIX ; -11 8-22 8-22 VPL-CS1...
- Page 99 C627 1/2W 0.15 :CHIP :RN-CP :CHIP B:CHIP R649 :CHIP C626 C625 R652 R653 330p 4.7k B:CHIP :CHIP :CHIP B:CHIP Q604 V??? ACTIVE FILTER,CONTROL ACTIVE FILTER 2SC2712 ACT FILT ON/OFF MAIN CONVERTER,SUB CONVERTER IDET I IN- VDET B-SS1697<08.>-GA. 8-23 8-23 VPL-CS1...
- Page 100 D715 L707 D2FS6-TA D10SC9M D727 10µH D2FS6-TA GND 2 GND 2 C776 GND 2 GND 2 C740 GND 2 GND 2 GND 2 R775 C769 R776 C772 – A SIDE – (DC/DC CONVERTER) SUFFIX ; -11 B-SS1697<08.>-GBB 8-24 8-24 VPL-CS1...
- Page 101 The material contained in this manual consists of information that is the property of Sony Corporation. Sony Corporation expressly prohibits the duplication of any portion of this manual or the use thereof for any purpose other than the operation or maintenance of the equipment described in this manual without the express written permission of Sony Corporation.
- Page 102 English 99KZ08111-1 Sony Corporation Printed in Japan B & P Company 9-929-671-01 ©1999.11...
Need help?
Do you have a question about the VPL-CS1 and is the answer not in the manual?
Questions and answers