Advertisement
Check out the exercises in this manual for ways to get started using your Waver. Next, be sure to visit our website waver.lifeprofitness.com for access to our FREE library of workout videos which demonstrate how to easily incorporate the Waver into your fitness routine.
GET STARTED
WHAT'S IN THE BOX
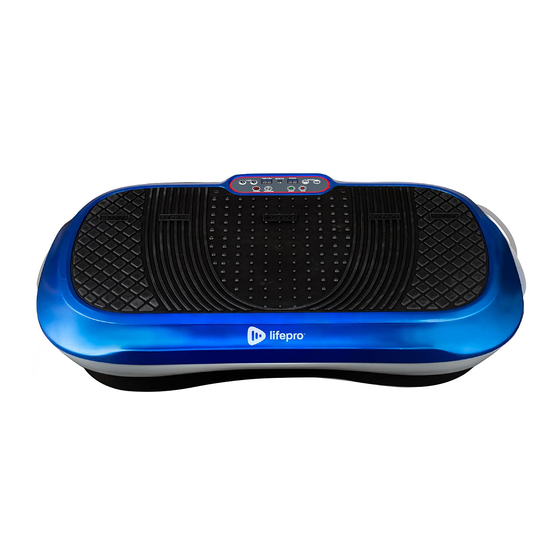
- Lifepro Waver™ Vibration Plate
- Power Cord
- Remote Control
- Resistance Bands (2)
- Lifepro Mini Bands (4)
- User Guide
FIRST STEPS
- Remove your Waver from the shipping box and remove all packaging from the unit and accessories.
- Read carefully through this user manual and all safety instructions before using the Waver.
- Go to waver.lifeprofitness.com and register your product within 14 days of purchase to activate your lifetime warranty.
- Complete the steps in the EASY-START SETUP GUIDE to begin using your Waver.
CUSTOMER SUPPORT
If you have any questions about setting up your Waver, we're here to help. Call or email us and an experienced customer support representative will be happy to assist you: (732) 456-6063 or support@lifeprofitness.com.
GET ACQUAINTED


EASY-START SETUP GUIDE
Setup your Waver in just 3 easy steps:
ASSEMBLE THE WAVER
- Remove the back of the remote control and insert 1 two AAA batteries into the battery compartment.
- Loop the resistance bands into the metal rings at the front of the Waver.


CONNECT TO POWER
- Insert the power cord firmly into the front of the Waver.
NOTE: Press forcefully until you feel a click, which indicates that the cord is securely connected. The power cord fits tightly so it will not loosen during use. - Plug the power cord into an AC outlet.
POWER ON THE WAVER
- Flip the breaker switch on the front of the Waver to the ON position.
- Press the power button on the Waver's display.
- That's it. Your Waver is now ready to use. See OPERATING INSTRUCTIONS and CHOOSING A PROGRAM on the next pages for details about how to use your Waver.
MODES
Standby mode: The Waver is powered on, but no program is selected.
Program Mode: Choose from preset workout programs: P0-P9. Each program has low, medium, or high vibration speed.
Manual mode: Set your own workout duration and vibration speed.
OPERATING INSTRUCTIONS
USING THE DISPLAY PANEL TO OPERATE THE WAVER

- Power Button: Press the button to power the Waver on and off.
- Program Mode Button: Press the button to select a preset workout program: P0-P9.
- Start Button: Ensure power is turned ON. Press the button to activate the selected program or begin a custom workout in manual mode.
- Stop/Pause Button: Press the button to stop the selected program or manual mode workout.
- Speed Increase/Decrease Buttons: Press the buttons to adjust vibration speed in manual mode. Press Start to begin manual mode before adjusting the speed. NOTE: You cannot adjust the speed when in program mode.
- Speed Display: The display shows vibration speed for the current program or custom workout.
- Remote: Infrared receiver window for the remote.
- Time Display: The display shows the duration of the current program or custom workout.
- Time Increase/Decrease Buttons: Press the buttons to set the time duration in manual mode. NOTE: You cannot adjust the time when in program mode.
USING THE REMOTE TO OPERATE THE WAVER

- Power Button: Press the button to power the Waver on and off.
- Program Mode Button: Press the button to select a preset workout program: P0-P9.
- Start/Stop Button: Ensure power is turned ON. Press the button to activate the selected program or begin a custom workout in manual mode. Press again to stop the selected program or manual mode workout.
- Time Increase/Decrease Buttons: Press the buttons to set the time duration in manual mode. NOTE: You cannot adjust the time when in program mode.
- Speed Increase/Decrease Buttons: Press the buttons to adjust vibration speed in manual mode. Press Start to begin manual mode before adjusting the speed. NOTE: You cannot adjust the speed when in program mode.
CHOOSING A PROGRAM
PROGRAM MODE
| Low Settings (P0-P2) | Medium Settings (P3-P6) | High Settings (P7-P9) |
Great for starting out.
| Perfect for people with arthritis and fibromyalgia.
| Great for increased intensity.
|
CHOOSING A PROGRAM IN PROGRAM MODE
- Press the Power button to turn the system on.
- Press the Program Mode button to toggle between preset program modes P0 through P9.
- Press the Start button to activate the selected program.
PROGRAM SPEEDS
The Waver will change speed once a minute. Speed levels will depend on the program level you've chosen (as outlined in the chart below).
| MINUTES | ||||||||||||||||
| SPEED | PROGRAM | 15 | 14 | 13 | 12 | 11 | 10 | 9 | 8 | 7 | 6 | 5 | 4 | 3 | 2 | 1 |
| Low | 0 | 4 | 8 | 10 | 12 | 17 | 20 | 24 | 20 | 17 | 6 | 12 | 17 | 20 | 24 | 20 |
| 1 | 2 | 4 | 6 | 8 | 10 | 13 | 15 | 12 | 9 | 8 | 8 | 10 | 13 | 15 | 12 | |
| 2 | 8 | 14 | 8 | 14 | 8 | 20 | 8 | 14 | 8 | 14 | 14 | 8 | 20 | 8 | 14 | |
| Med | 3 | 12 | 23 | 29 | 38 | 49 | 6 | 68 | 76 | 48 | 29 | 38 | 49 | 56 | 68 | 76 |
| 4 | 9 | 13 | 16 | 21 | 24 | 35 | 67 | 50 | 38 | 30 | 21 | 24 | 35 | 67 | 50 | |
| 5 | 23 | 55 | 23 | 55 | 23 | 55 | 23 | 55 | 23 | 55 | 55 | 23 | 35 | 23 | 55 | |
| High | 6 | 11 | 11 | 25 | 25 | 38 | 38 | 48 | 48 | 25 | 25 | 25 | 38 | 38 | 48 | 48 |
| 7 | 30 | 30 | 50 | 50 | 70 | 70 | 40 | 40 | 60 | 60 | 50 | 70 | 70 | 40 | 40 | |
| 8 | 55 | 40 | 55 | 40 | 50 | 77 | 80 | 65 | 65 | 99 | 40 | 50 | 77 | 80 | 60 | |
| 9 | 40 | 85 | 75 | 65 | 25 | 96 | 78 | 60 | 65 | 80 | 65 | 25 | 96 | 78 | 60 | |
MANUAL MODE
In manual mode, vibration speeds correspond to the following levels
Low Settings
(1-33)
Medium Settings
(34-66)
High Settings
(67-99)
CREATING A CUSTOM WORKOUT IN MANUAL MODE
- Press the Power button to turn the system on.
- While already standing on the Waver, use the Time Increase/Decrease buttons to set a time duration for your manual workout.
- Press the Start button to begin the manual workout.
- Press the Speed Increase/Decrease buttons to adjust the vibration speed.
TO GET THE BEST RESULTS, ALTERNATE BETWEEN PROGRAMS
Keep your body guessing. We tend to adapt, so we want to continue eliciting change in our bodies. Each level has its own set of benefits; however, we recommend you start out at the first level, P0, and work your way up.
STANDING POSITIONS
Where you stand on the Waver will impact how challenging the vibrations are for your body. Stand with your feet close together for an "easy" workout and stand with your feet further apart for "medium" and "intense" workouts.


LIFEPRO MINI BANDS
MINI BANDS HAVE REVOLUTIONIZED THE FITNESS INDUSTRY
Mini bands have become the new go-to for sculpting a stronger, leaner physique. You've definitely seen your favorite fitness Instagrammers and Youtubers using these versatile, colored resistance bands in conjunction with their workout routines. They add resistance to cardio workouts and power to strength training sessions, allowing you to train both simultaneously. The number of creative workout possibilities are endless. Unlike the inconvenience of a full gym, these mini bands are well-known for their ability to train all aspects of fitness and performance at any intensity—anywhere, anytime. No more excuses.
The Lifepro mini bands are made from 100% latex. Each band has a different resistance strength, which allows you to level-up your resistance training effortlessly. Use the mini bands in conjunction with your Lifepro Waver to exponentially improve your fitness results.
AMPLIFY YOUR WORKOUTS
Experience the unique benefits of the Lifepro mini bands:
- Versatile: add resistance to cardio workouts and power to strength training
- Joint-friendly: reduce joint compression; high-intensity, low-impact training
- Portable: carry the mini bands in your pocket to work out on the go
HOW TO USE THE WAVER

STRAIGHT ARM PLANK

NECK STRETCH

GLUTE BRIDGE

DIP

HAMSTRING STRETCH

GLUTE STRETCH

SPLIT SQUAT

SIDE LUNGE

QUAD STRETCH

SQUAT

REVERSE FLY

ALTERNATE SHOULDER PRESS
EXERCISE QUICK START GUIDE
HOW TO BEGIN
It's a good idea to start off slow and easy with your Waver as it can take time to get use to how vibration plates move and feel. We recommend you follow the workout guide below--building from beginner to advanced over a period of several weeks.
EXERCISE GUIDE
Hold the stretches and exercises on pages 16 and 17 for the number of seconds shown in the chart below. You will build strength and stamina as you progress through the levels.
| LEVEL | SPEED | SECONDS |
| Beginner | Speed 1 | 15 |
| 30 | ||
| 45 | ||
| Speed 16 | 15 | |
| 30 | ||
| 45 | ||
| Speed 33 | 15 | |
| 30 | ||
| 45 | ||
| Intermediate | Speed 34 | 60 |
| 75 | ||
| 90 | ||
| Speed 50 | 60 | |
| 75 | ||
| 90 | ||
| Speed 66 | 60 | |
| 75 | ||
| 90 | ||
| Advanced | Speed 67 | 105 |
| 120 | ||
| 135 | ||
| Speed 83 | 105 | |
| 120 | ||
| 135 | ||
| Speed 99 | 105 | |
| 120 | ||
| 135 |
Visit our FREE library of personal training videos at waver.lifeprofitness.com
SAFETY
PLEASE KEEP THIS MANUAL IN A SAFE PLACE FOR REFERENCE.

To reduce the risk of burns, fire, electric shock, or injury to persons, read the following important precautions and information before operating the Lifepro Waver.
RESPONSIBILITIES
- It is the responsibility of the owner to ensure that all users of the Waver are adequately informed of all warnings and precautions.
- Use the Waver only as instructed in this manual.
- Place the Waver on a level surface, with at least eight feet of clearance behind it. Do not place the Waver on any surface that blocks air openings. To protect the floor or carpet from damage, place a mat under the Waver.
- Keep the Waver indoors, away from moisture and dust. Do not put the Waver in a garage or covered patio, or near water.
DOS AND DON'TS
- Do not operate the Waver where aerosol products are used or where oxygen is being administered.
- Keep children under the age of 12 and pets away from the Waver at all times.
- The Waver should not be used by persons weighing more than 330 lbs.
- Never allow more than one person on the Waver at a time.
- Keep the power cord and the surge suppressor away from all heat sources.
- Never leave the Waver unattended while it is running. Always unplug the power cord when the Waver is not in use.
EXERCISING
- Consult with a medical professional before beginning a new exercise program.
- Get into position before powering on the Waver.
- Always wear appropriate clothing and athletic shoes when using the Waver.
- The Waver is intended for in-home use only. Do not use the Waver in any commercial, rental, or institutional setting.
MAINTENANCE
- DANGER: Always unplug the power cord immediately after use, before cleaning the Waver, and before performing the maintenance and adjustment procedures described in this manual.
- Inspect and tighten all external screws periodically (do not remove the motor hood).
- Never remove the motor hood unless instructed to do so by an authorized service representative. Servicing other than the procedures in this manual should be performed by an authorized service representative only.
- Never insert or drop any object into any opening.
PRODUCT SPECIFICATIONS
UNIT SPECS
Size: 27"l x 15"w x 6"h
Power: 200W
Voltage: 110V
Amplitude: 0-8mm Max User Weight: 330 lbs.
Frequency: 4-12 Hz
Speed Levels: 99
Auto Programs: P0-P9
Batteries Required: 2 AAA Batteries (not included)
MADE IN CHINA
LIFETIME WARRANTY
Lifepro Fitness creates quality, durable exercise products and we stand by that quality with a lifetime warranty on all of our products. If your Waver ever breaks (and we doubt it will), we'll send you replacement parts and show you how to repair it. If your Waver cannot be repaired, we'll replace it— free of charge. Register your Waver at waver.lifeprofitness.com to activate your warranty within 14 days of purchase.

Access Lifepro TV, our library of free personal training videos on the web at waver.lifeprofitness.com to learn how to get the most out of your Lifepro® Waver™ and achieve the results you want.
 Lifeprousa
 Lifeprousa
support@lifeprofitness.com
VideosHow to use your Waver Vibration Platform by LifePro Fitness Video
Documents / Resources
References
Download manual
Here you can download full pdf version of manual, it may contain additional safety instructions, warranty information, FCC rules, etc.
Advertisement


Need help?
Do you have a question about the WAVER and is the answer not in the manual?
Questions and answers