Table of Contents
Advertisement
Quick Links
Advertisement
Table of Contents

Related Manuals for Kaadas Lamborghini Legends


Summary of Contents for Kaadas Lamborghini Legends
- Page 1 Kaadas Lamborghini Legends User Manual...
- Page 2 Dear customers, thank you for using our smart lock. Please check the package content and read the installation instruction carefully before you install this lock, and then install the product according to the instruction. Our company will not assume any responsibility for direct or indirect product problems, other hazards and losses if you don't follow the instruction to install.
-
Page 3: Table Of Contents
Contents 1 Important information Delete user PIN code 6 Other functions Safety instruction Delete user fingerprint Restore to default setting Warning Delete user card (optional) System reboot Disposal of used battery and lock Set the door opening mode Emergency power supply System system Replace battery 2 Install your smart lock... -
Page 4: Important Information
●Your warranty may invalidate if you used accessories produced ●Do not scratch the fingerprint reader with sharp objects, otherwise by other manufacturer or not recommended by Kaadas. it may cause permanent Long-term damage. ●Do not expose the product to corrosive substances, so as not to Disposal of used battery and lock damage the outer protective layer. -
Page 5: Install Your Smart Lock
2 Install your smart lock Package list This Package list is for reference only, and all contents are subject to the actual packaging contents. Front panel Back panel Installation template Mortise Strike plate Mechanical key (with rubber gasket) (with rubber gasket) User Screw warranty... -
Page 6: Explosive View
Explosive view Understanding the installation of a three-dimensional assembly drawing is beneficial to understand lock structure. 1.Front panel 2.M6 Connecting screw bolt 3. Mortise 4.M5 screws (4) 5.Back panel 6.Upper M6 Screw 7.Back cover 8.Springs (2) 9. Square shaft (2) 10. -
Page 7: Before Installation
Before installation Change the direction of Latchbolt Check door open direction before installation 1.Loosen the screw counterclockwise 2.Take out latchbolt and with an Allen wrench, then take out rotate 180°, then take Right-out open Right-in open face plate. back latchbolt. Face plate Allen wrench 3. -
Page 8: Installation Steps
Installation steps Square Shaft Mortise Connecting Connecting Screw bolt cable Spring Front Panel Connector M5 screw Front Panel bolts Mortise connector Connecting Cable Connecting Screw bolt Note: According to the thickness of the door, select the appropriate length square shaft and connecting screw. - Page 9 Square Shaft Spring Interface for front panel connector Interface for mortise connector Take out back panel and Insert the preesure spring and the square The excess cable plugs back the battery cover. shaft into the hole of back panel. Then cable holes and then tighten the insert the front panel connector and screws to fix the back panel.
- Page 10 Install the back cover and batteries Check whether each part is installed well. (4 pcs or 8 pcs) , then install battery cover.
-
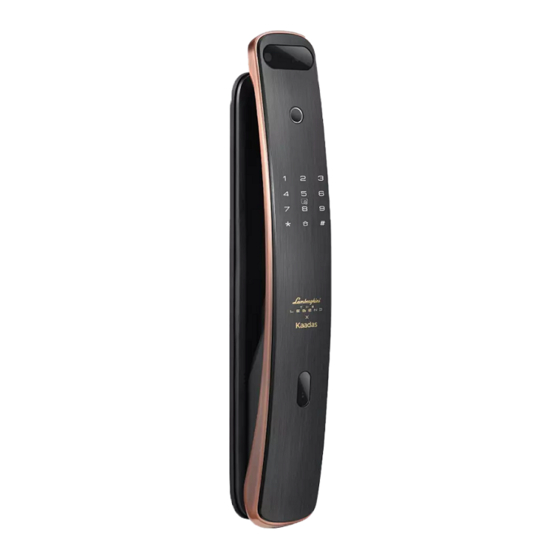
Page 11: Overview
3 Overview Front panel Back panel Doorbell Open/close indicator Unlock inside sensor Keypad Card Reader area Low voltage Privacy mode indicator indicator Fingerprint sensor Open button Close button Reboot button Knob Reset button A/M switch Micro USB interface (Emergency power) Battery cover Mechanical key hole... -
Page 12: Set Your Smart Lock
4 Set your smart lock Before you set up User Number The system mode of the smart lock is divided into Under master mode , when you enroll PIN code, security mode and common mode, and the default fingerprint and card , you should enter user number. system mode is a common mode. -
Page 13: Enter Master Mode
Enter master mode 1.Touch the keypad area to Press1 for user setting, then press 1 to add user card . wake up the keypad. Put card on the reader until voice prompt: setting 2.Press * twice and enter the succeeded. master PIN code (default is 12345678 ) with # key to Add one-time user... -
Page 14: Delete User Card (Optional)
Delete user Enable/Disable Dual validation Under master mode: Under master mode: Press 1 for user setting., then press 6 to enable or disable Press 1 for user setting, press 5 to delete users, then dual verification. Voice prompt setting succeeded. press 1 to delete single user pin code , fingerprint or card. - Page 15 Unlock from outdoor(Common mode) Enter Card code Reader area Fingerprint sensor Push or Push or Push or Pull Pull Pull handle handle handle to unlock to unlock to unlock Touch the pad screen by palm Place the enrolled finger Place the enrolled card properly to lighten keypad;...
- Page 16 Unlock by mechanical key Lock/unlock from in door You can unlock by mechanical key if you forget pin code , the battery run out or system error occurs. 1. Locking button (close) press the close button to lock long press the close button to enable privacy mode.
- Page 17 Emergency Knob Doorbell Doorbell When system error occurs, you can rotate the knob tp unlock Indoor /Back Panel When you pressed the doorbell button , the Doorbell sounds. Volume Adjustment when system is in voice mode , you can long press 0 button after keypad lighten to turn off...
-
Page 18: Other Functions
Other Functions Emergency power supply When the battery voltage is too low to open the lock Restore to factory settings from outside, you can use 5V power bank to charge the door lock via Micro USB port. After the door is unlocked, If you forgot the master pin code, you can take out please replace all batteries immediately. - Page 19 When voice prompts that low battery , please change Extended network module is reserved for smart home battery in time . please follow the prompt to change system, please contact kaadas for more details 。 battery in time Interface for...
- Page 20 Shenzhen Kaadas Intelligent Technology co.,Ltd. reserves all rights for the final interpretation for this user manual. And the mannual is subject to be changed without notice.
Need help?
Do you have a question about the Lamborghini Legends and is the answer not in the manual?
Questions and answers