
Related Manuals for Jaton 3DForceFX5700-256DE


Summary of Contents for Jaton 3DForceFX5700-256DE
- Page 1 3DForceFX 5700 3DForceFX5700LE 3DForceFX 5700-256 3DForceFX5700LE-256 nVIDIA GeForceFX™ 5700/5700LE User’s Manual Version 4.00 C o p y r i g h t © 2 0 0 5 J a t o n C o r p o r a t i o n , U S A...
-
Page 2: Table Of Contents
INTRODUCTION ... 5 FEATURES ... 6 LTRA HADOW ECHNOLOGY FX E ... 6 NGINE RECISION RAPHICS NTELLISAMPLE ECHNOLOGY NIFIED RIVER RCHITECTURE ULTI DISPLAY IGITAL IBRANCE ONTROL AGP 8X ... 7 DVANCED IXEL HADERS ® D ICROSOFT IRECT GL® 1.5 O PTIMIZATIONS AND 400MH RAMDAC... - Page 3 CHECK LIST ... 9 HARDWARE DESCRIPTION... 10 DISPLAY DEVICES OUTPUT ... 11 HARDWARE INSTALLATION... 12 NSTALLATION ROCEDURES : ... 12 TEPS SOFTWARE INSTALLATION... 13 ® 98 D INDOWS ® M INDOWS ICROSOFT INDOWS ® 2000 D INDOWS ® XP D INDOWS TECHNICAL ASSISTANCE...
- Page 4 ... 43 THER IMITS XCLUSIVE BLIGATION ... 44 THER TATEMENTS ERMS AND ONDITIONS ERVICES AGREEMENT ... 45 NTIRE BLIGATION REDUCING WARRANTY CLAIM REJECTIONS... 45 ..43 ..44 :... 45...
-
Page 5: Introduction
Introduction 3DForceFX 5700 series video accelerators are nVIDIA GeForceFX™ 5700/5700LE core technology based 128MB/256MB DDR memory modules built-in onboard totally. These AGP 8x-bus video accelerators are capable of driving very complex geometry and character animation images on your PC desktop incomparably, with truly genuine filling experience you may anticipate like never before. -
Page 6: Features
A matchless of hardware and software technology combination, the primary principles of 3DForce FX 5700 series video accelerators that will contribute many of new features and more benefits to your desktop computing as well as the best-performance integrated, unusual quality and exceedingly resolution. -
Page 7: Nview Multi-Display Technology
compatibility with software drivers. Simplifies upgrading to a new NVIDIA product because all NVIDIA products work with the same driver software. nView Multi-display Technology The nView hardware and software technology combination delivers maximum flexibility for multi-display options, and provides unprecedented end-user control of the desktop experience. -
Page 8: Opengl® 1.5 Optimizations And Support
OpenGL® 1.5 Optimizations and Support Ensures the best performance and application compatibility for all OpenGL applications. 400MHz RAMDACs Industry’s fastest RAMDACs support QXGA displays with ultra- high, ergonomic refresh rates. DVI Support Drives the new generation of desktop digital flat panel displays and projectors. -
Page 9: Overall Performance
Overall performance • 1.7 billion pixels per second fill rate • 319 Million vertical per second fill rate • Up to 8.8 GB per second on memory bandwidth • 128MB/256MB DDR memory onboard supported Compatibility • nVIDIA Unified Driver Architecture (UDA) •... -
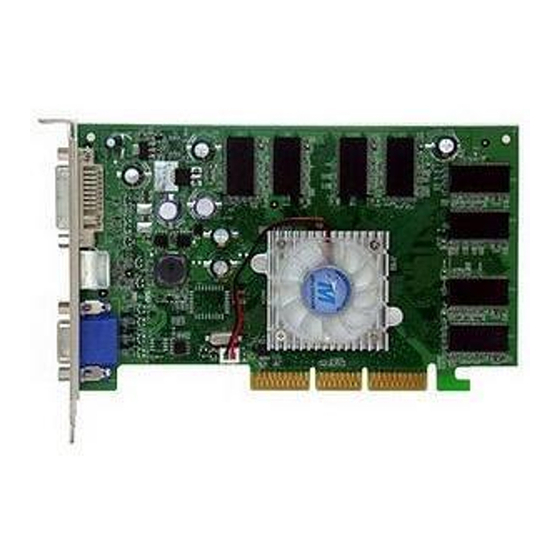
Page 10: Hardware Description
• 3” cable convert TV-Out from MD 4pin to Composite RCA • DVI to RGB converter for Dual RGB out • Software & Documents CD • Quick Start Guide (Printed) Hardware Description Produt Name / PCB Ver. 3DForce FX5700 82248C 3DForce FX5700LE 82248D 3DForce FX5700-256... -
Page 11: Display Devices Output
Display Devices Output LCD Display Panel TV set CRT Monitor RGB out - DB15 VGA connector to analog monitor. TV-Out - MD4 connector converts S_Video to RCA Composite Output, or direct connects S_Video to TV set. DVI out - DVI connector to LCD display panel. DVI converts to RGB with DVI-RGB converter for Dual RGB out. -
Page 12: Hardware Installation
Hardware Installation Installation Procedures The manufacturer assumes no liability for any damage, caused directly or indirectly, by improper installation of any components by unauthorized service personnel. If you do not feel comfortable performing the installation, consult with a qualified computer technician Steps: Turn OFF all powers to your system, including any peripherals (printer, external drives, modem, etc.). -
Page 13: Software Installation
Upgrade Steps: Add or change your video adapter to an existing system, you may precede a few steps before you install the new hardware and software (video display driver). The followings are some of the considerations: 1. To change a new adapter, please remove the existing video driver, or replace it to SVGA driver from Windows®98/Me system before you remove the existing hardware. - Page 14 5. Select [Next] to install “3DForceFX 5700, nVIDIA GeForceFX 5700” driver. 6. Select [Finish] to restart the computer. To a new system: SELECT the “Display” icon from control panel and then tab on “Settings” screen. 1. Select Advanced at selection bar. 2.
- Page 15 InstallShield® Program: Since the Microsoft InstallShield® program has been added into our software’s CD, the Display Driver Installation and its procedures are much easier for users to run with Windows® 98/Me operating systems. When you power-up the computer and boots-up in Windows, the Plug-n- Play detects new hardware and pops-up install wizard.
- Page 16 Microsoft InstallShield® Wizard has start loading its setup process; please wait until it has completed. Click on “Next” to continue the process.
-
Page 17: Windows ® M Edrive Installation
The Windows system will copy all driver files from source media to your local hard disk; please wait until the process has completed. Click on “Finish” to restart your computer, the new display driver will be in place after Windows boots-up. ®... - Page 18 Select [Finish] to restart the computer. To a new system: SELECT the “Display” icon from control panel and then tab on “Settings” screen. Select Advanced at selection bar. Click on Adapter tab. Click the Change button at Adapter Screen Click [Specify the location of the driver (Advanced)] then check Next. Insert Software’s CD to CD-ROM.
- Page 19 Autorun feature brings-up the “Welcome Screen”, and you may point to “display driver”, then press on it. Microsoft InstallShield® Wizard has start loading its setup process; please wait until it has completed.
- Page 20 Click on “Next” to continue the process. The Windows system will copy all driver files from source media to your local hard disk; please wait until the process has completed.
-
Page 21: Microsoft Windows ® Nt™4.0
Click on “Finish” to restart your computer, the new display driver will be in place after Windows boots-up. Microsoft Windows The procedure of display driver installation it required setup with service pack 6 (Microsoft® Windows NT™4.0) first. After your windows desktop has loaded with service pack 6 completely, you may insert the software CD into CD ROM drive and follow the installation steps below: Upgrade video adapter to an existing system. - Page 22 Windows NT 4.0 prompt you for the location where those files for video driver. INPUT the path or unfold with “X:\Winnt4\”. (X: is the CD ROM drive where the Software & Documents CD has been inserted.) If the driver “3DForceFX 5700, nVIDIA GeForceFX 5700” is listed under the Display list, SELECT the “OK”...
- Page 23 1. Autorun feature brings-up the “Welcome Screen”, and you may point to “display driver”, then press on it. Microsoft InstallShield® Wizard has start loading its setup process; please wait until it has completed.
- Page 24 Click on “Next” to continue the process. Scroll down and select on the “3DForceFX 5700, nVIDIA GeForceFX 5700” then click on “OK” for next screen.
-
Page 25: Windows ® 2000 Driver Installation
The Windows system will copy all driver files from source media to your local hard disk; please wait until the process has completed. Click on “Finish” to restart your computer, the new display driver will be in place after Windows boots-up. ®... - Page 26 Select [Next] at Found New Hardware Wizard. Check [Search for a suitable driver for my device (recommended)] then select [Next]. Insert the Software’s CD. Check [Specify a location:] Under [Copy manufacturer’s files from:] enter D:\WIN2K&XP, where D is your CD_ROM drive. Then click on [OK]. Select [Next] to install “3DForceFX 5700, nVIDIA GeForceFX 5700”...
- Page 27 Autorun feature brings-up the “Welcome Screen”, and you may point to “display driver”, then press on it. Microsoft InstallShield® Wizard has start loading its setup process; please wait until it has completed.
- Page 28 Click on “Next” to continue the process. Click on “Yes” to continue the installation. Otherwise, you may terminate the process by clicking on “No”. The hardware will be...
-
Page 29: Windows ® Xp Driver Installation
identify automatically on this screen such as 3DforceFX 5700 either way. Click on “Finish” to restart your computer, the new display driver will be in place after Windows boots-up. ® Windows Upgrade video adapter to an existing system. (Windows has been pre-loaded) Select [Next] at Found New Hardware Wizard. - Page 30 Select [Next] to install “3DForceFX 5700, nVIDIA GeForceFX 5700” driver. Select [Finish] to restart the computer. InstallShield® Program: Microsoft Windows® XP detects this new hardware and places appropriate display driver from its system folder automatically - it doesn’t matter if you have added a new driver or changed the existing one. To maximize the video board acceleration and increase its performance, you may install the manufacturer display driver as follows: Autorun feature brings-up the “Welcome Screen”, and you may...
- Page 31 Microsoft InstallShield® Wizard has start loading its setup process; please wait until it has completed. Click on “Next” to continue the process.
- Page 32 4. Click on “Continue Anyway” to carry through the installation. Otherwise, you may terminate the process by clicking on “Stop Installation”. this screen such as 3DForceFX 5700 either way. The Windows system will copy all driver files from source media to your local hard disk;...
-
Page 33: Technical Assistance
Click on “Finish” to restart your computer, the new display driver will be in place after Windows boots-up. Notice: We believed that the all steps where mentioned above are the clear and the correct procedures for installing display driver from manufacturer software’s CD to your operating system. - Page 34 Q: What kind monitors can display 800x600 modes or higher resolution mode? Explain and Suggestion: To display 800x600 resolution at 60Hz refresh rate, the monitor must be capable of synchronizing a 31.5KHz horizontal scan rate (e.g., NEC 2A, 3D). At 72Hz refresh rate, the monitor must be capable of synchronizing a 48.0KHz scan rate (e.g., Sony HG 1304, NEC 4D, 5D, Seiko 1450).
-
Page 35: Frequently Asked Questions (Faq)
Q: Multiple images or unreadable screen after loading video driver. Explain and Suggestion: There are a variety of reasons why the display might be distorted. One common reason is a monitor mis-match. Some older multi-frequency monitors are unable to switch video modes without being turned off then turned on again. If the problem occurring in windows, make sure that you have loaded that proper video driver, and that the driver is compatible with the monitor being used. - Page 36 Answer “Rendering Engine” generically applies to the part of the graphics engine that draws 3D primitives, usually triangles. In most implementations, the rendering engine is responsible for interpolation of edges and "filling in" the triangle. Q3 What does the set-up engine do in a graphics controller? Answer A set-up engine allows drivers to pass triangles in the form of raw vertex information;...
-
Page 37: Pinout And Sync Frequencies
equipped CPU's are employed along with special-case software optimization techniques. As stated above, SW 3D can achieve credible results with today's (software optimized) applications, but the rising popularity of good 3D hardware at the consumer price level is inexorably compelling the public to expect hardware level scene enhancements and frame rates. -
Page 38: Conversion Table: Pin Adapters
Note: Analog monochrome type monitors use green video for all video input and ignore red and blue video. Conversion Table: Pin Adapters If you will be using a 9-to-15-pin adapter cable to link your 9-pin monitor connector to the 15-pin accelerator card connector, check Table carefully before you install the cable. -
Page 39: Digital Visual Interface (Dvi) Connector
Full Intensity (White) Level = +0.7 V Digital Visual Interface (DVI) Connector 24 pin DVI FEMALE connector built-in onboard. Pin Number C1 C2 24 C3 C4 Signals TMDS Data 2 - TMDS Data 2 + TMDS Data 2 Shield No Connection No Connection DDC Clock DDC Data... -
Page 40: Technical Support
In the event you have a technical problem with this product, please read the README files in the software CD_ROM. Updated drivers are available through Jaton Web site. Have following information handy when you contact technical support: Name of the product. - Page 41 In Europe contact: Jaton Europe B.V. Overwegwachter 3, 3034 G, Potterdam, Netherlands (Holland) 31-10-412-1154 In Thailand contact: Jaton (Thailand) Co., Ltd. 93, 93/1-2 Moo 4 Thana City PC Tower 1 Fl. Bangna-Trad KM.14 Bangchalong Bangplee Samutprakarn 10540 Thailand Tel: 662-336-1212...
- Page 42 Unit 8, 41-49 Norcal Road, Nunawading, Vic 3131 Australia Tel: (Mel) 03 9873 3999 Fax 03 9873 3933 This equipment has been tested and found to comply with the limits for a Class B digital device, pursuant to Part 15 of the FCC Rules. Operation is subject to the following conditions: (1) this device may not cause harmful interference, and (2) this device must accept any interference received, including interference that may cause undesired operation,...
-
Page 43: Limited Warranty
(2) years from manufacturing date. This limited warranty applies only to the original purchaser of Jaton Product and is not transferable. This limited warranty does not apply if failure to the Product Registration, or over thirty (30) days from purchase (original invoice date). - Page 44 Registered User: Others: This warranty applies only for a period of two (2) years from purchase date of Jaton original invoice. This warranty applies only for a period of two (2) years from manufacturing date. This warranty applies only for a...
-
Page 45: Reducing Warranty Claim Rejections
Services agreement: (1) All applicants shall completed service request form from Manufacturer. (2) All returned checks will be charged a $20.00 fee by Manufacturer. (3) All repair and replacement services allow 4-6 weeks from the date of receiving by Manufacturer. (4) All products without warranties require service processing fee $20 (payment in advance), which is not refundable. - Page 46 • Ask your dealer if there are any known problems with the system requirements or installation procedures for any add-on products that your are purchasing; • Buy industry standard products where compatibility issue are more likely to surface; • If you are unsure about installation for a new product, contact your dealer’s service department.
- Page 47 Warranty Service Use Only Serial Number - ten or eleven digit code, the serial number consists of the following parts: Packaging Type Manufactured Date Code Production Numerical Code 00 8 000015 Year Month XXXXX-XXX-XX S/N: A008000015 xxxx/xxxx 00.0 XXXX XX XXXXXX Product Label and Manufactured Date Code...
Need help?
Do you have a question about the 3DForceFX5700-256DE and is the answer not in the manual?
Questions and answers