
Related Manuals for Jaton 3DForce2MX


Summary of Contents for Jaton 3DForce2MX
- Page 1 3DForce2 MX Series nVIDIA GeForce2 MX400™ User’s Manual Version 10.00 C o p y r i g h t © 2 0 0 5 J a t o n C o r p o r a t i o n , U S A...
-
Page 2: Table Of Contents
INTRODUCTION...4 KEY FEATURES...4 ECOND ENERATION ...5 PERFORMANCE ...5 UALITY SYSTEM REQUIREMENT...5 CHECK LIST ...6 HARDWARE DESCRIPTION ...7 HARDWARE INSTALLATION ...8 NSTALLATION ROCEDURES : ...9 TEPS SOFTWARE INSTALLATION ...9 TECHNICAL ASSISTANCE...28 REQUENTLY SKED PINOUT AND SYNC FREQUENCIES...33 NALOG OLOR ISPLAY ONVERSION ABLE -15 P ONVERSION... - Page 3 ..38 THER TATEMENTS ERMS AND ONDITIONS ERVICES AGREEMENT ..39 NTIRE BLIGATION REDUCING WARRANTY CLAIM REJECTIONS..40 ..38 : ...39...
-
Page 4: Introduction
Introduction 3DForce2 MX Series are the faster 3D graphics and multimedia accelerators made by Jaton Corporation. These accelerators based on GeForce2 MX400™ core technology with single chipset solution which is provided from nVIDIA®. By incorporating GeForce2 MX’s break-through 3D architecture, in a 2-pipe form, GeForce2 MX delivers the full GeForce2 GTS 3D feature set at mainstream price points. -
Page 5: Performance
• nVIDIA Shading Rasterizer (NSR) • High-Definition Video Processor (HDVP) • AGP 4x with fast writes • 32/64 MB SDR/DDR memory onboard • 32-bit color, 32-bit Z/stencil buffer • 4 texels per clock • 256-bit graphics architecture • Cube environment mapping •... -
Page 6: Check List
• Hard Drive with at least 50MB Free space • MS Windows® 98/Me, Windows 2000/XP, and Windows NT™4.0 operating systems Check List • 3DForce2 MX Series Multimedia Accelerator • Software & Documents CD • Quick Start Guide (Printed) -
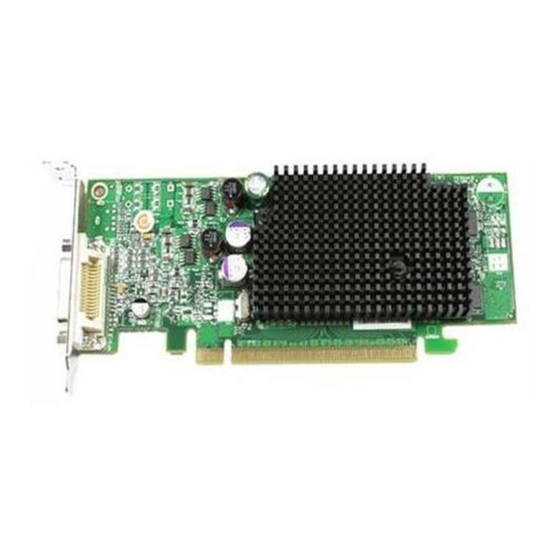
Page 7: Hardware Description
Hardware Description TVout optional RCA Composite (TV out) DIM-4Pin (TV out) DB 15 VGA (RGB out) Product Name / PCB Version 3DForce2 MX-32 82118G nVIDIA GeForce2 MX400 82118F nVIDIA GeForce2 MX400 3DForce2 MX-32TV 82118G nVIDIA GeForce2 MX400 3DForce2 MX-64 82118G nVIDIA GeForce2 MX400 3DForce2 MX-64TV 82118G... -
Page 8: Hardware Installation
Display devices connection: ( TVout) TV set PC Computer Hardware Installation Installation Procedures Plate RCA Composite Connector S_Video Connector DB 15 VGA Connector !! WARNING !! Discharge static electricity by touching the GROUND such as metal part of your case connected with good power ground before you handle the electronic circuit boards. -
Page 9: Steps
The manufacturer assumes no liability for any damage, caused directly or indirectly, by improper installation of any components by unauthorized service personnel. If you do not feel comfortable performing the installation, consult with a qualified computer technician. Steps: Turn OFF all powers to your system, including any peripherals (printer, external drives, modem, etc.). - Page 10 2. Check [Search for the best driver for your device] then select [Next] 3. Insert the software’s CD. 4. Check [Specify a location:] ,Under that enter D:\MX\Win9x, then select [Next]. 5. Select [Next] to install 3DForce2 MX 200/400 Series driver. 6.
- Page 11 10. Click the Next button. 11. Click the Finish button. 12. Click the Close button. 13. Click Close at the Display Properties screen. 14. Click the Yes button next to restart computer. InstallShield® Program: Since the Microsoft InstallShield® program has been added into our software’s CD, the Display Driver Installation and its procedures are much easier for users to run with Windows®...
- Page 12 Autorun feature brings-up the “Welcome Screen”, and you may point to “display driver” then press on it. Microsoft InstallShield® Wizard has started loading its setup process, please wait until it has finished.
- Page 13 Click on “Next” to continue the process. Click on “Finish” to restart your computer, the new display driver will be in place after Windows boots-up.
- Page 14 Windows® Me Drive Installation Upgrade video adapter to an existing system. (Windows has been pre-loaded) 1. Check [Specify the location of the driver[Advanced] ]then select [Next]. 2. Insert the Software’s CD. 3. Check [Specify a location:] ,Under that enter D:\MX\Win9x, then select [Next]. (Where D is the letter of your CD ROM drive, typically, D or E drives, etc.) 4.
- Page 15 is the letter of your CD ROM drive, typically, D or E drives, etc.) 8. Click Next to install “3DForce2 MX Series, nVIDIA GeForce2 MX 200/400” driver. 9. Click the Finish button. 10. Click the Yes button next to restart computer. InstallShield®...
- Page 16 Autorun feature brings-up the “Welcome Screen”, and you may point to “display driver” then press on it. Microsoft InstallShield® Wizard has started loading its setup process, please wait until it has finished.
- Page 17 Click on “Next” to continue the process. Click on “Finish” to restart your computer, the new display driver will be in place after Windows boots-up.
- Page 18 Windows® 2000 Driver Installation Upgrade video adapter to an existing system. (Windows has been pre-loaded) 1. Select [Next] at Found New Hardware Wizard. 2. Check [Search for a suitable driver for my device (recommended) ]then select [Next]. 3. Insert the Software’s CD. 4.
- Page 19 Autorun feature brings-up the “Welcome Screen”, and you may point to “display driver” then press on it. Microsoft InstallShield® Wizard has started loading its setup process; please wait until it has finished.
- Page 20 Click on “Next” to continue the process. Click on “Yes” to continue the installation. Otherwise, you may terminate the process by click on “No”.
- Page 21 Click on “Finish” to restart your computer, the new display driver will be in place after Windows boots-up. Windows®XP Driver Installation Upgrade video adapter to an existing system. (Windows has been pre-loaded) 1. Select [Next] at Found New Hardware Wizard. 2.
- Page 22 6. Select [Next] to install “3DForce2 MX Series, nVIDIA GeForce2 MX 200/400” driver. 7. Select [Finish] to restart the computer. InstallShield® Program: Microsoft Windows® XP detects this new hardware and places appropriate display driver from its system folder automatically - it doesn’t matter you have added a new driver or changed the existing one.
- Page 23 Microsoft InstallShield® Wizard has started loading its setup process, please wait until it has finished. Click on “Next” to continue the process.
- Page 24 Click on “Continue anyway” to carry through the installation. Otherwise, you may terminate the process right away. Click on “Finish” to restart your computer, the new display driver will be in place after Windows boots-up.
- Page 25 Windows® NT™4.0 Driver Installation Upgrade video adapter to an existing system. (Windows has been pre-loaded) To proceeding the video display driver installation, you may process the setup of service pack 6 or above versions (Microsoft® Windows NT 4.0) first. 1. SELECT the “Display” icon from control panel and then Tab on the “Settings”...
- Page 26 1. Autorun feature brings-up the “Welcome Screen”, and you may point to “display driver” then press on Microsoft InstallShield® Wizard has started loading its setup process, please wait until it has finished.
- Page 27 Click on “Next” to continue the process. You may select on the “3DForce2 MX Series, nVIDIA GeForce2 MX 200/400”, then click on “OK” for next screen.
-
Page 28: Technical Assistance
Click on “Finish” to restart your computer, the new display driver will be in place after Windows boots-up. Notice: We believed that the all steps where mentioned above are the clear and the correct procedures for installing display driver from manufacturer software’s CD to your operating system. - Page 29 normal type (mode 3), and to reduce (decrease) the refresh rate with the monitor's specification. Q: What kind monitors can display 800x600 mode or higher resolution mode? Explain and Suggestion: To display 800x600 resolution at 60Hz refresh rate, the monitor must be capable of synchronizing a 31.5KHz horizontal scan rate (e.g., NEC 2A, 3D).
-
Page 30: Frequently Asked Questions (Faq)
effective way to check for conflicts is to replace with the original video driver, or delete and re-install the current video driver to the system. Accomplishing IRQs (Interrupt Request Query) settings or troubleshooting the conflicts on hardware source may necessary. Most AGP video cards designed for Plug-n-Play, that means video card IRQ's setup which controls by main board’s (motherboard) circuitry and BIOS. - Page 31 3D technology is becoming increasingly important (and common) not only in games, but also in other applications such as VRML, which allows 3D scene descriptions in Web applications. 3D technology is used for image editing, modeling, and an increasing number of in home and business applications.
- Page 32 stratagems, the speed of software rendering for simple scenes can approach that of low-level hardware 3D rendering. On the other hand, as scenes become more complex (or frame sizes become larger), there are conflicts between using the CPU for high-level game logic, geometry, lighting, and rendering, all of which increase their demands.
-
Page 33: Pinout And Sync Frequencies
Pinout and Sync Frequencies Analog Color Display Pinouts (DB 15) Note: Analog monochrome type monitors use green video for all video input and ignore red and blue video. Conversion Table: Pin Adapters If you will be using a 9-to-15-pin adapter cable to link your 9-pin monitor connector to the 15-pin accelerator card connector, check Table carefully before you install the cable. -
Page 34: 9-To-15 Pin Conversion Table
Technical Support In the event you have a technical problem with this product, please read the README files in the software CD_ROM. Updated drivers are available through Jaton Web site. Have following information handy when you contact technical support: Name of the product. - Page 35 The information in this document is subject to change in order to improve reliability, design, or function without prior notice and does not represent a commitment on the part of the company. In no event will the company be liable for direct, indirect, special, incidental, or consequential damages arising out of the use or the inability to use the product or documentation, even if advised of the possibility of such damages.
- Page 36 and other rights owners. Use of this copyright protection technology must be authorized by Macrovision Corporation , and is intended for home and other limited viewing used only unless otherwise authorized by Macrovision Corporation. Reverse engineering or disassembly is prohibited. All Trademarks and Registered Trademarks belong to respective owners.
-
Page 37: Limited Warranty
(2) years from manufacturing date. This limited warranty applies only to the original purchaser of Jaton Product and is not transferable. This limited warranty does not apply if failure to the Product Registration, or over thirty (30) days from purchase (original invoice date). -
Page 38: Exclusive Obligation
Reseller/ Vendor: Registered User: Others: This warranty applies only for a period of two (2) years from purchase date of Jaton original invoice. This warranty applies only for a period of two (2) years from manufacturing date. This warranty applies only for... - Page 39 Services agreement: (1) All applicants shall completed service request form from Manufacturer. (2) All returned checks will be charged a $20.00 fee by Manufacturer. (3) All repair and replacement services allow 4-6 weeks from the date of receiving by Manufacturer. (4) All products without warranties require service processing fee $20 (payment in advance), which is not refundable.
- Page 40 This warranty applies only to this product, and is governed by the law of the State of California. Reducing Warranty Claim Rejections. To reduce the potential of incurring damages not covered by Manufacturers warranties, we strongly recommend the following: • Read your manuals before installing peripherals and/or before making changes to the machine’s configuration;...
- Page 41 conjunction with any other hardware item. If a computer product is not working because it is not compatible with another product, or because it has not been properly installed and set-up, the manufacturer does not pay for the service time. To help avoid these inconveniences, contact a professional consultant that one can help you determine the possibility of incompatibility issue before you purchase add-on or accessories.
Need help?
Do you have a question about the 3DForce2MX and is the answer not in the manual?
Questions and answers