
Related Manuals for Jaton 3DForceMX4000


Summary of Contents for Jaton 3DForceMX4000
- Page 1 3DForce MX4000 Series NVIDIA® GeForce™ MX 4000 User’s Manual Version 3.00 C o p y r i g h t © 2 0 0 5 J a t o n C o r p o r a t i o n , U S A...
-
Page 2: Table Of Contents
INTRODUCTION...4 FEATURES ...5 AGP B NTERFACE RAPHICS ROCESSOR ...5 ERFORMANCE ...6 OMPATIBILITY HDTV/DVD P LAYBACK SYSTEM REQUIREMENT...6 CHECK LIST ...7 HARDWARE DESCRIPTION ...7 DISPLAY DEVICES OUTPUT...9 Device Output Connection (TV-out) ...9 Device Output Connection (Dual RGB out)...10 HARDWARE INSTALLATION ...10 NSTALLATION ROCEDURES : ...11... - Page 3 ® XP D INDOWS TECHNICAL ASSISTANCE...31 REQUENTLY SKED PINOUT AND SYNC FREQUENCIES...33 NALOG OLOR ISPLAY ONVERSION ABLE -15 P ONVERSION ECHNICAL UPPORT LIMITED WARRANTY..37 ..37 THER IMITS XCLUSIVE BLIGATION ..38 THER TATEMENTS ERMS AND ONDITIONS ERVICES AGREEMENT .
-
Page 4: Introduction
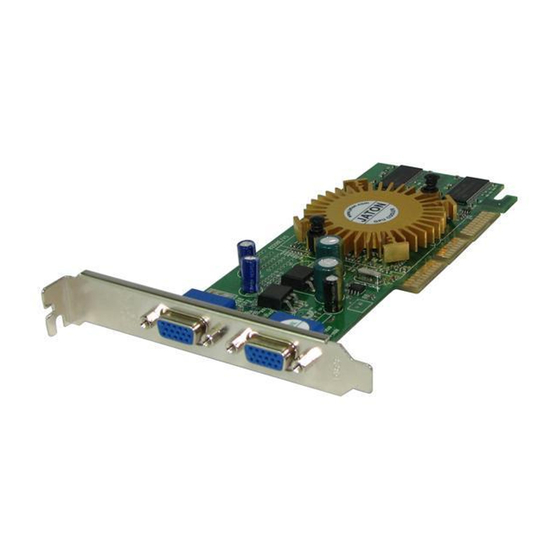
Introduction The 3DForce MX4000 Series video accelerators are excellent 2D/3D multimedia video adapters for AGP 8X local bus desktop PCs’. Based on nVIDIA GeForce4 MX4000 core technology, built-in with 64MB or 128MB DDR SDRAM memory module, these video cards will provide multiple display outputs onboard for TVout (Analog and Digital) or Dual RGB out (Twin) all together in optional. -
Page 5: Features
Features AGP Bus Interface • AGP 8x/4x/2x compatible • AGP 3.0 supported Graphics Processor Unit (GPU) • 256-bit graphics engine • 64MB/128MB DDR SDRAM memory access bus. • Integrated dual 270 MHz RAMDACs drives CRT display • 2 dual 128bit pixel pipelines rendering •... -
Page 6: Compatibility
• High-performance 2D rendering engine • API support - DirectX® 8.1 and lower Compatibility • nVIDIA Unified Driver Architecture • Industry’s first fully compliant professional OpenGL 1.3 support for Windows® operating systems • Windows® 98, Windows®Me, Windows®NT™4.0, Windows® 2000, and Windows®XP HDTV/DVD Playback •... -
Page 7: Check List
• Hard Drive with at least 50MB Free space • MS Windows® 98/Me/NT 4.0/2000/XP operating systems Check List • 3DForce MX4000-64,3DForce MX4000,3DForce MX4000-64Twin or 3DForce MX4000-Twin Multimedia Accelerator. • Software & Documents CD. • Quick Start Guide (Printed). • TV-out convert cable may vary in package, which depends the offering from manufacturer. - Page 8 RCA Composite (TV out) DIM-4Pin (TV out) DB 15 VGA (RGB out) Product Name / PCB Version 3DForce MX4000-64 82208D nVIDIA GeForce4 MX4000 82208D nVIDIA GeForce4 MX4000 3DForce MX4000 82208D nVIDIA GeForce4 MX4000 TVout ports built-in onboard that do not need any converter cable from manufacture.
-
Page 9: Display Devices Output
Display Devices Output Device Output Connection (TV-out) Monitor Note: TV-out convert cable that describes above is bundle within the package from manufacturer. Monitor Convert Cable Composite RCA DIM-4Pin S-Video Connector DB 15 VGA Connector Composite RCA S-Video Connector DB 15 VGA Connector... -
Page 10: Device Output Connection (Dual Rgb Out)
Device Output Connection (Dual RGB out) Monitor Monitor Hardware Installation Installation Procedures The manufacturer assumes no liability for any damage, caused directly or indirectly, by improper installation of any components by unauthorized service personnel. If you do not DB 15 VGA Connector DB 15 VGA Connector Discharge static electricity by touching the GROUND such... -
Page 11: Steps
feel comfortable performing the installation, consult with a qualified computer technician Steps: Turn OFF all powers to your system, including any peripherals (printer, external drives, modem, etc.). Disconnect the power cord and the monitor cable from the back of the computer. Unfasten the cover mounting screws on your system and remove the system cover. -
Page 12: Software Installation
then you must disable that port first. Otherwise, that will be a problem for the new video adapter setup. 4. The driver installation for system upgrade is as the same as below, if an error occurs when you proceed step 1,2 or 3, please consult with your system’s dealer or the existing hardware manufacturers support. - Page 13 3. Click the Change button. 4. Click the Next button at Update Device Driver Wizard. 5. Click the Next button. 6. Select Display a list of the drivers in a specific location... Then click the Next. 7. Insert the Software’s CD then Click the Have Disk button.
- Page 14 Microsoft Windows for your video adapter, then restart the Windows. After the desktop is loaded completely, insert the software’s CD into CD ROM drive and proceed to the display driver installation which provided from the hardware manufacturer. Autorun feature brings-up the “Welcome Screen”, and you may point to “display driver”...
- Page 15 Click on “Next” to continue the process. Windows system will copy all driver files from source media to your local hard disk, please wait until the process has completed.
-
Page 16: Windows ® M Edrive Installation
Click on “Finish” to restart your computer, the new display driver will be in place after Windows boots-up. ® Windows Upgrade video adapter to an existing system. (Windows has been pre-loaded) Select [Next] to install Standard VGA Graphics Adapter at Add New Hardware Wizard screen. - Page 17 Select [Finish] to restart the computer. To a new system: 1. SELECT the “Display” icon from control panel and then tab on “Settings” screen. 2. Select Advanced at selection bar. 3. Click on Adapter tab. 4. Click the Change button at Adapter Screen 5.
- Page 18 software’s CD into CD ROM drive and proceed to the display driver installation which provided from the hardware manufacturer. Autorun feature brings-up the “Welcome Screen”, and you may point to “display driver” then press on it. Microsoft InstallShield® Wizard has start loading its setup process, please wait until it is finished.
- Page 19 Click on “Next” to continue the process. Windows system will copy all driver files from source media to your local hard disk, please wait until the process has completed.
-
Page 20: Microsoft Windows ® Nt™4.0
Click on “Finish” to restart your computer, the new display driver will be in place after Windows boots-up. Microsoft Windows The procedure of display driver installation requires setup with service pack 6 (Microsoft® Windows NT™4.0) first. After your windows desktop has fully loaded service pack 6, you may insert the software CD into CD ROM drive and follow the install steps below: Upgrade video adapter to an existing system. - Page 21 Windows NT 4.0 prompt you for the location where those files for video driver. INPUT the path or unfold with “X:\Winnt4\”. (X: is the CD ROM drive where the Software & Documents CD has been inserted.) If the driver “3DForce MX4000 Series, NVIDIA GeForce4 MX 4000”...
- Page 22 1. Autorun feature brings-up the “Welcome Screen”, and you may point to “display driver” then press on Microsoft InstallShield® Wizard has preparing its setup, please wait until it completes.
- Page 23 Click on “Next” to continue. Scroll down and Select on the “3DForce MX4000 Series, NVIDIA GeForce4 MX4000” , then click on “OK” for next screen.
-
Page 24: Windows ® 2000 Driver Installation
Windows system will transmit all driver files from source media to your local hard disk, please wait until the process has completed. Click on “Finish” to restart your computer, the new display driver will be in place after Windows boots-up. ®... - Page 25 Insert the Software’s CD. Check [Specify a location:] Under [Copy manufacturer’s files from:] enter D:\WIN2K&XP, where D is your CD_ROM drive. Then click on [OK]. Select [Next] to install “3DForce MX4000 Series, NVIDIA GeForce4 MX 4000” driver. Select [Finish] to restart the computer. InstallShield®...
- Page 26 Autorun feature brings-up the “Welcome Screen”, and you may point to “display driver” then press on it. Microsoft InstallShield® Wizard has start loading its setup process, please wait until it has completed. Click on “Next” to continue the process.
- Page 27 Click on “Yes” to continue the installation. Otherwise, you may terminate the process by click on “No”. Click on “Finish” to restart your computer, the new display driver will be in place after Windows boots-up.
-
Page 28: Windows ® Xp Driver Installation
® Windows Upgrade video adapter to an existing system. (Windows has been pre-loaded) Select [Next] at Found New Hardware Wizard. Check [Search for a suitable driver for my device (recommended) ]then select [Next]. Insert the Software’s CD. Check [Specify a location:] Under [Copy manufacturer’s files from:] enter D:\WIN2K&XP, where D is your CD_ROM drive. - Page 29 Autorun feature brings-up the “Welcome Screen”, and you may point to “display driver” then press on it. Microsoft InstallShield® Wizard has start loading its setup process, please wait until it has completed.
- Page 30 Click on “Next” to continue the process. 4. Click on “Continue Anyway” to complete the installation. Otherwise, you may terminate the process at this time.
-
Page 31: Technical Assistance
Click on “Finish” to restart your computer, the new display driver will be in place after Windows boots-up. Technical Assistance Frequently Asked Questions (FAQ) Q1 Why do we need 3D graphics capability in our PC? Answer 3D technology is becoming increasingly important (and common) not only in games, but also in other applications such as VRML, which allows 3D scene descriptions in Web applications. - Page 32 “Rendering Engine” generically applies to the part of the graphics engine that draws 3D primitives, usually triangles. In most implementations, the rendering engine is responsible for interpolation of edges and "filling in" the triangle. Q3 What does the set-up engine do in a graphics controller? Answer A set-up engine allows drivers to pass triangles in the form of raw vertex information;...
-
Page 33: Pinout And Sync Frequencies
Software 3D is generally used to mean using non-specific (2D) hardware in conjunction with the CPU to render for 3D applications. Some of these techniques allow usable 3D applications when high- powered and/or MMX™-equipped CPU's are employed along with special-case software optimization techniques. As stated above, SW 3D can achieve credible results with today's (software optimized) applications, but the rising popularity of good 3D hardware at the consumer price level is inexorably compelling the public to expect... -
Page 34: Conversion Table: Pin Adapters
Note: Analog monochrome type monitors use green video for all video input and ignore red and blue video. Conversion Table: Pin Adapters If you will be using a 9-to-15-pin adapter cable to link your 9-pin monitor connector to the 15-pin accelerator card connector, check Table carefully before you install the cable. -
Page 35: Technical Support
Technical Support In the event you have a technical problem with this product, please read the README files in the software CD_ROM. Updated drivers are available through Jaton Web site. Have following information handy when you contact technical support: Name of the product. - Page 36 Macrovision Corporation , and is intended for home and other limited viewing used only unless otherwise authorized by Macrovision Corporation. Reverse engineering or disassembly is prohibited. All Trademarks and Registered Trademarks belong to respective owners. © 2005 Jaton Corporation. All rights reserved.
-
Page 37: Limited Warranty
(2) years from manufacturing date. This limited warranty applies only to the original purchaser of Jaton Product and is not transferable. This limited warranty does not apply if failure to the Product Registration, or over thirty (30) days from purchase (original invoice date). -
Page 38: Exclusive Obligation
Reseller/ Vendor: Registered User: Others: This warranty applies only for a period of two (2) years from purchase date of Jaton original invoice. This warranty applies only for a period of two (2) years from manufacturing date. This warranty applies only for... -
Page 39: Services Agreement
Services agreement: (1) All applicants shall complete a service request form from Manufacturer. (2) All returned checks will be charged a $20.00 fee by Manufacturer. (3) All repair and replacement services allow 4-6 weeks from the date of receiving by Manufacturer. -
Page 40: Reducing Warranty Claim Rejections
This warranty applies only to this product, and is governed by the law of the State of California. Reducing Warranty Claim Rejections. To reduce the potential of incurring damages not covered by Manufacturers warranties, we strongly recommend the following: • Read your manuals before installing peripherals and/or before making changes to the machine’s configuration;... - Page 41 product is not working because it is not compatible with another product, or because it has not been properly installed and set-up, the manufacturer does not pay for the service time. To help avoid these inconveniences, contact a professional consultant that one can help you determine the possibility of incompatibility issue before you purchase add-on or accessories.
Need help?
Do you have a question about the 3DForceMX4000 and is the answer not in the manual?
Questions and answers