
Related Manuals for Jaton Video-PX7800GT


Summary of Contents for Jaton Video-PX7800GT
- Page 1 Video-PX7800GT series nVIDIA GeForce™ 7800GT User’s Manual Version 1.00 C o p y r i g h t © 2 0 0 5 J a t o n C o r p o r a t i o n , U S A...
-
Page 2: Table Of Contents
INTRODUCTION ... 3 FEATURES AND SPECIFICATIONS ... 3 SYSTEM REQUIREMENT ... 6 CHECK LIST ... 7 HARDWARE DESCRIPTION... 7 DISPLAY DEVICES OUTPUT ... 8 HARDWARE INSTALLATION... 9 NSTALLATION ROCEDURES : ... 9 TEPS TECHNICAL ASSISTANCE... 10 REQUENTLY SKED UESTIONS ... 18 ECHNICAL UPPORT OW TO... -
Page 3: Introduction
Video-PX7800GT series are designed to reach even higher levels of performance through NVIDIA SLI technology. With NVIDIA SLI, you can combine two Video-PX7800GT series in a single system to scale performance by up to 2x. Through and intelligent combination of software and hardware, NVIDIA SLI is able to offer this unbelievable performance on over 60 of the top PC titles. - Page 4 NVIDIA® CineFX™ 4.0 Engine Delivers advanced visual effects at unimaginable speeds. Full support for Microsoft® DirectX® 9.0 Shader Model 3.0 enables stunning and complex special effects. Next-generation shader architecture with new texture unit design streamlines texture processing for faster and smoother gameplay. NVIDIA SLI Technology Delivers up to 2x the performance of a single GPU configuration for unparalleled gaming experiences by allowing two graphics...
- Page 5 WMV-HD—with minimal CPU usage so the PC is free to do other work. Feature requires supported video software. Advanced Motion Adaptive De-Interlacing Smoothes video and DVD playback on progressive displays to deliver a crisp, clear picture that rivals high-end home theater systems.
-
Page 6: System Requirement
life of NVIDIA GeForce GPUs. Includes full support for PCI Express and AGP. OpenGL® 2.0 Optimizations and Support Ensures the best performance and application compatibility for all OpenGL applications. NVIDIA® nView® Multi-Display Technology Advanced technology provides the ultimate in viewing flexibility and control for multiple monitors. -
Page 7: Check List
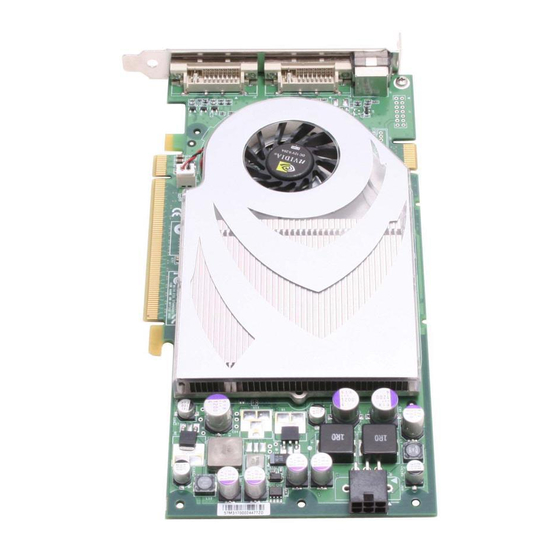
Check List • Video-PX7800GT Multimedia Accelerator • Mini-DIN 9-pin converter cable for VIVO connection (Part # CB9D0006) • DVI to RGB converter (X2) • Standard 4 pin to 6 pin PCI-E power converter cable (Part # CB6D0001) • Software & Documents CD •... -
Page 8: Display Devices Output
Display Devices Output DVI out - DVI connects to LCD display panel. DVI converts to RGB with DVI-RGB converter for VGA out. DVI out - DVI connects to LCD display panel. DVI converts to RGB with DVI-RGB converter for VGA out. Video Out - Connects to HDTV via Component Video Out or to regular TV via S-video Out or Composite Out. -
Page 9: Hardware Installation
Video In – Connects to DVD player or Camcorder via S-video In or Composite In. Hardware Installation Installation Procedures The manufacturer assumes no liability for any damage, caused directly or indirectly, by improper installation of any components by unauthorized service personnel. If you do not feel comfortable performing the installation, consult with a qualified computer technician Steps: Turn OFF all powers to your system, including any peripherals (printer,... -
Page 10: Technical Assistance
Replace the computer cover. Secure the cover with the mounting screws you removed in Step 3. You have now completed the installation of your new graphics adapter on your system. Upgrade Steps: Add or change your video adapter to an existing system, you may precede a few steps before you install the new hardware and software (video display driver). - Page 11 Autorun feature brings-up the “Welcome Screen”, and you may point to “Display Driver” and then press on it. Microsoft InstallShield® Wizard has start loading its setup process; please wait until it has completed.
- Page 12 Click on “Next” to continue the process. The Windows system will copy all driver files from source media to your local hard disk; please wait until the process has completed.
-
Page 13: Windows 2000 Driver Installation
Click on “Finish” to restart your computer, the new display driver will be in place after Windows boots-up. ® Windows 2000 Driver Installation InstallShield® Program: Microsoft Windows®2000 detects this new hardware and places appropriate display driver from its system folder automatically - it doesn’t matter if you have added a new driver or changed the existing one. - Page 14 Autorun feature brings-up the “Welcome Screen”, and you may point to “Display Driver” and then press on it. Microsoft InstallShield® Wizard has start loading its setup process; please wait until it has completed.
- Page 15 Click on “Next” to continue the process.
- Page 16 Click on “Finish” to restart your computer, the new display driver will be in place after Windows boots-up. Notice: We believe that the all the installation steps mentioned above are clear from manufacturer software’s CD to your operating system. Any procedures other than these processes have not been specified.
-
Page 17: Frequently Asked Questions (Faq)
Debug the source-code or fix the error in video driver that should be done by the driver developer. Likewise, upgrade the video driver from the manufacturer or from the original software developer is necessary. Frequently Asked Questions (FAQ) Q1: Is Video-PX7800GT series a new architecture? Answer... -
Page 18: Technical Support
By designing and enhancing these functions at the most fundamental level, NVIDIA has brought graphics performance to new levels in the Video-PX7800GT series. Q3: How many slots will Video-PX7800GT series based cards take up in my PC? Answer One. Video-PX7800GT series is a single slot solution. -
Page 19: How To Obtain Warranty Service
In United States contact: Jaton Corporation. Service Center 556 S. Milpitas Blvd., Milpitas, CA 95035 (408)-934-9369 In Thailand contact: Jaton (Thailand) Co., Ltd. 93, 93/1-2 Moo 4 Thana City PC Tower 1 Fl. Bangna-Trad KM.14 Bangchalong Bangplee Samutprakarn 10540 Thailand Tel: 662-336-1212... - Page 20 In Australia contact: Jaton Technology pty, Ltd. Unit 8, 41-49 Norcal Road, Nunawading, Vic 3131 Australia Tel: (Mel) 03 9873 3999 Fax 03 9873 3933 FCC SHIELDED CABLE WARNING: This equipment has been tested and found to comply with the limits for a Class B digital device, pursuant to Part 15 of the FCC Rules.
-
Page 21: Limited Warranty
(2) years from manufacturing date. This limited warranty applies only to the original purchaser of Jaton Product and is not transferable. This limited warranty does not apply if failure to the Product Registration, or over thirty (30) days from purchase (original invoice date). -
Page 22: Exclusive Obligation
Terms and Conditions Direct Jaton Customer: Reseller/ Vendor: This warranty applies only for a period of two (2) years from purchase date of Jaton original invoice. This warranty applies only for a period of two (2) years from manufacturing date. -
Page 23: Services Agreement
Registered User: Others: Services agreement: (1) All applicants shall complete service request form from Manufacturer. (2) All returned checks will be charged a $20.00 fee by Manufacturer. (3) All repair and replacement services allow 4-6 weeks from the date of receiving by Manufacturer. (4) All products without warranties require service processing fee $20 (payment in advance), which is not refundable. -
Page 24: Reducing Warranty Claim Rejections
rights. You may have other rights, which may vary from state to state. This warranty applies only to this product, and is governed by the law of the State of California. Reducing Warranty Claim Rejections To reduce the potential of incurring damages not covered by Manufacturers warranties, we strongly recommend the following: •... - Page 25 possibility of incompatibility issue before you purchase add-on or accessories. Warranty Service Use Only Serial Number - ten or eleven digit code, the serial number consists of the following parts: Packaging Type Manufactured Date Code Production Numerical Code 00 8 000015 Year Month XXXXX-XXX-XX...
Need help?
Do you have a question about the Video-PX7800GT and is the answer not in the manual?
Questions and answers