Table of Contents
Advertisement
Quick Links
Advertisement
Table of Contents

Related Manuals for Draper 16128


Summary of Contents for Draper 16128
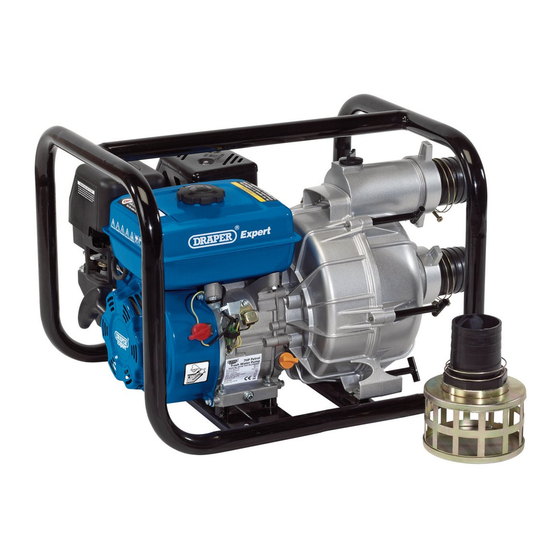
- Page 1 Original Instructions Version 1 750L/MIN 7HP PETROL TRASH WATER PUMP 16128...
-
Page 2: Preface
All photographs and drawings within this manual are document is part of the product; retain it for the life supplied by Draper Tools to help illustrate correct of the product, passing it on to subsequent holders. operation of the product. -
Page 3: Table Of Contents
11.6 Risk of Moving Parts 11.7 Risk from Lifting Additional Health and Safety Instructions for this Trash Water Pump 12. Optional Accessories 12.1 Draper Suction Hoses Health and Safety Information for Machines with a Petrol Engine 12.2 Draper Hose Clamps 6. Identification and Unpacking 13. -
Page 4: Warranty
This warranty period covers parts and labour for 12 months from the date of purchase. Your Draper Tools guarantee is not effective until you can Where tools have been hired out, the warranty period produce, upon request, a dated receipt or invoice to covers 90 days from the date of purchase. -
Page 5: Product Introduction
Any other application beyond the conditions established for use will be considered misuse. Draper Tools accepts no responsibility for improper use of this product. 4.2 Specification Stock No. -
Page 6: Health And Safety Information
• NEVER operate the pump without first correctly • DO NOT modify this product in any way. priming it. • ONLY use spare parts supplied by Draper Tools. • Check the product for broken, worn, or loose parts ATTENTION before every use. -
Page 7: Health And Safety Information For Machines With A Petrol Engine
5. Health and Safety Information • DO NOT drop or strike the pump. • NEVER remove the fuel cap while the engine is running or immediately after use. − If sudden force is applied to the pump, IMMEDIATELY switch it off and inspect it for −... -
Page 8: Identification And Unpacking
6. Identification and Unpacking 6.1 Product Overview (1) (2) (20) (19) (18) (17) (16) (15) (14) (10) (11) (13) (12) Fuel tank cap (11) Muffler (exhaust) Fuel tank (12) Water drain Priming cap (13) Inlet (suction) Hose barb (14) Hose barb coupling “T”... -
Page 9: What's In The Box
If any part is occurred during shipment. damaged or missing, do not attempt to use the product. Please contact the Draper Helpline; contact details can be found at the back of this manual. 1 x Pump unit (not shown) -
Page 10: Preparing The Water Pump
7. Preparing the Water Pump 7.1 Hose Connection Use a solid wall (reinforced) hose to stop the hose from collapsing on the suction side of the pump. Please see the optional accessories section for recommended suction hose. Fig. 3 4. Slide a hose clamp (D) over one end of the solid wall hose (not supplied) and push that end of the hose as far as possible onto the hose barb (Fig. -
Page 11: Setting The Water Pump
8. Setting the Water Pump 8.1 Checking the Engine Oil ATTENTION This product is NOT shipped with engine oil. ALWAYS add oil before first use. Important: Ensure that the oil reservoir is filled with SAE30 four-stroke oil before starting the motor. Damage to the motor is NOT covered under warranty if the motor is run without oil. -
Page 12: Fuelling
8. Setting the Water Pump 8.2 Fuelling ATTENTION Use unleaded petrol ONLY. DO NOT overfill the tank. Leave an air gap between the fuel and the roof of the tank. 3. Screw down the fuel cap securely and clean up any spilled fuel immediately. -
Page 13: Basic Water Pump Operation
9. Basic Water Pump Operation 9.2 Starting the Pump Important: Place the pump on a firm and level surface during use. Keep in mind that the length of the hoses and Important: Read and understand all Health and Safety the difference in elevation between the pump and the guidance and preparation instructions before attempting source and delivery reservoirs may impact the flow rate. -
Page 14: Stopping The Pump
9. Basic Water Pump Operation 9.3 Stopping the Pump Important: Before stopping the engine, lower the throttle to idle (pushed to the left) and run the engine for (16) a few minutes. • If the engine is only being stopped for a moment, slide the fuel lever to the left and turn the engine switch (16) off. -
Page 15: Maintenance And Storage
10. Maintenance and Storage 10.2 Cleaning out Blockages Important: ALWAYS drain the product of BOTH FUEL AND OIL before returning it to Draper Tools for repairs. ALWAYS ensure that the water pump is turned off before Important: This product may only be serviced by attempting to open the pump. -
Page 16: Changing The Oil
10. Maintenance and Storage 10.3 Changing the Oil 10.4 Changing the Air Filter Element Important: The engine oil should be changed after the Important: The air filter element should be replaced first 20 hours of operation and then every 100 hours after every 50 hours of operation. thereafter. -
Page 17: Spark Plug Care
10. Maintenance and Storage 10.5 Spark Plug Care 10.6 Changing the Engine Oil Important: The spark plug should be checked and Important: The engine oil should be changed after the cleaned after every 50 hours of use and replaced if first 20 hours of operation and then every 100 hours necessary. -
Page 18: Draining The Fuel
10. Maintenance and Storage 10.7 Draining the Fuel Important: Read all the Health and Safety guidance for the use of petrol as a fuel before filling or using this product. 1. Ensure that the fuel lever (18), throttle lever (20), choke lever (19) and engine switch (16) are in their OFF or lowest positions and allow the engine to cool for at least 30 minutes (see Fig. -
Page 19: Storing The Pump
10. Maintenance and Storage 10.8 Storing the Pump Prepare the pump correctly if it is to be stored for a prolonged period: 1. Ensure that all switches are in the OFF or lowest position. 2. ALWAYS allow the pump to cool for at least 30 minutes when storing it after use. -
Page 20: Periodic Maintenance
Regular maintenance is most important for the best performance and safe operation. For guidance relating to any of the listed procedures, contact the Draper Helpline; details can be found on the back page of this manual. – 20 –... -
Page 21: Optional Accessories
11. Associated Risks and Preventative Measures 11.1 Risk of Fire Hazard What could happen How to prevent it Attempting to fill the Fuel and fuel vapours can become ignited Turn the engine off and allow it to cool fuel tank while the by coming in contact with hot components before adding fuel to the tank. -
Page 22: Risk Of Injury And Property Damage When Transporting Water Pump
11. Associated Risks and Preventative Measures 11.2 Risk of Injury and Property Damage When Transporting Water Pump Hazard What could happen How to prevent it Fire, inhalation, Fuel or oil can leak or spill, resulting in fire, The water pump is equipped with a fuel damage to vehicle a breathing hazard, serious injury or death. -
Page 23: Risk Of Hot Surfaces
11. Associated Risks and Preventative Measures 11.5 Risk of Hot Surfaces Hazard What could happen How to prevent it Contact with hot Contact with hot surfaces, such as engine During operation, touch only the control engine and water exhaust components, could result in surfaces of the water pump. -
Page 24: Optional Accessories
12. Optional Accessories 12.1 Draper Suction Hoses Description Stock No. Part No. 3" Suction hose 20471 APWP3 12.2 Draper Hose Clamps Description Stock No. Part No. 3" Hose clamps (x 2) 22601 SHC3 – 24 –... -
Page 25: Troubleshooting
13. Troubleshooting Problem Possible cause Remedy The engine does not start. The fuel level is too low. Check the fuel level and top it up if it is low (see 8.2 Fuelling). The fuel lever is in the lowest Move the fuel lever to a higher position. -
Page 26: Disposal
14. Disposal At the end of its working life, or when it can no longer be repaired, dispose of the product according to local regulations. Contact your local authority for details of collection schemes in your area. In all circumstances: • DO NOT dispose of this product with domestic waste • DO NOT dispose of this product with unsorted municipal waste... -
Page 27: Explanation Of Symbols
15. Explanation of Symbols Do not expose to rain or wet conditions Hot surfaces, do not touch CAUTION! WARNING! Risk of electric shock WEEE – Danger! Waste Electrical & Electronic Equipment Highly flammable liquid Do not dispose of Waste Electrical & Electronic Equipment in with domestic rubbish Wear ear defenders Do not abandon in the environment... - Page 28 General Enquiries: +44 (0) 23 8026 6355 General Fax: +44 (0) 23 8026 0784 Service / Warranty Repair Agents For aftersales servicing or warranty repairs, please contact the Draper Tools Product Helpline for details of an agent in your area. © Published by Draper Tools Limited...
Need help?
Do you have a question about the 16128 and is the answer not in the manual?
Questions and answers