Table of Contents
Advertisement
Quick Links
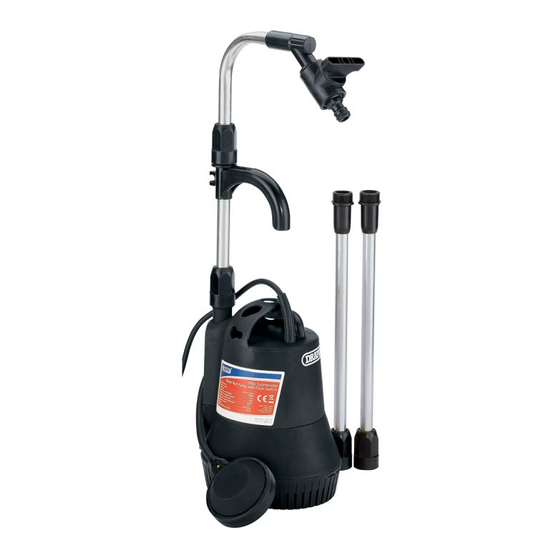
230V SUBMERSIBLE
WATER BUTT PUMP
WITH FLOAT SWITCH
40218
These instructions accompanying the product are the original instructions. This document is part of the product,
keep it for the life of the product passing it on to any subsequent holder of the product. Read all these
instructions before assembling, operating or maintaining this product.
This manual has been compiled by Draper Tools describing the purpose for which the product has been
designed, and contains all the necessary information to ensure its correct and safe use. By following all the
general safety instructions contained in this manual, it will ensure both product and operator safety, together
with longer life of the product itself.
AlI photographs and drawings in this manual are supplied by Draper Tools to help illustrate the operation of the
product.
Whilst every effort has been made to ensure the accuracy of information contained in this manual, the Draper
Tools policy of continuous improvement determines the right to make modifications without prior warning.
Advertisement
Table of Contents

Related Manuals for Draper WBP1A


Summary of Contents for Draper WBP1A
- Page 1 AlI photographs and drawings in this manual are supplied by Draper Tools to help illustrate the operation of the product.
-
Page 2: Introduction
Commercial copying, redistribution, hiring or lending is prohibited. No part of this publication may be stored in a retrieval system or transmitted in any other form or means without written permission from Draper Tools Limited. In all cases this copyright notice must remain intact. -
Page 3: Table Of Contents
CONTENTS 1. TITLE PAGE 1.1 INTRODUCTION......................2 1.2 REVISION HISTORY ....................2 1.3 UNDERSTANDING THIS MANUAL ................2 1.4 COPYRIGHT NOTICE ....................2 2. CONTENTS 2.1 CONTENTS ........................3 3. WARRANTY 3.1 WARRANTY......................... 4 4. INTRODUCTION 4.1 SCOPE......................... 5 4.2 SPECIFICATION ......................5 4.3 HANDLING AND STORAGE .................. -
Page 4: Warranty
This warranty applies in lieu of any other warranty expressed or implied and variations of its terms are not authorised. Your Draper warranty is not effective unless you can produce upon request a dated receipt or invoice to verify your proof of purchase within the warranty period. -
Page 5: Introduction
INTRODUCTION 4.1 SCOPE This pump is designed for pumping rain water out of a water butt for garden/plant watering This pump is not designed for use in fish ponds. 4.2 SPECIFICATION Stock No...........................98911 Part No............................... SWP121 Motor: Rated voltage ........................230V Rated frequency........................ -
Page 6: Health And Safety Information
HEALTH AND SAFETY INFORMATION Have this tool repaired by a qualified person. This tool is designed to conform to the relevant international and local standards and as such should be maintained and repaired by someone qualified; using only original parts supplied by the manufacturer: This will ensure the tool remains safe to use. -
Page 7: Power Tool Use And Care
HEALTH AND SAFETY INFORMATION 3) Personal safety continued... e) Do not overreach. Keep proper footing and balance at all times. This enables better control of the power tool in unexpected situations. f) Dress properly. Do not wear loose clothing or jewellery. Keep your hair, clothing and gloves away from moving parts. - Page 8 If the power cable becomes damaged it must be changed by the manufacturer or it’s service agents. Important: Any pump returned to Draper Tools Ltd under warranty must be CLEAN. If a pump is received that has NOT been cleaned, it will be returned to you at your cost.
-
Page 9: Connection To The Power Supply
The float switch fitted to this pump is not suitable for continuous use as an on/off switch. Important: ANY PUMP RETURNED TO DRAPER TOOLS UNDER WARRANTY MUST BE CLEAN. IF A PUMP IS RECEIVED THAT IS NOT, OR HAS NOT BEEN CLEANED, IT WILL BE RETURNED TO YOU AT YOUR COST. -
Page 10: Technical Description
TECHNICAL DESCRIPTION 6.1 IDENTIFICATION Filtered inlet. (2) Pump outlet. (3) Carry handle. (4) Approved 3 pin non-rewireable moulded plug and cable. (5) Float control and on/off switch. - 10 -... -
Page 11: Unpacking And Checking
Lay the contents out and check them against the parts shown below. If any part is damaged or missing, please contact the Draper Help Line (the telephone number appears on the Title page) and do not attempt to use the product. - Page 12 ASSEMBLING THE WATER BUTT PUMP Note: Remove the plug from the socket before carrying out adjustment, servicing or maintenance. 8.1 EXTENSION TUBES - FIGS.1 - 2 Attach the straight extension piece (6) to the threaded pump outlet (2) by tightening clockwise. Ensure seal (6.1) is installed correctly to achieve a water tight (6.1) connection.
- Page 13 INSTALLING THE WATER BUTT PUMP 9.3 INSTALLATION - FIG. 5 The pump must be fully submersed before the power is switched on. Do not turn the pump on when its dry. FIG.4 9.4 POSITIONING THE PUMP - FIGS. 5 & 6 When submersing or lifting the pump it may be necessary to use a rope or chain, this must only be attached to the transport handle.
-
Page 14: Connecting To Power Via Rcd
Plug your pump into a Residual Current Device (RCD) such as Draper Stock No.69307 (8) or 89301 (9) and connect to your mains supply. RCD’s sold separately FIG.8 9.7 SWITCHING ON THE PUMP... -
Page 15: Maintenance
10. MAINTENANCE 10.1 MAINTENANCE & PARTS REPLACEMENT (1.1) If the replacement of the power cable is necessary, this has to be done by the manufacturer or his agent in order to avoid a safety hazard. FILTER REMOVAL Note: Remove the plug from the socket before carrying out adjustment, servicing or maintenance. -
Page 16: Optional Accessories
11. OPTIONAL ACCESSORIES 11.1 OPTIONAL ACCESSORIES A full range of accessories are available from Draper Tools. Please visit our website for details: www.drapertools.com - 16 -... -
Page 17: Troubleshooting
12. TROUBLESHOOTING 12.1 TROUBLESHOOTING CHECKLIST WARNING: For your own safety, always turn the main switch on the machine "Off" and remove the plug from the power supply before carrying out any servicing or maintenance. Problem Cause Remedy No power 1. Fuse 1. -
Page 18: Explanation Of Symbols
13. EXPLANATION OF SYMBOLS 13.1 EXPLANATION OF SYMBOLS Single value noise marking. (Maximum declared A-Weighted sound power level in decibels). Do not dispose of WEEE* unsorted municipal waste. Warning! Read the instruction manual. Warning! Not to be used in fish ponds. - 18 -... -
Page 19: Disposal
14. DISPOSAL 14.1 DISPOSAL – At the end of the machine’s working life, or when it can no longer be repaired, ensure that it is disposed of according to national regulations. – Contact your local authority for details of collection schemes in your area. In all circumstances: •... - Page 20 ©Published by Draper Tools Limited. No part of this publication may be reproduced, stored in a retrieval system or transmitted in any form or by any means, electronic, mechanical photocopying, recording or otherwise without prior permission in writing from Draper Tools Ltd.
Need help?
Do you have a question about the WBP1A and is the answer not in the manual?
Questions and answers