
Related Manuals for York Fitness WR1000


Summary of Contents for York Fitness WR1000
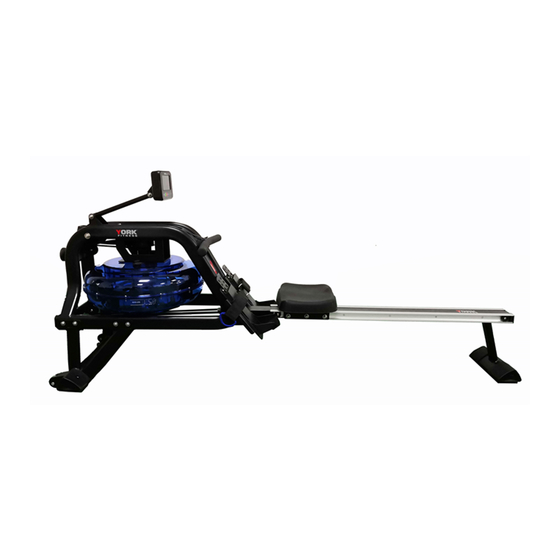
- Page 1 Owner’s Manual YORK WR1000 WATER RESISTANCE ROWER Item # YRK56041A www.yorkfitness.com.au...
- Page 2 Important Safety Instructions WR1000 Water Resistance Rower Assembly Instructions Operation of Your Console Troubleshooting Parts List ATTENTION THIS ROWER IS INTENDED FOR RESIDENTIAL USE ONLY AND IS WARRANTED FOR THE APPLICATION. ANY OTHER APPLICATION VOIDS THIS WARRANTY IN ITS ENTIRETY.
-
Page 3: Important Safety Instructions
Important Safety Instructions When using an electrical appliance, basic precautions should always be followed, including the following: Read all instructions before using this appliance. DANGER - To reduce the risk of electric shock: 1. Always unplug this appliance from the electrical outlet immediately after using and before cleaning. WARNING - To reduce the risk of burns, fire, electric shock, or injury to persons: 1. -
Page 4: Before You Begin
For your benefit, read this manual carefully before you use the York Fitness WR1000 Water Resistance Rower. To help us assist you, note the product model number and serial number before contacting us. Before reading further, please familiarize yourself with the parts that are labeled in the drawing below. -
Page 5: Pre-Assembly Check List
PRE-ASSEMBLY CHECK LIST NO.1 NO.2 NO.4 NO.25 NO.26 NO.46 NO.3 NO.35 NO.82 NO.83 NO.77 NO.76 Water Purification NO.36 tablet www.yorkfitness.com.au... -
Page 6: Parts List
Parts List PART NO. DESCRIPTION Q’TY Main Frame Front Stabilizer Rear Stabilizer Slide Rail Left End Cap Right End Cap Console Rail Endcap L Rail Endcap R Stopper Seat Funnel Pumping Siphon Water-purification tablet User manual Hardware parts Note: Above parts are all needed to assemble this machine. Before you start to assemble, please check the hardware packaging to make sure everything is included. -
Page 7: Hardware Parts List
HARDWARE PARTS LIST #35 Stopper 2pcs #58 M8*15 4pcs #60 M8*18 14pcs #66 M8*15 4pcs #68 M4*12 2pcs #71 OD20*ID8.5*1.5 16pcs #74 S5 1pc #75 S13-17 1pc #82 Rail Endcap L 1pc #83 Rail Endcap R 1pc #87 OD16*ID8.5*1.5 2pcs www.yorkfitness.com.au... -
Page 8: Rear Stabilizer
Assembly Instructions Rear Stabilizer #66 M8*15 4pcs #71 OD20*ID8.5*1.5 4pcs S13-17 NOTE: We recommend having 2 people to assemble the product. 1. Turn over the Slide Rail (No. 3) as above. Attach the Rear Stabilizer (No.4) to the Slide Rail with 4 Washers (No.71) and 4 Outer Hex Screws (No.66). 2. - Page 9 www.yorkfitness.com.au Front Stabilizer End caps #68 M4*12 2pcs S13-17 1. Attach L & R End Caps (No.25 & 26) to Front Stabilizer (No.2). Then tighten with 2 Cross Screws (No.68) using the Spanner (No.75). www.yorkfitness.com.au...
- Page 10 Attaching the Front Stabilizer #60 M8*18 8pcs #71 OD20*ID8.5*1.5 8pcs 1. Turn the Main Frame (No.1) upright. Attach the Front Stabilizer (No.2) to Main Frame (No.1) using 8 Washers (No.71) and 8 Screws (No.60). Tighten with Allen Wrench (No.74). 2. You can put 3~4 screws into the holes first and start tightening by hand. After all the screws are put in, then tighten with the tool.
- Page 11 Seat and Rail #35 S t opper 2pcs #58 M 8*15 4pcs #60 M 8*18 2pcs #87 O D 16*I D 8. 5*1. 5 2pcs #82 R ai l endcap L 1pc #83 R ai l endcap R 1pc 1. Slide the Seat (No.36) onto the Slide Rail (No.3). 2.
- Page 12 Console #60 M 8*18 4pcs #71 O D 20*I D 8. 5*1. 5 4pcs 1. Attach Console (No.46) to Main Frame (No.1) using 4 Washers (No.71) and 4 Screws (No.60). Tighten with Allen wrench (No.74). www.yorkfitness.com.au...
-
Page 13: How To Fill And Empty The Tank
How to Fill and Empty the Tank 1. Remove the Fill Plug (No.33) from the Upper Tank Cover (No.12). 2. To fill tank with water, refer to Fig. A. Insert the Funnel (No.77) into the tank, then use a cup or the Siphon Pump (No.76) and a bucket to fill the tank. -
Page 14: Adjustment Guide
Adjustment Guide There are 3 hooks (A, B, C) for the bungee cord, located on the inside of the Frame (No.1) under the water tank. If you hook the Bungee Cord (No.39) on to B or C, it increases the assisted return of the mesh belt. - Page 15 Adjustment Guide and Storage The pedal strap is adjustable and can be personalized to fit the user’s foot size. To adjust the pedal strap, remove the Velcro end of the strap from the mesh side by pulling it upward and over to the side. Once removed, you may increase the opening of the pedal strap by pulling the mesh end up and to the side.
- Page 16 Adjustment Guide Adjusting the Balance Adjust the End Caps on the Rear Stabilizer (No.4) of the machine if the machine is unbalanced during use. CAUTION! Moving parts, such as the seat, can crush and cut. Keep hands clear of the Slide Rail during use.
- Page 17 CAUTION! Move the Seat (No.36) to the front of the Slide Rail (No.3) first or it will glide down when raising the rower up! CAUTION! Move with caution when you raise the rower up, as your head may touch the Rear Stabilizer (No.
-
Page 18: Operation Of Your Console
Operation of Your Console Our computerized display console on the WR1000 Water Resistance Rower allows the user to tailor a personalized workout by monitoring their progress. During a workout, the display console will alternately and repeatedly display the Time, Time/500M, SPM, Distance, Strokes, Total Strokes, Calories Burned and Pulse (all of the above). - Page 19 Functions TIME: Set a target time by pressing the UP and/or DOWN buttons (1min ~ 99 min), in 1 minute increments. TIME / 500M: Your average time to reach 500 metres is automatically displayed. SPM: Strokes per minute. DISTANCE: Preset a target value by pressing the UP and/or DOWN buttons (0 ~ 99900 meters), This is measured in 100 metre increments.
- Page 20 Operation of Your Console 1. Install 2 AA batteries (included) and the console will beep for 2 seconds (Fig.1). Then the console will enter into the CLOCK & CALENDAR MODE (Fig.2). 2. The CLOCK will flash. Press UP / DOWN to set the hour. Press ENTER to confirm. Press UP / DOWN to set the minutes.
- Page 21 Operation of Your Console 1. MANUAL (Fig.4): There are 2 options in MANUAL mode. A. The console can be set to countdown a value. When you select MANUAL, the value of TIME will start to flash. Press UP to set the value of TIME to countdown. Press ENTER to confirm it.
- Page 22 A. Press START button to start and STOP will disappear. USER and PC will display in the matrix (Fig.6). The console will stop when either user or console has reached the race distance that was set. Then the matrix displays “PC WIN” or “USER WIN” (Fig.7). B.
-
Page 23: Troubleshooting
Trouble Shooting Problem Cause Solution Batteries not Installed Install Batteries Monitor does not display Ensure the computer wires are connected properly at both ends of Computer Wires not connected the console support tube Ensure the computer wires are connected properly at both ends Sensor wire not connected of the console support tube No speed or distance... -
Page 24: Part List
Part List PART NO. DESCRIPTION Main frame Front Stabilizer Slide Rail Rear Stabilizer Support for computer Support Plate Tank Plate Plate for bushing Handlebar Seat carriage Impeller Upper tank Lower tank Mesh belt wheel Decorate cover Belt wheel Handlebar seat Roller Roller shaft Guide roller... - Page 25 PART NO. DESCRIPTION Sensor stand R Bushing Pin Ø6.0*40 Console Sensor Wire Sensor Holder Magnet Ø10*5 Spacer for mesh belt wheel Short spacer Screw M10*185 Washer OD25*ID10.5*2.0 Screw M8*30 Screw M6*15 Nylon lock nut M8 Nylon lock nut M10 Flat screw M8*15 Screw M10*55 Screw M8*18 Screw M3*20...
- Page 26 www.yorkfitness.com.au...
- Page 27 York Fitness WR1000 Water Resistance Rower.: WARRANTY, SAFETY AND IMPORTANT ASSEMBLY INFORMATION Please read and retain this manual as it will assist with identification for parts and service. ---------------------------------------------------------------------------------------------------------------------- BOYLES FITNESS warrants their Rower to be free from defects in material and workmanship under normal use and service conditions.
- Page 28 BFE Warranty Policy – November 1 2013 1. When purchased from an authorised BFE distributor, the BFE warranty shall guarantee that all framework and components of your product are free from faulty manufacture. All faulty framework and components will be repaired or replaced as set out in this policy. All warranties in this policy apply to INDOOR HOME/DOMESTIC USE ONLY.
- Page 29 (b) Lack of general maintenance and or failure to service or maintain the equipment in accordance with the user manual specifications and recommendations. This includes a lack of lubrication. Only use factory approved silicon lubricant. DO NOT USE WD40 or anything similar.
- Page 30 Returned Goods: The unauthorised return of parts or product shall be refused and placed in the hands of the carrier at the cost of the shipper. Return authorisations (RA) can be obtained from BFE Head Office only. Service Department hours: Monday to Friday between 8am and 3pm Service Email: spares@bfe.com.au Service Request: www.bfe.com.au/service PLEASE NOTE:...
Need help?
Do you have a question about the WR1000 and is the answer not in the manual?
Questions and answers