GMI PS500 User Training
Hide thumbs
Also See for PS500:
- User handbook manual (70 pages) ,
- User handbook manual (127 pages) ,
- User handbook manual (89 pages)
Advertisement
Quick Links
Advertisement

Related Manuals for GMI PS500


Summary of Contents for GMI PS500
- Page 1 Detection, P rotection, Innovation PS500 USER TRAINING Iss.A...
- Page 2 Detection, P rotection, Innovation • Single Button User Operation • Integral Impact Resistant Housing • Graphic Display with Screen Light • 4 Gases Detected Simultaneously • High Intensity Audible / Visual Alarms • Datalogging • Infrared interface for data download •...
- Page 3 Detection, P rotection, Innovation • Certification Hazardous areas – flammable atmospheres: ATEX - required for all member countries of the EU − UL - allows use in America − Performance testing: MED (Ships’ Wheelmark) - EU Marine Equipment Directive −...
- Page 4 Detection, P rotection, Innovation • Ranges of Operation – 4 gases are monitored: • 0-100% LEL propane • 0-25% Oxygen (O • 0-1000 ppm Carbon Monoxide (CO) • 0-5% Carbon Dioxide (CO • NB: this slideshow shows pics of 5 gas version –...
- Page 5 Detection, P rotection, Innovation • Operating Procedure – Check the Following Before Use: • instrument is clean and in good condition • battery is fully charged and fitted correctly • Sensor gas inlets are clean and in good condition • all gas ranges are operational and the instrument is zeroed •...
- Page 6 Detection, P rotection, Innovation • Switching the Instrument On −Press and Hold right button for 1 s. −Instrument begins warm-up routine. During 30 second warm-up a countdown timer appears on the screen −The instrument display identifies the model, serial number, software version, datalogging option and battery status during warm-up.
- Page 7 Detection, P rotection, Innovation • Warm-up Information − Time and Date • The time and date from the instrument’s built-in clock is displayed − Calibration Required • If the display below appears (audible / visual alarms are also activated), the instrument has detected a fault in the calibration memory.
- Page 8 Detection, P rotection, Innovation • Warm-up Information – Calibration Due Date • The calibration due date is shown on the display • If the calibration due date has expired, the audible and visual alarm activates • Press right Button once to acknowledge overdue calibration due date, cancel alarms and continue with warm-up...
- Page 9 Detection, P rotection, Innovation • Warm-up Information – Sensor Confirmation Check • A diamond symbol appears above each sensor to confirm that the sensor – has been recognised – is working correctly – is being zeroed • When sensors are zeroed correctly a tick appears above each sensor...
- Page 10 Detection, P rotection, Innovation • Warm-up Information – Sensor Check Failure • If sensor(s) fail the zero check at the end of warm-up, the audible and visual alarms activate. The instrument display will show a spanner symbol. • To acknowledge the alarm, press the right button. This clears the audible / visual alarm.
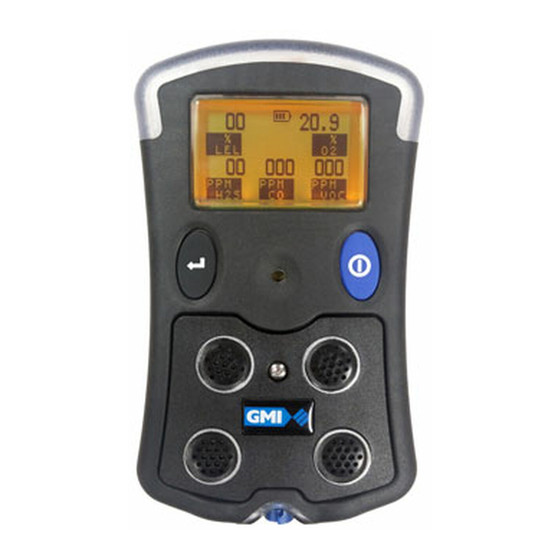
- Page 11 Detection, P rotection, Innovation • Normal Operating Display – When warm-up is completed successfully, screen light switches off and normal operating screen is shown – Each gas the instrument can measure is displayed – Display screen light can be manually switched on with a single press of the right button.
- Page 12 Detection, P rotection, Innovation • Viewing Maximum and Minimum Recorded Values − Start from normal operating screen. Press the right button to switch screen light on. Press right button again while light is on to view maximum values for each gas. −...
- Page 13 Detection, P rotection, Innovation • Alarms − All gas ranges have alarm limits that trigger an alarm when the measured value exceeds the set level − If a pre-set alarm is exceeded, the audible alarm sounds, LEDs flash red and the gas range in alarm flashes on the display •...
- Page 14 Detection, P rotection, Innovation • Alarms – The instrument display will signal the range in alarm. • Example of LoLo Oxygen Alarm Display toggles to • Example of HiHi LEL Alarm Display toggles to...
- Page 15 Detection, P rotection, Innovation • Alarms – Alarms can be latching or non-latching • Latching - alarm will stay on until the user resets by a press and hold of the right button when the gas level return to within the pre-set alarm limits •...
- Page 16 Detection, P rotection, Innovation • Alarms − Acknowledging Gas Alarms • Once in a safe gas free area, or the gas reading has returned to within pre-set limits, press and hold the right button to acknowledge/clear the alarm sounder and extinguish the red LED’s.
- Page 17 Detection, P rotection, Innovation • Alarms − High Flammable Gas Over-Range Alarms • Protects the user from danger in event of the LEL sensor being over exposed to a high concentration of flammable gas • When over 120% LEL has been detected, the displayed value will change to four rising arrows, tone of audible alarm will change and a flashing message will be shown alternating...
- Page 18 Detection, P rotection, Innovation • Alarms − High Flammable Gas Over-Range Alarms • The instrument must be returned to a gas free area and switched off • Switch off by a press of both buttons together. A timer from 10 to zero will appear with the messages below alternating...
- Page 19 Detection, P rotection, Innovation • Default Alarm Settings (Table 1) − For more alarm levels, refer to contract review...
- Page 20 Detection, P rotection, Innovation • Confidence Signal – During normal operation, the instrument sounds a confidence beep and illuminates the right LEDs briefly every 15 seconds. – This function makes the user aware that the instrument is working correctly. – However, for this project we have disabled the audible beep...
-
Page 21: Low Battery
Detection, P rotection, Innovation • Fault Alarms −Low Battery • The ‘Low Battery’ flag is displayed intermittently when the instrument’s battery power is low (approx. 30 mins operating time remaining). The audible alarm sounds every 2 secs and a red LED flashes. •... - Page 22 Detection, P rotection, Innovation • Fault Alarms − Zero Fault • The ‘Zero Fault’ flag and a flashing spanner appears, after warm-up, if the instrument is switched on in the presence of gas or the instrument has been unable to zero all sensors correctly. The audible alarm sounds, once every 2 secs, and the red LED flashes.
- Page 23 Detection, P rotection, Innovation Fault Alarms • Zero Fault − • If a Zero Fault flag and a spanner appears above gas type, then sensor requires replacement or an electrical fault exists. • If a Zero Fault flag and a flashing spanner symbol alternating with a zero LEL reading appear, apply test gas for 2 minutes to allow the display to return to zero.
- Page 24 Detection, P rotection, Innovation • Calibration Expired – During normal operation where the calibration date has expired, a warning flag will flash on the display every 30 seconds to warn the user that the expiry date has been exceeded.
- Page 25 Detection, P rotection, Innovation • Switching Instrument Off −Press and hold the left and right button together to switch the instrument off. −The instrument will start a countdown from three (3) to OFF. Both buttons must be pressed together until the display goes blank.
- Page 26 Detection, P rotection, Innovation • Operator Maintenance − Recharging a Battery Pack • Battery should be left overnight connected to the standard charger • Battery pack can be removed from the instrument and connected to the charger or it can be charged while still connected to the instrument...
Need help?
Do you have a question about the PS500 and is the answer not in the manual?
Questions and answers