Advertisement
Quick Links
Advertisement

Related Manuals for COMGROW CNC Carving Machine


Summary of Contents for COMGROW CNC Carving Machine
- Page 1 User Manual V1.1...
- Page 2 Welcome 1. COMGROW cannot verify and ensure that you are assembling the ROBO CNC correctly. We are not responsible for and expressly disclaim liability for loss, injury, damage or expense associated with the assembly, handling, storage, use or other disposal of the product.
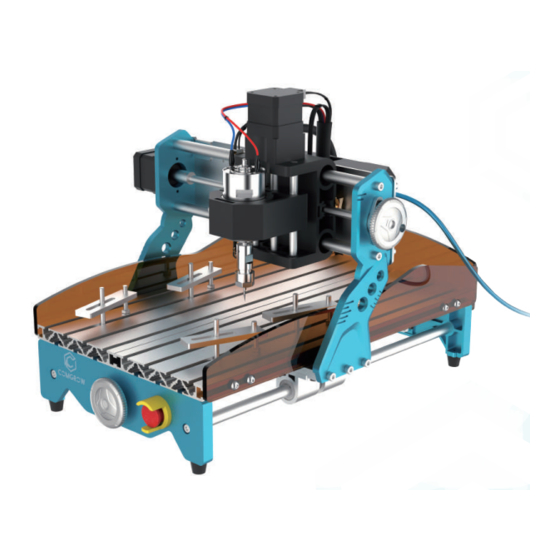
- Page 3 Milling size 300*180*45mm Comgrow was founded in 2017 by people who have a serious passion for technology that helps you make things. With this deep-rooted dedication, we wanted to make the digital manufacturing process more accessible, giving educators, engineers, manufacturers, small businesses and tinkerers Weight 7.5KG...
- Page 4 Assembly:Part 1 Contents Ready: Y-axis base XZ-axis gantry Protective baffle Plug 24V/5A Adapter a:Protective baffle(x2) offline control Spindle motor Spindle Tool holders offline control handle handle cable b:Y-axis base(x1) Tool setting gauge Wrenches Clamps*4 SD Card USB cable block Remove the two protective baffles (a) and install the M5*10 (c) screws and M5 T-nuts (d) Install the protective baffle on both sides of the c:M5X10 Screw(x8)...
- Page 5 Assembly:Part 2 Assembly:Part 3 Ready: Ready: e:back side panel(x1) g:M5X12 Screw(x6) Use two M5*12 screws (f) to secure the back side panel (e) to the rear of the Y-axis base Using six M5*12 screws (g) , secure the XZ-axis gantry (h) to the side of the Y-axis base.
- Page 6 Assembly:Part 4 Wiring schematic Ready: i:M4X25 Screw(x1) Z-axis limit switch cable Y-axis limit switch cable Take out the spindle motor and load into the collet, The spindle red wire is connected to the Use an Hexagonal wrench to jam the gap port next to the red dot mark on the motor The side with the red...
- Page 7 Assemble the hold downs Tool Change • Fixing the material (PVC, wood, acrylic, or other plastic boards.) on the table of the engraving machine Use two wrenches to remove the lock nut on the spindle, select the appropriate tool into the handle, need with clamps.
- Page 8 Mainboard Module Instructions for use of the main board mode: • AB top at the same time, for MOS tube mode, can adjust the spindle speed, Spindle MOS tube the motherboard default wiring in this mode. mode power input • A up B down, for the relay mode, can not adjust the spindle speed, you need to use an external Spindle MOS tube current greater than on the motherboard.
- Page 9 • If there are multiple USB serial ports, right click each one and check the manufacturer, the machine will be "CH340". 2.Open the SD card, select "CNC Carving Machine". 3.Select "software". 4.Select "win".If you're on ios, choose "mac". 5.Select "Driver".
- Page 10 3. Open Grblcontrol software 4.Grblcontrol Use • Click Service • Choose COMX port • Click OK,connect • Check connection display,if 'Not Connected' is displayed, connection fails if 'Port Opened' is displayed, connection is done 1.You can obtain this software from others, or you can use our complimentary software .
- Page 11 6.Open the test file 5.Grblcontrol software Interface introduction 1.Select "file" from the menu bar, then select "Open". 2.Open the SD card, select "CNC Carving Machine". 3.Select "test file". 4.Click the"40X40-3.175.nc" . Control Coordinates movement spindle on/off XY \re zero Z \re zero...
- Page 12 7.Start Running After the test file is opened, the software interface is as follows. Control the spindle head to move to the Observe the tool path operation window at the top left of Candle, the moving dotted line is the line of center of the engraved material, as shown below, the red box is the safety range of the engraved material machine operation.
- Page 13 Operation precautions Tool setting gauge block Please check to make sure the CNC machine is assembled and wired correctly first, then start the The use of tool setting instrument is very convenient for users to determine the working zero position of machine test run.
- Page 14 Offline Controller B. Menu Page Notice: If you want to run the CNC machine with an offline controller, you must first disconnect the USB cable from the controller board. 1. Connect the memory card to the computer through a card reader, copy the G-code into the memory card, and then insert the memory card into the offline control handle.
- Page 15 C. Move Page D. File Page X-axis positive direction Press key [Y+]or[Y-] to select file X-axis negative direction Press key [OK] to Enter Y-axis positive direction Y-axis negative direction Press key [OK] to Confirm cave Z-axis positive direction Press key [RESET] to pause or run Z-axis negative direction On first 2 pages, pressing and holding on the 'Back' button to return;...
- Page 16 Laser engraving Our machine can be used to do CNC engraving or laser engraving. To use laser engraving, you need to install the LaserGRBL Control Software first. 1.If you are using it for the first time, you need to install the software. Open the SD card,select "LaserGRBL Control Software".
- Page 17 Upgrade spindle motor: https://youtu.be/aF2GPAPU-Rk Thanks again for using our CNC engraving products, if you encounter any problems during the use, we will reply you at the first time. service@comgrow.com Service Email: https://www.comgrow.com For related installation files, please check: 5W or 10W laser head wiring: https://www.facebook.com/groups/comgrow/...
Need help?
Do you have a question about the CNC Carving Machine and is the answer not in the manual?
Questions and answers