COMGROW COMGO Z1 Beginner's Manual
Laser lightburn
Hide thumbs
Also See for COMGO Z1:
- User manual (24 pages) ,
- User manual (14 pages) ,
- User manual (24 pages)
Table of Contents
Advertisement
Advertisement
Table of Contents

Related Manuals for COMGROW COMGO Z1


Summary of Contents for COMGROW COMGO Z1
- Page 1 COMGO Z1 Laser LightBurn Beginner's Guide User Manual V1.1...
-
Page 2: Table Of Contents
Dear Customers, Thank you for choosing the COMGO Z1 Laser Engraver! Paramenters The COMGO Z1 Laser Engraver is a desktop laser engraver. Disclaimer Before operating the COMGO Z1 Laser.Engraver, please read the manual carefully and follow the instructions for assembly Install LightBurn and operation. -
Page 3: Paramenters
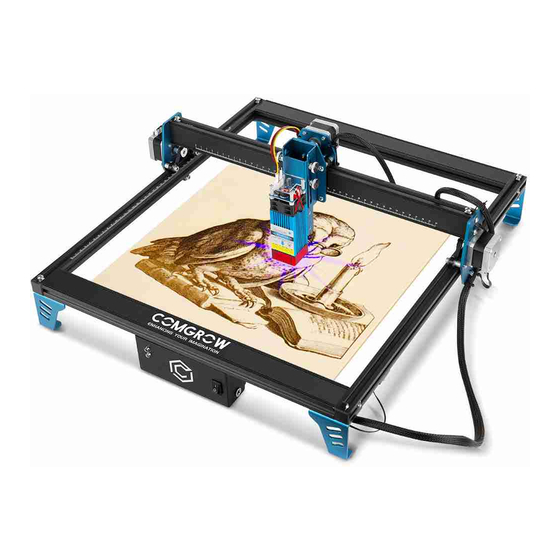
Paramenters Machine Size 575*575*205mm/22.64*22.64*8.07inch Working Area 400*400mm/15.75*15.75 inch How to level the focus Machine Weight 5.0 KG/11lbs Frame Material Aluminum Stepper Motor 42mm*42mm*34mm Laser module type Diode lasers Wavelength 445nm Compatible Software Laser GRBL 、Lightburn LaserGRBL : Windows XP 、 Windows7 、 Compatible System Windows8 、... -
Page 4: Disclaimer
Comgrow Co., Ltd. shall bear no responsibility for any loss caused due to the operation of LightBurn . The firmware of COMGO Z1 has been tested in detail by Comgrow Co., Ltd, but incompatibility with the software or hard- ware may still occur. -
Page 5: Install Lightburn
Install LightBurn Go to https://lightburnsoftware.com/pages/trial-version-try-before-you-buy to download the latest version of LightBurn, and install it. If you are a new user, you have a 30-day free trial. Tip: Download the appropriate version for your computer configuration. - Page 6 Install LightBurn 1. Install LightBurn software. 2. Choose the installation path,Default 3. Create the LightBurn folder. 4. Create a desktop icon. path(C:\Program Files\LightBurn) . Choose “Next” to continue. Choose “Next” to continue. Choose “Next” to continue 5. Choose “Next” to continue. 6.
-
Page 7: Open The Lightburn
Open The LightBurn Tip: If you are a new user, 1. Open the LightBurn you have a 30-day free trial. LightBurn 2. When you first open Lightburn, you need to set up your device or click on "Devices" in the bottom right corner of the software screen. -
Page 8: Manual Creation Devices
Manual Creation Devices 2. Click on "Serial/USB" and 1. Click to Next, enter the open "Create length 400 for Manually" X-axis/400 for and select Y-axis and click "GRBL" on Next 3. Set the machine's starting point to "Front Left". 5. Confirm the set parameters again and click 6. -
Page 9: Usb Online
Function bar: Save, export, language switch, etc. USB Online Drawing toolbar: Custom engraving, cut shapes. Image display area: shows the images you have imported, the graphics you have drawn. Machine status bar: Shows the immediate status of the machine when you connect it. - Page 10 USB Online 1. Connecting the computer to the machine with a USB cable. 2. Click on the Select Serial Port button and watch the console feedback for the connection information. 3. The machine is successfully connected when the status bar shows "OK" connection. Tip: When there is a failure to connect (see page 10 for details).
-
Page 11: Confirmation Before Use
Confirmation Before Use 1. Select the unit to be used: Edit → Setting → Chooes mm/min 2. Select the total percentage of power you use (this value is selected by default 1000): Edit → Setting → 1000... -
Page 12: Usb Online Debugging
USB Online Debugging Plug in the USB cable,Select “Current Position → Front Left → Home” (If the error 9 prompt appears in the control bar, the preferred option is to reset) -
Page 13: Importing Images
Importing Images Tip: Please make sure that the size of the project Choose to import the image, click on the image and engraved or cut graphics does not exceed 400*400mm. edit the engraving size you need 1. File → Import →Picture 2. - Page 14 Importing Images 1. Double-click on the C00 window to enter the cut Settings Editor. Special note: If you reset to zero position as the 2. Set the default parameters according to those engraving origin, you need to close the :Over scanning. provided.
-
Page 15: Set The Starting Point And Running The Device
Set The Starting Point And Running The Device Select Move, adjust the laser head to your desired position, and click Set Home. 1. Click “Move”. 2. Use the directional movement keys to move the laser head to the starting point. 3. -
Page 16: Engraving Parameters
Engraving Parameters 01 14... - Page 17 Engraving Parameters 01 15...
-
Page 18: Troubleshooting
Troubleshooting 1:The product can’t connect to LightBurn. Solutions: 1: Confirm whether the driver (CH340) has been installed,and reinstall the driver; 2: Confirm whether the baud rate in the setting parameter is 115200; 3: Remove the setting parameters in the device list and reset the connection parameters; 4: Check whether the serial port is damaged;... - Page 19 Troubleshooting 2:After the product is connected to LightBurn, it is displayed as connected but cannot be operated. Solutions: Disconnect the power supply and USB cable of the product and reconnect it; 3:After the product clicks reset, start the start button and the product stops working and the alarm information is as follows.
Need help?
Do you have a question about the COMGO Z1 and is the answer not in the manual?
Questions and answers