COMGROW COMGO Z1 User Manual
Laser engraver
Hide thumbs
Also See for COMGO Z1:
- User manual (24 pages) ,
- Beginner's manual (19 pages) ,
- User manual (14 pages)
Advertisement
Table of Contents
- 1 Table of Contents
- 2 Introduction
- 3 Cautions
- 4 Parameters
- 5 Machine Display
- 6 Frame Assembly Pt.1
- 7 Board Module Diagram
- 8 Software Installation Guide
- 9 Laser GRBL Tutorial
- 10 Lightburn Tutorial
- 11 WIFI Module Installation
- 12 APP Usage Instruction
- 13 Engraving Parameters
- 14 Troubleshooting
- Download this manual
After Sales Service
Comgrow official will provide you with a one-year warranty service, if you
encounter any problems in the process of use, please contact Comgrow offi-
cial or visit Comgrow official website for more product information.
Comgrow Amazon after-sale service: laserengravingcnc@comgrow.com
Comgorw Website after-sale service: service@comgrow.com
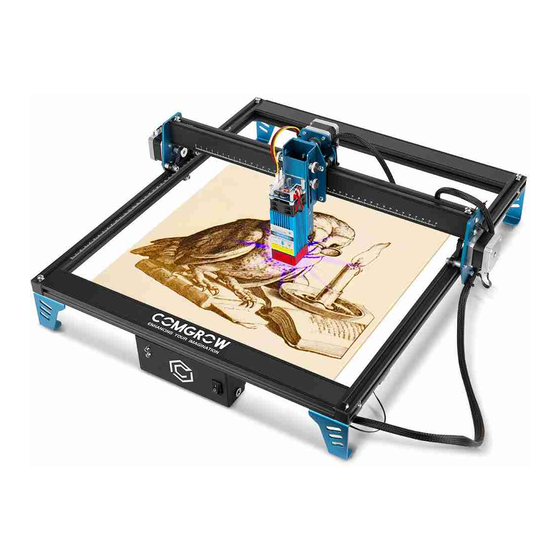
COMGO Z1 Laser Engraver
COMGO Z1 Laser Engraver
User Manual V1.1
Advertisement
Table of Contents

Subscribe to Our Youtube Channel
Related Manuals for COMGROW COMGO Z1


Summary of Contents for COMGROW COMGO Z1
- Page 1 COMGO Z1 Laser Engraver User Manual V1.1 Comgrow official will provide you with a one-year warranty service, if you encounter any problems in the process of use, please contact Comgrow offi- cial or visit Comgrow official website for more product information.
-
Page 2: Table Of Contents
Thank you for choosing the COMGO Z1 Laser Engraver! 01 Introduction The COMGO Z1 Laser Engraver is a desktop laser engraver. Before operating the COMGO Z1 Laser 02 Cautions Engraver, please read the manual carefully and follow the instructions for assembly and operation. If 03 Parameters this manual does not effectively solve your problem, please contact our support team. -
Page 3: Cautions
Cautions Paramenters 1. The COMGO Z1 Laser Engraver is for indoor use only and you must be 18 years of age or above 575*575*205mm/22.64*22.64*8.07inch Machine Size to operate this machine. Working Area 400*400mm/15.75*15.75 inch Machine Weight 5.0 KG/11lbs 2. Please wear appropriate protective equipment when you are operating the equipment (e.g. -
Page 4: Machine Display
Machine Display General List Laser Module Lifting Slider Profile X-axis Kit Support Feet Laser Module Power Adapter Y-axis Belt Stepper Motor Image Name Image Name Image Name Support Feet Safety Goggles Wire holder M5X8 Screw Ties M5X25 Screw USB Cable SD Card Hexagonal wrench Profile Cover... -
Page 5: Frame Assembly Pt.1
Frame Assembly Pt.1 Frame Assembly Pt.2 Tip: To watch the installation tutorial video, please visit SD Card. Note:the threaded holes are oriented outward. Ready: Ready: The scale for this profile is on the back. Aluminum Profiles(4Pcs) X-axis assembly M5X25 Screw(4Pcs) This threaded hole is positioned facing inward. - Page 6 Frame Assembly Pt.3 Frame Assembly Pt.4 Ready: Ready: Support Feet (4Pcs) X-axis assembly M5X8 Screw(8Pcs) M5X8 Screw(2Pcs) M5 T-Nut(4Pcs) STEP3.Use 2 M5*8 screws to fix the motherboard cover to the front STEP4.Take out the 4 support feet and install them using 8 M5*8 of the gantry.
- Page 7 Frame Assembly Pt.5 Frame Assembly Pt.6 Diagram of belt installation Ready: Ready: Belt(2Pcs) M5X8 Screw(4Pcs) Profile Cover(4Pcs) M5 Square Nut(4Pcs) STEP6.Take out the 4 profile covers and install them on the profile end faces STEP5.Take out 2 belts, put the belts through the two pulleys and the timing pulley, and fix them with 2 M5*8 screws and M5 square nuts.
- Page 8 Frame Assembly Pt.7 Frame Assembly Pt.8 Ready: Ready: Belt(2Pcs) M3X8 Screw(3Pcs) Wire holder STEP7.Take out the laser module, remove the focus slider, use 3 M3*6 screws STEP8.Connect the cables of the laser module and the Y-axis limit switch, then then fix the laser module to the focus slider and install the focus slider and attach the fixing mount to the right front support feet and fix the cables.
-
Page 9: Board Module Diagram
Frame Assembly Pt.9 Board Module Diagram Wifi- Power- Limit Limit Card output USB Port WIFI 45mm 23mm Power supply STEP9.Loosen the fixing screws on both sides of the laser module to focus the height of the laser Laser- Laser- module. (5W laser module focal length is 23mm, 10W laser module focal length is 45mm) X Motor Y1 Motor Y2 Motor... -
Page 10: Software Installation Guide
RAM needs to be 8GB or more. supports Windows systems. The COMGO Z1 Laser Engraver receives mobile commands from the computer in real time, and the engraver needs to stay connected to the computer and cannot close the engraving software (LaserGRBL or LightBurn) during the engraving process. In addition, the configura- tion of the computer can affect the speed and even the quality of the engraving. -
Page 11: Laser Grbl Tutorial
Software Installation Guide Software Installation Guide 1.Laser Grbl Tutorial(Window) 1.Laser Grbl Tutorial(Window) 3.Link the USB cable and turn on the machine, then 5.Select the engraving mode and click "Next". click“Connect“. (It is recommended that you select the horizontal engraving mode). 4.Click "Open File"... -
Page 12: Lightburn Tutorial
Software Installation Guide Software Installation Guide 1.Laser Grbl Tutorial(Window) 2.LightBurn Tutorial(Window/Mac/Linux) Tip: Installation on MAC requires adding trust, as follows. 1.Double-click the LightBurn.dmg file to mount the disk image. 7.Click "Boundary" to preview the engraving area and 2.Drag the LightBurn application into your applications folder. adjust the position of the engraved object. - Page 13 1-10 to set up the operation.Open the SD card, 3.Select Serial/USB and press Next. select "Driver Files", and install the driver according to your computer system. 4.Add device name and engraving range. 2.Select "GRBL", then click"Next". Name:COMGO Z1 Engraver X Axis Length:400mm Y Axis Length:400mm...
- Page 14 Software Installation Guide 2.LightBurn Tutorial(Window/Mac/Linux) 2.LightBurn Tutorial(Window/Mac/Linux) 5.Select Front Left as your Origin X,Y and uncheck Auto 7.Select "COMGO Z1 Laser Engraver" and click "OK". “Home”, then press Next. 6.Click Finish. 8.Click "Edit-Settings" in order to set the unit to...
- Page 15 Software Installation Guide Software Installation Guide 2.LightBurn Tutorial(Window/Mac/Linux) 2.LightBurn Tutorial(Window/Mac/Linux) 9.Click "Edit-Device Settings" and change 11.Click "File-Import" to import the engraving file. "S-value-max" to "1000". 12.After importing the file, you can modify the 10.Select "Start From" as "Current Location" on the right, engraving size on the top of the interface.
-
Page 16: Wifi Module Installation
WIFI module installation Software Installation Guide Tip: To watch the refresh firmware tutorial video, please visit SD Card. 2.LightBurn Tutorial(Window/Mac/Linux) 13.Double click the engraving parameters interface on the right side to set the engraving parameters and engraving mode. 1.Loosen the fixing screws and remove 2.Take out the WIFI module and install it to the WIFI the motherboard cover. -
Page 17: App Usage Instruction
2.Connect the device Android user ① Open the app, select "COMGO Z1 Engraver" and click on top right corner with a “Suspend” tag. Android users can search for "Mini laser engraver" in Samsung App Market and Google Play or Note: Please open the positioning function of your phone when you use it! directly scan the QR code below to download. - Page 18 APP Usage Instruction APP Usage Instruction 2.Connect the device 3.Adjust the focal length ② Click Available devices on the popup screen and select the Wi-Fi Settings Center; then, connect to the network with the WIFI name prefix "COMGO Laser-Z1-xxxxx" and connect to it, then return to the Turn the knob screws on both sides of the laser slider to adjust the height of previous level.
- Page 19 APP Usage Instruction APP Usage Instruction 4.Interface Introduction 5.Engraving The following is an example of the "Material library" carving operation. There are six engraving modules available in APP, namely: Photo album, Material library, White board, Photograph, QR Code and Bar Code. Photo album: you can access the photo album through this module and select the pictures in the album for engraving...
- Page 20 Engraving Parameters APP Usage Instruction 5.Engraving ④ Select "Laser Power" and "Material" ⑤ Click "Preview" to preview the engraving according to the power of the machine, range, and click "Start" to start engraving then click "SAVE". after the preview is completed.
-
Page 21: Engraving Parameters
Troubleshooting Engraving Parameters 1.The machine moves normally, but the laser head does not light (1)Check the main board and the laser module on the power and signal cable connection is loose. (2)If the wire connection is correct, but still no light light. Please unplug the laser module wire and adjust the laser brightness to "Max Brightness"... - Page 22 4.Alarm occurs during engraving and engraving stops. 5.APP cannot recognize the machine. (1)Check if any object (such as wire, etc.) touches the limit switch of the machine during the 1.For users with older firmware versions, you need to upgrade the machine firmware to version carving process.
- Page 23 Tip:if your machine has a low version number, you need to follow the steps below to update the firmware. 2.Please open the "Location Services" function in your phone settings. 3.You can visit the video tutorial link in the SD card for more detailed APP tutorial videos. 6.Poor engraving or cutting results.
- Page 24 FCC Warning Statement Changes or modifications not expressly approved by the party responsible for compliance could void the user’s authority to operate the equipment. This equipment has been tested and found to comply with the limits for a Class B digital device, pursuant to Part 15 of the FCC Rules. These limits are designed to provide reasonable protection against harmful interference in a residential installation.
Need help?
Do you have a question about the COMGO Z1 and is the answer not in the manual?
Questions and answers