Table of Contents
Advertisement
Quick Links
Advertisement
Table of Contents

Related Manuals for Intermec 0100A


Summary of Contents for Intermec 0100A
-
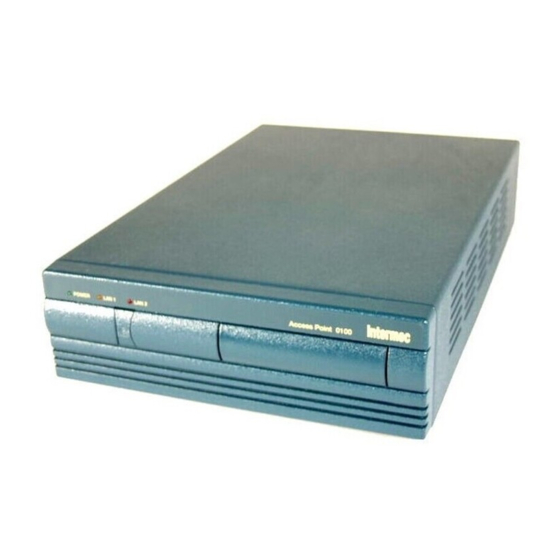
Page 1: Access Point
User’s Manual 0100 Access Point P/N 062367-002... - Page 2 The information contained herein is proprietary and is provided solely for the purpose of allowing customers to operate and/or service Intermec manufactured equipment and is not to be released, reproduced, or used for any other purpose without written permission of Intermec.
-
Page 3: Table Of Contents
Warranty Information vii Safety Summary vii Cautions and Notes viii About This Manual viii Other Related Manuals ix Learning About the Access Point Introduction 1-3 About Network Operating Systems 1-3 Network Operating Systems and the RF Network 1-5 Simple Network 1-5... - Page 4 Configuring the Access Point Locally 3-4 Editing the SLIP.BAT File 3-5 Configuring the Access Point Remotely 3-6 Configuring the Access Point Using SNMP Management Packages 3-7 Starting the Configuration Application 3-10 Configuring a Local Access Point 3-10 Adding a New Remote Access Point 3-11...
- Page 5 Appendix A Specifications A-3 How the 2.4 GHz RF Network Fits in the OSI Model A-4 Access Point as an Ethernet Segment Bridge A-5 Access Point as a One-Hop Repeater A-5 The AUTOEXEC.BAT File for the Access Point A-6 The NET.CFG File for the Access Point A-6 The CFG.CFG File for the Access Point A-8...
- Page 6 0100 Access Point User's Manual Appendix B Understanding the Radio Parameters B-3 Station Type B-3 Master Name B-4 Channel B-4 Subchannel B-4 Domain B-5 Security ID B-5 Understanding the Spanning Tree Protocol Parameters B-6 Spanning Tree Priority B-6 Bridge Max Age B-7...
-
Page 7: Before You Begin
Warranty Information To receive a copy of the standard warranty provision for this product, contact your local Intermec sales organization. In the U.S. call (800) 755-5505, and in Canada call (800) 688-7403. Otherwise, refer to the Worldwide Sales & Service list shipped with this manual for the address and telephone number of your Intermec sales organization. -
Page 8: Cautions And Notes
About This Manual The 0100 Access Point User’s Manual provides information on what networks are, how to install the Access Point and how to configure it. To set up an Access Point, you must be familiar with your PC and your network. -
Page 9: Other Related Manuals
Other Related Manuals You may need to refer to additional information when working with the Access Point in a data collection network. To order additional manuals, contact your local Intermec representative. Intermec Manuals 0100 Access Point Mounting Bracket Instruction Sheet JANUS 2.4 GHz Installation Utility User's Manual... - Page 10 0100 Access Point User's Manual...
-
Page 11: Learning About The Access Point
Learning About the Access Point This is for the graphics Learning About the Access Point... - Page 12 0100 Access Point User's Manual This is for the graphics...
-
Page 13: Introduction
This chapter explains what the 0100 Access Point is and how it fits into your network operating system. This is for the graphics Introduction The 0100 Access Point acts as a wireless bridge for JANUS RF readers and other wireless LAN products that run in the 2.4 GHz network to communicate with your Ethernet network. - Page 14 0100 Access Point User's Manual As the growth of personal computers proliferated throughout business environments, network operating systems expanded to provide the ability for This is for the graphics diifferent types of network equipment (bridges, PCs, mainframes, etc.) to operate in a wide variety of networks. Current network operating systems are an integral part of the corporate network, providing access between the smallest personal computers and the largest mainframe system.
-
Page 15: Network Operating Systems And The Rf Network
Simple Network For a network with only one RF subnetwork, use the default settings for all Access Points. A Simple Wireless Network Server Learning About the Access Point Acce Poin 2020-01RF AP-09 2020-01RF... -
Page 16: Moderately Complex Network
0100 Access Point User's Manual Moderately Complex Network This is for the graphics In a moderately complex network, you may need the additional capabilities of multiple Access Points: • Transparent bridging, which supports all protocols. • Spanning tree protocol support (IEEE 802.1d), which supports the IEEE standard for interoperability and dynamically reconfigures the network if a link is broken or if you add products. -
Page 17: Roaming
Note: The cells must overlap to ensure that there are no gaps in coverage and that the roaming JANUS reader will always have a connection available. In a roaming network, you should configure each Access Point for a different channel/subchannel pair, but you must configure each one with the same domain number and security ID. - Page 18 0100 Access Point User's Manual A Network With Roaming Capability This is for the graphics Printer POWE Acces s Point Mainframe Server INT ERM POWE Acces s Point Bridge POWE POWE Acces Acces s Point 2020-01RF 2020-01RF s Point AP-08...
-
Page 19: About Peer-To-Peer Network Operating Systems
Client PCs, using traditional network operating systems, cannot share data with other clients without storing the information on a server. Learning About the Access Point INT ERM AP-07... -
Page 20: Peer-To-Peer And The Rf Network
0100 Access Point User's Manual Peer-to-Peer and the RF Network This is for the graphics Wireless peer-to-peer networks are easier to install than wired peer-to-peer networks. Wireless Peer-to-Peer Network 2020-01RF 1-10 2020-01RF AP-05... - Page 21 To establish communication between wired and wireless peer-to-peer This is for the graphics networks, use the Access Point to bridge between the two subnetworks. After installing Access Points and a peer-to-peer network operating system, you can establish a network that can share files and printer resources instantly.
- Page 22 0100 Access Point User's Manual This is for the graphics 1-12...
-
Page 23: Installing The Access Point
Installing the Access Point This is for the graphics Installing the Access Point... - Page 24 0100 Access Point User's Manual This is for the graphics...
-
Page 25: Unpacking The Access Point
(International power cables are purchased separately.) If any of these items are missing or damaged, please contact your local Intermec representative. Additional information that becomes available after the printing of this manual will be contained in a README file on the Access Point disk. -
Page 26: System Requirements
Access Point LEDs There are three LEDs on the front panel of the Access Point. • The green Power LED is on whenever the Access Point is powered on. • The yellow LAN1 LED flashes to indicate RF transmissions on the network. -
Page 27: Access Point Reset Button
• The green LED in the bottom left lights whenever the card detects another station is transmitting. • The red LED in the bottom right lights when the Access Point is acting as the master. There should be only one ISA card on the subnetwork with this light on at any time. -
Page 28: Making A Backup Copy Of The Boot Disk
Run the Access Point from the backup copy. To make a backup copy 1. Insert the Access Point boot disk in the 3.5 inch drive of your host PC. You may have to remove it from the Access Point drive. - Page 29 The Access Point runs on any voltage from 100 to 240 VAC at 50 Hz or 60 Hz. 5. Insert the copy of the Access Point boot disk into the drive on the front of the Access Point.
- Page 30 0100 Access Point User's Manual You have finished installing the Access Point if all of the following conditions are true: This is for the graphics • There will only be one Access Point on this network. If you have more Access Points, refer to your site survey to place and configure them.
-
Page 31: Configuring The Access Point
Configuring the Access Point This is for the illustrations Configuring the Access Point... - Page 32 0100 Access Point User's Manual This is for the illustrations...
-
Page 33: Navigating Through The Configuration Application
Before you run the configuration software, you need to install it on your host PC. Then, you need to decide if you want to configure the Access Point by hooking it up to your PC (locally), or if you are going to configure it across the network (remotely). -
Page 34: Configuring The Access Point Locally
3. Connect the Access Point to a serial port on your PC using the null modem RS-232 cable. 4. Turn on the Access Point. You will hear a series of beeps as the Access Point boots and initializes. 5. If the serial port that is connected to the Access Point is not COM2, change the SLIP.BAT file to reflect the correct port. -
Page 35: Editing The Slip.bat File
Refer to the following table. COM1 COM2 COM3 COM4 An example of the SLIP.BAT file if the Access Point is connected to COM2 and communicating at 9600 baud is: SLIP8250 0x60 SLIP 3 0x2F8 9600 Configuring the Access Point 0x3F8... -
Page 36: Configuring The Access Point Remotely
0100 Access Point User's Manual Configuring the Access Point Remotely This is for the illustrations To configure the Access Point remotely, you need: • a DOS-based PC with an Ethernet card To configure the Access Point 1. Load a packet driver for your Ethernet card on your PC. If you wish to use the Ethernet card’s ODI driver rather than a packet driver, follow Step 2... -
Page 37: Configuring The Access Point Using Snmp Management Packages
NET.CFG file and bind them to the proper frame type. Configuring the Access Point Using SNMP Management Packages You can manage the Access Point using any SNMP management package. The Access Point supports the following managed objects: • MIB-II (RFC 1213) •... - Page 38 RF Port Path Cost Ethernet Port Priority Ethernet Port Enabled Ethernet Port Path Cost Aging Time The Access Point currently supports two SNMP community strings: “Public,” which has read-only permission, and “Private,” which has full read-write permission. prAPReset prAPIPAddress prRlCfgChannel...
- Page 39 6. Choose OK to exit this dialog box and return to the configuration dialog box. 7. Cycle power on the Access Point, or press the reset button on the front panel of the Access Point for your changes to take effect.
-
Page 40: Starting The Configuration Application
• Select an Access Point to configure. Choose this button if you want to configure a local Access Point or edit an existing remote Access Point. • Add a new Access Point and configure it. Choose this button if you want to add a remote Access Point. -
Page 41: Adding A New Remote Access Point
BOOTP server. 4. Enter the Physical Address for the new Access Point. The physical address is written on a label that is on the rear panel of the Access Point. 5. Choose OK. 6. Cycle power on the Access Point, or press the reset button on the front panel of the Access Point for your changes to take effect. -
Page 42: Editing A Remote Access Point
Follow the instructions in the section “Using the Configuration Dialog Box” later in this chapter. Deleting an Access Point 1. From the main menu, use the down arrow key to select the Access Point you want to delete. 2. Choose Delete. -
Page 43: Configuring The Radio Parameters
8. Choose OK to exit this dialog box and return to the configuration dialog box. 9. Cycle power on the Access Point, or press the reset button on the front panel of the Access Point for your changes to take effect. -
Page 44: Configuring The Spanning Tree Protocol Parameters
3. Choose OK to exit this dialog box and return to the configuration dialog box. 4. Cycle power on the Access Point, or press the reset button on the front panel of the Access Point for your changes to take effect. -
Page 45: Configuring Filters
3. Choose OK to exit this dialog box and return to the configuration dialog box. 4. Cycle power on the Access Point, or press the reset button on the front panel of the Access Point for your changes to take effect. - Page 46 0100 Access Point User's Manual More About the Access Point Filters This is for the illustrations The filter configuration allows you to customize the type of traffic that is forwarded from the Ethernet network to the RF network. If one of the boxes...
-
Page 47: Setting The Security Id
Setting the Security ID This is for the illustrations As an added security measure, the Access Point allows you to set a security ID for each RF product installed on a network. All RF products must have matching security IDs in order to communicate. -
Page 48: Resetting The Access Point
• From the configuration dialog box, choose Reset Access Point. • Press the reset button on the front panel of the Access Point. • Turn the Access Point off and then on using the switch on the back of the Access Point. - Page 49 Helpful Hints and Troubleshooting This is for the graphics Helpful Hints and Troubleshooting...
- Page 50 0100 Access Point User’s Manual This is for the graphics...
-
Page 51: Helpful Hints
Helpful Hints and Troubleshooting This chapter gives you some ideas on how to increase performance on a wireless network. It also provides solutions to some of the more common problems. This is for the graphics Helpful Hints The following sections provide some helpful hints that may make your Access Point or your network run more efficiently. -
Page 52: Microwave Ovens
0100 Access Point User’s Manual This configuration leaves the system administrator for the network with the task of configuring each wireless station on the network as a master station, This is for the graphics alternate master station, or a station. In most cases, using the default configurations for each of the drivers will work fine. -
Page 53: Antenna Placement
The Access Point is very easy to install and operate. If you do experience difficulties however, use the information in this section to help diagnose and solve the problem. If you cannot resolve the problem, contact your Intermec service representative. - Page 54 PC’s COM port and other cards in the computer. 3. Verify that you are using a null modem serial cable when attaching a configuration PC to the Access Point. You are unable to establish communication with another machine on the network.
- Page 55 Appendix A This is for the graphics Appendix...
- Page 56 0100 Access Point User's Manual This is for the graphics...
-
Page 57: Specifications
Specifications This is for the graphics Network Interfaces Ethernet 10BASE2 (Thin Coax BNC) Data Frame Types Ethernet_802.2 Data Rate Media Access Protocol Ethernet Compatibility Frequency Band Independent Channels Output Power Range Ethernet 10BASET (Twisted Pair) Ethernet_802.3 Ethernet_II 1.6 Mbps (uncompressed) — RF 10 Mbps —... -
Page 58: How The 2.4 Ghz Rf Network Fits In The Osi Model
The following picture shows where the 2.4 GHz RF Network fits into the OSI model. Layer Name 2.4 GHz RF Network Application Presentation Session Transport Novell’s IPX/SPX and TCP/IP Network Data Link 0100 Access Point MAC Layer S/W Physical Access Point/JANUS 2020 NetBIOS Novell’s ODI Novell’s LSL... -
Page 59: Access Point As An Ethernet Segment Bridge
Access Point as a One-Hop Repeater This is for the graphics 2020-01RF Access Point as an Ethernet Segment Bridge Segment Bridge 2020-01RF 2020-01RF 2020-01RF Repeater AP-16 2020-01RF 2020-01RF AP-15 Appendix A... -
Page 60: The Autoexec.bat File For The Access Point
0100 Access Point User's Manual The AUTOEXEC.BAT File for the Access Point This is for the graphics The following printout is the AUTOEXEC.BAT file that the Access Point uses. call slip rem if not errorlevel 1 beep rem if not errorlevel 1 beep... - Page 61 NET.CFG (continued) This is for the graphics link driver RL2ISA port channel subchannel domain station_type master_name hop_period b_freq s_freq radio_mode bus_mode no_roaming no_repeating bridge debug_color frame ethernet_II frame ethernet_802.2 protocol ip 800 ethernet_II protocol arp 806 ethernet_II protocol span 42 ethernet_802.2 LINK DRIVER NI6510 INT 5 PORT 300...
-
Page 62: The Cfg.cfg File For The Access Point
0100 Access Point User's Manual The CFG.CFG File for the Access Point This is for the graphics The following printout is the CFG.CFG file that the Access Point uses. ip_address 192.9.200.24... - Page 63 Appendix B Appendix...
- Page 64 0100 Access Point User’s Manual...
-
Page 65: Understanding The Radio Parameters
If an alternate master cannot locate any other master within range, it acts as a master. For most network operating systems, define the ISA card in the server or Access Point as the master and all clients such as JANUS readers as stations. -
Page 66: Master Name
0100 Access Point User’s Manual Master Name Master Optional You can use this optional parameter to specify an alphanumeric name of up to 11 characters to simplify the identification of each master in your network. Channel Master Each master can select one of 15 channels to establish communications with stations. -
Page 67: Domain
The domain is a number between 0 and 15, with 0 being the default setting. For larger wireless networks, use the domain to establish roaming subnetworks throughout your building. Only clients with the same domain will roam from one Access Point to another. Security ID Master Alternate To further improve the security of a wireless subnetwork, each RF product requires the same security ID to establish communication. -
Page 68: Understanding The Spanning Tree Protocol Parameters
IEEE 802.1d Bridge MIB (RFC 1493). Spanning Tree Priority This parameter sets the priority of an Access Point in the spanning tree created on the network. Use it to determine the root node and the branches of the tree and to resolve conflicts over which bridge on a network will become inactive when there is a loop. -
Page 69: Bridge Max Age
Bridge Max Age When the Access Point acts as the root, it uses this parameter to determine the maximum amount of time before discarding hello packet data for all bridges on the network. This parameter is specified in seconds between 6 and 40, with a default value of... -
Page 70: Rf Port Priority And Ethernet Port Priority
These parameters specify the cost that is added to the spanning tree for this port of the Access Point. This cost applies only when the Access Point is not the root of the tree and when the port you are setting is the root port of the two Access Point ports. -
Page 71: Glossary
Glossary Glossary... - Page 72 0100 Access Point User's Manual...
- Page 73 This glossary contains definitions for terms specific to this manual and the Novell software network user environment. 0100 Access Point Intermec’s wireless bridge that allows RF packets to go from the RF network to the Ethernet network. alphanumeric Character set containing letters, numbers, and other characters, such as punctuation marks.
- Page 74 0100 Access Point User's Manual BRU (Base Radio Unit) A device that receives messages from the controller and broadcasts them to the data collection devices over radio frequency waves. The BRU also receives messages sent from devices over the radio waves and uploads them to the controller.
- Page 75 Glossary device Any physical item that is attached to a computer. A terminal, a printer, a reader, and a controller are all devices. device address A type of address that is used by the host to identify a particular data collection device.
- Page 76 This protocol provides a means for message packets to be exchanged on an internetwork. IRL (Interactive Reader Language) A high level programming language developed by Intermec for their bar code readers. LAN (Local Area Network) A group of intelligent workstations that are hooked together to allow them to share of data, printers, and other devices.
- Page 77 Glossary LSL (Link Support Layer) This layer serves as an intermediary between the ODI and the link driver that supplies an interface between the network board and the rest of the operating system. network A collection of devices that can store and manipulate electronic data, interconnected in such a way that their users can store, retrieve, and share information with each other.
- Page 78 0100 Access Point User's Manual port The physical place where devices connect to each other for communication purposes. protocol stack A group of drivers that work together to span the layers in the network protocol hierarchy. preferred tree The tree you specify that you first want to connect to in a NetWare 4.X network if you have multiple trees.
- Page 79 Glossary router A software and hardware connection between two or more networks that permits traffic to be routed from one network to another on the basis of the intended destinations of that traffic. scratch drive The physical hard drive that you use to build the JANUS reader’s drive images. serial A communication scheme in which the bits of a byte are transferred one at a time.
- Page 80 0100 Access Point User's Manual subnet mask An internal TCP/IP protocol stack variable. subnetwork A section of a large network that functions as an independent network, but does not appear separate to remote networks. TCP (Transmission Control Protocol) This protocol provides a method for creating a connection-oriented, reliable, error-free, full-duplex, byte-stream communication between two processes.
- Page 81 Index Index...
- Page 82 0100 Access Point User's Manual...
- Page 83 B-6 specifications, A-3 system requirements, 2-4 troubleshooting, 4-5 unpacking, 2-3 Access Point Filters dialog box, 3-15 Add Access Point dialog box, 3-11 IP address, 3-11 name, 3-11 physical address, 3-11 adding a remote Access Point, 3-11...
- Page 84 Configure 2.4 GHz RF button, 3-12 Configure Bridge button, 3-12 Configure Filters button, 3-12 Configure SNMP button, 3-12 Reset Access Point button, 3-12, 3-18 Configure 2.4 GHz RF button, 3-12 Configure Bridge button, 3-12 Configure Filters button, 3-12 Configure SNMP button, 3-12...
- Page 85 4-3 host computer definition, G-6 HOSTS file definition, G-6 IEEE 802.1d, 1-6 IEEE 802.3, 1-3 installing the Access Point, 2-6 inteference definition, G-6 interactive reader language. See IRL Internet packet exchange. See IPX Internet protocol. See IP definition, G-6...
- Page 86 0100 Access Point User's Manual local area network. See LAN: definition LOGIN program running efficiently, 4-3 adding to AUTOEXEC.BAT, 3-6 definition, G-7 main menu adding an Access Point, 3-10 deleting an Access Point, 3-10 editing an Access Point, 3-10 manual...
- Page 87 3-11 deleting, 3-12 editing, 3-12 repeater definition, G-8 requirements to connect the Access Point, 2-4 Reset Access Point button, 3-12, 3-18 reset button, 2-5, 3-18 resetting the Access Point, 3-18 reverse address resolution protocol server. See RARP server: definition...
- Page 88 0100 Access Point User's Manual spanning tree, B-3 spanning tree priority, B-6 spanning tree protocol parameters, 1-6 aging time, B-7 bridge forward delay, B-7 bridge hello timer, B-7 bridge max age, B-7 configuring, 3-14 Ethernet port enabled, B-8 Ethernet port path cost, B-8...
Need help?
Do you have a question about the 0100A and is the answer not in the manual?
Questions and answers