
Subscribe to Our Youtube Channel
Related Manuals for ZERO-X stratus+


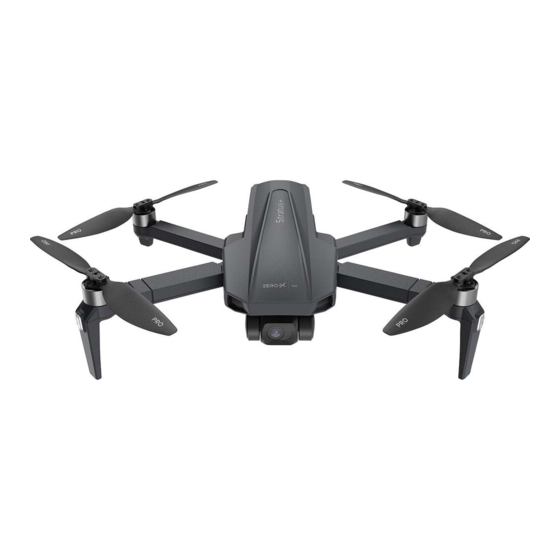
Summary of Contents for ZERO-X stratus+
- Page 1 stratus+ USER MANUAL 1000 SONY ELECTRONIC 2-AXIS BRUSHLESS IMAGE GIMBAL MOTORS STABILISATION Flight Time Flight Range 12MP 4K CMOS Sensor ZXMP-D1000...
-
Page 4: Table Of Contents
HOW TO CHANGE THROTTLE MODE ............16 7.0 SETTING UP THE SMARTPHONE HOLDER ..........17 8.0 DOWNLOADING THE APP TO YOUR SMARTPHONE ....... 17 WHERE TO DOWNLOAD ................17 ZERO-X APP ....................17 CONNECTING YOUR SMARTPHONE TO THE DRONE'S WIFI ....18 SAVING PHOTOS AND VIDEOS ..............18... - Page 5 9.0 PRE-FLIGHT CHECKLIST ................18 10.0 STATUS INDICATOR LIGHTS ..............19 11.0 FLIGHT SAFETY ..................20 12.0 UNDERSTANDING KEY CONTROLS ............20 12.1 AUTO RETRUN HOME ..................20 12.2 RETURN HOME (GPS MODE ENABLED) ............20 12.2.1 SMART RETURN TO HOME ..............21 12.2.2 LOW BATTERY RETURN TO HOME ..........21 12.2.3 FAILSAFE - OUT OF CONNECTION RETURN TO HOME .....22 12.3 CAMERA ANGLE ADJUSTMENT ..............22...
-
Page 6: Welcome
WELCOME Thank You for a purchasing a Stratus+ Drone. The Zero-X range has been specifically designed to provide the intermediate to advanced user with a great flight experience. Please take the time to read the following safety warnings and operating instructions carefully. In this document, the Zero-X Pro ZXMP-D1000 Stratus+ Drone will be referred to as the "Drone". -
Page 7: Product Contents
PRODUCT CONTENTS 1. Stratus+ Drone 7. Small Screw Driver 2. Remote Control 8. Screws 3. Rotor Blades x 4 9. Quickstart Guide 4. USB AC Wall Charger 10. Carry Case 5. USB Charging Cable 11. Protective Case for Gimbal 6. User Manual... -
Page 8: Product Overview
PRODUCT OVERVIEW 1. Brushless Motor 2. Landing Gear 3. Blades 4. Front Lights 5. Camera 6. Optical Flow System 7. Rear Light 8. Power Switch CONTROLLER OVERVIEW 1. Photo/Video 2. Left Thumb Stick (Yaw left/Right) 3. Lock/Unlock Button 4. Mobile Phone Holder 5. -
Page 9: Battery Safety
BATTERY SAFETY When handled incorrectly, Lithium polymer batteries can be dangerous and can potentially harm and do damage to persons or property. Zero-X does not accept any liability for damage to persons or property if the battery is not correctly charged, stored or protected. - Page 10 PLEASE NOTE: YOUR ZERO-X DRONE COMES WITH A CERTIFIED ZERO-X USB AC CHARGING ADAPTER AND CABLE FOR 240V CHARGING OF YOUR DRONE BATTERY. USE OF A NON ZERO-X CERTIFIED USB AC CHARGING ADAPTER AND CABLE WILL VOID YOUR WARRANTY AND MAY DAMAGE BOTH YOUR BATTERY AND DRONE.
-
Page 11: Setting Up Your Drone
SETTING UP YOUR DRONE INSTALLING THE BATTERY 1. Ensure that the battery is fully charged. 2. Insert the battery into the middle of the Drone in the correct orientation. 3. Slide the battery all the way down until it securely slots into place. NOTE: •... -
Page 12: Remove Protective Gimbal Case
REMOVE PROTECTIVE GIMBAL CASE The Drone comes with a protective case over the gimbal. Before flying your Drone, please remove the gimbal protective case. 1. With the Drone upside down, gently pull the protective cover away from the body of the gimbal as shown below. NOTE: •... -
Page 13: Remote Control
REMOTE CONTROL The remote control is battery operated and will require two AA batteries to use. To access and open the battery door, you will need to unfold the hand sticks. Then place the two batteries in the correct positions and close the battery door. -
Page 14: Lcd Screen Display
LCD SCREEN DISPLAY Distance from Home Point Altitude from Home Point PAIRING YOUR DRONE AND REMOTE CONTROL 1. Hold down the button and swipe the Power ON button to the right, to turn on the remote control. 2. Ensure that the battery is connected correctly to the Drone. Power ON your Drone by pressing down the button on the top of the battery for 3 seconds. -
Page 15: Photo/Video Controls
PHOTO/VIDEO CONTROLS To take a photo with your Drone, short press the button on the remote control. The same icon on the LCD screen will flash once, confirming a photo has been taken. To record a video with your Drone, long press button on the remote control. -
Page 16: Drone Low Battery Warning
DRONE LOW BATTERY WARNING If the rear indicator lights on the Drone are flashing red slowly, this indicates your battery level is starting to get low. The battery icon on the remote control LCD screen will be (See Pic 1 below for reference). If your Drone is more than 100 metres away or more than 30 metres in altitude from the take off location (home point), it will return home automatically. -
Page 17: Signal Strength Indicator
SIGNAL STRENGTH INDICATOR On the remote LCD screen you will see identical bars on the left and right, these indicate the strength of the connection between your remote control and the Drone. The stronger the signal is, the more bars will show. •... -
Page 18: Throttle Control Stick Mode
THROTTLE CONTROL STICK MODE THROTTLE MODE SWITCH Flight Flight Control Control Throttle Throttle Forward/ Forward/ Control Control Backward Backward Turn Left/ Flight Turn Left/ Flight Right Control Right Control Control Left/Right Control Left/Right In MODE 1 the right control stick controls the throttle. In MODE 2 the left control stick controls the throttle. -
Page 19: Setting Up The Smartphone Holder
For Android phones - go to the Google Play Store and search for the Zero X Evolved 4K app. OR scan the QR code to download the App. The Zero-X Evolved 4K App requires iOS 11.0 and above on iPhone or Android 7.0 device to run. ZERO-X APP The Drone has a built in WIFI connection which us used to wirelessly connect your smartphone to your Drone. -
Page 20: Connecting Your Smartphone To The Drone's Wifi
• All arms are fully unfolded. • Camera lens is clean, free of dirt and dust. • All parts used are genuine Zero-X Stratus+ products. Using other parts that are not made specifically for the Drone can be unsafe or cause the Drone... -
Page 21: Status Indicator Lights
10.0 STATUS INDICATOR LIGHTS Front Indicator Light Rear Indicator Light The table below will explain what each sequence of the Drone status lights mean: LED Status Indicates Drone is disconnected from the The indicator light flashes Yellow rapidly controller No GPS Signal. Drone not in GPS The indicator light is solid Yellow mode Good GPS Signal. -
Page 22: Flight Safety
11.0 FLIGHT SAFETY Before flying your Drone please make sure the area is safe and adheres to Drone flying regulations. CASA restrictions regarding flying Drones require them to be no less than 5.5 kms from any airport or airfield while flying. Drones should also not be flown higher than 120 metres above the ground, over populated areas or any closer than 30 metres from vehicles, people or animals. -
Page 23: Smart Return To Home
12.2.1 SMART RETURN TO HOME Press the button on your remote control or click the icon on your App and follow the instructions on screen, the remote control will start beeping. Your Drone will return to the take off point if the button is pressed on the remote control, this will cause the remote control to start beeping. -
Page 24: Failsafe - Out Of Connection Return To Home
12.2.3 FAILSAFE - OUT OF CONNECTION RETURN TO HOME If the GPS control signal is continuously interrupted for longer than 6 seconds and the App controls are turned off, the Drone's internal flight control system will take over. In doing this, it will force the Drone to the Home Point. -
Page 25: Optical Flow
12.4 OPTICAL FLOW The optical flow system consists of optical flow lens modules. This system will obtain the Drone's position through optical images, which will ensure safe flights and accurate positioning. See below for reference, so you can see where the optical flow camera is located on your Drone. Optical Flow Camera NOTE:... -
Page 26: Geomagnetic Calibrating Your Drone
13.2 GEOMAGNETIC CALIBRATING YOUR DRONE To enter into calibration mode, you must unlock the Drone first. To do this, pull both thumb sticks to the bottom right corner together at the same time. (See picture for your reference). There are two steps to calibrate your Drone successfully: Horizontal calibration &... -
Page 27: Optimal Transmission Zone
13.3 OPTIMAL TRANSMISSION ZONE For a great flight experience, make sure that your Drone is flying in front of your remote control with no obstacles in between them. NOTE FOR INDOOR FLYING: • When flying indoors, please turn off the "GPS switch" of the remote control to avoid the Drone getting out of control (this could be due to the weak GPS signal indoors). -
Page 28: Setting A Home Point
13.6 SETTING A HOME POINT If the GPS signal is strong (Satellite level over 7) before take off, the take off location will automatically be saved as the Drone's Home Location. The strength of the GPS signal is shown on the remote LCD screen at the bottom middle. -
Page 29: Beginner Mode
14.0 BEGINNER MODE 1. Max flight altitude - The default factory setting is OFF, therefore the Drone can reach a maximum altitude of 120 metres. To increase the maximum Drone altitude, activate the setting to ON, and move the setting slider in order to set the desired altitude. -
Page 30: Speed Mode
15.0 SPEED MODE The Drone has 2 speed modes that control the acceleration and maneuverability of the Drone. To cycle through the Speed Modes, use the Speed Button on the top right of the controller. 16.0 HEADLESS MODE When headless mode is enabled, the Drone will move in the direction of the remote control, regardless of its orientation. -
Page 31: Follow Me Mode (Gps Mode Enabled)
To activate the FOLLOW-ME FUNCTION, the Drone will follow your smartphone wherever you go. Please make sure the smartphone is connected to your Drone and the Zero-X Evolved 4K App is installed and open. 1. Press the icon on the left side of the App to launch options. - Page 32 2. Please enlarge the map and then press the button on the bottom right of the App screen to choose waypoint flight mode. You can now either draw a route by pressing the button or mark route points by pressing the Track Points button and tapping different points on the map.
-
Page 33: Vision Positioning System
19.1 VISION POSITIONING SYSTEM This system is typically activated and used in indoor environments when the GPS signal is weak or not available. The vision positioning system works best when the Drone is less than 3 metres from the ground. 19.2 PHOTO MODE Press the button on the remote control or click... -
Page 34: Activating Search Function For A Lost Drone
20.0 ACTIVATING SEARCH FUNCTION FOR A LOST DRONE 1. Check that your mobile phone has disconnected from the Drone's WiFi. 2. Click on the "SETTINGS" button in the App. 3. Click on the "FLIGHT LOG" button within the settings menu, and then click the "SEARCH"... -
Page 35: Replacing Rotor Blades
22.0 REPLACING ROTOR BLADES To remove and replace the rotor blades, please follow the instructions below. 1. Unscrew the two screws on the top of the rotor blades using the supplied screwdriver. It is advised that you replace the blades one at a time to avoid losing screws or installing blades incorrectly. -
Page 36: Replacement Parts
'close call' can turn into a to receive crash landing. Accidents happen! 50% OFF To thank you for your support of Zero-X and your Drone purchase, we would like to help your spare parts purchase! you build your confidence in learning how to... -
Page 37: Warranty Terms & Conditions
Directed Electronics, will be borne by you. Email: admin@zero-x.com.au INDEMNITY You agree to defend, indemnify and hold harmless Zero-X and its subsidiaries and affiliates from and against any and all claims, proceedings, injuries, liabilities, losses, costs and expenses (including reasonable legal fees), including but not... - Page 38 Zero-X to compensate you or anyone else. You release and waive for yourself and your insurer all subrogation and other rights to recover against Zero-X arising as a result of the payment of any claim for loss, damage or injury.
- Page 39 The preceding preclusion and limitation of liability will also not apply to claims for damages arising out of loss of life, bodily injury or health impacts for which Zero-X may be liable, or for non-contractual liability.
-
Page 40: Notes
25.0 NOTES... - Page 42 Capture the skies.™ ANOTHER DIRECTED BRAND All Images, Information and Content are Copyright © 2022 Directed Electronics Australia Pty Ltd. All Rights Reserved. www.zero-x.com.au | www.zero-x.co.nz www.directed.com.au | www.directed.co.nz...
Need help?
Do you have a question about the stratus+ and is the answer not in the manual?
Questions and answers