
Related Manuals for ZERO-X Raven+


Summary of Contents for ZERO-X Raven+
- Page 1 Lightweight Drone with Full-HD Camera DRONE USER MANUAL Capture the skies.™ v3.0 PRODUCT CODE: ZX-RVP...
-
Page 2: Table Of Contents
Welcome ......................5 Before You Get Up In The Air ................5 General Safety ....................5 Battery Safety ..................... 6 Introduction ....................... 7 2.1 Package Contents ..................7 Fig 2.1.1 ....................7 2.2 Product Overview ..................8 Raven ......................8 Fig 2.2.1 .................... - Page 3 4.5 Trimming ......................15 Fig 4.5.1 .......................15 4.6 Flipping & Stunts ....................16 Fig 4.6.1 .......................16 4.7 Using Your Camera ...................16 4.8 Shooting Video ....................16 4.9 Shooting Photos ....................16 4.10 Tilt The Camera ....................16 4.11 Using Your Directional Lock ................17 To Activate Directional Lock ................17 Adjusting Directional Lock ................17 Fig 4.11.1 .....................17 4.12 Using Assisted Return Mode ................18...
-
Page 4: Welcome
WELCOME Thanks for purchasing a Zero-X Raven + , get ready to have the time of your life! We’re sure your Zero-X Raven + will bring you a world of great experiences in the air. Please take the time to read the following safety warnings and operating instructions carefully. -
Page 5: Battery Safety
BATTERY SAFETY When handled incorrectly, Lithium polymer batteries can be dangerous and can potentially harm and do damage to persons or property. Zero-X does not accept any liability for damage to persons or property if the battery is not correctly charged, stored or protected. -
Page 6: Introduction
INTRODUCTION 2.1 PACKAGE CONTENTS Raven + Remote Control Drone Battery Drone Battery Charger Drone Feet Rotor Guards Spare Rotor Blades Screwdriver Manual 10. USB Wall Charger *Fig 2.1.1 Capture the skies.™... -
Page 7: Product Overview
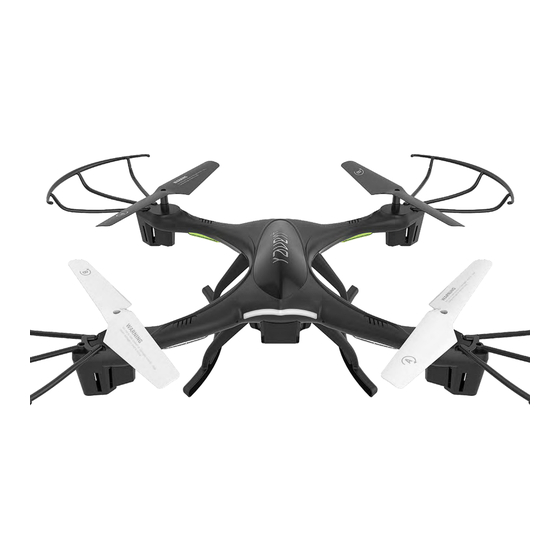
2.2 PRODUCT OVERVIEW RAVEN + DIAGRAM Under Side View LED Lights Camera Power Switch Micro SD Card Slot * Feet Battery Hatch Rotor Blades Rotor Guards *Fig 2.2.1 * Micro SD Card not included REMOTE CONTROL DIAGRAM Power Switch Left Thumbstick (Acceleration / Yaw) Right Thumbstick (Pitch / Roll) -
Page 8: Remote Control Lcd
PLEASE NOTE: YOUR ZERO-X DRONE COMES WITH A CERTIFIED ZERO-X USB AC CHARGING ADAPTER FOR 240v CHARGING OF YOUR DRONE BATTERY. USE OF A NON ZERO-X CERTIFIED USB AC CHARGING ADAPTER WILL VOID YOUR WARRANTY AND MAY DAMAGE BOTH YOUR BATTERY AND DRONE. -
Page 9: Installing The Battery
3.2 INSTALLING THE BATTERY Ensure that the Raven + ’s power switch is in Release the battery hatch lock by gently the OFF position. (Refer to Fig 2.2.1 on page squeezing the sides of the door at the front of 8 - number 3) the Raven Connect the battery cable to the Raven... -
Page 10: Fig 3.1.3
C. Align the clips on the camera with the slots on the underside of the drone making sure the camera is facing the front of the drone (indicated by the battery hatch). Refer to Fig 3.1.3) D. Slide the clips into place ensuring *Fig 3.1.3 that the clips lock into place. -
Page 11: Feet Installation
3.6 FEET INSTALLATION Line up the guide pegs on the feet with the holes on the underside of the Raven + ’s body so that the screws in the feet match up with the screw holes on the underside of the Raven + . Firmly press the feet into position. -
Page 12: Flight Safety
FLIGHT SAFETY Before flying your Raven + make sure that you are in a safe setting. CASA restrictions regarding flying drones require the drone to be no closer than 5.5kms from any airport or airfield whilst flying. Drones should also not be flown over populated areas or any closer than 30 metres from vehicles people or animals. -
Page 13: Troubleshooting
4.2 TROUBLE SHOOTING Do not approach the drone again until the remote has been powered off. If for any reason the Raven + does not work after following the above steps please check the following. a) The Raven + battery is fully charged, correctly connected and not damaged. -
Page 14: Speed Modes
4.4 SPEED MODES The Raven + has 3 speed modes that control the acceleration and maneuverability of the drone. To cycle through the Speed Modes, use the Speed Button marked H/L on the top right of the controller. (Refer to Fig 2.2.2 page 8 for button selection) When the Raven + is powered up it will start in LOW speed mode. -
Page 15: Flipping & Stunts
4.6 FLIPPING AND STUNTS The Raven + can perform 360 flips in any direction by pushing the Flip Button, and then pushing the Right Thumbstick (Pitch / Roll) in the direction you want to flip the drone. (Refer to Fig 4.6.1) Please ensure that... -
Page 16: Using Your Directional Lock
4.11 USING YOUR DIRECTIONAL LOCK Directional Lock mode is a mode that makes it easy for beginners to fly. In this mode the direction you and the Raven + are facing when the Raven + is launched will always be forward on the controls, no matter which way the Raven + is facing. -
Page 17: Using Assisted Return Mode
4.12 USING ASSISTED RETURN MODE Assisted Return Mode moves the drone backwards from its current position and can be used to aid the return of the Raven + . Return mode does not locate or track the user, instead it moves the drone in reverse from the orientation it is in when Assisted Return mode is activated. -
Page 18: Maintenance
To thank you for your support of Zero-X and your drone purchase, we would like to help you build you confidence in learning how to fly your drone. We would like to offer you 50% off your first two orders of any spare parts, by using the codes in the coupons below - visit www.zero-x.com.au. -
Page 19: Specifications
THANK YOU FOR YOUR SUPPORT! THANK YOU FOR YOUR SUPPORT! PLEASE VISIT OUR WEBSITE & PLEASE VISIT OUR WEBSITE & USE PROMO CODE: USE PROMO CODE: OOPSIBROKEIT OOPSIBROKEITAGAIN to receive to receive 50% OFF 50% OFF your spare parts purchase! your spare parts purchase! SPECIFICATIONS Dimensions... -
Page 20: Warranty
The retailer will then return the goods to Zero-X. Zero-X will repair, replace or refurbish the product at its discretion. The retailer will contact you when the product is ready for collection.
Need help?
Do you have a question about the Raven+ and is the answer not in the manual?
Questions and answers