Table of Contents
Advertisement
Quick Links
Advertisement
Table of Contents

Related Manuals for KaVo EC3


Summary of Contents for KaVo EC3
- Page 1 Instructions for use Display Always be on the safe side.
- Page 2 Sales: Manufacturer: KaVo Dental GmbH Kaltenbach & Voigt GmbH Bismarckring 39 Bismarckring 39 D-88400 Biberach D-88400 Biberach +49 7351 56-0 Fax +49 7351 56-1488...
-
Page 3: Table Of Contents
2.2.2 Product-specific ..........................11 2.3 Safety instructions ..........................12 2.3.1 General ............................12 3 Product description ............................13 3.1 EC3 display, 15" ............................13 3.2 EC3 display, 19" ............................14 3.3 Rating Plate ............................15 3.4 Techniscal data, display, 15-inch ......................16 3.5 Techniscal data, display, 19-inch ......................18 4 Start-up ................................20... - Page 4 Instructions for use Display Table of Contents 6.1 Cleaning ..............................37 6.1.1 Exterior cleaning by hand ......................37 6.2 Disinfection ............................38 6.3 Maintenance ............................39 7 Glossary ...............................40 2/40...
-
Page 5: User Notes
Instructions for use Display 1 User Notes 1.1 User guidelines 1 User Notes 1.1 User guidelines Requirement Please read these instructions before using the product to avoid operator error and damage. 1.1.1 Abbreviations Abbre‐ Meaning viation User instructions Care instructions Assembly instructions Service Technician's instructions Safety checks... -
Page 6: Intended Users
Instructions for use Display 1 User Notes 1.2 Intended users 1.2 Intended users This document is intended for use by dentists and other dental practice employees. 4/40... -
Page 7: Service
Instructions for use Display 1 User Notes 1.3 Service 1.3 Service Service hotline: +49 7531 56-2700 Service.Multimedia@kavo.com Please indicate the product serial number in all requests. Additional information can be obtained at: www.kavo.com 5/40... -
Page 8: Guarantee Provisions
As a general rule, this guarantee does not apply to lamps, glassware, rubber parts or the colour durability of synthetic materials. KaVo shall not be liable for defects or their consequences if they are likely to be a direct result of actions or modifications by a customer or third party. -
Page 9: Transportation And Storage
1.5.1 Packaging ordinance of August 28,1998 Note Applies only to the Federal Republic of Germany. KaVo transit packaging is disposed of and recycled by local waste management and recycling companies under Germany's Dual System. For more information about waste management and recycling, and for up-to-date lists of local waste management and recycling companies, visit the following sites: http://www.umweltdatenbank.de... -
Page 10: Storage
1 User Notes 1.5 Transportation and storage Outside of Germany Note KaVo shall not be liable for damage caused in transit. Check the shipment immediately upon delivery! If the outer packaging is noticeably damaged upon delivery, you must proceed as follows: 1. -
Page 11: Safety
Instructions for use Display 2 Safety 2.1 Description of safety instructions 2 Safety 2.1 Description of safety instructions 2.1.1 Warning symbol Warning symbol 2.1.2 Structure The introduction describes the type and source of the danger. This section portrays the possible consequences of non-observance. ▶... -
Page 12: Intended Purpose
KaVo product. The user must ensure that that the device works properly and is in a satisfactory condition before each use. -
Page 13: Product-Specific
Instructions for use Display 2 Safety 2.2 Intended Purpose 2.2.2 Product-specific The display shows the multimedia content of external image and audio sourcesn. Medical product accessories in a dental practice outside of the patient environment, protection class 1. The flat screens may be operated only in connection with ERGOcom 3. Their use for medical purposes is permitted only in this combination. -
Page 14: Safety Instructions
2.3 Safety instructions 2.3 Safety instructions 2.3.1 General The KaVo product is not permitted to be used in areas subject an explosion hazard. Injuries or harm caused by damaged functional components. Damaged functional components can cause personal harm or injury. -
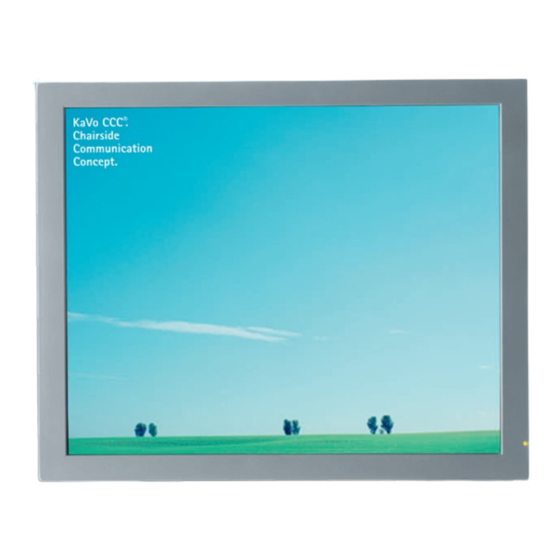
Page 15: Product Description
Instructions for use Display 3 Product description 3.1 EC3 display, 15" 3 Product description 3.1 EC3 display, 15" This display is available in the following models: ▪ With safety glass 13/40... -
Page 16: Ec3 Display, 19
Instructions for use Display 3 Product description 3.2 EC3 display, 19" 3.2 EC3 display, 19" This display is available in the following models: ▪ With safety glass ▪ With touchscreen 14/40... -
Page 17: Rating Plate
Instructions for use Display 3 Product description 3.3 Rating Plate 3.3 Rating Plate Type EC3 display, 19" Serial number REF: Material number CE identification 15/40... -
Page 18: Techniscal Data, Display, 15-Inch
Instructions for use Display 3 Product description 3.4 Techniscal data, display, 15-inch 3.4 Techniscal data, display, 15-inch Note The data specified are applicable after a warmup time of at least 30 minutes. Module type 15-inch XGA-TFT-LCD, diagonal / 380.10 mm Display range 304.1 mm horizontal x 228.1 mm vertical Resolution... - Page 19 Instructions for use Display 3 Product description 3.4 Techniscal data, display, 15-inch Dimensions/Weight Dimensions 280 mm x 370 mm x 67 mm Weight 5.6 kg (6.5 safety glass) Temperature range Operation -5 °C to + 50 °C Storage -20 °C to +55 °C Air humidity Operation 20 % to 80 % (no condensation)
-
Page 20: Techniscal Data, Display, 19-Inch
Instructions for use Display 3 Product description 3.5 Techniscal data, display, 19-inch 3.5 Techniscal data, display, 19-inch Note The data specified are applicable after a warmup time of at least 30 minutes. Module type 19-inch SXGA-TFT-LCD, 376 x 301 mm Display range 304.1 mm horizontal x 228.1 mm vertical Resolution... - Page 21 Instructions for use Display 3 Product description 3.5 Techniscal data, display, 19-inch Temperature range Operation -5 °C to + 50 °C Storage -20 °C to +55 °C Air humidity Operation 20 % to 80 % (no condensation) Storage 5 % to 95 % (no condensation) Audio Loudspeakers with amplifier 2 x 1 Watt...
-
Page 22: Start-Up
Instructions for use Display 4 Start-up 4.1 Set up screen 4 Start-up 4.1 Set up screen Hazards due to external influences. Heat, moisture, strong light sources and direct sunlight may lead to damage. ▶ Select an appropriate installation point. CAUTION ▶... -
Page 23: Connections
Instructions for use Display 4 Start-up 4.2 Connections 4.2 Connections ▶ Remove the protective flap on the back of the device to install the connecting wires. ▶ Create connections to other components. See also: EIERGOcom 3 21/40... -
Page 24: Touchware
Instructions for use Display 4 Start-up 4.3 TouchWare 4.3 TouchWare Note The touchscreen driver software is provided on CD. The relevant drivers are available to download fromwww.microtouch.com . The following operating systems are supported: ▪ Windows XP ▪ Windows 2000 4.3.1 Install Requirement ●... - Page 25 Instructions for use Display 4 Start-up 4.3 TouchWare ▶ Confirm acceptance of the licence terms by clicking the "Yes" button. ▶ Select serial connection to the touch controller and confirm by clicking the "Next" button. ▶ Select "Express Install" and confirm by clicking the "Next" button. 23/40...
-
Page 26: Calibrate
Instructions for use Display 4 Start-up 4.3 TouchWare If the touchscreen display is switched on and a correct connection has been set up between the PC and the ERGOcom 3, the installation software will automatically detect which Com port the touch controller is using. This will be indicated by means of a short display note. - Page 27 Instructions for use Display 4 Start-up 4.3 TouchWare ▶ Start calibration by clicking the "Calibrate" button. Two test dots appear on the display which have to be touched in the centre as accurately as possible, one after the other (when prompted). The more precisely this calibration is carried out, the more accurate touchscreen control will be.
- Page 28 Instructions for use Display 4 Start-up 4.3 TouchWare Calibration is now complete. To test the touch function, touch the screen with your finger and move it in different directions. If the cursor follows your finger around the screen, calibration can be terminated by clicking the "Done" button. If not, calibration has to be repeated.
-
Page 29: Operation
Instructions for use Display 5 Operation 5.1 Controls and functions 5 Operation 5.1 Controls and functions 5.1.1 Control knob The control knob is a user-friendly multifunction instrument. It is located behind the indicator LED, on the bottom right-hand side of the display. There are three ways in which the control knob can be moved: ▪... -
Page 30: Switching On And Off
Instructions for use Display 5 Operation 5.1 Controls and functions 5.1.2 Switching on and off Note The Display 1 can always be left on. ERGOcom 3 controls standby and ON/OFF. Switch on Requirement The LED is not green. ▶ Press the control knob. The device is ready for operation and the LED is on. -
Page 31: Osd Operation
Instructions for use Display 5 Operation 5.2 OSD operation 5.2 OSD operation Requirement The Display 1 is switched on. ▶ Press the control knob briefly. The OSD menu appears on the Display 1. There are three ways in which the control knob can be moved: ▪... -
Page 32: Led Display
Instructions for use Display 5 Operation 5.3 LED display 5.3 LED display The LED display is green when Display 1 is operational and ERGOcom 3 is switched The LED display turns orange as soon as Display 1 switches to energy saving mode. If Display 1 is in power saving mode or if it fails to identify a correct input signal, Display 1 turns black and the LED flashes. -
Page 33: Prevu™ On-Screen Display
Instructions for use Display 5 Operation 5.4 PreVu™ On-Screen Display 5.4 PreVu™ On-Screen Display Note The OSD settings are implemented by the engineer during start-up and matched with the ERGOcom 3 . This function will then be switched off by the engineer in order to prevent incorrect settings being implemented. -
Page 34: Picture
Instructions for use Display 5 Operation 5.4 PreVu™ On-Screen Display ▶ Confirm settings when you close Auto Setup. Auto Setup implements automatic settings with regard to horizontal and vertical size, horizontal and vertical position, frequency and phase. This allows Display 1 to be set quickly and easily. -
Page 35: Color Temp
Instructions for use Display 5 Operation 5.4 PreVu™ On-Screen Display Position ▶ Select Position from the menu, followed by H. position or V. position. ▶ H. Position. Set the horizontal image position on a scale of 0 to 50. V. Position. Set the vertical image position on a scale of 0 to 50. Phase ▶... -
Page 36: Management
Instructions for use Display 5 Operation 5.4 PreVu™ On-Screen Display Neutral ▶ Select the Neutral function and confirm by pressing the control knob. Neutral is the ideal setting for desktop publishing. Warm ▶ Select the Warm function and confirm by pressing the control knob. Warm is the ideal setting for image processing. - Page 37 Instructions for use Display 5 Operation 5.4 PreVu™ On-Screen Display OSD Display ▶ Select OSD Display from the menu. ▶ H. Position. Set the horizontal position of the OSD menu. V. Position. Set the vertical position of the OSD menu. Language ▶...
-
Page 38: Input Source
Instructions for use Display 5 Operation 5.4 PreVu™ On-Screen Display 5.4.5 Input Source ▶ Select Input Source from the menu. You can toggle manually between analog and digital in the Input Signal menu. The signal is automatically detected by default. 5.4.6 Volume ▶... -
Page 39: Preparation Methods Din En Iso 17664
As damage to surfaces is very much dependent on the reaction times of these sub‐ stances, it is essential for any spilled substances to be wiped away immediately using a damp cloth. Detergent recommended: KaVo Elastoclean. The following detergents must not be used: 1. Strongly alkaline lyes 2. -
Page 40: Disinfection
Instructions for use Display 6 Preparation methods DIN EN ISO 17664 6.2 Disinfection 6.2 Disinfection Damage caused by fluids. Faults in electrical components. ▶ Protect product openings from the penetration of fluids. CAUTION ▶ Remove fluids from unit interior. ▶ Wipe surface with a soft, fluff-free cloth to disinfect them. 38/40... -
Page 41: Maintenance
Instructions for use Display 6 Preparation methods DIN EN ISO 17664 6.3 Maintenance 6.3 Maintenance The product does not require regular user maintenance. 39/40... -
Page 42: Glossary
Instructions for use Display 7 Glossary 7 Glossary Term Description Screen 1 Screen 1 is the screen connected to the VGA Monitor interface and is installed on the upright operating light‐ post. Screen 2 Screen 2 is the screen connected to the VGA OUT in‐ terface.
Need help?
Do you have a question about the EC3 and is the answer not in the manual?
Questions and answers