
Related Manuals for HOMCOM 824-006V90


Summary of Contents for HOMCOM 824-006V90
- Page 1 INcjh016_DE_EN 824-006V90 220-240V~50-60Hz 45W READ AND SAVE THIS INSTRUCTION FOR FUTURE USE ASSEMBLY INSTRUCTION...
-
Page 2: Wichtige Sicherheitshinweise
INSTALLATIONS-, BETRIEBS- UND / ODER WARTUNGSARBEITEN AN DIESEM PRODUKT DURCHFÜHREN. BITTE SCHÜTZEN SIE IHRE UND DIE SICHERHEIT ANDERER, INDEM SIE ALLE RELEVANTEN SICHERHEITSVORKEHRUNGEN EINHALTEN. DIE NICHTBEACHTUNG DIESER SICHERHEITSVORKEHRUNGEN KANN ZU VERLETZUNGEN UND / ODER SACHSCHÄDEN FÜHREN. WICHTIGE SICHERHEITSHINWEISE 1.Bitte lesen Sie alle Vorsichtsmaßnahmen sorgfältig durch, bevor Sie den Lüfter verwenden. - Page 3 Der Hauptnetzschalter und der Ein / Aus-Schalter WARNUNG : dürfen nicht als einziges Mittel zum Trennen der Stromversorgung verwendet werden. Ziehen Sie immer den Netzstecker, bevor Sie das Gerät warten oder bewegen. 14.Trennen Sie den Lüfter immer vom Stromnetz, wenn Sie ihn von einem Ort an einen anderen transportieren.
-
Page 4: Montage
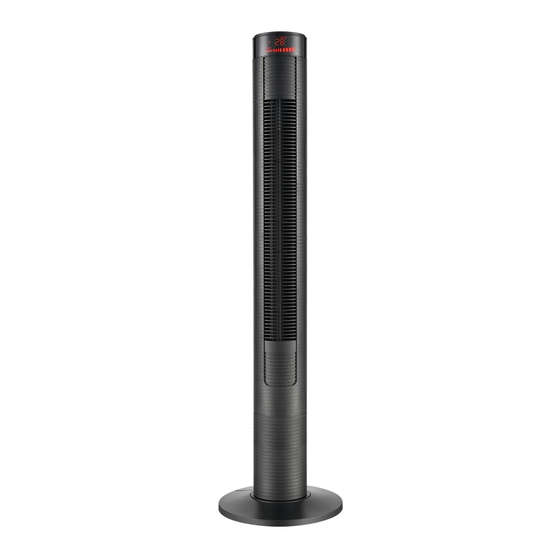
EINZELTEILNAMEN Schalttafel Anzeigetaf Luftauslass Standfuß el MONTAGE Der Standfuß des Turmventilators besteht aus zwei Teilen, die um die Oszillationsbasis passen. Beide Teile passen problemlos zusammen. 1. Befestigen Sie zuerst die vordere Hälfte des Standfußes, indem Sie die Löcher am Standfuß mit den Schraubenlöchern an der Oszillationsbasis ausrichten und das Netzkabel am Standfuß... - Page 5 (Abbildung 1) 3. Führen Sie das Netzkabel durch die beiden Aussparungen an der Unterseite des Standfußes. FERNBEDIENUNG 1. Setzen Sie eine Quecksilberbatterie (im Lieferumfang enthalten) ein. 2. Die Ein / Aus-Taste der Fernbedienung ist als solche gekennzeichnet. Alle mit der Fernbedienung ausgeführten Funktionen entsprechen den manuellen Bedienelementen (ABBILDUNG 2).
- Page 6 AN/AUS GESCHWINDIGKEI LUFTZIRKULATION ABBLENDEN MODUS TIMER (ABBILDUNG 2) NUTZUNG Der Lüfter kann mit den manuellen Bedienelementen direkt am Lüfter (siehe ABBILDUNG 3) oder mit der Fernbedienung (siehe ABBILDUNG 2) bedient werden. (ABILDUNG 3) 1. Stellen Sie den Lüfter auf eine stabile und ebene Oberfläche. Stecken Sie den Kabelsatz in eine Steckdose mit 220-240 V ~ Wechselstrom.
- Page 7 2. EINSCHALTEN : Schalten Sie den Lüfter mit der Ein- / Aus-Taste ein. Schalten Sie den Lüfter durch erneutes Drücken derselben Taste aus. 3. GESCHWINDIGKEIT : Sie können die Lüftergeschwindigkeit auf die gewünschte Stufe einstellen: niedrig, mittel oder hoch, indem Sie auf "GESCHWINDIGKEIT"...
-
Page 8: Wartung
mittlerer Geschwindigkeit und dann den Rest der Zeit mit niedriger Geschwindigkeit. Sie können die Schwingung jederzeit manuell einstellen. 5. TIMER : Der Lüfter ist mit einem Timer ausgestattet, mit dem Sie die Betriebsdauer von 1 Stunde bis 12 Stunden einstellen können. LUFTZIRKULATION: Durch Drücken der Taste "OSC"... - Page 9 durchgeführt werden. 3. Wenn das Gerät von außen gereinigt werden muss, vergewissern Sie sich, dass es ausgeschaltet und vom Stromnetz getrennt ist. Bitte verwenden Sie für allgemeine Reinigungsarbeiten ein weiches Tuch oder ein Tuch. Um hartnäckigeren Schmutz oder Schmutz zu entfernen, wischen Sie ihn mit einem mit warmem Seifenwasser angefeuchteten Tuch ab.
-
Page 10: Important Safety Information
READ CAREFULLY BEFORE ATTEMPTING TO ASSEMBLE, INSTALL, OPERATE OR MAINTAIN THE PRODUCT DESCRIBED. PROTECT YOURSELF AND.OTHER BY OBSERVING ALL SAFETY INFORMA- TION. FAILURE TO COMPLY WITH INSTRUCTIONS COULD RESULT IN PERSONAL INJURY AND/OR PROPERTY DAMAGE! IMPORTANT SAFETY INFORMATION 1. Read all instructions carefully before using the FAN. 2. - Page 11 WARNING : The Main Power Switch and the On/Off switch should not be used as the sole means of disconnecting power. Always unplug the power cord before servicing or moving the unit. 14. Always disconnect the fan from the power supply when moving it from one location to another.
-
Page 12: Parts Name
PARTS NAME ASSEMBLY The base of the tower fan comes in two parts, which fit around the oscillation base. Both parts fit easily together. 1.First attach the front half of the base, aligning the holes in base with the screw hole in the oscilla- tion base, and leading the power cord up the base. -
Page 13: Remote Control
(Figure 1) 3. Thread the power supply cord through the two cut-outs at the bottom of the base. REMOTE CONTROL 1. Install one ‘mercury’ ( included) batteries. 2. The Remote Control Power button is labeled as such. All the functions performed with the Remote Control work identically to the Manual Controls. -
Page 14: Operation
(FIGURE 2) OPERATION The FAN may be operated by the manual controls located on the FAN (as shown in FIGURE 3) or by your remote control (shown in FIGURE 2) . (FIGURE 3) 1. Place the FAN on a stable flat surface. Plug the cord set into a 220-240V~A.C. - Page 15 2. POWER : Turn the FAN on by pressing the ‘POWER’ button; Turn the FAN off by pressing the ‘POWER’ button again. 3. SPEED : You can adjust the fan speed to the desired level: low, medium, or high by pressing ’SPEED’ . The speed setting is displayed on the LED panel (shown in FIGURE 4) ...
-
Page 16: Maintenance
set its length of operation from 1 hour to 12 hours. 6. OSCILLATION : Pressing the ‘OSC’ button will start and stop the oscillation function. The symbol is displayed on the LED panel. TF3803TR-L TF4604TR-L FIGURE 4 7. Cable Hock: The cable hock is packed with user manual, take it out and install at the back side of product.Hanging the power cord at cable hock when the fan is not be used.(FIGURE 5) (FIGURE 5) -
Page 17: Conformity With Directives
Sealer dealer or any agent qualified to undertake electrical repairs. 3. If the unit requires external cleaning make sure it is switched off and unplugged from the mains supply. Use a soft tissue or cloth for general cleaning. To remove more persistent dirt or grime wipe down with a cloth that has been dampened with warm soapy water.
Need help?
Do you have a question about the 824-006V90 and is the answer not in the manual?
Questions and answers