
Subscribe to Our Youtube Channel
Related Manuals for Carbatec BS-345C


Summary of Contents for Carbatec BS-345C
- Page 1 14" (345mm) Heavy Duty Bandsaw BS-345C I N S T R U C T I O N S M A N U A L CA RBAT E C .C OM .AU...
-
Page 2: Introduction
Carbatec to keep you woodworking, as promised. We look forward to sharing in your woodworking journey! If you have any questions about our products or service, please call us on 1800 658 111 or email us at info@carbatec.com.au Find us on social media facebook.com/Carbatec instagram.com/Carbatec... -
Page 3: What's In The Box
BS-345C WELCOME WHAT’S IN THE BOX BS-345C 14" BANDSAW Fence Door Lock Keys Cast table Front fence rail Mitre Gauge Stand Cross Braces Rear fence rail Table Tilt Lock Knobs Stand Left/Right Legs Fence Hardware Guard Height & Blade Fence Rule... -
Page 4: Key Information
DATE OF PURCHASE: Date: Made for: CARBATEC PT Y LTD Brisbane - Australia F O R T E C H N I C A L S U P P O RT C A L L 1 8 00 65 8 1 11... -
Page 5: Table Of Contents
Changes and improvements may be made at any time, with no obligation on the part of Carbatec to modify previously delivered units. Reasonable care has been taken to ensure that the information in this manual is correct, to provide you with the guidelines for the proper safety, assembly and operation of this machine. -
Page 6: Safety Instructions - General
Australian/New Zealand Standards to ensure their compliance with all mandatory standards and regulations (applicable at time of original sale). Carbatec Pty Ltd are registered as a responsible supplier with relevant Australian government departments and our products are registered on the EESS & ACMA database. -
Page 7: Safety Instructions - Bandsaw
BS-345C SAFETY INSTRUCTIONS GENERAL SAFETY Operating a power tool can be dangerous if GROUND ALL TOOLS. If the tool is supplied safety and common sense are ignored. The with a 3-prong plug, it must be plugged into operator must be familiar with the operation of a 3-contact electrical receptacle. - Page 8 BS-345C GENERAL SAFETY ALWAYS UNPLUG THE TOOL FROM THE MAINTAIN TOOLS WITH CARE. Always ELECTRICAL RECEPTACLE keep tools clean and in good working order. when making adjustments, changing parts or Keep all blades and tool bits sharp, dress performing any maintenance.
- Page 9 BS-345C SAFETY INSTRUCTIONS including silicosis (a serious lung disease), be avoided where possible. When using an cancer, and death. Avoid breathing dust, and extension cord, be sure to have a cord heavy avoid prolonged contact with dust. Allowing enough to carry the current your product will...
- Page 10 BS-345C BANDSAW SAFETY INTENDED USE • Always use the blade guard to avoid • The machine must only be used in possible injury due to blade breakage. technically perfect condition in accordance • Never leave the work area with the power...
-
Page 11: Safety Instructions - Electrical
BS-345C SAFETY INSTRUCTIONS • Avoid accidental starts: do not press the start button while inserting the plug into the socket. ELECTRICAL SAFETY CHECK WITH A QUALIFIED ELECTRICIAN or service personnel if you do not completely This tool must be grounded while in use to understand the grounding instructions, or if you protect the operator from electric shock. -
Page 12: Overview
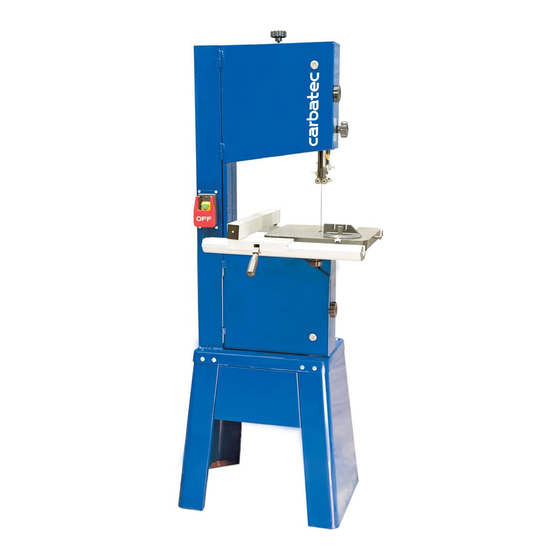
BS-345C OVERVIEW BS-345C (345MM) HEAVY DUTY BANDSAW Blade tension knob Rip fence 1.5 HP motor Blade tracking knob Table pin NVR on/off switch Quick tension lever Cast table Top access door Top door key lock Mitre gauge Fence rail Top door opening knob... -
Page 13: Specifications
BS-345C SPECIFICATIONS SPECIFICATIONS CODE BS-345C MOTOR 1-1/2 HP (1100 W) SWITCH TYPE Magnetic NVR BLADE GUIDES Dual bearing BLADE LENGTH 2553 mm BLADE RELEASE Quick release lever BLADE SPEED 2200 DEPTH OF CUT 200 mm (8") DUST PORT 1 × 100 mm (4”) MINIMUM BLADE WIDTH 3.2 mm (1/8") -
Page 14: Assembly
BS-345C ASSEMBLY ASSEMBLING THE STAND Fig. A1 This stand is simple to assemble. There are only four panels; the two legs and two cross support panels. Fig. A1 Stand the legs upright and spaced apart so you have room to install the cross panels. - Page 15 BS-345C ASSEMBLY MOUNTING THE MACHINE Fig. B1 You can now lift the saw body onto the base. This is a (minimum) two person job. The machine will sit perfectly over the stand, located by the lip on the base. Take care to keep your fingers out of the way when placing the machine down onto the stand! Fig.
- Page 16 BS-345C ASSEMBLY INSTALLING THE TABLE Fig. C1 First, remove the table insert and pin. The insert can be pressed or tapped out carefully from below, while the pin is tapered and may require a spanner or vise grips to loosen and slide out.
-
Page 17: Machine Setup
BS-345C MACHINE SETUP MACHINE SETUP TABLE SETUP Fig. D1 Place the table insert back in position, taking care to align the insert notches. Insert the table pin and firmly seat with a small hammer tap. Fig. D1 Tilt the table up to roughly 30° to 40°, or enough to insert the 90°... - Page 18 BS-345C MACHINE SETUP INSTALLING AND SETTING Fig. E1 UP THE RIP FENCE Mount the front fence rail to the table using two hex head bolts (M6 x 20) and two spring washers. A 10 mm spanner is required. Leave the bolts just a little loose for now.
- Page 19 BS-345C MACHINE SETUP Fig. E4 Slide the fence across until it just barely touches the blade and push the handle down to lock in this position. Now slide the fence scale/rule in the channel on the front rail, under the fence. Align the...
-
Page 20: Adjustments
BS-345C ADJUSTMENTS BLADE TENSION & TRACKING Fig. G1 This machine features a quick-release blade tension lever. Fig. G1 Always ensure this is in the correct position before use and release tension after use. There is a blade tension indicator guide near the... - Page 21 BS-345C ADJUSTMENTS BLADE BEARING GUIDE Fig. I1 Thrust Bearing ADJUSTMENT and Adjuster The bearing guide systems found on this machine are fully adjustable. Working from the side, release the depth lock knob and rotate the threaded adjuster, until the bearing sits approx. 2mm behind the set of the teeth on the blade.
- Page 22 BS-345C ADJUSTMENTS CHANGING THE SAW BLADE Fig. J1 Remove the table pin and table insert. As this bandsaw’s table slot faces the side, there is no need to remove your fence rail. Open both upper and lower doors of the bandsaw. Release the blade...
-
Page 23: Operation
BS-345C OPERATION OPERATION WARNINGS The purpose of this overview is to provide the novice machine operator with a basic understanding of how the machine is used. If you are not experienced with this type of machine, we strongly recommend that you seek additional training outside of this manual. Read books, watch videos or get formal training before beginning any projects. - Page 24 BS-345C OPERATION RIP CUTTING Fig. M4 Continue feeding until your board is cut through. Controlling your cuts utilising feather boards will free up your hands, allowing you to safety reach around the rear to control the board exiting the blade.
- Page 25 BS-345C OPERATION CURVE OR FREE HAND CUTTING Curve cutting is usually done with the fence removed from the machine, or locked out of the way. Ensure you have enough room to perform all your cuts before starting. Remember to avoid placing your hands anywhere near the cutting area, and make sure you have push sticks, push blocks in close proximity.
- Page 26 Blade length on this machine is 2553 mm. A wide variety of blades to suit this machine are available from Carbatec - check them out online. The machine accepts blades from 3.2 to 19 mm (1/8" to 3/4") wide. For best results it is important to understand how to select the right blade.
-
Page 27: Maintenance
(avoid silicone based products that may cause issues with wood finishes later on). Take a clean cloth to wipe any cleaning residue, dirt or dust off the table. When it’s dry, apply a surface protectant. Carbatec offer many products for machine cleaning and care. -
Page 28: Wiring Diagram
BS-345C WIRING DIAGRAM F O R T E C H N I C A L S U P P O RT C A L L 1 8 00 65 8 1 11... -
Page 29: Parts Diagram/Parts List
BS-345C SPARE PARTS PARTS DIAGRAM - BODY 14" (345MM) HEAVY DUTY BANDSAW BS-345C C A RBATE C.C OM.AU... - Page 30 BS-345C PARTS LIST-BODY PART PART DESCRIPTION DESCRIPTION REF. REF. Body 8mm spring washer Guide bar up/down label Adjust piece Model no. label M6 x 6 hex soc set scr Saw blade tension label Spring piece Knob M4 x 8 cross hd countersunk scr...
- Page 31 BS-345C SPARE PARTS PART PART DESCRIPTION DESCRIPTION REF. REF. 5mm spring washer M8 x 30 hex bolt Bias shaft 8mm spring washer Double end sealed ball bearing M8 x 80 hex bolt M5 x 10 hex soc cap scr M8 hex nut...
- Page 32 BS-345C PARTS LIST - BODY PART PART DESCRIPTION DESCRIPTION REF. REF. 8mm spring washer Motor w/switch Flat washer 5 x 30 key Wheel tire M8 x 20 hex soc cap scr Saw blade Flat washer Lower wheel 8mm spring washer...
- Page 33 BS-345C SPARE PARTS PARTS DIAGRAM - SAW TABLE PART DESCRIPTION REF. Table Table pin Table insert 203A 3 x 10 spring pin Trunnion M6 x 16 hex soc cap scr 205A Flat washer 205B 6mm spring washer Scale Trunnion clamp shoes...
-
Page 34: Troubleshooting
BS-345C TROUBLESHOOTING TO PREVENT INJURY TO YOURSELF or damage to the bandsaw, turn the switch to the “OFF” position and unplug the power cord from the electrical receptacle before making any adjustments. PROBLEM LIKELY CAUSE(S) SOLUTION(S) The machine does No power supply. -
Page 35: Warranty
1. a copy of the order or receipt for the goods; 2. the serial or batch number printed on the A. We warrant that this Carbatec product will be free machinery manufacturing plate; and from defects caused by faulty workmanship or faulty materials for a period of 3 years from date of sale. - Page 36 C a r b at e c P t y L td E info@carbatec.com.au AU 1800 658 111 NZ 0800 444 329 128 Ingleston Road, Wakerley, Queensland Australia 4154 ABN 84 010 706 242 CA R BATEC .C O M .AU...
Need help?
Do you have a question about the BS-345C and is the answer not in the manual?
Questions and answers