Intermec 5020 User Manual
Intermec 5020: user guide
Hide thumbs
Also See for 5020:
- System manual (310 pages) ,
- User manual (144 pages) ,
- Installation manual (16 pages)
Table of Contents
Advertisement
Quick Links
Advertisement
Table of Contents

Subscribe to Our Youtube Channel
Related Manuals for Intermec 5020


Summary of Contents for Intermec 5020
- Page 1 User's Guide Data Collection Browser Client ™...
- Page 2 The information contained herein is provided solely for the purpose of allowing customers to operate and service Intermec-manufactured equipment and is not to be released, reproduced, or used for any other purpose without written permission of Intermec Technologies Corporation.
- Page 3 Replaced “DCS 30X or G4X00” with “Intermec Application Server.” 03/2008 Updated to add CV30, CK60 series, and CN3 series support. Organized current Intermec computer chapters by operating system (Windows Mobile 5.0 and Windows CE). Removed chapters for 5020s, JANUS devices, and RT1100s/RT1700s/6400s. Data Collection Browser User’s Guide...
- Page 4 Data Collection Browser User’s Guide...
-
Page 5: Table Of Contents
Contents Before You Begin ............ix Safety Information . - Page 6 Exploring the Intermec Computer ........
- Page 7 Configuring Special Features (Optional) ........54 700 Series Mobile Computers (Pocket PC 2003 and Pocket PC 2002) Using ActiveSync to Connect to the 700 Series .
- Page 8 Contents Troubleshooting ............85 Symptoms and Solutions .
-
Page 9: Before You Begin
Global Services and Support Warranty Information To understand the warranty for your Intermec product, visit the Intermec web site at > Warranty. Disclaimer of warranties: The sample code included in this document is presented for reference only. - Page 10 Service Service contracts Outside the U.S.A. and Canada, contact your local Intermec representative. To search for your local representative, from the Intermec web site, click About Us > Contact Us. Service Location Support For the most current listing of service locations, click Support > Returns and Repairs >...
-
Page 11: Who Should Read This Manual
2 Click Support > Manuals. 3 In the Select a Product field, choose the product whose documentation you want to download. To order printed versions of the Intermec manuals, contact your local Intermec representative or distributor. Data Collection Browser User’s Guide www.intermec.com... - Page 12 Before You Begin Data Collection Browser User’s Guide...
-
Page 13: Getting Started
Getting Started This chapter describes the Data Collection Browser (dcBrowser) and explains the environments that you must set up in order to run the Data Collection Browser. This chapter covers these topics: • Learning about Data Collection Browser • What’s new? •... -
Page 14: Learning About The Data Collection Browser
The Intermec Data Collection Browser™ (dcBrowser™) provides a HyperText Markup Language (HTML) application development environment for Intermec data collection devices. Use dcBrowser to run HTML applications in your data collection network and to send the information to your enterprise information system. - Page 15 Note: For help configuring UDP Plus or WTP devices to connect to the dcBrowser gateway through an Intermec Gateway, see the Intermec Gateway User’s Guide. Note: For help installing the dcBrowser gateway on a PC (which is called the software-only dcBrowser gateway), see Gateway Environment”...
-
Page 16: What's New
The simulator contains a local dcBrowser gateway that runs on your PC, and it simulates the dcBrowser gateway on the Intermec Application Server or the software-only dcBrowser gateway. The simulator also simulates the device screens so you can enter data and see how the application responds. -
Page 17: About The Clients
For help installing licenses, see the “Placing the Licenses in the Pak File” topic in the dcBrowser online help. Note: Before you install the licenses, Intermec allows one device to connect to the dcBrowser gateway for development purposes only. Data Collection Browser User’s Guide Operating System Windows Mobile 5.0... - Page 18 Chapter 1 — Getting Started Data Collection Browser User’s Guide...
-
Page 19: Developing And Testing Your Application
This chapter provides a list of the HTML features that are supported, the features that are not supported, and additional information about some of the tag attributes of dcBrowser. It also provides a summary of the HTML tags and how dcBrowser supports them and a sample HTML file. This chapter covers these topics: •... -
Page 20: About The Development Environment
Chapter 2 — Developing and Testing Your Application About the Development Environment dcBrowser provides a runtime environment for data collection devices. For more information about the development environment, see Chapter 1, “Getting Started.” Note: Compile your CGI scripts for whatever environment your web server uses. -
Page 21: Unsupported Html Features
Unsupported HTML Features The following list explains some of the HTML features that are not currently supported by dcBrowser. Contact your local Intermec representative to determine which features will be implemented in future releases. • HTML tags that are inappropriate for the devices. These tags are either implemented as far as possible or ignored. - Page 22 Chapter 2 — Developing and Testing Your Application Summary of HTML 3.2 Tags (continued) HTML Tag Description Bold <B> Base <BASE> Beep <BEEP> Big text <BIG> Block quote <BLOCKQUOTE> Body <BODY> Line break <BR> Caption <CAPTION> Center <CENTER> Citation <CITE> Code <CODE>...
- Page 23 Summary of HTML 3.2 Tags (continued) HTML Tag Description No break <NOBR> No embed <NOEMBED> No frames <NOFRAMES> Ordered list <OL> Option <OPTION> Paragraph <P> Parameters <PARAM> Preformatted text <PRE> Strike <S> Sample <SAMP> Form select <SELECT> Small text <SMALL> Span <SPAN>...
-
Page 24: Special Html Tags
Chapter 2 — Developing and Testing Your Application Special HTML Tags This section describes HTML tags with special attributes or notes that are particular to using these tags with dcBrowser. For a complete description of HTML tags, see an HTML reference manual. Anchor Syntax: <A>...</A>... -
Page 25: Beep
Beep Syntax: <BEEP> Attributes: repeat= spacing= Notes: To set the beep volume and frequency, see the user’s manual for your device. Example: <BEEP repeat=3> The device beeps three times. Headings Syntax: <H1>…</H1> <H2>…</H2> <H3>…</H3> <H4>…</H4> <H5>…</H5> <H6>…</H6> Notes: <H1> is centered in uppercase letters with a blank line before and after the heading. -
Page 26: Image
Chapter 2 — Developing and Testing Your Application The device displays “containers” in uppercase letters with a blank line before and after the heading. Image Syntax: <IMG> Attributes: alt Notes: Since some device screens cannot render graphics, dcBrowser displays the alt text. -
Page 27: Input
Input Syntax: <INPUT TYPE=> Attributes: hidden password reset submit text name value size maxlength Special Attributes: cursor transmit key= scanonly dti_capture= Puts data in a field based on data type identifier. If a field is dti_strip noscan Notes: Use the value attribute to set a default value for the input field that is specified by the name attribute. -
Page 28: Meta
Chapter 2 — Developing and Testing Your Application The input field cannot extend beyond the right edge of the device’s screen. dcBrowser does not support viewporting. The maxlength attribute supports scrolling fields. You can set maxlength to any number, but the visible field length is set by the size attribute. Example: <INPUT TYPE=”text”... - Page 29 Trakker Antares terminal 700 Series (monochrome screen) computers 700 Series Color computers CK30 or CK31 computer Intermec Computer Command Reference Manual (P/N CN3 Series or CK61 computer CV30 or CV60 computer Intermec Computer Command Reference Manual (P/N returnserial Data Collection Browser User’s Guide Chapter 2 —...
- Page 30 Chapter 2 — Developing and Testing Your Application relay= Note: You may find it useful to number each row in this table from 0x0 to 0xF, or 0000 to 1111, where each bit in the four-bit number represents a relay, and where 0 is Off (deactivated) and 1 is On (activated). If you number the rows in this manner, the first row is 0000 where all relays are Off;...
- Page 31 getsi retonsi Notes: To use the id attribute, you must set the show_userid parameter in DCB.INI. For help, see the online help for the dcBrowser gateway. Examples: <META HTTP-EQUIV=REFRESH CONTENT=“3;/testlist.asp”> After a 3-second delay (no activity on the device), testlist.asp is requested from the web server.
-
Page 32: Paragraph
Sets the baud rate on the device to allowed values, for example, 9600. For valid baud rates, see your Intermec computer user’s manual. Sets the data bits to 7 or 8. If this attribute is not used, the data bits are set to 8. -
Page 33: Table
Notes: Use the Print tag to pass control and data messages from the web server to a printer attached to the COM port of a an Intermec computer running the dcBrowser client. Check with your Intermec sales representative for the availability of the Print feature with other products. - Page 34 Chapter 2 — Developing and Testing Your Application Notes: If you have a scrollable table and links are disabled, F5 is hard-coded to scroll to the previous section of the table and F6 is hard-coded to scroll to the next screen. You must add HTML tags to your web page to provide this information for your user.
-
Page 35: Example Web Page And Html Code
RFSIGN.HTM file, your browser will display a web page similar to the screen on the right. To set up the sample application and web pages 1 Copy the .exe files from the \INTERMEC\DCBROWSER\ EXAMPLES\CGI_BASED\CGI\BIN directory to the CGI-BIN directory for your web server. - Page 36 To use a text editor to view the HTML code 1 Choose File > Open. 2 Go to the \INTERMEC\DCBROWSER\HTML directory, and then choose RFSIGN.HTM. 3 Click OK. To use Internet Explorer to view the HTML code •...
- Page 37 Chapter 2 — Developing and Testing Your Application RFSIGN.HTM <HTML> <HEAD> <TITLE>RF SIGN ON</TITLE> </HEAD> <BODY> <CENTER> <H1>SIGN ON</H1> <FORM METHOD=POST ACTION="/cgi-bin/cgi.exe"> <BR> <BR> <TABLE> <TR ALIGN=LEFT> <TD ALIGN=RIGHT>OPERATOR: <TD ALIGN=LEFT><INPUT TYPE="text" NAME=UserID SIZE=8 MAXLENGTH=16> <TR ALIGN=LEFT> <TD ALIGN=RIGHT>PASSWORD: <TD ALIGN=LEFT><INPUT TYPE="Password" NAME=Password SIZE=8 MAXLENGTH=16> </TABLE>...
-
Page 38: Advanced Features
Chapter 2 — Developing and Testing Your Application Advanced Features This section explains some features of dcBrowser that may not be standard for HTML applications. Using the Links Feature When you enable the links feature on the dcBrowser Device Mapping Configuration page, you can use the stylus and touch screen when viewing web pages on a device with a touch screen. -
Page 39: Transmitting On A Full Field
Scan-ahead and type-ahead are always available. While the device is waiting for a new screen, all scanned and keyed data is buffered. When the device receives a new screen with input fields, it applies the buffered data to the new screen. If an auto-transmit field is filled in before the end of the screen is reached, the screen is transmitted, and the remainder of the scan-ahead or type-ahead data waits for the next screen. -
Page 40: Choosing The Field That Appears First
Chapter 2 — Developing and Testing Your Application Choosing the Field That Appears First When a screen appears, the cursor is placed in the first available field. If you want the cursor placed in another field when the screen appears, add CURSOR as a property for that field. -
Page 41: Setting Up The Test Software-Only Gateway Environment
• dcBrowser simulator (on dcBrowser client CD) Note: A free web server is provided in INTERMEC\DCBROWSER\ DEVTOOLS. Intermec does not provide product support for the server. For help installing the web server, see the README.TXT. To set up the test/software-only gateway environment 1 Load a web server and a web browser on your PC. - Page 42 3 Read the Welcome screen and click Next. The Software License Agreement screen appears. 4 Read the Intermec Software License Agreement and click Yes. The Choose Destination Location screen appears. 5 Choose the path where you want to install the simulator.
-
Page 43: Running Multiple Copies Of The Simulator (Optional)
4 Start the Local dcBrowser Gateway. A DOS window appears. 5 Start your web browser. Data Collection Browser User’s Guide Chapter 2 — Developing and Testing Your Application –hx.x.x.x –pport –isimid –l \INTERMEC\DCBROWSER\EXAMPLES\ directory to the CGI-BIN directory for your web \INTERMEC\DCBROWSER\ directory to the HTML directory for... -
Page 44: Configuring The Test/Software-Only Gateway Environment
5 Configure the local dcBrowser gateway. For help, see “Configuring the Local dcBrowser Gateway” in the next section. 6 From the Start menu, select Intermec > dcBrowser > run simulator. A simulator window appears. Press Ctrl-F1 to change the screen size. -
Page 45: Changing The Local Dcbrowser Gateway Ini File (Optional)
2 In the Address line or the Go to line: • If you are browsing from the same computer that hosts the Intermec • If you are not browsing from the same computer that hosts the Press Enter. The dcBrowser Device Mapping Configuration screen appears. - Page 46 Specify the location of the license Pak files if you did not install them to the default locations: On a controller, the default location is C:\PROGRAM FILES\INTERMEC\LICPAK.TXT. On your NT or newer machine, the default location is C:\PROGRAM FILES\INTERMEC\DCBROWSER\GATEWAY\LICPAK.TXT. Define the character to be sent with keyboard data.
-
Page 47: Testing Your Application
Verify that appropriate error messages appear. Setting Up the Runtime Environment To set up the runtime environment for the Intermec Application Server, see the documentation that came with your Intermec Application Server. To set up the runtime environment for the software-only dcBrowser gateway, see the online help. - Page 48 Chapter 2 — Developing and Testing Your Application Data Collection Browser User’s Guide...
-
Page 49: Cn3 Series, Ck61, 700 Series, And Cv30 Computers (Windows Mobile 5.0)
This chapter covers these topics: • Using ActiveSync to connect to the Intermec computer • Installing the dcBrowser client • Configuring TCP/IP or UDP Plus on the Intermec computer • Starting the dcBrowser client for the first time • Connecting to the dcBrowser gateway •... -
Page 50: Using Activesync To Connect To The Intermec Computer
To establish a partnership between an Intermec computer and a desktop PC, you must use a serial cable or a USB cable. If you have an Intermec mobile computer, you can also use a single dock. To order a cable or dock, contact your Intermec sales representative. -
Page 51: Installing The Dcbrowser Client
3 Tap Sync. ActiveSync connects to your desktop PC. 4 To disconnect, tap Stop. ActiveSync disconnects from the desktop PC. To reconnect an Intermec computer to a desktop PC using ActiveSync through an RF connection 1 Make sure the Intermec computer is in range of an access point. -
Page 52: Configuring Tcp/Ip Or Udp Plus On The Intermec Computer
You need to determine the UDP Plus port number (which defaults to 5555) and the IP address of the controller, which is the Intermec Application Server or PC that the dcBrowser gateway is running on. Data Collection Browser User’s Guide... - Page 53 “Save configuration changes?” prompt appears. Tap Yes to save the changes. 6 To close Intermec Settings, tap the X button in the upper right corner of the screen. Note: When you start the dcBrowser client for the first time, you will be prompted for an IP address and port number.
-
Page 54: Starting The Dcbrowser Client For The First Time
7 Tap the X button in the upper right corner of the screen. The “Save configuration changes?” prompt appears. 8 Tap Yes to save the changes. 9 To close Intermec Settings, tap the X button in the upper right corner of the screen. 10 Perform the steps in... -
Page 55: Running The Dcbrowser Client
• Use the cursor keys, Tab key, or stylus to navigate from field to field. Note: If the touch screen does not work, you need to change the dcBrowser gateway configuration on your Intermec Application Server or PC running the dcBrowser gateway. You must enable the Links parameter on the dcBrowser Device Mapping Configuration page. -
Page 56: Configuring Special Features (Optional)
Chapter 3 — CN3 Series, CK61, 700 Series, and CV30 Computers (Windows Mobile 5.0) This table lists key combinations for keys on the CN3 Series or CK61. CN3 Series, CK61 Key, or 700 Series Key Combinations Client Keys Ctrl-P Ctrl-X Configuring Special Features (Optional) By changing the dcBrowser client .ini file (IMDCB.INI), you can configure the features described in the following table. - Page 57 2 Use ActiveSync to copy IMDCB.INI from the computer root directory (Mobile Device\My Pocket PC) to a desktop PC. For help, see ActiveSync to Connect to the Intermec Computer” on page 3 If your mobile computer has an SDRAM card, use ActiveSync to delete IMDCB.INI from the directory \SDMMC Disk.
- Page 58 Chapter 3 — CN3 Series, CK61, 700 Series, and CV30 Computers (Windows Mobile 5.0) Data Collection Browser User’s Guide...
-
Page 59: Ck61, Cv30, And Cv60 Computers (Windows Ce)
CV60 Vehicle Mount Computer. This chapter covers these topics: • Using ActiveSync to connect to the Intermec computer • Installing the dcBrowser client • Configuring TCP/IP or UDP Plus on the Intermec computer • Starting the dcBrowser client for the first time • Connecting to the dcBrowser gateway •... -
Page 60: Using Activesync To Connect To The Intermec Computer
To establish a partnership between an Intermec computer and a desktop PC, you must use a serial cable or a USB cable. If you have an Intermec mobile computer, you can also use a single dock. To order a cable or dock, contact your Intermec sales representative. -
Page 61: Installing The Dcbrowser Client
To reconnect a computer to a desktop PC using ActiveSync through a serial connection 1 Connect the Intermec computer to your desktop PC with a serial cable, a USB cable, or a single dock. If ActiveSync is set to automatically connect to your desktop PC whenever the computer is connected, the ActiveSync connection screen appears on your desktop PC. -
Page 62: Configuring Tcp/Ip Or Udp Plus On The Intermec Computer
You need to determine the UDP Plus port number (which defaults to 5555) and the IP address of the controller, which is the Intermec Application Server or PC that the dcBrowser gateway is running on. Data Collection Browser User’s Guide... - Page 63 “Save configuration changes?” prompt appears. Tap Yes to save the changes. 6 To close Intermec Settings, tap the X button in the upper right corner of the screen. Note: When you start the dcBrowser client for the first time, you will be prompted for an IP address and port number.
-
Page 64: Starting The Dcbrowser Client For The First Time
Chapter 4 — CK61, CV30, and CV60 Computers (Windows CE) 8 Tap Yes to save the changes. 9 To close Intermec Settings, tap the X button in the upper right corner of the screen. 10 Perform the steps in “Starting the dcBrowser Client for the First Time”... -
Page 65: Running The Dcbrowser Client
• Use the cursor keys, Tab key, or stylus to navigate from field to field. Note: If the touch screen does not work, you need to change the dcBrowser gateway configuration on your Intermec Application Server or PC running the dcBrowser gateway. You must enable the Links parameter on the dcBrowser Device Mapping Configuration page. -
Page 66: Configuring Special Features (Optional)
Chapter 4 — CK61, CV30, and CV60 Computers (Windows CE) This table lists key combinations for keys on the CK61. CK61 Key Combinations Client Keys Ctrl-P Ctrl-X Configuring Special Features (Optional) By changing the dcBrowser client .ini file (IMDCB.INI), you can configure the features described in the following table. - Page 67 2 Use ActiveSync to copy IMDCB.INI from the computer root directory (Mobile Device\My Pocket PC) to a desktop PC. For help, see ActiveSync to Connect to the Intermec Computer” on page 3 If your mobile computer has an SDRAM card, use ActiveSync to delete IMDCB.INI from the directory \SDMMC Disk.
- Page 68 Chapter 4 — CK61, CV30, and CV60 Computers (Windows CE) Data Collection Browser User’s Guide...
-
Page 69: Series Mobile Computers (Pocket Pc 2003 And Pocket Pc 2002)
This chapter explains how to load and run the dcBrowser client on your 700 Series Mobile Computer running Pocket PC 2003 or Pocket PC 2002. Note: If your 700 Series Mobile Computer is running Windows Mobile 5.0, see (Windows Mobile 5.0).” This chapter covers these topics: •... -
Page 70: Using Activesync To Connect To The 700 Series
To establish a partnership between a 700 Series and a desktop PC, you must use a serial cable, a USB cable, or a 700 Series Single Dock. To order a cable or dock, contact your Intermec sales representative. To install ActiveSync and establish a partnership with your 700 Series 1 Download ActiveSync from the Microsoft web site and follow the onscreen instructions for installing it on your desktop PC. -
Page 71: Exploring The 700 Series
Chapter 5 — 700 Series Mobile Computers (Pocket PC 2003 and Pocket PC 2002) Now that the partnership has been established, ActiveSync handles all future connects and disconnects. Exploring the 700 Series Once you have installed ActiveSync and established a partnership with your 700 Series, you can use ActiveSync to explore, copy, and delete files on the 700 Series. -
Page 72: Installing The Dcbrowser Client
PC, if you accepted the default path, the files are in two paths: • For a 700 Series running Windows Mobile 2003 or Pocket PC 2003: C:\Program Files\Intermec\dcBrowser\client\I700 • For a 700 Series running Pocket PC 2002: C:\Program Files\Intermec\dcBrowser\client\I700_2002 To install the dcBrowser client 1 Connect the 700 Series to your PC using ActiveSync. -
Page 73: Configuring Tcp/Ip Or Udp Plus On The 700 Series
You need to determine the UDP Plus port number (which defaults to 5555) and the IP address of the controller, which is the Intermec Application Server or PC that the dcBrowser gateway is running on. “For a 700 Series... - Page 74 “Save configuration changes?” prompt appears. Tap Yes to save the changes. 7 To close Intermec Settings, tap the round X button in the upper right corner of the screen. Note: When you start the dcBrowser client for the first time, you will be prompted for an IP address and port number.
-
Page 75: For A 700 Series Running Pocket Pc 2002
8 Tap the round X button in the upper right corner of the screen. The “Save configuration changes?” prompt appears. 9 Tap Yes to save the changes. 10 To close Intermec Settings, tap the round X button in the upper right corner of the screen. 11 Perform the steps in... - Page 76 “Save configuration changes?” prompt appears. Tap Yes to save the changes. 7 To close Intermec Settings, tap the round X button in the upper right corner of the screen. Note: When you start the dcBrowser client for the first time, you will be prompted for an IP address and port number.
-
Page 77: Starting The Dcbrowser Client For The First Time
TAB_TO_ANCHOR For the software-only dcBrowser gateway, the .ini file is DCB.INI. For the dcBrowser on an Intermec Application Server, the .ini file is WBS.INI. To change the INI parameters 1 Open the .ini file in a text editor such as Notepad. -
Page 78: Running The Dcbrowser Client
• Use the cursor keys, Tab key, or stylus to navigate from field to field. Note: If the touch screen does not work, you need to change the dcBrowser gateway configuration on your Intermec Application Server or PC running the dcBrowser gateway. You must enable the Links parameter on the dcBrowser Device Mapping Configuration page. -
Page 79: Configuring Special Features (Optional)
Chapter 5 — 700 Series Mobile Computers (Pocket PC 2003 and Pocket PC 2002) This table lists key combinations for keys on the 700 Series. 700 Series Key Combinations Client Keys Gold-7 Gold-9 Configuring Special Features (Optional) By changing the dcBrowser client .ini file (IMDCB.INI), you can configure the features described in the following table. - Page 80 Chapter 5 — 700 Series Mobile Computers (Pocket PC 2003 and Pocket PC 2002) Features Configured Through IMDCB.INI (continued) Feature Description Virtual keyboard Make the system tray button for the virtual keyboard available. To show the system tray button for the virtual keyboard, set: ENABLE_SIP=1 To not show the system tray button for the virtual keyboard (default), set:...
- Page 81 Chapter 5 — 700 Series Mobile Computers (Pocket PC 2003 and Pocket PC 2002) 7 Use ActiveSync to copy the edited IMDCB.INI file to the 700 Series root directory. Your changes take effect the next time you run the dcBrowser client. Data Collection Browser User’s Guide...
- Page 82 Chapter 5 — 700 Series Mobile Computers (Pocket PC 2003 and Pocket PC 2002) Data Collection Browser User’s Guide...
-
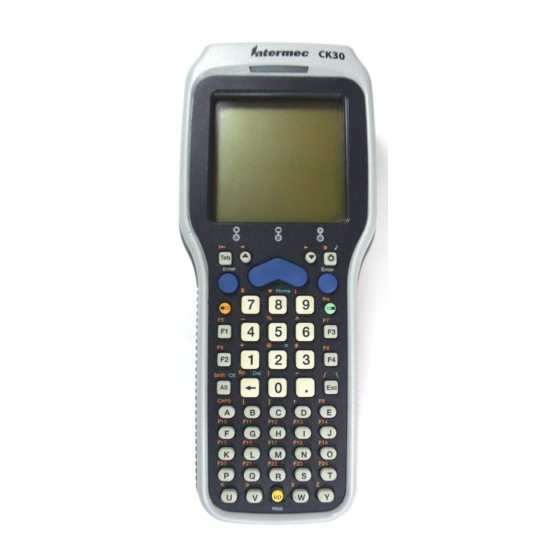
Page 83: Ck30 And Ck31 Handheld Computers
This chapter explains how to determine if the dcBrowser client is loaded on your CK30 or CK31 Handheld Computer and how to load and run the dcBrowser client. This chapter covers these topics: • Verifying the dcBrowser client is loaded •... -
Page 84: Verifying The Dcbrowser Client Is Loaded
“Loading and Launching the dcBrowser Client.”. dcBrowser client loaded. See the next section, Launching the dcBrowser Client.” \dcBrowser\Client\CK30\DCBCK30.CAB Intermec \dcBrowser\Client\CK31\DCBCK31.CAB Intermec to the CK30 and install the .cab file. For help DCBCK30.CAB to the CK31 and install the .cab file. For help DCBCK31.CAB... -
Page 85: Configuring Tcp/Ip Or Udp Plus On The Ck30 Or Ck31
You need to determine the UDP Plus port number (which defaults to 5555) and the IP address of the controller, which is the Intermec Application Server or PC that the dcBrowser gateway is running on. elect Controller Port and press Enter. Type the port... -
Page 86: Running The Dcbrowser Client
7 To exit, press Esc three times. The “Do you want your settings to persist through a cold boot?” prompt appears. 8 Press Enter to save your changes. 9 Press Esc to exit Intermec Settings. You should see a UDP Plus icon in the system tray. Running the dcBrowser Client When you are running your HTML application, follow these guidelines: •... -
Page 87: Setting Up To Print Through The Com Port (Optional)
• Edit the to and to change the baud rate, parity, data bits, and stop bits for the chosen COM port. For supported values, see the Intermec Computer Command Reference Manual (P/N 073529). To set the registry key for Bluetooth printing •... -
Page 88: Setting A Connection Delay (Optional)
Setting a Connection Delay (Optional) If the CK30 or CK31 is communicating with your network through a non- Intermec access point, the dcBrowser client may fail to connect to the dcBrowser gateway after the CK30 or CK31 has been warm booted. The... -
Page 89: Trakker Antares Terminals
Trakker Antares Terminals This chapter explains how to determine if the dcBrowser client is loaded on your Trakker Antares TCP/IP or UDP Plus terminal, and how to load and run the dcBrowser client. This chapter covers these topics: • Verifying that the dcBrowser client is loaded •... -
Page 90: Verifying The Dcbrowser Client Is Loaded
Chapter 7 — Trakker Antares Terminals Verifying the dcBrowser Client is Loaded If your Trakker Antares TCP/IP or UDP Plus terminals came preloaded with the dcBrowser client, go to Terminals” on page If you want to update your version of the dcBrowser client, go to the next section, To determine if you have the dcBrowser client loaded on your terminal 1 On your terminal, access the TRAKKER Antares 2400 Menu System by... - Page 91 Note: Currently, you can use the Intermec Application Server to download the dcBrowser client only to your UDP Plus terminals. This section explains how to use the FileCopy utility. For help using LOADER.EXE Trakker Antares terminal user’s manual. The FileCopy utility ships on the dcBrowser client CD. When you installed...
-
Page 92: Configuring Your Trakker Antares Terminals
Chapter 7 — Trakker Antares Terminals 6 Select the FileCopy tab. 7 In the PC Filename and Path box, type: C:\PROGRAMFILES\INTERMEC\DCBROWSER\CLIENT\TRAKKER\ DCBT24.BIN 8 In the Terminal Filename and Path box, type: C:DCBT24.BIN 9 Choose Download. The dcBrowser client is downloaded to your terminal. -
Page 93: Connecting To The Dcbrowser Gateway
4 Set the Host IP Address field or the Controller IP Address field to the dcBrowser gateway IP address. 5 Set the Terminal IP Address field to the IP address of the terminal and press ;. The Communications menu appears. 6 Choose Advanced Network. -
Page 94: Running The Dcbrowser Client
Chapter 7 — Trakker Antares Terminals 1 On your terminal, access the TRAKKER Antares 2400 Menu System by pressing ) y 2 4 8 or by scanning this bar code: TRAKKER Antares 2400 Menu System *..-.* *..-.* Note: If your terminal has a Left Enter key (y), you must use it when entering the key sequences in Step 1;... -
Page 95: Displaying Different Font Types (Optional)
Toggle Timing mode (shows round trip time on each screen) Refresh screen Reboots the terminal and restarts the dcBrowser client Decrease contrast Increase contrast Increase volume Decrease volume file. IMDCB.INI in a text editor. In a standard installation, IMDCB.INI is in C:\PROGRAMFILES\INTERMEC\DCBROWSER\... - Page 96 Chapter 7 — Trakker Antares Terminals where: #set font to fonttype is a comment letting you know what you have set IM_COMMAND is the dcBrowser client command to set the font $+DT 3 Save the changes to 4 Load dcBrowser Client” on page 78 IMDCB.INI the font type to (fonttype indicates the font type, such as 8 x 8)
-
Page 97: Troubleshooting
Troubleshooting This chapter describes solutions to some common problems. It also explains the diagnostics and how you can get help from Intermec Product Support. This chapter covers these topics: • Symptoms and solutions • Using the Product Support page Data Collection Browser User’s Guide... -
Page 98: Symptoms And Solutions
If you are using a UDP Plus or WTP terminal, check your configurations and correct if necessary. You may access the Internet by using a proxy server. Make sure that you have added the Intermec Application Server IP address to your Exceptions list. - Page 99 Data Collection Browser User’s Guide Solution Verify that the web page is configured for the device. “Thin client Verify that the Intermec Application Server is is replaced by configured properly. After you change the Intermec Application Server configuration, you must save and reboot.
-
Page 100: Using The Product Support Page
Intermec products • Telephone numbers for contacting Product Support To access the Product Support page • From the home page for the Intermec Application Server, click Support. The Product Support page appears. Product Support Page Data Collection Browser User’s Guide... -
Page 101: Ascii To Hex Conversion
ASCII to Hex Conversion This appendix provides a table for converting ASCII characters to their hexadecimal values. Data Collection Browser User’s Guide... - Page 102 Appendix A — ASCII to Hex Conversion ASCII to Hex Conversion ASCII ASCII " & < > Data Collection Browser User’s Guide...
- Page 103 ASCII to Hex Conversion (continued) This column lists the hexadecimal value. This column lists the ASCII character. SP is the SPACE character. Data Collection Browser User’s Guide Appendix A — ASCII to Hex Conversion ASCII ASCII...
- Page 104 Appendix A — ASCII to Hex Conversion Data Collection Browser User’s Guide...
-
Page 105: Index
Index Data Collection Browser User’s Guide... - Page 106 Index Numerics 2400 Menu System, 248X terminal, controlling the four relays, 700 Series Mobile Computer ActiveSync installing, 38, reconnecting to PC, 38, using to connect to PC, 38, using to explore files, 38, configuring TCP/IP, 41, 62, UDP Plus, 41, 62, continually reboots, troubleshooting, DCB700PPC2002.CAB file, troubleshooting,...
- Page 107 CK30 computer (continued) System Main Menu, test and service mode, CK31 computer Bluetooth printing, configuring TCP/IP, UDP Plus, continually reboots, troubleshooting, dcBrowser client fails to connect to gateway, troubleshooting, loading and launching, running, verifying it is loaded, key combinations, PRINTER_PORT registry key, stylus does not work, troubleshooting, 26, System Main Menu, test and service mode,...
- Page 108 Index client, Trakker Antares (continued) running, starting, verifying it is loaded, troubleshooting, UDP Plus, continually reboots, troubleshooting, understanding, verifying it is loaded CK30 or CK31, Trakker Antares, Windows CE computer, running, Windows Mobile 5.0 computer, running, CN3 Series Mobile Computer ActiveSync installing, reconnecting to PC,...
- Page 109 CV60 computer (continued) HTML application, running, IMDCB.INI, changing, key combinations, starting dcBrowser client on, stylus does not work, troubleshooting, 26, 53, touch screen does not work, troubleshooting, 26, 53, user interface lockdown, data collection, enabling extensive performance, data=, attribute for Print tag, DCB.INI, configuring, DCB700.CAB, installing, DCB700PPC2002.CAB, installing,...
- Page 110 F and function key number, input type, flagging, INPUT_HIGHLIGHT, int, attribute for Input tag, Intermec Application Server, troubleshooting, cannot connect, IP address, turn on special screen, ITCLICPAKFILE, Java, how dcBrowser supports, JavaScript, how dcBrowser supports, 16–19...
- Page 111 key combinations, 700, 44, 54, CK30 or CK31, CK61, 44, CN3, 44, Trakker Antares, key= attribute for Anchor tag, attribute for Input tag, KEY_FLAG, keyboard data, adding flag, launching client on CK30 or CK31, length=, attribute for Print tag, licenses default locations, for each dcBrowser client, how to install,...
- Page 112 Index running (continued) your application, runtime environment, setting up, sample application, setting up, SCAN_FLAG, scan-ahead, scanned data, adding flag, scanner input, screen transmitted, scanonly, attribute for Input tag, screen size, changing, screen, opening after delay, scrollable=, attribute for Table tag, scrolling log CommonLogFormat, dispatch,...
- Page 113 Trakker Antares terminal 2400 Menu System, configuring, continually reboots, troubleshooting, dcBrowser client downloading new, loading, running, starting, verifying it is loaded, fonts, displaying different, key combinations, network port, configuring, test and service mode, transmit attribute for Input tag, for Print tag, transmit screen upon scanner input, TRANSMIT_ON_FULL, TRANSMIT_ON_RETURN,...
- Page 114 Index Data Collection Browser User’s Guide...
- Page 116 Worldwide Headquarters 6001 36th Avenue West Everett, Washington 98203 U.S.A. tel 425.348.2600 fax 425.355.9551 www.intermec.com Data Collection Browser ™ Client User's Guide *070011-008* P/N 070011-008...
Need help?
Do you have a question about the 5020 and is the answer not in the manual?
Questions and answers