
Related Manuals for Cisco LINKSYS one PHM1200


Summary of Contents for Cisco LINKSYS one PHM1200
- Page 1 User Guide Release 1.3 Business IP Phone for Key Systems Models PHM1200 and PHB1100...
- Page 2 Specifications are subject to change without notice. Linksys, the Cisco Systems logo, the Linksys Logo, and the Linksys One logo are registered trademarks of Cisco Systems, Inc. All other trademarks mentioned in this document are the property of their respective owners.
-
Page 3: Table Of Contents
Linksys One Communications Solution Contents Chapter 1: Getting Started - - - - - - - - - - - - - - - - - - - - - - -1 Additional Documentation Chapter 2: Getting to Know Your Phone - - - - - - - - - - - - - - - - -3 Understanding Phone Buttons Understanding Your Phone Screen Navigating the PHM1200 IP Phone Menu... - Page 4 Linksys One Communications Solution Using PHM1200 IP Phone Screen Features Using the Calls tab Placing Calls Using Hold and Resume Making Conference Calls Using the Tasks tab Using Call History Using the Local Directory Using Voicemail Using System Voice Mail Chapter 4: Using Voice Mail - - - - - - - - - - - - - - - - - - - - - 25 Accessing Personal Voice Mail Using Voice Prompts Accessing Personal Voice Mail Using the Phone Screen...
- Page 5 Linksys One Communications Solution Chapter 6: Using the Auto Attendant - - - - - - - - - - - - - - - - - 42 Accessing the Auto Attendant Managing the Auto Attendant Recording the Auto Attendant Greeting Enabling the After Hours Greeting Changing the Auto Attendant Password Managing Operator Calls...
- Page 6 Linksys One Communications Solution...
-
Page 7: Chapter 1: Getting Started
Linksys One Communications Solution Getting Started This guide introduces you to your Linksys One IP phone and provides an overview of your phone’s features. NOTE: Each phone comes with a Quick Installation Guide.Be sure to refer to the Quick Installation Guide to install your phone. -
Page 8: Additional Documentation
Linksys One Communications Solution If you want to... Then... Use your phone’s speakerphone or See ”Using the Handset, Headset and Speakerphone” connect a headset section on page 17. Change the ring volume or tone See ”Using the Handset, Headset and Speakerphone” section on page 17. -
Page 9: Chapter 2: Getting To Know Your Phone
Linksys One Communications Solution Getting to Know Your Phone The Linksys One IP phone PHM1200 and PHB1100 are wired desktop phones that provide voice communication over a data network. In addition to the phone features you’ve come to expect from a traditional phone, the Linksys One IP phone also provides: •... -
Page 10: Understanding Phone Buttons
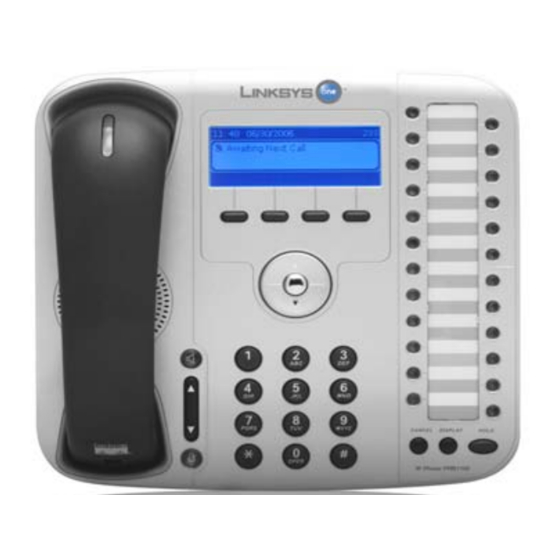
Linksys One Communications Solution Understanding Phone Buttons This table describes the buttons on your IP phone. See the button layout illustration at right: Description Phone screen serves as your phone “desktop.”. Intercom buttons are available for handling calls inside your company. The button template lists your intercoms, outside lines, and feature button assignments. -
Page 11: Understanding Your Phone Screen
Linksys One Communications Solution Understanding Your Phone Screen PHB1100 IP Phone This is what your main PHB1100 phone screen may look like once your phone is connected: Displays the phone number (directory or intercom Primary phone line number) for your primary phone line. Date and Time Display Displays the current date and time Displays the caller ID, current calls per line, call... - Page 12 Linksys One Communications Solution PHM1200 IP Phone This is what your PHM1200 phone screen may look like once your phone is connected. Displays the phone number (directory or intercom Primary phone line number) for your primary phone line. Date and Time Display Displays the current date and time.
-
Page 13: Navigating The Phm1200 Ip Phone Menu
Linksys One Communications Solution Navigating the PHM1200 IP Phone Menu Here’s how you navigate your PHM1200 IP phone screen menu If you want to... Then... 1. Use the arrows on the navigation dial to scroll Select an item on the screen through menus and tabs. -
Page 14: Understanding Line And Call Icons
Linksys One Communications Solution Understanding Line and Call Icons Your phone displays icons to help you determine the call and line state. Line or Call State PHM1200 Phone Screen PHB1100 Phone Screen Idle Outgoing call Incoming call Call connected Call on hold Error Conference call Call proceeding... -
Page 15: Understanding Your Phone Passwords
Linksys One Communications Solution Understanding Your Phone Passwords Here is a list of default passwords that you will use to access phone features. Some features may not be available to you and must be enabled by your phone administrator for you to access. - Page 16 Linksys One Communications Solution Feature/Action User How to Access Default Password Call the Auto All users Dial extension 201. No password needed. Attendant See ”Accessing the Auto Attendant” on page 42. • Dial extension 209 Manage the Auto Users who have 209.
-
Page 17: Chapter 3: Using Your Phone
Linksys One Communications Solution Using Your Phone Your Linksys One IP phone includes a range of features for call handling. This section describes how to access your phone features. The following topics are covered: • ”Basic Call Handling Options” on page 11 •... -
Page 18: Placing A Call
Linksys One Communications Solution Placing a Call Here are some easy options you can use to place a call. If you want to... Then... Place a call using the handset Pick up a handset and enter a number. See ”Using the Handset, Headset and Speakerphone” on page 17. -
Page 19: Answering A Call
Linksys One Communications Solution Answering a Call You can answer a call by lifting the handset, or you can use other options if they are available on your phone. If you want to... Then... 1. Plug a headset into the headset port on the back of the phone. Answer with a headset 2. -
Page 20: Using Hold And Resume
Linksys One Communications Solution Using Hold and Resume You can hold and resume calls If you want to... Then... Place a Call on Hold While in a call, press the Hold button on the phone or on the phone screen. Remove a call from Hold To resume the call, press the line button for the call. -
Page 21: Transferring Calls
Linksys One Communications Solution Transferring Calls You can redirect a connected call to another phone number. If you want to... Then... 1. While on an internal call, press the Transfer Transfer a Call feature button. 2. Select an intercom and call the number to which you want to transfer the call. -
Page 22: Using Do Not Disturb
Linksys One Communications Solution Using Do Not Disturb The Do Not Disturb (DND) feature button allows you to disable the phone ringer and call waiting features If you want to... Then... Turn on DND Press the DND feature button to turn it on. Turn off DND Press the active DND feature button again to turn it off. -
Page 23: Using The Handset, Headset And Speakerphone
Linksys One Communications Solution Using the Handset, Headset and Speakerphone You can use your phone with a handset, headset or speakerphone. If you want to... Then... Use the handset Lift it to go off-hook; replace it to go on-hook. Use a headset Press the headset button to set the headset mode on or off. -
Page 24: Advanced Call Handling Options
Linksys One Communications Solution Advanced Call Handling Options Advanced call handling tasks involve special feature buttons that your phone administrator may configure for your phone depending on your call handling needs. Using Call Park You can park a call when you want to store the call so that you or someone else can retrieve it using another Linksys One IP phone (for example, at phone at a co-worker’s desk or conference room). -
Page 25: Using System Voice Mail
Linksys One Communications Solution Using System Voice Mail You can access and manage the system-wide mailbox using the System Voicemail feature button. However, this feature is not available by default and must be enabled by your phone administrator. If you want to... Then... -
Page 26: Using Shared Lines
Linksys One Communications Solution Using Shared Lines You can use a shared line if you are sharing call-handling tasks with co-workers using a single one phone number. This feature may not be available to you and must be configured on your phone. If you want to... -
Page 27: Using The Calls Tab
Linksys One Communications Solution Using the Calls tab Press the Calls tab to open the Calls menu. Here are some options that are available: Placing Calls You can place an internal or external call. If you want to... Then... Place a call Press the Calls tab and dial a phone number. -
Page 28: Making Conference Calls
Linksys One Communications Solution Making Conference Calls You can create a three-way conference call. If you want to... Then... 1. Place a call to the first participant. Create a Conference Call 2. Press an intercom button or outside line button and dial the next participant. -
Page 29: Using The Tasks Tab
Linksys One Communications Solution Using the Tasks tab Press the Tasks tab to open the Tasks menu. Here are some options: Using Call History Your phone maintains a call history that contains records of your missed, placed and received calls. You can also place calls from the Call History List. If you want to... -
Page 30: Using System Voice Mail
Linksys One Communications Solution Using System Voice Mail You can access and manage the system-wide mailbox. However, this feature is not available by default. and must be enabled by your phone administrator. If you want to... Then... Use the System Voicemail See ”Accessing Your System Voice Mailbox”... - Page 31 Linksys One Communications Solution Chapter 3: Using Your Phone Using PHM1200 IP Phone Screen Features...
-
Page 32: Chapter 4: Using Voice Mail
Linksys One Communications Solution Using Voice Mail The Linksys One IP phones include an integrated Voice Mail application for high-quality voice messaging services. You can access voice mail from your phone using the Voice Mail menu on your phone screen, or from any phone using the voice mail prompts. When you receive a new message, the message waiting indicator lights up on your phone and a stuttered dial tone is played when you go off hook (if configured). -
Page 33: Accessing Personal Voice Mail Using The Phone Screen
Linksys One Communications Solution Using an Outside Phone • From an outside phone, dial the phone number for the Auto Attendant. NOTE: If you have a private line, you can access the Auto Attendant remotely by modifying the call forward destination on your User Settings screen. - Page 34 Linksys One Communications Solution See the table below for options that are available to you on the Voice Mail menu (you can click the back arrow on the navigation dial to return to the previous menu). Option Description Action 1. Click the Play tab to listen to the message New Messages Displays a list of new or click the Save tab to save the...
-
Page 35: Managing Your Personal Voice Mailbox
Linksys One Communications Solution Managing Your Personal Voice Mailbox The following sections help you set up your voice mail using the phone screen interface on your PHM1200 IP phone: • ”Recording Voice Mail Greetings” on page 29 • ”Recording Your Name” on page 29 •... -
Page 36: Recording Voice Mail Greetings
Linksys One Communications Solution Recording Voice Mail Greetings You can record two types of greetings that are played when calls get forwarded to voicemail: a Primary Greeting and an Alternate greeting: Using the Voice Mail Feature Button: 1. Press the Voice Mail feature button. 2. - Page 37 Linksys One Communications Solution On your PHM1200 IP phone screen: 1. Press the Tasks softkey tab and select Voice Mail. 2. On the phone screen, use the navigation dial to highlight and select Options. 3. Select Personal Settings. 4. Select Recorded Name. 5.
-
Page 38: Changing Your Voice Mail Password
Linksys One Communications Solution Changing Your Voice Mail Password Using the Voice Mail Feature Button: 1. Press the Voice Mail feature button. 2. Follow the voice prompts to change your voice mail password. On your PHM1200 IP phone screen: 1. Press the Tasks softkey tab and select Voice Mail. 2. -
Page 39: Changing Voice Mail Notification Settings
Linksys One Communications Solution Changing Voice Mail Notification Settings When you have a new voice mail message in your voice mailbox, the message waiting indicator on the phone handset lights up red and you’ll also hear a “stutter” dialtone when you go off hook. - Page 40 Linksys One Communications Solution You can access your system voicemail as follows: Using an Intercom Button: 1. Select an intercom on your phone and dial the default extension 301 (or the extension number for your system-wide mailbox as applicable). Using an Outside Line: •...
-
Page 41: Chapter 5: Customizing Your Phone Settings
Linksys One Communications Solution Customizing Your Phone Settings Although most system settings are already set for you, you can control some phone features and settings using the web browser on your computer. Once you define your phone settings, you can access them on your phone. This section describes how to access your phone settings on the Linksys One Portal. -
Page 42: Changing Your Password
Linksys One Communications Solution 2. When presented with a User login page, enter the following information: User: <3-digit phone extension> Password: <3-digit phone extension + 100> by default Changing Your Password The first time you access your Linksys One Portal you will be prompted to change your password. -
Page 43: Accessing Your User Settings
Linksys One Communications Solution Accessing Your User Settings Call Forward Use your web-based User Settings page to set your call forwarding options and change the Description Option name assigned on your phone. To access your User Settings page: Call Forward All calls are forwarded to the specified 1. -
Page 44: Setting A Name
Linksys One Communications Solution To Forward Busy or No Answer calls: 1. Open your User Settings page. Call Forward 2. Choose a Call Forward Busy or No answer destination from the drop down box (see Busy or No Description table). Answer Destination 3. -
Page 45: Enabling The Voicemail To Email Forwarding Option
Linksys One Communications Solution Enabling the Voicemail to Email Forwarding Option Voicemail to You can setup your IP phone to forward voicemail alerts to a specified email address. Email Description To enable voicemail to email forwarding: Forwarding Mode 1. Open your User Settings page. Notification When a voicemail message 2. -
Page 46: Accessing Your User Template
Linksys One Communications Solution Accessing Your User Template Use your web-based User Template page to change the phone and Auto Dial features for a customized phone button template. To access your User Template page: 1. Login to Linksys One Portal. 2. - Page 47 Linksys One Communications Solution To move a phone or AutoDial feature from your button template: 1. Locate a phone or AutoDial feature in your button template. 2. Click the Move icon( 3. Move the feature to the Unused area. 4. Click once to release the feature. 5.
-
Page 48: Viewing Phone Button Assignments
Linksys One Communications Solution Viewing Phone Button Assignments You can view phone button assignments from your phone or from your User Template page as follows: On your phone: • Press the Display button.The feature assigned to that button is displayed at the top of your phone screen. - Page 49 Linksys One Communications Solution Using the Auto Attendant The Linksys One IP phones include an Auto Attendant application that helps callers to quickly reach the right person or hear information they need without the assistance of an operator 24 hours a day, 7 days per week. This section provides procedures for accessing and administering the Auto Attendant application.
- Page 50 Linksys One Communications Solution You can then refer to the following sections for managing the Auto Attendant: • ”Recording the Auto Attendant Greeting” on page 43 • ”Enabling the After Hours Greeting” on page 45 • ”Changing the Auto Attendant Password” on page 45 Recording the Auto Attendant Greeting If you have administrative access, you can change the greeting the Auto Attendant plays to callers before presenting the menu options.
- Page 51 Linksys One Communications Solution To record a greeting using the Auto Attendant voice prompts for your IP phones: 1. Do one of the following: • Open an intercom on your phone and dial the Auto Attendant Administration extension (209) • From an outside line, use the Auto Attendant to transfer to the Auto Attendant administration extension (209).
- Page 52 Linksys One Communications Solution Enabling the After Hours Greeting Your phone administrator defines the times that the Auto Attendant plays the Main Greeting and the After Hours greeting. However, if you have administrative access, you can override this setting by pressing the After Hours button or by choosing a greeting as follows: On your PHM1200 IP phone screen interface: Open the Auto Attendant menu on your phone screen and select the greeting you want to play: Main Greeting or After Hours.
- Page 53 Linksys One Communications Solution 4. Choose option 3 from the Auto Attendant voice prompt menu. 5. Follow the voice prompts to change the password. Managing Operator Calls Your phone administrator can add you as a "Live" Operator; this enables the Operator, Operator DND and System Voice Mail feature buttons on your phone.
- Page 54 Linksys One Communications Solution Linksys One Contact Information Need to contact Linksys One? Visit us online for information on the latest products and updates to your existing products at http://www.Linksys.com Customer Service Contacts If you experience problems with any Linksys One product, you can call us at: 1-866-870-5826 For Email Service, submit your requests or questions on-line at www.Linksys.com (Details on Warranty and RMA issues can be found in the Warranty Information section in...
- Page 55 Linksys One Communications Solution Sales Contacts Normal business hours are from 7 AM to 5 PM Pacific Time Monday through Friday. Phone: (800) 546-5797 (Option 1) Fax: (949) 823-3007 For Email Service, submit your requests or questions on-line at www.Linksys.com Appendix A: Linksys One Contact Information...
- Page 56 ©2007 Cisco Systems, Inc. All rights reserved. Linksys is a registered trademark and the Linksys One logo is a trademark of Cisco Systems, Inc. Software Release 1.3...
Need help?
Do you have a question about the LINKSYS one PHM1200 and is the answer not in the manual?
Questions and answers