
Related Manuals for Cisco PenTeleData 8800 Series


Summary of Contents for Cisco PenTeleData 8800 Series
-
Page 1: Table Of Contents
!"#$%&'(&()%*+&,,--&.+/"+#&0#+/&12"3+ Cisco IP Phone 8800 Series User Guide Chapter 1 – Cisco 8800 IP Phones Page 2 Chapter 2 – Calls Page 13 Chapter 3 – Contacts Page 29 Chapter 4 – Recent Calls Page 31 Chapter 5 – Voicemail Page 34 Chapter 6 –... -
Page 2: Chapter 1 - Cisco 8800 Ip Phones
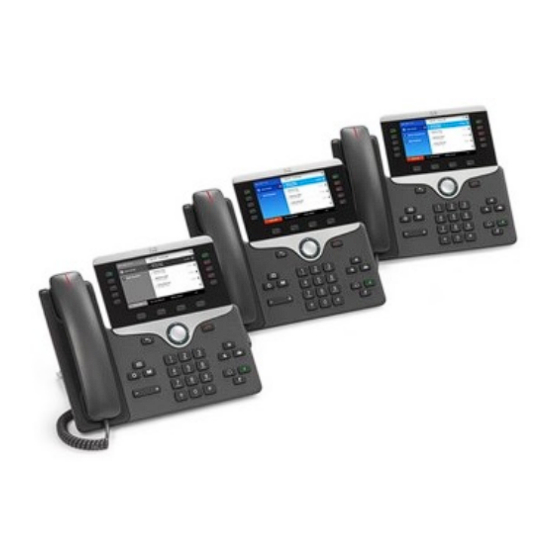
!"#$%&'(&()%*+&,,--&.+/"+#&0#+/&12"3+ CHAPTER !"#$%&'()$*+$+"),#$--..$/#0&#' The Cisco IP Phones 8841, 8851, 8861, and 8865 deliver easy-to-use, highly-secure voice communications. Figure 1: Cisco IP Phone 8800 Phone & Table 1: Cisco IP Phone 8800 Series Major Features Features 8841 8851 8861 8865 Screen... - Page 3 !"#$%&'(&()%*+&,,--&.+/"+#&0#+/&12"3+ Adjust the Handset Rest If your phone is wall-mounted or if the handset slips out of the cradle too easily, you may need to adjust the handset rest to ensure that the receiver does not slip out of the cradle. Procedure Step 1 Remove the handset from the cradle and pull the plastic tab from the handset rest.
- Page 4 Buttons and Hardware The Cisco IP Phone 8800 Series has two distinct hardware types: • Cisco IP Phones 8841, 8851, and 8861—do not have a camera. • Cisco IP Phone 8865—has a built-in camera. Figure 2: Cisco IP Phone 8800 Buttons and Hardware...
- Page 5 !"#$%&'(&()%*+&,,--&.+/"+#&0#+/&12"3+ Speakerphone, Mute, and Speakerphone Toggle the speakerphone on or off. Headset When the speakerphone is on, the button is lit. Mute Toggle the microphone on or off. When the microphone is muted, the button is lit. Headset Toggle the headset on or off. When the headset is on, the button is lit.
- Page 6 The screen is made up of three sections: the header row, the middle section, and the footer row. Figure 3: Cisco IP Phone 8800 Screen At the top of the screen is the header row. The header row displays the phone number, current date and time, as well a number of icons.
- Page 7 Bluetooth and Your Phone Bluetooth is supported on Cisco IP Phone 8851 and 8861. If your phone supports Bluetooth, use a Bluetooth headset and connect your mobile phone or tablet to the phone. Bluetooth connections work best when you're within 3 to 6 feet (1 to 2 meters) from your phone, but you might be able to be as far away as 66 feet (20 meters).
- Page 8 !"#$%&'(&()%*+&,,--&.+/"+#&0#+/&12"3+ Add a Bluetooth Headset Procedure Step 1 Make your Bluetooth headset discoverable. Step 2 Press Applications Step 3 Select Bluetooth > Devices Step 4 Select Scan. Step 5 Select your headset and press Connect. Step 6 (Optional) If prompted, enter the PIN for your headset. Disconnect a Bluetooth Headset You should disconnect your Bluetooth headset before you use it with another device.
- Page 9 !"#$%&'(&()%*+&,,--&.+/"+#&0#+/&12"3+ Procedure Step 1 Press Applications Step 2 Select Accessibility > Voice Feedback. Step 3 Select On to enable the feature. Step 4 Select Exit twice to save your settings and return to Applications. Adjust Voice Speed You can customize the speed of Voice Feedback if it reads too quickly or too slowly. Voice Feedback must be enabled before you can select a Voice Speed.
- Page 10 Hardware version - Version number of the Cisco IP Phone hardware. Certificate - Status of the client certificate, which authenticates the Cisco IP Phone for use in the ITSP network. This field indicates if the client certificate is properly installed in the phone.
- Page 11 !"#$%&'(&()%*+&,,--&.+/"+#&0#+/&12"3+ View the Status Messages on the Phone Procedure Step 1 Press Applications Step 2 Select Status > Status messages. You can view a log of the various phone statuses since provisioning was last done. Note: Status messages reflect UTC time and are not affected by the time zone settings on the phone. Step 3 Press Back.
- Page 12 !"#$%&'(&()%*+&,,--&.+/"+#&0#+/&12"3+ Wi-Fi - 8861 View Wi-Fi Status Messages on the Phone You can view messages about the Wi-Fi connection status of your phone. The messages can help you diagnose Wi-Fi connection problems. The messages contain: • connection time and MAC address of the AP •...
-
Page 13: Chapter 2 - Calls
!"#$%&'(&()%*+&,,--&.+/"+#&0#+/&12"3+ CHAPTER Calls Make a Call Use your phone just like any other phone to make a call. Procedure Enter a number and pick up the handset. Make a Call with the Speakerphone Use your speakerphone for hands-free calling. Keep in mind that your coworkers might be able to hear your call too. - Page 14 !"#$%&'(&()%*+&,,--&.+/"+#&0#+/&12"3+ Before you begin Your phone must be set up to obtain your physical location. Emergency services personnel need your location to find you when you make an emergency call. Procedure Enter the emergency number and lift the handset. Caller ID Outbound Caller ID The caller ID number sent with outbound calls is set on each user.
- Page 15 !"#$%&'(&()%*+&,,--&.+/"+#&0#+/&12"3+ Procedure Step 1 Press Applications Step 2 Select Speed dial. Step 3 Scroll to an unassigned speed-dial index. Step 4 Press Edit and do one of the following: • Enter the name and number. • Select Option > Select from contact to select a contact from the address book. Step 5 Select Save Make a Call with a Speed-Dial Code Before you begin...
- Page 16 Note: The 911 operator is sent the callback number and address for that number. Answer Calls Your Cisco IP Phone works just like a regular phone. But we make it easier for you to answer calls. Answer a Call Procedure Press the flashing red session button.
- Page 17 !"#$%&'(&()%*+&,,--&.+/"+#&0#+/&12"3+ Call Waiting When you're on an active call, you know that a call is waiting when you hear a single beep and the session button flashes red. Only for devices that have one line. Procedure Step 1 (Optional) If you have more than one call waiting, select an incoming call. Step 2 Press the line button.
- Page 18 !"#$%&'(&()%*+&,,--&.+/"+#&0#+/&12"3+ Softkey Procedure Step 1 Press More □¡ softkey Step 2 Press DND softkey to turn ON, Press Clr DND to turn OFF. * Code Procedure Step 1 To turn on DND, dial *78. Step 2 To turn off DND, dial *79. !"#$%&'(')*$*&+%&,#'-.*"%'/)(00'-12+345' If you share call handling tasks with your coworkers, you can answer a call that is ringing on a coworker’s phone.
- Page 19 !"#$%&'(&()%*+&,,--&.+/"+#&0#+/&12"3+ • You will hear a prompt saying, “Your anonymous call rejection service has been activated. All incoming calls will be checked for number privacy before they are allowed to complete to your line”. Step 2 Dial *85 to disable Anonymous Call Block. •...
- Page 20 !"#$%&'(&()%*+&,,--&.+/"+#&0#+/&12"3+ Procedure Step 1 Dial *60 Step 2 Enter your voicemail PIN followed by #. Step 3 Enter the number to be blocked followed by #. • Be sure to include “1” before the 10-digit phone number. • You will hear a prompt saying, “Calls from [phone number you entered] will be blocked”. Block Custom Caller with Message The caller will hear a message indicating that calls are not being accepted at this time.
- Page 21 !"#$%&'(&()%*+&,,--&.+/"+#&0#+/&12"3+ Call Park You can use your phone to park a call. You can then retrieve the call either from your phone or another phone, such as a phone at a coworker’s desk or in a conference room. A parked call is monitored by your network, so you won't forget about it. If the call remains parked for too long, you hear an alert.
- Page 22 !"#$%&'(&()%*+&,,--&.+/"+#&0#+/&12"3+ Retrieve a Call on Hold with Call Park You can pick up a parked call from anywhere in your network. Before you begin You need the number that was used to park the call. Procedure Step 1 Lift the receiver and listen for dial tone. Step 2 Dial *66 + the parking spot the call was placed in.
- Page 23 !"#$%&'(&()%*+&,,--&.+/"+#&0#+/&12"3+ Disable Call Forward – Busy Procedure Step 1 Lift the receiver and listen for dial tone. Step 2 Press *90. Step 3 When prompted, enter your PIN. Step 4 Press 2. Enable Call Forward – No Answer Procedure Step 1 Lift the receiver and listen for dial tone. Step 2 Press *92.
- Page 24 !"#$%&'(&()%*+&,,--&.+/"+#&0#+/&12"3+ Remotely Access Call Forwarding for All Calls Procedure Step 1 Access Your Voicemail Menu • Dial your 10-digit phone number from a phone not connected to your account. • When you hear your voicemail greeting, press #. • Enter your 4-digit PIN, followed by #. Step 2 Press 8 for personal options.
- Page 25 !"#$%&'(&()%*+&,,--&.+/"+#&0#+/&12"3+ Call Transfer – Blind Transfer If you are sending a call to another party and do not need to talk to them before transferring the call, use this method. The party you transfer the call to will see the call as if it is coming from the original caller. Before you begin You have an active call that needs to be transferred.
- Page 26 Cisco IP Phone 8865 supports video calls with a built-in video camera. Make a Video Call Cisco IP Phone 8865 supports video calls as long as the person you're calling also has a video phone. The ring on the outside of the camera controls the shutter.
- Page 27 !"#$%&'(&()%*+&,,--&.+/"+#&0#+/&12"3+ "#$$%&!'&()&&*!+,#*&!-*.!/0.&#!1023%-4! If you need to see your phone's desktop while you're on a video call, you can easily switch between the video and the desktop. When you hide the video, it blurs and moves to the background. Procedure Step 1 Press the Call list softkey to hide the video. Step 2 Press the Show video softkey to show the video.
- Page 28 !"#$%&'(&()%*+&,,--&.+/"+#&0#+/&12"3+ Adjust the Video Bandwidth During a video call, your video can suddenly stop or lag behind the audio. The lag is often caused by a busy network. By default, your phone automatically selects a bandwidth setting that balances the audio and video network requirements.
-
Page 29: Chapter 3 - Contacts
!"#$%&'(&()%*+&,,--&.+/"+#&0#+/&12"3+ CHAPTER Contacts Corporate Directory You can look up a coworker's number from your phone, which makes it easier to give them a call. Your administrator sets up and maintains the directory. Dial a Contact in the Corporate Directory Procedure Step 1 Press Contacts Step 2 Select the directory name that you have defined. - Page 30 !"#$%&'(&()%*+&,,--&.+/"+#&0#+/&12"3+ Edit a Contact in Your Personal Address Book Procedure Step 1 Press Contacts Step 2 Select Personal Address Book and search for an entry. Step 3 Select the entry you want to change. Step 4 Modify the entry information. Step 5 Press Save to modify a phone number.
-
Page 31: Chapter 4 - Recent Calls
!"#$%&'(&()%*+&,,--&.+/"+#&0#+/&12"3+ CHAPTER Recent Calls Recent Calls List Use the Recents list to see the 180 most recent individual calls and call groups. If your Recents list reaches the maximum size, the next new entry overwrites the oldest entry in the list. If you have missed calls, the phone shows the number of missed calls for the line on the main screen (up to 99 missed calls). - Page 32 !"#$%&'(&()%*+&,,--&.+/"+#&0#+/&12"3+ Procedure Step 1 Press Applications Step 2 Select Recents. Step 3 Select the call record that you want to dial. Step 4 (Optional) Press Edit call to edit the call record. Step 5 Press Call. Clear the Recent Calls List Procedure Step 1 Select a line to view.
- Page 33 !"#$%&'(&()%*+&,,--&.+/"+#&0#+/&12"3+ Delete All Call Records You can delete all call history records on your phone. Procedure Step 1 Press Applications Step 2 Select Recents. Step 3 Press Recents. Step 4 Select Option > delete All. Step 5 Press Delete again to confirm. 33 | P a g e...
-
Page 34: Chapter 5 - Voicemail
!"#$%&'(&()%*+&,,--&.+/"+#&0#+/&12"3+ CHAPTER Voicemail Your Voicemail Account You can access your voice messages directly from your phone. But your administrator must set up your voicemail account, and may also set up your phone to access the voicemail system. The Messages button on your phone acts as a speed dial into the voicemail system. When you aren’t at your desk, you can call your voicemail system to access your voicemail. - Page 35 !"#$%&'(&()%*+&,,--&.+/"+#&0#+/&12"3+ To access your voicemail from any Phone Press the voicemail soft button - From another phone, dial your phone number. Please enter you PIN followed by the # sign. - Listen for your voicemail greeting and press #. 1. Listen to Messages 9.
-
Page 36: Chapter 6 - Settings
!"#$%&'(&()%*+&,,--&.+/"+#&0#+/&12"3+ CHAPTER Settings Settings Overview You can customize your phone in a number of ways: • From the menus on the phone, accessed from the Applications button. The common settings menus are: • User preferences • Device administration User Preferences Menu You can customize many settings for your phone from the User preferences menu. - Page 37 !"#$%&'(&()%*+&,,--&.+/"+#&0#+/&12"3+ Audio Preferences The User preferences > Audio preferences menu allows you to customize ringtones and how you prefer to answer calls. Set Your Preferred Audio Device You can set how you want to answer the call: headset, speaker, or handset. Procedure Step 1 Press Applications Step 2 Select User preferences >...
- Page 38 !"#$%&'(&()%*+&,,--&.+/"+#&0#+/&12"3+ Set the Backlight Duration You can adjust the length of time that the phone screen is bright before it automatically dims. Procedure Step 1 Press Applications Step 2 Select User preferences > Screen preferences > Backlight timer. Step 3 Press Edit or Select button. Step 4 Press Select to scroll through the list and select a duration for which the backlight remains on: •...
- Page 39 !"#$%&'(&()%*+&,,--&.+/"+#&0#+/&12"3+ Device Administration Settings You can set some other preferences from the phone in the Device administration menu. Change the Time Format You can change the current time format that the phone screen displays. Procedure Step 1 Press Applications Step 2 Select Device administration > Date/Time > Time format. To set daylight savings, select Device administration >...
- Page 40 !"#$%&'(&()%*+&,,--&.+/"+#&0#+/&12"3+ Set up Power Save You can put your phone into power save mode when your phone is idle. If your phone is not idle, you can't turn power save on and you see a message on the screen. When your phone is in power save mode, the screen is not lit and the Select button is lit. You press the Select button to wake up the phone.
Need help?
Do you have a question about the PenTeleData 8800 Series and is the answer not in the manual?
Questions and answers