Table of Contents
Advertisement
Quick Links
Advertisement
Table of Contents

Related Manuals for Jumbuck HS-19CB1


Summary of Contents for Jumbuck HS-19CB1
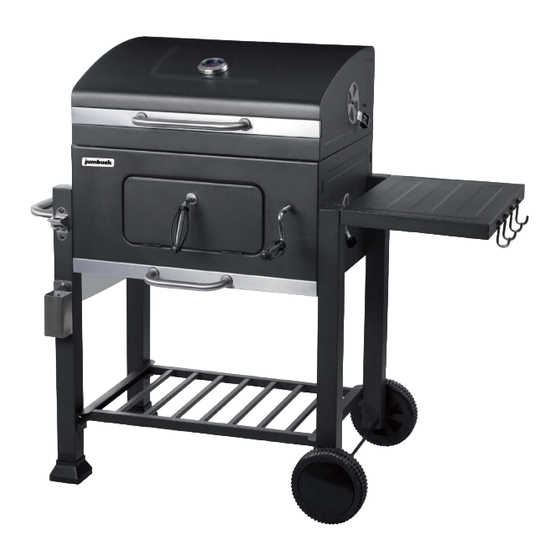
- Page 2 Charcoal BBQ with Adjustable Tray Height Instruction Manual Model: HS-19CB1 WARNING Read these instructions carefully before use! FOR OUTDOOR USE ONLY DO NOT PLACE FLAMMABLE ARTICLES ON OR AGAINST THIS APPLIANCE DO NOT OPERATE THIS APPLIANCE BEFORE READING THE INSTRUCTION BOOKLET...
-
Page 3: Table Of Contents
TABLE OF CONTENTS SAFETY INSTRUCTIONS …………………………………………………………………………………..….……….. GENERAL NOTES …………………………………………………………………………………..….………..……….. EXPLODED PARTS VIEW………………………………………………………………………………………………. PARTS LIST…………………………………………………………………………………………..……..……..……….. BOLT PACK……………………………………………………………………………….……..……..……..……..…….. ASSEMBLY STEPS…………………………………………………………………………………………………………. COOKING FOR THE FIRST TIME…………………………………………………………………………………….. HOW TO USE THE BBQ ……………………………………………………………………………………….……….. COOKING METHODS ……………………………………………………………………………………….…………… 20 PERIODIC CLEANING……………………………………………………………………………………….….………… STORAGE WHEN NOT IN USE………………………………………………………………………………….…….. 20 WARRANTY………………………………………………………………………………………………….……………….. -
Page 4: Safety Instructions
SAFETY INSTRUCTIONS This BBQ is an OUTDOOR APPLIANCE ONLY. It must NOT be used indoors. READ ALL OPERATING INSTRUCTIONS BEFORE USE. Do not store chemicals or flammable materials near this appliance. Unsupervised children should not be near the BBQ while cooking or during warm up or cool down. People with flammable clothing such as nylon etc. -
Page 5: Exploded Parts View
Exploded Parts View Page 5 of 22... -
Page 6: Parts List
Parts List 1 Hood handle 2 Handle seat X 4 3 Hood 4 Back panel of firebox 5 Side table 6 Right side panel of 7 Right rear leg of shelf 8 Right front leg of shelf firebox 9 Wheel axle 10 Wheel X 2 11 Wheel cover X 2 12 Ash tray... - Page 7 17 Cap of leg X 3 18 Connecting piece X 2 19 Left front leg of shelf 20 Bottle cap box 21 Handle of charcoal 22 Handle seat of 23 Locking plate of 24 Left rear leg of shelf door charcoal door charcoal door 25 Side handle...
-
Page 8: Bolt Pack
Bolt Pack Nut: M10 Washer: M6 Bolt: M6*10 Bolt: M5*30 Washers: M6 Hinge pin Nut:M6 Clip Spring washer: M6 Bolt: M5*20 Fibre Washer Page 8 of 22... -
Page 9: Assembly Steps
Assembly Steps Always wear gloves during assembly of this BBQ. STEP 1 Assemble the front panel of firebox (13) and back panel of firebox (4) and left side panel of firebox (26) and right side panel of firebox (6) as shown. Page 9 of 22... - Page 10 STEP 2 Assemble the connecting piece (18) and cap of leg (17) on the left front leg of shelf (19) and left rear leg of shelf (24) as shown. STEP 3 Assemble the left front leg of shelf (19) and left rear leg of shelf (24) and right front leg of shelf (8) and right rear leg of shelf (7) with 8pcs screws as shown.
- Page 11 STEP 4 Assemble the wheel (10) and wheel axle (9) with nut (A) 2pcs. 1 pcs nut (A) is already in position on the wheel axle. Then fit the wheel cover (11) STEP 5 Assemble the bottom rack (16) on the legs as shown. Page 11 of 22...
- Page 12 STEP 6 Assemble the lifting handle of charcoal tray (14) on the front panel of firebox with Bolt (B) 1pcs and washer (C) 1pcs as shown. STEP 7 Assemble the charcoal tray (27) on the front panel of firebox left and right lifting pieces as shown. Insert Clip (I) 1pcs on the charcoal tray support as shown.
- Page 13 STEP 8 Assemble the handle of charcoal door (21) and handle seat of charcoal door (22) and locking plate of charcoal door (23) with nut (D) 1pcs and spring washers (E) 1pcs on the charcoal door as shown. STEP 9 Push the side handle (25) on the leg as shown.
- Page 14 STEP 10 Assemble the side table (5) on the shelf as shown. Page 14 of 22...
- Page 15 STEP 11 1. Assemble the hood handle (1), Fibre Washers (2) and handle seat (2) with bolt (G) 2pcs on the hood (3) as shown. STEP 12 2. Assemble the complete hood with R pin (I) 2pcs and hinge pin (H) 2pcs on the firebox as shown. Page 15 of 22...
- Page 16 STEP 13 Assemble the handle of ash tray (15) and handle seat (2) with bolt (J) 2pcs on the ash tray (12) as shown. STEP 14 Insert the ash tray on the shelf as shown. Page 16 of 22...
- Page 17 STEP 15 Assemble the warming rack (29) on the firebox as shown. STEP 16 Insert the cooking grill (28) on the firebox as shown. Page 17 of 22...
- Page 18 STEP 17 Assemble the bottle cap box (20) on the left front leg as shown. Completed Assembly Page 18 of 22...
-
Page 19: Cooking For The First Time
Cooking for the first time Wash the cooking surfaces and warming shelf before use. • The BBQ may have an unpleasant odour during the first use and this is normal. To avoid this odour • during cooking, we recommend the BBQ is burnt in with 2kg of fuel prior to cooking food for the first time. -
Page 20: Cooking Methods
Cooking methods Direct Method The direct method involves placing the food directly above the heat/fuel source. Indirect Method The indirect method is used for roasting & baking where the food is placed in a baking tray however, the tray is not placed directly above the heat. This method requires the fuel source to be heaped into 2 piles on the left and right sides of the charcoal tray with the baking tray located centrally on the grill. - Page 21 PRODUCT WARRANTY Thank you for purchasing one of our quality Jumbuck products. Your Jumbuck product is covered against defects for a period of 12 months for parts and labour, repair or replacement. This warranty excludes surface rust and damage caused by abuse or neglect.
-
Page 22: Warranty
For Australian customers WHAT IS NOT COVERED IN THE If you experience any technical issues with WARRANTY your Jumbuck product, in the first instance review the instruction manual or call the • warranty service agent below. Removal or re-installation costs. This...
Need help?
Do you have a question about the HS-19CB1 and is the answer not in the manual?
Questions and answers