Table of Contents
Advertisement
Quick Links
Advertisement
Table of Contents

Related Manuals for Comfy Go Mobility X-6


Summary of Contents for Comfy Go Mobility X-6
- Page 1 User Manual / Warranty...
-
Page 2: Table Of Contents
Table of Contents Preface Product Performance Safety Instructions Usage and Operation Battery and Charger System Diagnostics Controller Maintenance Areas Tech Support Warranty For all of your spare parts needs, please visit www.ComfyGoMobility.com Don't forget to register your product to activate your warranty, de- tailed information can be found on page 23. -
Page 3: Preface
Please read the user manual carefully before using this product. - This manual contains the operation, assembly methods, and and simple faults solutions. The manual applies to our model: X-6 - This manual contains wheelchair maintenance information and self checking methods. -
Page 4: Product Performance
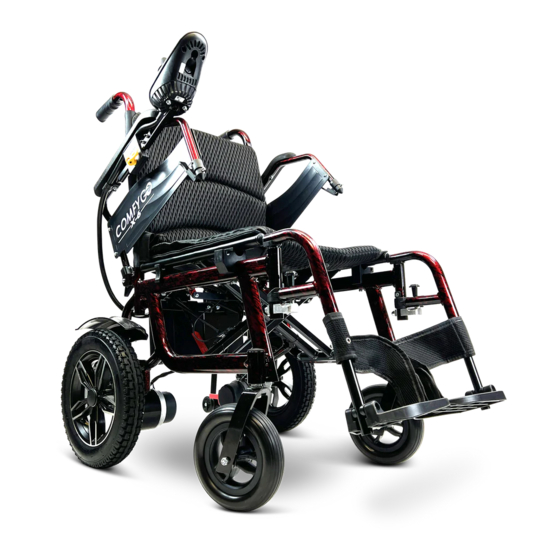
This wheel- chair is suitable for use at low speeds, on good road conditions, and moderate slopes. Performance Parameters and Technical Specs, X-6 Overall size 40” x 24.5” x 38” (1010x625x970mm) Fold size 28.5“... - Page 5 1. Product Performance Main Structure This series of electric wheelchairs is composed of two main parts: 1) The Frame: Frame, Wheels, Footrest, Armrests, Backrest, etc. 2) The Electrical: Controller, Motor, Battery Electrical Wires, etc. Application Range This electric wheelchair is designed for individuals who have physical disabili- ties that limits their mobility.
-
Page 6: Safety Instructions
2. Safety Instructions 2.1 Main Security Features - Classified based on the type of protection: Against electric shock, Internal power. - Classified based on the type of protection: Against electric shock, Type B application. - Classified based on the degree of inlet liquid protection: IPX3 - Classified based on the safe use of in a flammable anesthetic mix- ture with air or gas mixed with oxygen or nitrous oxide flammable a esthetic gases occurs: Non-AP/APG type. - Page 7 2. Safety Instructions Avoid Riding in These Conditions Unless Accompanied by a Caretaker - Riding in inclement weather such as rain, heavy fog, strong winds, snow, etc. If your wheelchair gets wet, electronic functions may be damaged so please wipe off all water immediately. - Riding in sub optimal conditions such as muddy areas, trails, sand, gravel, etc.
- Page 8 2. Safety Instructions Precautions for Caregivers - Caregivers should confirm that the users’ feet are in the proper posi- tion on the footrest. - Caregivers should make sure the user is in the seat properly and that the user is properly secured - Caregivers should confirm that there are no loose clothing articles that can get tangled by the wheels or drive motor.
- Page 9 2. Safety Instructions 2.5 Electromagnetic Compatibility - The wheelchair should away from strong magnetic fields and large inductive electrical equipment, such as radio station, TV stations, un- derground radio stations, or cell phone transmitting radio stations. Please avoid any strong electromagnetic fields. The electric wheel- chair should avoid electromagnetic interference at all times.
-
Page 10: Usage And Operation
3. Usage and Operation Please visit YouTube channel for a detailed Usage and Operations explanation. Simply search "ComfyGO Mobility Lightweight Foldable Electric Wheelchair (Model # X-6)" on YouTube. www.youtube.com/c/ComfyGO... - Page 11 3. Usage and Operation 3.1 Wheelchair Adjustments Folding Your Wheelchair Step 1: Take off the battery and unplug the red plug. (Picture 1). Step 2: Pull the joint switch backward and pull back on the handle (Picture 2 and 3). Step 3: Pull the cushion up by hand and fold the wheelchair (Picture 4).
- Page 12 3. Usage and Operation Assemble and Dissemble the Footrest Install the footrest into the frame tube, and push the footrest into the fixed position. For disassemble, push the plastic part then lift up foot- rest (Picture 7 and 8) Picture 7 Picture 8...
- Page 13 3. Usage and Operation Install and Dismantle the Anti-tipper Press the button to install/dismantle the anti-tipper (Picture 11 and 12). Picture 10 Picture 11 Raising and Lowering the Armrest To raise the armrest, press the armrest button near the armrest frame and lift the armrest (Picture 13).
- Page 14 3. Usage and Operation Switching Between Manual Mode and Electric Mode Manual mode: Pull the levers up on the left and right motors (Picture 14 and 15). Picture 14 Picture 15 Electric mode: Pull the lever down on the left and right motors (Pic- ture 16).
-
Page 15: Battery And Charger
4. Battery and Charger 4.1 Charger Requirements The charger is used to charge the battery. When the electric wheel- chair is charging, do not attempt to use the wheelchair. Wheelchair must be disconnected from the charger before using. Charger Technical Data - Input voltage: AC 220V (110V) ±10% - Output voltage: 24V/DC - Output current: 2A/4A... - Page 16 4. Battery and Charger Usage of Charger To charge the battery, connect the charger into the Wheelchair’s con- trol socket then connect the charger to a power supply. Follow these steps to complete the charging process: Step 1: Make sure the electric wheelchair is powered off. Step 2: Make sure the controller socket is not blocked.
- Page 17 4. Battery and Charger 4.3 Battery Use and Maintenance - Improper replacement of the battery may cause a danger or explo- sion. Replace the battery only with the same battery type or one rec- ommended by the manufacturer. Please make sure the battery poles are correct.
-
Page 18: System Diagnostics
5. System Diagnostics If the indicator LED lights are blinking, it means the wheelchair has abnormalities. The abnormalities may occur in following parts: motors, brakes, battery, wire connections, etc. Troubleshooting guide is below. For Audio Signal Indication please check the table. - Page 19 5. System Diagnostics Description of LED light The meaning of LED light Explanation & Solution All LED lights are unlit with no The power is off, wheelchair is in Power is poorly contacted. Fuse is sound standby or sleep mode. tripped or burned out.
-
Page 20: Controller
6. Controller 6.1 Controller Panel Battery Power Gauge Power On/Off Button Horn Button Speedometer Speed Deceleration Speed Acceleration Controller 6.2 Controller Use Power Switch Press the power switch button,the screen will light up and the control- ler will be powered on. Press the power switch button,the screen goes out,and the controller is powered off. - Page 21 6. Controller Speed is divided into five sections, in the following ranges: 20%, 40%, 60%, 80%, 100% of the max speed. First gear: 20% of max speed. Fifth gear of speed: 100% of max speed. Horn Button Press the horn button to use the horn. Battery Power Gauge After you turn on the power, the battery power indicator will light up.
-
Page 22: Maintenance Areas
7. Maintenance Areas 7.1 Maintaining Your Wheelchair Maintenance of wheelchair includes general cleaning of the wheel- chair, checking and tightening all nuts and bolts. Checking the wheels and tire pressure. Checking the battery, battery cables, and battery connections. Check the battery charge level. For further maintenance please contact with your dealer. - Page 23 7. Maintenance Areas 7.5 Wheelchair Malfunction and Checking If a malfunction happen while the wheelchair is in use, turn off the power before checking. Symptom: complete loss of power, and all the LED lights on the con- troller panel are off. Check Step: Step 1: Check if the controller’s plug is loose.
-
Page 24: Tech Support
8. Tech Support Please visit https://www.comfygomobility.com/product-registration/ and register your product now! Registering your ComfyGO product allows for extended warranty service if if applicable to your product.You will also receive product updates and important news on our ComfyGO products. (Simply scan QR code with your phone for the Registration Link) - The fastest way to get support, please e-mail to support@ComfyGoMobility.com All warranty and return requests you can visit for getting professional... -
Page 25: Warranty
9.Warranty Policy - Our goal is to ensure that you are delighted with your purchase. - According to our warranty agreement, all new products have a limit- ed warranty. All batteries have a six month warranty. Spare parts have a one year warranty. The limited warranty does not include: labor or device failure due to the owner's misuse or negligence, non-durable components and components subject to normal wear and tear that need replacement from time to time (for example rubber materials,... - Page 26 www.ComfyGoMobility.com...
Need help?
Do you have a question about the X-6 and is the answer not in the manual?
Questions and answers