
Related Manuals for CURIOSIS Celloger Nano


Summary of Contents for CURIOSIS Celloger Nano
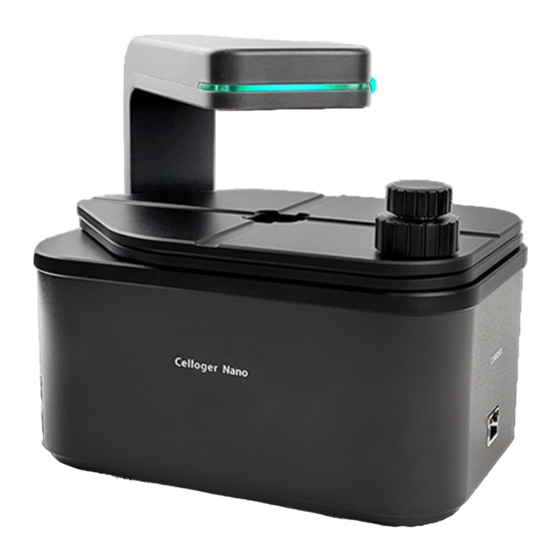
- Page 1 Automated live cell imaging system ™ Celloger Nano Instruction manual www.curiosis.com...
- Page 2 Developed and manufactured by CURIOSIS Inc. Email: info@curiosis.com Website: www.curiosis.com CURIOSIS Inc. 4F, 10 Teheran-ro 38-gil, Gangnam-gu, Seoul 06221, South Korea Tel: +82-2-508-5237 Fax: +82-2-508-5246 Copyright © 2021, by CURIOSIS Inc. All rights reserved. Published in Korea.
-
Page 3: Table Of Contents
3.1. Capture 3.2. Intensity 3.3. Ruler and manual count 4. Time-lapse 5. Process single image or time-lapse images 5.1 Import the original data taken by celloger nano 5.2 Slide show 5.3 Merge fl image 5.4 Estimate confluency (Coverage) 5.5 Make video... -
Page 4: Package Contents
USB memory - Instruction Manual - Celloger Nano App - Celloger Nano Analysis App When receiving the package, • Check that all items listed above are included in your package. • Examine the device carefully for any damage during shipping. -
Page 5: Device Layout
Device layout Front-left side POE Injector... -
Page 6: Getting Started
Upon using multiple equipment, there should be a proper clearance among equipment. PC specifications (Refer to page 40) Celloger Nano software can be used on PCs with Window 10. Large capacity hard drive is necessary to save images from Timelapse. If the capacity is not enough, scanning will not function properly. -
Page 7: Installation
Turn on the power by pressing the power switch located next to the power cable port. Perform the PC network setting (changing PC IP address) as follows to connect the PC with the equipment. Alternative method to set PC network within the Celloger Nano App can be found in Appendix B (p.45) Click the “Start”... - Page 8 To start Celloger Nano App, first, connect the USB drive provided with the device into the PC, then copy APP folder to the PC and execute “Celloger Nano App.exe” in the APP folder. <Image Descriptions of PC network setting> ③...
- Page 9 ⑨ ⑧ ⑦...
-
Page 10: Software Description
Software description Celloger Nano provides two software: Celloger Nano App and Analysis App. Celloger Nano App is a program for actual operation of Celloger Nano device that includes real-time monitoring and time-lapse imaging function. Celloger Nano Analysis App is a program for analyzing or post-processing the images obtained from Celloger Nano and it operates even without the device connection. - Page 11 [ Tool ] ➢ Visibility : Show/hide features displaying image information such as histogram. ✓ Histogram (p.29) : Show/hide intensity histogram of an image. ✓ Intensity (p.29) : Show/hide point and mean intensity of an image. ✓ Manual Counting : Show/hide “Manual Counting” function. ✓...
- Page 12 [ File ] : Save the image on the Display. [ Zoom & Pan ] : Zoom in (Digital zoom) ✓ : Zoom out (Digital zoom) ✓ ✓ : Pan (Drag the display in Zoom-in status) ✓ : Return the zoomed image or relocated image to its original state at once. [ Measure ] Measure the length between the two clicked points.
- Page 13 ④ Light Source Control The tabs in “Light Source Control” are composed of BF, FL green and FL red. The configuration of tabs are set depending on the light options of Celloger Nano. ✓ LampPower (%) : Control lamp (Illuminator) power (0~100%).
- Page 14 D. Jog button : Move Z stage up. [Z coordinate + step distance] : Stop the stage on the move. : Move Z stage down. [Z coordinate - step distance] [ Focus ] Select the channel used for time lapse imaging and select the focus position (Z coordinate) for each channel. ✓...
- Page 15 ✓ Auto Focus ➢ None : During time-lapse imaging, it does not execute autofocusing function and captures based on the entered coordinates (Ref. Pos./Offset B) ➢ FirstCycle : During time-lapse imaging, the autofocusing function is executed only for the first cycle and the capturing for other cycles is done on the z coordinates designated in the first cycle.
- Page 16 1. (Count = Cycle count + 1) B. The progress rate (%) within a cycle and remaining time until the next cycle (“Remaining”). Index shows the number of images taken within a cycle (With Celloger Nano, Index is always 0). C. Current date and time.
-
Page 17: Celloger Nano Analysis App
① Menu bar It is managed by “config file” instead of a project. Other menus are the same as those of Celloger Nano App. ② Toolbox : Mask the area recognized as confluency (Possible to use after confluency analysis). All other tools and functions are the same as those of Celloger Nano App. -
Page 18: Operation Overview
④ Light Source Control Display the light source settings of Celloger Nano App and it cannot be changed. ⑤ Image Analysis Control Upon importing a folder, file list is displayed. Upon selecting the file, the image is shown on Display. -
Page 19: Create Or Open A Project
Create or open a project ✓ With Celloger Nano, the settings can be managed by the project file (“.cgnproj” file format). Setting values (Light intensity, Focus position, Schedule, file storage location, etc.) are saved in the project. ✓ Upon executing App, popup screen for project selection is displayed. -
Page 20: Device Connection
Device connection Icon of devices connected by LAN cable is shown. To connect the device, select the icon and press “Connect”. Upon completing the connection, the color of LED status indicator changes from red to green. Note. If the icon is not shown, check the following steps and take appropriate actions. Case 1. -
Page 21: General Operation
④ Discard PBS buffer and treat trypsin-EDTA solution to detach the cell from vessel. ⑤ Incubate for a few minutes and check cell detachment by Celloger Nano or microscopy. ⑥ Remove cell and trypsin-EDTA to conical tube and add fresh medium to neutralize the Trypsin reagent. -
Page 22: Cell Monitoring And Image Setting
Celloger Nano has mechanical X/Y stage and motorized Z stage. 1) Adjust X/Y position XY stage of Celloger Nano uses X/Y stage controller (Knob) to move X/Y axis by +/-6mm respectively. To adjust further, the vessel must be manually moved. In order to designate the scan point, first, move the vessel by hand to see the desired location in Preview state, and then adjust the X/Y location using X/Y stage controller. - Page 23 Step X1mm manipulation (Z : 2.000) Step X 100um manipulation (Z : 2.100) Step X 10um manipulation (Z : 2.060) Step X 1um manipulation (Z : 2.055)
- Page 24 Light Source Control, and move the jog to find a clear point like BF. ➢ Auto focusing Autofocus function of Celloger Nano works by selecting clear focal point after screening the area up and down the location. Therefore, it is necessary to have the focus location within the designated range in Autofocus parameter for more successful autofocusing.
- Page 25 ✓ Depth : Screening scope for autofocusing (Recommended value is 0.100mm or more). ✓ Resolution : The interval of autofocusing calculation within screening scope (0.010mm or less for 4X optic and 0.005mm or less for 10X optics). ✓ Offset : If you want to select the point different from focal plane recognized by Celloger Nano, input the difference between the point and Z position coordinates from autofocusing.
-
Page 26: Light Intensity Adjustment
2.2. Light intensity adjustment Light source option for Celloger Nano is displayed on the upper tab (Light Source Control in Celloger Nano App). Select the desired light source to adjust and change the parameter. It is automatically saved. Brightness is one of the important factors that has an impact on analysis accuracy. It is important to set the appropriate brightness to distinguish cells from background. -
Page 27: Image Analysis
3. Image Analysis 3.1. Capture Icon ( ) in the Toolbox captures the image on Display. 1) An image with features It is possible to generate and manipulate the desired features, show it on Display and save it as it is. To obtain image without features, press (Feature layer) for deactivation and then press 2) BF or FL channel image... - Page 28 Green * FL image Thresholding Celloger Nano conducts thresholding for FL channel image based on intensity and merge it with BR image. There are two methods for intensity thresholding. Method 1) Global thresholding: Thresholding is executed based on the overall intensity of the image.
-
Page 29: Intensity
Note: When the Fluorescence areas are distorted or clustered in one place, Global thresholding function is recommended; and when the Fluorescence areas are evenly distributed, the Local adaptive thresholding function is recommended. 3.2. Intensity 1) Point Intensity, Mean Intensity Upon activating Intensity in the Visibility in Tool menu, Point Intensity and Mean Intensity information is displayed at the top left side of Display. -
Page 30: Ruler And Manual Count
3.3. Ruler and manual count 1) Ruler In Measures, select either (Free) or (Horizontal) or (Vertical) directions and select the desired area from point to point. The number on the line is the length measurement (um). Note : The font size of the number can be changed in “Appearance”... -
Page 31: Time-Lapse
2) Manual count Select Count in the Manual Counting in the Tool menu and click the desired area to count with cursor, clicked area is checked and the counted number is shown in Counting Result. To delete part of the result, press Remove and click the items to be deleted. To delete all press Clear. To hide them without removing all data, deactivate them by pressing Manual Counting activated in Visibility of Tool menu. - Page 32 ⑥ When Total progress bar becomes 100%, open the folder with the project name to check the image, make video using Celloger Nano Analysis App or conduct additional analysis. Note. The default image is in Tiff format and raw image of each channel is stacked. Stack image can be checked with window default image viewer.
-
Page 33: Process Single Image Or Time-Lapse Images
It is possible to conduct confluency analysis and make videos in the Celloger Analysis App using time- lapse images taken by Celloger Nano. In addition, intensity measurement, length measurement and manual counting are available in the Celloger Nano Analysis App and the methods are same as Celloger Nano App. -
Page 34: Slide Show
Note. The file location, address, and file name should only be composed of English alphabets, numbers and some special symbols to import the file correctly in Celloger Nano App. If it fails to import the file, check whether the file location address is written in languages other than English. -
Page 35: Estimate Confluency (Coverage)
5.4 Estimate confluency (Coverage) ① Open the file and images captured with Celloger Nano. ② Press (To analyze certain images from the retrieved file, use check function on the left) Note. Upon selecting right Icon (Green FL device) or (Red FL device) the coverage ratio of the fluorescence area is calculated. -
Page 36: Make Video
5.5 Make video ① Open the Timelapse folder. ② Select the light channel or merge (Merge layer activation ③ Create video by pressing (The video is saved where the timelapse folder is located). ④ Open the file for confirmation. Note. In order to change the speed, change the parameter in the Preferences of the Tool menu. (Recommended value: 5~13) Note. -
Page 37: Safety Instruction
Install the device on a rigid and level places. Operate the device in conditions described in the operating condition. Use only the components provided and authorized by Curiosis Inc. Ensure the input voltage matches with the device’s power supply voltage. -
Page 38: Safety Standards
When cleaning optical elements, use only a damp cloth to avoid scratching soft lens coatings. Do not clean lenses with organic solvents. Lightly wipe working surfaces of the Celloger Nano with soft cloth dampened with 70 % ethanol or hydrogen peroxide (H ). - Page 39 Video can be made only for time-lapse images obtained from Celloger Nano App program. Cannot analyze the confluency ✓ Check if the images are obtained from Celloger Nano App; Analysis can be performed only with the images obtained from Celloger Nano App. ✓...
-
Page 40: Product Specifications
Product specifications Dimension 211 x 146 x188 mm Weight 3.2kg / 7.0lb Objective Lens 4X / 10X Green : Excitation (480/30x) / Emission (535/40m) Fluorescence Red: Excitation (540/25x) / Emission (575lp) Light source Camera 1.25MP CMOS Stage Manual XY, motorized Z Imaging positions File export format TIFF, AVI... -
Page 41: Ordering Information
Ordering information Cat. No. Description CRCLG-NB04 Live cell imaging system (Bright field, 4X) CRCLG-NB10 Live cell imaging system (Bright field, 10X) CRCLG-NBG04 Live cell imaging system (Bright field + Green Fluorescence, 4X) CRCLG-NBG10 Live cell imaging system (Bright field + Green Fluorescence 10X) CRCLG-NBR04 Live cell imaging system (Bright field + Red Fluorescence 4X) CRCLG-NBR10... -
Page 42: Appendix A. Connecting Multiple Devices
Appendix A. Connecting multiple devices With Celloger Nano, multiple devices can be operated using one PC but this requires separate set up of Device IP or purchase of a router. As one program is used for one device, it is necessary to open the same number of programs as the number of devices to be connected. -
Page 43: Using A Router
PC or other devices’ IP address and click Change. Reboot the device from Device menu and the setup is completed. Ex) IP address setting for connecting 3 Celloger Nano devices and PC. PC IP address: 192.168.2.200 Device 1 Device IP address : 192.168.2.10 Device 2 Device IP address : 192.168.2.11... -
Page 44: Operation
2. Operation ① Open the Celloger Nano App after completing network setup. ② Select the device and connect it. Note. Devices connected to the App can be identified by choosing one of the methods below: Check the selected device description. -
Page 45: Appendix B. Alternative Pc Network Setup
Appendix B. Alternative PC network setup Perform the PC network setting as follows to connect the PC with the device using Celloger Nano App. 1. Open Celloger Nano App program. 2. Device Connection popup is displayed after Create or Open a project popup (p.19). - Page 46 < Image Descriptions of PC network setting > <Creat or open a project popup> ① ② <Device Connection popup> ① ②...
- Page 47 Curiosis Inc. HEADQUARTERS 4F, 10 Teheran-ro 38-gil Gangnam-gu, Seoul 06221 South Korea TEL +82-2-508-5236 FAX +82-2-508-5246 Email: info@curiosis.com FACTORY 400 Wonam-ro, Namsa-eub Cheoin-gu, Yongin-si, Gyeonggi-do 17123 South Korea TEL +82-31-339-6404 FAX +82-31-339-6409 www.curiosis.com...
Need help?
Do you have a question about the Celloger Nano and is the answer not in the manual?
Questions and answers