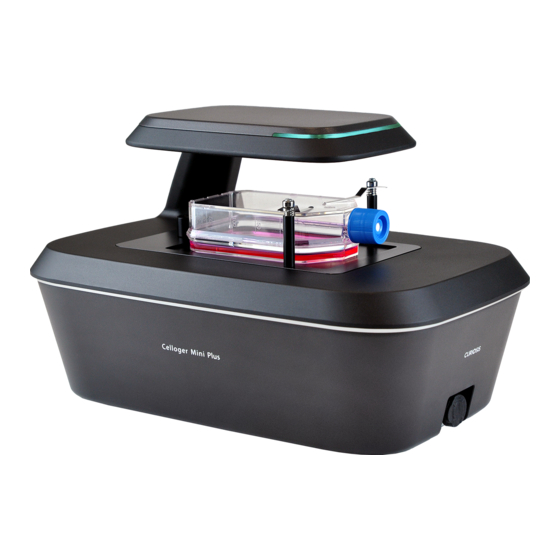
CURIOSIS Celloger Mini Plus Quick Manual
Automatic live cell imaging system
Hide thumbs
Also See for Celloger Mini Plus:
- Instruction manual (68 pages) ,
- Instruction manual (84 pages)
Table of Contents
Advertisement
Quick Links
Advertisement
Table of Contents

Related Manuals for CURIOSIS Celloger Mini Plus


Summary of Contents for CURIOSIS Celloger Mini Plus
- Page 1 Automatic Live Cell Imaging System Celloger Mini Plus Quick Manual...
- Page 2 Table of contents Ⅰ. Device layout Ⅱ. Installation • Hardware • Software Ⅲ. Software description • Celloger Mini Plus Scan APP • Celloger Mini Plus Analysis APP Ⅳ. Operation Ⅴ. Specification Ⅵ. Appendix www.curiosis.com...
-
Page 3: Device Layout
Device layout Front-left side Objective Lens LED status indicator Indicator LAN port(to PC) Illuminator LAN port(to Device) (Bright Field) Vessel holder Power input port LAN port Power switch www.curiosis.com... -
Page 4: Installation
Install the vessel holder first, then put the Step 4. Step 5. Check the connection Place the sample on the stage. device inside the incubator. between the PC and the device. Before using the device, Remove the lens cover.(Black) www.curiosis.com... - Page 5 Installation Ⅱ. Software ① ② Step 1. Click Celloger Mini Plus Scan App Step 2. Create or open a project ③ ④ Step 3. Select project name and storage location Step 4. To connect the device, select the icon and press “Connect”...
-
Page 6: Software Description
Software description Ⅰ. Celloger Mini Plus Scan App ② Tool bar ① Menu bar ② Tool bar ③ Display ④ Light source control www.curiosis.com... - Page 7 Software description Ⅰ. Celloger Mini Plus Scan App ⑤ Scan file location setting ① X-Y-Z control panel ③ Scan pattern control ⑥ Schedule - Interval time - Total running time - Total cycle ⑦ Current progress of the work ⑧ Start & Pause ②...
- Page 8 Software description Ⅱ. Celloger Mini Plus Analysis App ① Image analysis control ② Position of captured image www.curiosis.com...
-
Page 9: Operation
Operation 1. Preparation(Cell/Device) Before starting experiments, place Celloger Mini Plus in an incubator for prewarming. (more than 30mins) Prepare pre-warmed medium and cells on a plate. 2. Vessel Setting ② ① 48 well plate 24 well plate 12 well plate... - Page 10 BF Focus and choose Auto Focus option to change it. After changing them, press Apply All. To scan fluorescence, select checkbox under FL Focus Offset. Set the Step 4. fluorescence focus and press button. After focusing it, press Apply All. ④ www.curiosis.com...
- Page 11 Operation ① 4. Time setting & Time-lapse imaging Step 1. Enter interval time and total running time in the schedule, the total cycle is entered automatically. ② Step 2. Press Start to begin image capturing. www.curiosis.com...
- Page 12 ⑤ ② ③ ① ④ Step 1. Step 2. Click Mini Plus Analysis App. Press button to open folder or Drag & Drop images here Step 3. Click [Tool]-[Preferences]. Step 4. Select video speed (1~50). Press button. Step 5. www.curiosis.com...
- Page 13 Operation 6. Confluency & Growth Curve ① ② Press button to open folder or Step 1. ③ Drag & Drop images Press button to analyze Step 2. confluency. Step 3. Click button to create growth curve. www.curiosis.com...
-
Page 14: Specification
Vessel holder, Petri dish 60mm (Dual) Computer External PC CRCLG-MPPDS90 Vessel holder, Petri dish 90/100mm (Single) O/S required Window 10 Processor (recommended) CPU 3G Storage (recommended) Monitor (Recommended) 1920*1080mm Accessories PoE adapter, ethernet cable, USB memory Warranty 1 year www.curiosis.com... - Page 15 PC IP Setting ③ ④ ⑤ ② ① Step 1. Step 3. Step 4. Click the Window icon. Click Network and Internet in control panel. Click the Ethernet. Step 5. Step 2. Click Network and sharing center. Click the setting button. www.curiosis.com...
- Page 16 Appendix PC IP Setting ⑥ Mouse Right button Click ⑦ Step 6. Step 7. Click Change adapter settings on the left-side menu. Select Ethernet button and right-click the mouse and click Properties in the window that appears. www.curiosis.com...
- Page 17 IP address(192.168.2.xx*) and Subnet mask (255.255.255.0) in the blank fields. ⑨ ⑧ ※ Fill 2~254 except 10 in XX* fields. Internet Protocol Version 4 (TCP/IPv4) 255 255 Step 10. Click OK, then network configuration is completed. Properties ⑩ www.curiosis.com...
- Page 18 Thank you End of Document Curiosis Inc. 4F 10, Teheran-ro 38-gil, Gangnam-gu, Seoul 06221, South Korea T 82 2 508 5237 F 82 2 508 5246 sales@curiosis.com www.curiosis.com CRQM008-2112 www.curiosis.com...
Need help?
Do you have a question about the Celloger Mini Plus and is the answer not in the manual?
Questions and answers