Table of Contents
Advertisement
Quick Links
Advertisement
Table of Contents

Related Manuals for CURIOSIS Celloger Nano

Summary of Contents for CURIOSIS Celloger Nano
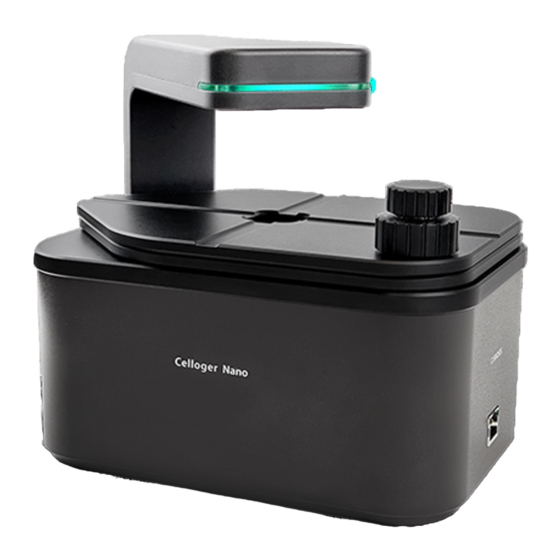
- Page 1 Automated live cell imaging system Celloger® Nano Instruction manual...
- Page 2 Developed and manufactured by CURIOSIS Inc. Email: info@curiosis.com Website: www.curiosis.com CURIOSIS Inc. 4F, 10 Teheran-ro 38-gil, Gangnam-gu, Seoul 06221, South Korea Tel: +82-2-508-5237 Fax: +82-2-508-5246 Copyright 2023, by CURIOSIS Inc. All rights reserved. Published in Korea. CR-IFU-006(Rev.3) FOR RESEARCH USE ONLY and not for use in diagnostic procedures. Specifications subject to change...
-
Page 3: Table Of Contents
3. Image analysis [in Scan App] 4. Time-lapse imaging [in Scan App] 5. Process single image or time-lapse images [in Analysis App] V. Software description 1. Celloger Nano Scan App 2. Celloger Nano Analysis App VI. Safety Instruction 1. General guidelines 2. -
Page 4: Package Contents
Adapter LAN Cable (5M, 4.8M) USB memory - Instruction Manual - Celloger Nano Scan App - Celloger Nano Analysis App When receiving the package, • Check that all items listed above are included in your package. • Examine the device carefully for any damage during shipping. -
Page 5: Device Layout
II. Device layout Front-left side POE Injector... -
Page 6: Getting Started
III. Getting started 1. Pre-requirements Installation location For normal and stable operation of the device, the following environmental conditions should be satisfied. ® Install Celloger Nano on a flat and level surface away from vibrating equipment. Place at dust- or other airborne particles-free area. ... -
Page 7: Installation
Nano from the box, remove all the covers, and place it on a clean and level surface. Make sure all accessories are present by checking “Package Contents” (p.4). If any items are missing or damaged, please contact your distributor or Curiosis at info@curiosis.com. 2.2.Connect the device and computer Prepare a computer that meets the specifications (refer to p.46 for PC specifications) and place it near the... -
Page 8: Create Or Open A Project
3. Create or open a project Upon executing the Celloger Nano Scan App, popup screen for project selection is displayed. With Celloger® Nano, the setting can be managed by the project file (“.cgnproj” file format). Setting values (Light intensity, Focus position, Schedule, File storage location, etc.) are saved in the project. -
Page 9: Connect The Device
② ③ ④ 1. Open Celloger Nano Scan App. 2. When the app is executed, Create or Open a project popup appears. Select Continue without configuration. 3. Connect your device popup will show. 4. Click Refresh Network Adapter to load the network adapters connected to the PC. - Page 10 <Device connection pop-up description> A. Refresh Network Adapter reads the connected network adapter from the PC. B. Network adapter list. Operational Status shows the network connection status where Up means network is enabled, while Down means disabled. Change IPAddress: Change the IP address of selected network and device. ...
-
Page 11: Software Overview
Nano Scan App is a program for actual operation of Celloger® Nano device which includes real-time cell monitoring and time-lapse imaging function. Celloger Nano Analysis App is a program for analyzing and post- processing the images obtained from Celloger® Nano and it can be operated even without the device connection. - Page 12 5.2 Celloger Nano Analysis App ① ② ③ ⑤ ④ ① Menu bar ② Toolbox ③ Display ④ Light source control & Z coordinates ⑤ Image analysis control...
-
Page 13: General Operation
IV. General Operation 1. Preparation (cell/device preparation) ① Place Celloger® Nano in the incubator for prewarming. Note. Install the system as far as possible from the incubator door and place the device around 10 cm away from the surroundings for proper air flow of rear cooling fan. ②... - Page 14 For Z positioning of the FL channel, check the Display while FL channel is selected in Light Source Control, and move the Jog to find a clear point like BF. Manual adjustment [using Celloger Nano Scan App program] ...
- Page 15 ② Open Preferences in the Tool menu. ③ Designate parameter(Depth, Resolution, Offset) in the Auto Focus and press OK. Depth: Screening scope for autofocusing Resolution: The interval of autofocusing calculation within screening scope (0.010 mm or less for 4X optic and 0.005 mm or less for 10X optics) ...
- Page 16 ② Check that the FL channel checkbox in Focus is checked and click on to specify the focus. ① ② 2.2 Light intensity adjustment Light source option for Celloger® Nano is displayed on the lower tab. Select the desired light source to adjust and change the parameter.
-
Page 17: Image Analysis [In Scan App]
3. Image analysis [in Scan App] 3.1 Capture icon in Toolbox captures the image on Display. (Use “Ctrl + I” as a shortcut) An image with features It is possible to generate and manipulate the desired features, show it on Display and save it as it is. To obtain without features, press (Features layer) for deactivation and then press BF or FL channel image... - Page 18 Method 2) Local adaptive thresholding: Divide the image into local areas and thresholding is conducted by comparing relative intensity among areas. Adjust parameters of the Kernel Size and Offset while looking at the mask of the image after checking the Adaptive Algorithm box. (Kernel Size indicates size of local and Offset indicates the relative offset of the threshold of local area.) Note.
- Page 19 Note. The adjustments are made with captured images, so cells are not affected during scanning. 3.4 Preview record Upon activating Preview Record in Tool menu, the image shown on the display is recorded and saved while streaming. The date and time of recording are displayed on the upper left of the recorded video. Note.
- Page 20 Intensity at (X coordinate, Y coordinate): Point intensity value of the X, Y coordinates indicated by the cursor. (If it is in merge state, intensity of BF channel and intensity of FL channel are displayed in order.) Mean intensity: Average intensity value of the image displayed on Display. (If it is in merge state, ...
- Page 21 3.6 Manual Counting Select Count in Manual Counting in Tool menu and click the desired area to count with cursor, clicked area is checked and the counted number is shown in Counting Result. To delete part of the result, press Remove and click the items to be deleted. To delete all, press Clear. To hide them without removing all data, deactivate them by pressing Manual Counting activated in Visibility of Tool menu.
-
Page 22: Time-Lapse Imaging [In Scan App]
③ Select the location to save and enter the project name. If the image storage location is not specified, the file will be saved in the Scan folder under the Celloger Nano Scan App folder and if the project name is not entered, a folder will be automatically created under the scan start date. - Page 23 ⑥ Once the scanning is completed, check the saved images, make videos, or perform additional analysis using Celloger Nano Analysis App. Note. Images are saved as “Tiff files” by default. If fluorescence was also imaged, the saved images are stacked file of merged image and raw images of each channel. Stack image can be viewed with the windows basic image viewer “Windows Photo Viewer”.
-
Page 24: Process Single Image Or Time-Lapse Images [In Analysis App]
(a file name shouldn’t contain any of the following characters: /, :, *, ?, “, <, >, |) to import the file correctly in Celloger Nano Analysis App. If it fails to import the file, check whether the file name and location address is written in languages other than English. - Page 25 (Alpha Blending): A method of combining images with transparent effect. It is the same merge method as Celloger Nano Scan App, so refer to Celloger Nano Scan App’s merge parameter(refer to p.17). (Channel Merge): A method of combining images without transparent effect. The parameters are the same as for Alpha Blending.
- Page 26 ③ Create video by pressing Record ( ④ Open the file for confirmation. Note. In order to change the speed, change the parameter in Preferences of Tool menu. (Recommended value: 5 ~ 13) Note. FPS is a parameter indicating the speed of slide show and video. However, the speed of slide show and video could be different even with the same FPS.
- Page 27 parameter. Therefore, to accurately calculate the coverage of fluorescence area, adjust the appropriate thresholding parameters (refer to p.17) before executing the coverage analysis. ④ The confluency values and confluency mask (yellow) are indicated. When a cycle is selected from the list, the corresponding cycle’s image and confluency mask can be seen.
- Page 28 5.6 Create confluency graph ① Open the time-lapse folder or images captured with Celloger Nano Scan App and press Analyze to analyze the confluency. ② Create the confluency graph by pressing Chart. <Confluency graph> Note. Upon selecting the light channel in the information of the chart, FL green or FL red graph can also be seen.
- Page 29 5.7 Show Z-stacking image ① Open the time-lapse folder or images captured with Z-stacking function. ② Click the Z-stacking tab to see the Z-stacking list. The image below shows the Z-stacking list when the Range of z-stacking function is set to (-5,5). ZStacking5 ZStacking4 ZStacking3...
- Page 30 ② ① 5.8 Merge Z-stacking image ① Open the time-lapse folder or images captured with Z-stacking function. ② Click the Z-stacking tab (on the right side of the analysis software). Select the merge parameters. Celloger's Z-stacking merge parameters offer two options for merging multiple ③...
- Page 31 5.9 Image adjustment Adjust the parameters in the same way as “Image Adjustment” of Celloger Nano Scan App (refer to p.18) and obtain the desired image.
-
Page 32: Software Description
V. Software description 1. Celloger Nano Scan App Upon opening Celloger Nano Scan App and completing pre-setup (refer to p.8~10), the following main page is displayed. ① ② ⑥ ⑦ ③ ⑧ ④ ⑤ ⑨ ① Menu bar [File] Open Project: Import a previously saved project. - Page 33 [Tool] Manual Counting (p.21): Count the points clicked by user. ① Count: Add a point for counting. ② Remove: Delete a clicked point. ③ Clear: Delete all points. Adjust (p.18): Adjust an image. Preview Record (p.19): Record the streaming ...
- Page 34 : Pan. Drag the display in zoom-in status. It can be used by clicking and dragging with the mouse while pressing the “Shift” key. : Return the zoomed image to its original state at once. [Measure] Measure the length between two clicked points. : Measure the distance between two selected points in any direction.
- Page 35 Gain: The amount of signal amplification during the process of changing photon data to digital data, adjustable from 1 to 30. This is a parameter associated with the contrast of image. Be careful as noise becomes higher when gain value is high. Offset (black level): Brightness of dark range of image.
- Page 36 Note. Upon focusing using the Jog button (E), the Z-knob is deactivated. Therefore, if you want to ) the Jog button and then use it. use the Z-knob, make sure to deactivate ( E. Jog button : Move Z-stage up. Adjustments can also be done using “+” on the number pad of the ...
- Page 37 Auto Focus None: During the time-lapse imaging, autofocusing function is not executed and captured based on the set coordinates. FirstCycle: During the time-lapse imaging, autofocusing function is executed only for the first cycle while the remaining cycles are imaged based on the Z coordinates designated in the first cycle.
- Page 38 Scan Location and if a location is not designated, the file will be saved automatically in the Scan folder under the Celloger Nano Scan App folder. The file name can be entered in the Enter Experiment Name Here field before saving. If a file name is not entered, the file will be automatically saved as the start time of the scan settings.
- Page 39 To go back to the original state, press Reset Layout in Tool menu before closing the Celloger Nano Scan App. When the window disappears, delete “LayourtCGN.XML” in the Celloger Nano Scan App folder to go back to default state after closing the App.
- Page 40 ① ②...
-
Page 41: Celloger Nano Analysis App
Upon opening Celloger Nano Analysis App and selecting Config file, the following main page is displayed. Note. Config file is a file that pops up when Celloger Nano Analysis App starts. It is for saving and managing parameters set in the Preferences of Tool menu. - Page 42 ④ Light Source Control & Z coordinates Display the light source settings and Z coordinates of Celloger Nano Scan App and it cannot be changed. ⑤ Image Analysis Control Upon importing a folder, file list is displayed. When a file is selected, the image is shown on Display. It is possible to analyze images or make video (refer to p.24~31).
-
Page 43: Safety Instruction
Install the device on a rigid and level place. Operate the device in conditions described in the operating condition. Use only the components provided and authorized by Curiosis Inc. Ensure the input voltage matches with the device’s power supply voltage. ... -
Page 44: Safety Standards
3. Safety standards European standards US standards UK Standards Korean standards Cleaning and Maintenance VII. When cleaning optical elements, use only a damp cloth to avoid scratching soft lens coatings. Do not clean the lens with organic solvents. Lightly wipe the working surfaces of the Celloger® Nano with soft cloth dampened with 70% ethanol or ... -
Page 45: Trouble Shooting
Video can be made only for time-lapse images obtained from Celloger Nano Scan App. Cannot analyze the confluency Check if the images are obtained from Celloger Nano Scan; Analysis can be performed only with the images obtained from Celloger Nano Scan App. -
Page 46: Product Specifications
Conduct FL merge, set appropriate thresholding parameter and use coverage analysis to calculate the coverage of fluorescence. Others Water droplets from on the well plate, dish lid or top of the flask (= Condensation occurs) Warm up the device 30 minutes before start monitoring. ... -
Page 47: Ordering Information
Warranty 1 year Computer External PC O/S required Window 10 Processor (Recommended) CPU 3G Storage (Recommended) Monitor (Recommended) 1920*1080mm Ordering information Cat. No. Description CRCLG-NB02 Live cell imaging system (Bright field, 2X) CRCLG-NB04 Live cell imaging system (Bright field, 4X) CRCLG-NB10 Live cell imaging system (Bright field, 10X) CRCLG-NBG04... -
Page 48: Appendix A. Connecting Multiple Devices
Celloger® Nano units with the same IP address, it is necessary to set the IP address of the devices. It is possible to change the IP address of a device in the Celloger Nano Scan App. ① After connecting one device to PC, open the Celloger Nano Scan App. - Page 49 192.168.2.12 Note. When setting the IP address of the network adapter in Celloger Nano Scan App, only one of two or more devices must be checked in the DHCP Server and other devices must be unchecked. In case of setting the IP manually on PC (p.52), connection can be done regardless of the DHCP Server.
- Page 50 1.2 Using a router Having a router or switching hub enables the use of multiple devices in one PC. It is necessary to purchase a router or switching hub to use different devices at once. Switching hub injector /Router injector Celloger Nano injector...
- Page 51 2. Operation ① Open the Celloger Nano Scan App after completing network setup. ② Select the device and connect it. ① ② Note. Devices connected to the app can be identified by choosing one of methods below: Check the selected device description.
-
Page 52: Appendix B. Alternative Pc Network Setup
⑨ Click “OK”, then network configuration is completed. ⑩ To start Celloger Nano Scan App, first, connect the USB drive provided with device into the PC, then copy app folder to PC and execute “Celloger Nano Scan App.exe” in the app folder. - Page 53 < Image Descriptions of PC network setting > 1) Window 10 ③ ② ① ⑤ ④ ⑥ Mouse right...
- Page 54 ⑧ ⑦ ⑨ 2) Window 11 ② ③ ① Properties ④ Properties...
- Page 55 ⑥ ⑤ ⑦ ⑧ ⑨...
- Page 56 2022/06/09 CR-IFU-006(Rev.1) Specification modified 2023/05/18 CR-IFU-006(Rev.2) - Added contents (Image adjustment, Preview record, Z-stacking) - Revised contents (Table of contents, Device Layout, Getting started, Chart, Merge image, Trouble shooting, Appendix B, Product specification) - Revised UI (Celloger Nano Analysis App)
- Page 57 Curiosis Inc. HEADQUARTERS 4F, 10 Teheran-ro 38-gil Gangnam-gu, Seoul 06221 South Korea TEL +82-2-508-5236 FAX +82-2-508-5246 Email: info@curiosis.com FACTORY 400 Wonam-ro, Namsa-eub Cheoin-gu, Yongin-si, Gyeonggi-do 17123 South Korea TEL +82-31-339-6404 FAX +82-31-339-6409 www.curiosis.com...
Need help?
Do you have a question about the Celloger Nano and is the answer not in the manual?
Questions and answers