
Subscribe to Our Youtube Channel
Related Manuals for Amcrest IP4M-1041B


Summary of Contents for Amcrest IP4M-1041B
- Page 1 Amcrest IP4M-1041B / IP4M-1041W 4MP ProHD Indoor Wi-Fi Camera User Manual Version 1.0.1 Revised September 27 , 2021...
-
Page 2: Table Of Contents
Contents Device Overview ................................5 Connection & Installation .............................. 6 Camera Access Setup ..............................7 App Setup ..................................8 Desktop Access Setup ..............................14 Operation and Interface .............................. 16 Live ....................................16 Playback ..................................17 Cloud Storage ................................17 Setup .................................... 18 Camera.................................. - Page 3 USA: +1-713-893-8956 Canada: 437-888-0177 UK: 203-769-2757 Important Security Warning To keep your Amcrest camera secure and prevent unauthorized access, please make sure to follow the steps below: • Always make sure that your camera has the latest firmware as listed on www.amcrest.com/firmware...
- Page 4 Overview Amcrest cameras are an excellent digital surveillance product that can be useful to a wide variety of users. This camera connects to any router and uses an internet connection to allow the user to access all of its functionality from many internet connected devices.
-
Page 5: Device Overview
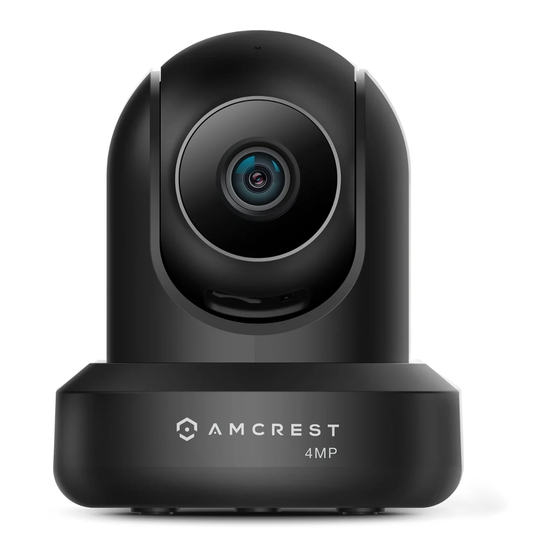
• Advanced Network Protocol Support The camera is UPnP compatible, and includes functionality for use with PPPoE, DDNS, and other protocols to allow remote and local connection with a large variety of network hardware. Note: There may be slight differences in functionality due to the existence of different product series. Device Overview The image below is a representation of your device: Please refer to the chart below for information about the camera’s indicator light:... -
Page 6: Connection & Installation
Inserting a MicroSD Card A microSD card is required to store events outside of the Amcrest Cloud. Please ensure a microSD card is inserted before physically installing the camera. The camera is compatible up to 256GB and requires a Class 10 or higher microSD card to function. -
Page 7: Camera Access Setup
How to Setup the Camera To make your experience with your Amcrest camera easy and simple, we've provided multiple ways to set up, view, and operate your camera depending on your needs. Please follow the instructions on this page to set up your camera in the way that works best for you. -
Page 8: App Setup
If you are setting up your camera for the first time, or you are setting up your camera for mobile viewing. Using the Amcrest Cloud app or Amcrest View app on your smartphone or tablet, you can view your camera live from anywhere, and access features such as taking snapshots, creating recordings, and more. - Page 9 Note: Connect your mobile device to the same network that your camera is on. 2. Register for an Amcrest Cloud account. To register click on Sign Up and fill out the form to complete registration. 3. Tap on Add Camera 4.
- Page 10 7. Set a new password for your camera. The password 8. If you are connecting a WiFi camera to the Amcrest must be between 8 to 32 characters long and contain Cloud and would like to enable WiFi via the Ethernet only letters and numbers.
- Page 11 Make sure your camera and mobile device are on the same network during setup. 1. Download and open the Amcrest View Pro app from the App Store or Play Store. 2. Open the app and tap on the + symbol in the middle 3.
- Page 12 4. Tap on WiFi Camera Select your connection type, in this case, select the left tab Set Up A New Camera On WiFi or Connect New Device (on Android) to begin adding the device to the app. Tap Ethernet WiFi Setup to continue. 6.
- Page 13 Network SSID field. Press Next to continue. Note: For Android 8.0 and above users, you will need to enable location permissions to be able to locate and scan for your WiFi network. For more information on how to locate an SSID visit: amcrest.com/androidP...
-
Page 14: Desktop Access Setup
WiFi Configuration Setup: Used as a secondary option for establishing a WiFi connection to a WiFi camera. For more information on this setup method visit, amcrest.com/wificonfig P2P Setup: Used for setting up already connected devices to the Amcrest View Pro app. For more information on this setup method visit, amcrest.com/p2psetup... - Page 15 Open the web browser and enter this IP address into browser. Press enter to access the web user interface. In the web user interface, enter the login credentials for your device. If this is the first time accessing the device, the username and password will both be admin.
-
Page 16: Operation And Interface
Operation and Interface This section will show you the basic operation and interfaces of the web user interface for your camera. Live This section of the manual details the camera’s interface, as well as all the operations the camera can perform. The live view tab allows the user to see a live video feed from the camera. -
Page 17: Playback
Playback Bar: These options allow the user to play, stop, and adjust the audio levels of a recording. Cloud Storage The Cloud Storage tab allows the user quick access to the Amcrest Cloud website. At this website (amcrestcloud.com) users can register for new accounts as well as view or modify existing accounts. -
Page 18: Setup
Setup The Setup tab allows the user to change different camera settings. Below is a screenshot of the setup tab: There are 3 main sections to note in the Setup tab: Menu Bar: The menu bar is composed of menu sections, which when clicked display any menu items that fall under their category. - Page 19 Below is an explanation for each of the fields on the Configuration tab in the Configuration menu item: Picture • Profile: This dropdown box allows the user to select which profile to modify. The 3 options are Day, Night, and Normal.
- Page 20 Exposure This dropdown box allows the user to select the exposure type for the video feed. The options are Auto, Low Noise, Low Motion Blur, and Manual. When low noise is selected, an additional option to specify a gain range appears below this box.
- Page 21 BLC Mode This dropdown box allows the user to select Back Light Compensation. The values are Off, BLC (Auto), WDR, and HLC. This feature should only be used in black lit environments. Below is a screenshot of this menu: • BLC: backlight compensation: Default will use the whole image to balance the lighting settings, and Customized will allow you to balance the lighting settings from the target area.
- Page 22 To reset to default settings, click the Reset Defaults button. To refresh the screen, click on Refresh. To save the settings, click the Save button. Day & Night Used to determine when black and white mode is turned on in a dark environment. Below is a screenshot of this menu: •...
- Page 23 • Black & White - Always sets picture to black and white, however when illumination is too dark it switches on IR mode. • Sensitivity: This option allows the user to change the Day/Night Sensitivity of the camera. The three options are Low, Middle, and High.
- Page 24 • Profile: This dropdown box allows the user to select which profile to modify. The 3 options are Day, Night, and Normal. • Mode: This dropdown box allows the user to select whether to turn the indication light on or off. To reset to default settings, click the Reset Defaults button.
-
Page 25: Video
To reset to default settings, click the Reset Defaults button. To refresh the page, click the Refresh button. To save the settings, click the Save button. Video This section allows the user to change video settings for the camera’s video feed. There are 4 tabs in this menu item: Video, Snapshot, Overlay, and Path. -
Page 26: Overlay
Below is an explanation for each of the fields on the Snapshot tab in the Video menu item: • Snapshot Type: This dropdown box allows the user to select a snapshot mode. There are two snapshot modes: General: Snapshots are taken as scheduled. ▪... -
Page 27: Audio
For Channel Title, the radio button enables or disables the feature. The Input Channel Title field allows the channel title to be modified. For Time, the radio button enables or disables the feature. Clicking the Display Weekdays checkbox will show the weekday at the end of the timestamp. - Page 28 QR code scanning feature cannot be used. • QR Code: This image is a Quick Response (QR) code. By scanning this image using the Amcrest View app, this camera can establish a connection with the app.
-
Page 29: Connection
Connection The Connection menu item has two tabs: Connection and ONVIF. Connection The Connection tab is where users can configure port connections. Below is an explanation of the fields on the Connection settings tab: • Max Connections: This field allows the user to specify the maximum number of users that can be connected to the camera at the same time. - Page 30 For purposes of this guide, AmcrestDDNS will be used. AmcrestDDNS is a free DDNS service provided by Amcrest, and it must be renewed every year. A renewal reminder email will be sent to the email entered in the username field below.
- Page 31 • Keep Alive: This checkbox allows the user to enable a function to periodically check in with the SMTP server to ensure it can connect correctly. • Email Test: This button causes the system to automatically send out an email to test the connection is OK or not. Prior to the email test, please save the email setup information.
- Page 32 The WiFi camera will now be connected to your WiFi network. You can now remove the Ethernet cable from the device. Please note, the IP address listed in the WiFi Network Information menu will be the IP address used to access your camera wirelessly.
-
Page 33: Event
Event This menu section allows the user to change different settings for triggering events. Video Detection The video detection menu has two tabs: Motion Detect and Video Tamper. Motion Detection This tab allows the user to modify motion detection settings. Below is an explanation of the fields on the Motion Detect tab: •... - Page 34 • When the setup button is clicked, a live stream of the video is shown. The user can then set up to 4 regions, each with their own region name, sensitivity (1-100), and threshold (1-100). Each region has a specific color, and the region selector tool is displayed when the mouse is moved to the top of the screen.
-
Page 35: Audio Detection
• Alarm Delay: This field specifies in seconds how long the delay between alarm activation and Relay alarm activation should be. Send Email: This checkbox allows the user to enable the camera to send an email when a video tampering alarm is triggered. - Page 36 • Event Type: This dropdown box allows the user to select which SD card abnormality to set event triggers for. The 3 options are No SD Card, SD Card Error, and Capacity Warning. • Enable: This checkbox enables the SD Card abnormality trigger for the camera. •...
-
Page 37: Storage
Illegal Access This tab allows the user to set the camera’s response to an Illegal Access related abnormality. Below is a screenshot of the Illegal Access tab screen: Below is an explanation of the fields on the Illegal Access settings tab: •... - Page 38 Below is an explanation of the fields on the Record Schedule settings tab: Record Type: These checkboxes allow the user to select which recording type they want to configure on the schedule. There are 3 types of recordings: General: General recording means that the camera captures all footage for the specified time period. General recording is represented by the color green.
- Page 39 Below is an explanation of the fields on the Snapshot Schedule settings tab: • Record Type: These checkboxes allow the user to select which snapshot type they want to configure on the schedule. There are 3 types of snapshots: General: General means that the camera will take snapshots during the specified time period. General recording is represented by the color green.
-
Page 40: Destination
• Calendar: This calendar allows the user to select days to designate as holidays. Once a day is designated, it can be customized to stop recording or snapshots for that day by using the Record and Snapshot checkboxes. To refresh the page, click the Refresh button. To save the settings, click the Save button. Destination This menu controls where recorded media is stored. - Page 41 • Read Only: This button allows the user to designate an SD card as read only. • Read & Write: This button allows the user to designate an SD card with read & write permissions. • Eject: This button allows the user to safely eject the SD card from the camera. •...
- Page 42 Below is an explanation of the fields on the NAS settings tab: • Enable: This checkbox allows the user to enable NAS uploading for the camera’s recorded media. • Server Address: This field allows the user to designate a DDNS address for the NAS server/device. •...
-
Page 43: Cloud Storage
Save button. Cloud Storage This menu redirects the user to the Amcrest Cloud web site. At this website (amcrestcloud.com) users can register for new accounts as well as view or modify existing accounts. For more information on Amcrest Cloud visit: amcrestcloud.com... - Page 44 Below is an explanation of the fields on the Date & Time settings tab: • Date Format: This dropdown box allows the user to change the date format used in the camera. • Time Format: This dropdown box allows the user to change the time format used in the camera. •...
- Page 45 • Group Name: This column shows the group of the different accounts on the camera. • Description: This column shows a description of the account. • Modify: This column allows the user to modify the user account. • Delete: This column allows the user to delete a user account. Note: The admin account cannot be deleted. •...
-
Page 46: Information
Go to amcrest.com/firmware • You will be taken to an Amcrest firmware downloads page. Search for the model number of your camera and download the latest firmware file. • Return to the web user interface for your camera and press the Browse button to locate and import the firmware file you just downloaded. -
Page 47: Alarm
Enable: This checkbox enables the remote log menu. IP Address: Enter the IP address of the device being logged. Connection: Enter the Port number of the remote device. (1~65534) Device Number: Enter the number for your device here. This will be how the devices are viewed in the log. Online Users This screen allows the user to see which users are online. -
Page 48: Logout
The table on the right shows the alarm log and all the alarm instances that have occurred. The checkboxes allow the user to narrow down which alarms they want to see in the alarm log. Clicking the checkbox next to Prompt will cause the system to pop up a dialog box anytime an alarm is triggered. Clicking the checkbox next to Play Custom Alarm will use a custom alarm sound for the alarm prompt. -
Page 49: Glossary Of Terms
• Web access may be setup incorrectly. • The username or password may be incorrect. 7. Web Access live view is only displaying a static picture. 8. Below are a few possible reasons why this may be occurring: • The network speed is not enough to transfer video data via web access. •... -
Page 50: Fcc Statement
• S/N – S/N stands for serial number. The S/N is unique to each camera and can be used to connect to different Amcrest apps and services to provide different methods of access to the camera. • Sensitivity – Sensitivity is the amount of change required to increase the motion detected by a percentage. The lower the sensitivity, the more movement is required to trigger an alarm. -
Page 51: Ic Warning Statement
user's authority to operate the equipment. In cases where the manual is provided only in a form other than paper, such as on a computer disk or over the Internet, the information required by this section may be included in the manual in that alternative form, provided the user can reasonably be expected to have the capability to access information in that form. - Page 52 To contact Amcrest support, please do one of the following: Visit http://amcrest.com/contact and use the email form Call Amcrest Support using one of the following numbers Toll Free US: (888) 212-7538 International Callers (Outside of US): +1-713-893-8956 USA: 713-893-8956 Canada: 437-888-0177...
Need help?
Do you have a question about the IP4M-1041B and is the answer not in the manual?
Questions and answers