Advertisement
Quick Links
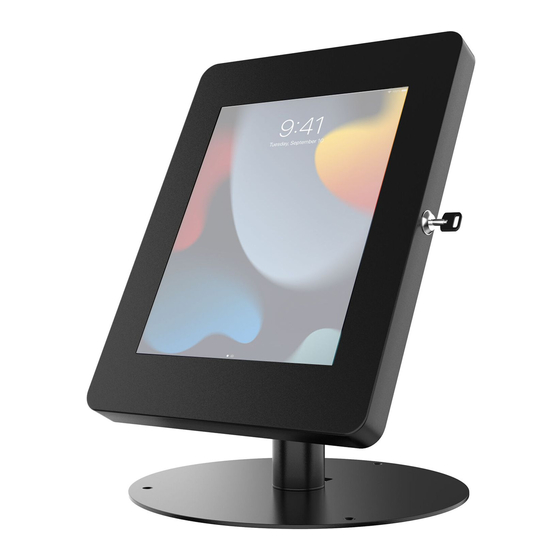
Hyperflex Security Kiosk Stand for Tablets
CONTENTS:
A
x1
INSTALLATION:
1. Assembling Base
J
3. Attaching and Setting up Enclosure
F
3A. Screw in the (4) screws (H) from behind through the enclosure and VESA,
while holding the hex nuts (I) from the front using the allen key tool (J) until
securely tightened.
PAD-HSKSB / PAD-HSKSW
INSTALLATION - MANUAL
B
x1
C
x1
A
1A. Align holes at the base (B)
with the holes on the base of
the body (A). Screw in bolts (E)
B
with the provided allen key tool
(J) as shown.
E
**Cables shown for illustration
and NOT INCLUDED.
G
C
A
F
D
x4
x2
M5 x 12
E
G
x4
x4
M5 x 8
M5 Hex Nut
2. Cable Managing
B
2A. Identify the hole at the bottom of the
base (B) through where cable routing
should go. Then, fish the cable.
3B. Once the enclosure is attached, fish the cable
through its rear holes to charge the device.
J
x1
M5 Allen Key
I
H
x3
x3
**Cables shown for illustration
and NOT INCLUDED.
A
2B. Fish the cord through the base and out of the top
to properly tuck away cord as shown above.
3C. Make sure to pop out and off the opening
covers in order to use enclosure at full capacity
and have access to key ports and openings.
K
x1
Foam Adapter & Sheet Bundle
Advertisement

Related Manuals for CTA PAD-HSKSB


Summary of Contents for CTA PAD-HSKSB
- Page 1 Hyperflex Security Kiosk Stand for Tablets PAD-HSKSB / PAD-HSKSW INSTALLATION - MANUAL CONTENTS: M5 Allen Key M5 x 12 M5 x 8 M5 Hex Nut Foam Adapter & Sheet Bundle INSTALLATION: 1. Assembling Base 2. Cable Managing **Cables shown for illustration and NOT INCLUDED.
- Page 2 Setting Up Device & Enclosure **Tablet shown for illustration and NOT INCLUDED. Insert the appropriate foam piece (K) Insert tablet as shown. Plug in power Place the appropriate provided tablet Close the enclosure and lock it that is compatible with your tablet. cable to tablet and cable route cover (K) to match your tablet.
Need help?
Do you have a question about the PAD-HSKSB and is the answer not in the manual?
Questions and answers