Table of Contents
Advertisement
Quick Links
Advertisement
Table of Contents

Related Manuals for AGFA Drystar 4500


Summary of Contents for AGFA Drystar 4500
- Page 1 Drystar 4500 User manual...
- Page 2 Agfa-Gevaert N.V. shall under no circumstances be liable for any damage arising from the use or inability to use any information, apparatus, method or process disclosed in this document.
-
Page 3: Table Of Contents
Privacy and security ..................15 Operating modes ..................16 Control modes (local and remote) ............... 18 The user interface ..................19 Switching on the Drystar 4500 ..............26 Switching off the Drystar 4500 ..............28 ...........29 Chapter 2: Basic operation (operator mode) Overview of operator functions ..............30... - Page 4 4500 U RYSTAR SER MANUAL ............77 Appendix B: Quality Control Charts 2801E EN 20050215...
-
Page 5: Chapter 1: Introducing The Drystar 4500
Chapter Introducing the Drystar 4500 This chapter introduces the Drystar 4500 to the user and draws attention to important safety precautions. Drystar 4500 features Safety precautions Security precautions Safety compliance Privacy and security Operating modes Control modes (local and remote) -
Page 6: Drystar 4500 Features
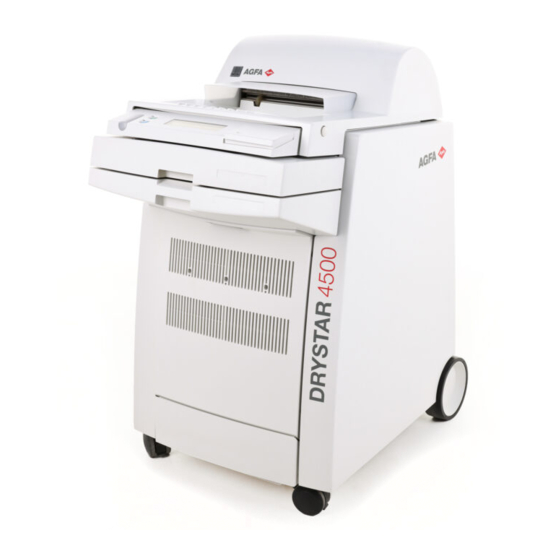
RYSTAR SER MANUAL Drystar 4500 features The Drystar 4500 is a dry digital printer for producing diagnostic black and white hard copies. It can use both 8x10” and 10x12” blue-based and clear- based film and offers crisp, dense grayscale images. - Page 7 Transmitting Stations. The functionality of the Drystar 4500 is completely controlled via the network. " You can control the working of the Drystar 4500 via the local keypad or via a " remote PC featuring a browser page functionality.
- Page 8 Drystar 4500 Reference manual. Consumables. " Drystar The Drystar 4500 can handle Drystar DT 1 B and DT 1 C consumables, both in 8x10” and in 10x12” format. Optional features Postscript connectivity. " A Postscript software module can be installed as an option. No hardware modifications are required prior to the installation of the Postscript module.
-
Page 9: Safety Precautions
AGFA positively will not assume any liability in these cases. It is advisable to switch off the Drystar 4500 if you do not have to use it for a period longer than one day. When operating or maintaining the Drystar 4500, always observe the... - Page 10 In order to reduce the risk of electric shock, do not remove any covers. Type B equipment: Indicates that the Drystar 4500 complies with the limits for type B equipment. Supplementary protective earth connector: Provides a connection between the Drystar 4500 and the potential equalization busbar of the electrical system as found in medical environments.
- Page 11 The appliance can only be transported with all covers closed. The appliance may not be transported continuously from one location to the other. To prevent injuries, lock the brakes when the Drystar 4500 is in place at the right location. Waste disposal and environmental regulations In most countries Drystar film is considered industrial waste and consequently it is not allowed to dispose of it as household waste.
-
Page 12: Security Precautions
Printed images should be treated as patient records and should only be viewed by authorized personnel. It is good practice not to delete images from the modality, until they have been correctly printed. Introducing the Drystar 4500 2801E EN 20050215... -
Page 13: Safety Compliance
CSA 22.2 No. 601.1-M90 of the Canadian Standards Association • FDA 510k • FDA Part 820 Good manufacturing Practice for Medical devices • IEC 601-1 and IEC 601-1-1 • • VDE 0750 Teil 1 (12.91) • TÜV • 2801E EN 20050215 Introducing the Drystar 4500... - Page 14 RYSTAR SER MANUAL Labels The Drystar 4500 carries the CE, TÜV, cULus and CCC labels. To find the label location Press the button [1] on the right hand side to open [2] the top cover. The label is visible at the inside of the printer at the left.
-
Page 15: Privacy And Security
Insurance Portability and Accountability Act) and to meet the IHE standards (Integrated Healthcare Enterprise) some security features are included in the user interface of the Drystar 4500 (available via the web pages only: under ‘Security tools’. Refer to ‘Controlling the Drystar 4500 via the browser’... -
Page 16: Operating Modes
4500 U RYSTAR SER MANUAL Operating modes The Drystar 4500 can be operated in four modes: operator mode, key- operator mode, service mode and specialist mode. Operator mode The operator mode groups all basic functions which are aimed at radiographers without special technical skills: Producing diagnostic usable hard copies;... - Page 17 The Administrator mode functions are reserved for the System Administrator. The Administrator mode is password protected and is only accessible by browser via a remote PC. Refer to ‘Privacy and security’ on page 15. 2801E EN 20050215 Introducing the Drystar 4500...
-
Page 18: Control Modes (Local And Remote)
RYSTAR SER MANUAL Control modes (local and remote) You can control the working of the Drystar 4500 via the local keypad or via a remote PC. The table below gives an overview of the operating modes you can access locally or via the remote PC. -
Page 19: The User Interface
Film input tray (Upper input tray) Film input tray (Lower input tray) Never try to open the printer or a film input tray when the Drystar 4500 is busy printing a film. Always follow the instructions on the display! 2801E EN 20050215... - Page 20 4500 U RYSTAR SER MANUAL The status indicator LED At the left side of the display, a LED indicates the status of the Drystar 4500: Color / Light Status Action Ready (standby) Proceed Constant Green Busy or in key- Wait...
- Page 21 SER MANUAL Audio signals The Drystar 4500 gives status information via beeps. The length of the beep indicates the response of the system to a key command. A short beep means that Drystar 4500 has accepted the key command and •...
- Page 22 4500 U RYSTAR SER MANUAL The Drystar 4500 keypad features the following keys: To rearrange the print queue: emergency jobs can Emergency be placed at the top of the queue to be printed with priority. Refer to ‘Assigning emergency priority’...
- Page 23 You can hold down an arrow key to scroll quickly through a list or a menu. The display The Drystar 4500 control panel has a backlit LCD display. We distinguish two panel types depending on the selected language: a backlit LCD display with 8 lines for Western languages (e.g. Dutch, •...
- Page 24 In operator mode, appropriate information is displayed, in accordance with the status of the printer. The operator basic screen looks as follows, indicating that the Drystar 4500 • is ready for operation and that no job is currently being executed.
- Page 25 Press and hold down a key to repeat arrow key actions. • To accept an entry in a menu, press the Confirm key. • A short beep acknowledges and terminates the entry. • 2801E EN 20050215 Introducing the Drystar 4500...
-
Page 26: Switching On The Drystar 4500
‘Security precautions’ on page 12. Follow the procedure below to ensure proper start-up of the Drystar 4500 and to check that everything is working correctly. Check that the power cord is plugged in and then switch on the printer by pressing the Power/Reset button. - Page 27 Make sure that the printer is loaded with appropriate consumables. Refer to ‘Loading films’ on page for detailed information on loading films. If the job status holds a warning or error indication, refer to ‘Troubleshooting checklists’ on page 67. 2801E EN 20050215 Introducing the Drystar 4500...
-
Page 28: Switching Off The Drystar 4500
Do NOT press the Power/Reset button without first pressing the Stop button when the Drystar 4500 is busy printing a film. Do NOT open the printer or an input tray before performing this procedure. -
Page 29: Chapter 2: Basic Operation (Operator Mode)
Overview of operator functions Managing the print queue Assigning emergency priority Deleting print jobs About Drystar 4500 consumables Changing the film format of the lower tray Loading films... -
Page 30: Overview Of Operator Functions
RYSTAR SER MANUAL Overview of operator functions This section focuses on the basic operating principles of the Drystar 4500. After reading this chapter, the operator should be able to produce diagnostic usable hard copies. No special technical skills are required. -
Page 31: Managing The Print Queue
Drystar 4500. Refer to the User manual of the acquisition modality for more information. - Page 32 4500 U RYSTAR SER MANUAL The other lines give information on the jobs that are still waiting in the print queue. A description of the possible status of each job is listed in the table below: Status Description Action Printing of this job is in Printing progress.
-
Page 33: Assigning Emergency Priority
4500 U RYSTAR SER MANUAL Assigning emergency priority You can assign emergency priority to jobs that need to be printed with urgency. Jobs that are marked for priority handling are placed at the top of the print queue for immediate processing. Emergency jobs will be printed before other jobs that were received previously. -
Page 34: Deleting Print Jobs
4500 U RYSTAR SER MANUAL Deleting print jobs You can remove jobs from the print queue if they are in the ‘waiting status’. However, any pending jobs that are already being calculated or scheduled for printing will be finished. Those jobs can not be deleted. On the keypad, press the Delete key. - Page 35 4500 U RYSTAR SER MANUAL Press the Confirm key to delete the print job. Printing will be resumed with the next job. The job that has been deleted will not be printed. 2801E EN 20050215 Basic operation (operator mode)
-
Page 36: About Drystar 4500 Consumables
RYSTAR SER MANUAL About Drystar 4500 consumables The Drystar 4500 can handle blue-transparent and clear-transparent films. Available film formats are 8x10” or 10x12”. The printer has 2 input trays. The upper input tray always uses 8x10” films and the lower input tray can use either 8x10” or 10x12” films. - Page 37 4500 U RYSTAR SER MANUAL Appropriate labels have been applied on the film trays by the service personnel, indicating the type of new film to be loaded when the tray is empty. 2801E EN 20050215 Basic operation (operator mode)
-
Page 38: Changing The Film Format Of The Lower Tray
Refer to ‘Changing the film format of the lower tray’ on page of the Drystar 4500 Reference manual. Proceed as follows to perform the mechanical modification: Open the lower input tray completely to make the tray accessible. Basic operation (operator mode) - Page 39 4500 U RYSTAR SER MANUAL Remove any remaining film sheets. To adjust the film format from 10x12” to 8x10”, pull out the partition clips and put them upright. 2801E EN 20050215 Basic operation (operator mode)
- Page 40 To adjust the film format from 8x10” to 10x12”, push the partition clips down. Adjust the ‘film format’ parameters in the Change setting screen. Refer to ‘Changing the film format of the lower tray’ on page of the Drystar 4500 Reference manual. Basic operation (operator mode) 2801E EN 20050215...
-
Page 41: Loading Films
The Drystar 4500 can be loaded with both 8x10” and 10x12” films. The Drystar 4500 can be loaded with new films in full daylight. Loading films is easy and can be done in no time. Follow the procedures as described in this section. - Page 42 Press the STOP button Do NOT press the Power/Reset button without first pressing the Stop button when the Drystar 4500 is busy printing a film Press the Stop button to initiate the stop sequence. Wait while the printer is finishing printing any current jobs.
- Page 43 4500 U RYSTAR SER MANUAL Film loading procedure: The printer is ready to be loaded with new films when the following message appears: Blinking OPEN THE INPUT TRAY Open the empty input tray completely to make the tray accessible. 2801E EN 20050215 Basic operation (operator mode)
- Page 44 When you have to load a film of another type, you will have to change the film type settings first. ‘Changing the configuration settings’ on page of the Drystar 4500 Reference manual. Basic operation (operator mode) 2801E EN 20050215...
- Page 45 Make sure not to load more than one film pack in an input tray. Loading more than one film pack in an input tray may damage the Drystar 4500. 2801E EN 20050215 Basic operation (operator mode)
- Page 46 4500 U RYSTAR SER MANUAL Verify that the film pack is kept in place under the two retainers. Close the input tray. The Drystar 4500 resumes printing as soon as the tray is closed. Basic operation (operator mode) 2801E EN 20050215...
-
Page 47: Chapter 3: Advanced Operation (Key-Operator Mode)
Chapter Advanced operation (key-operator mode) This chapter gives an overview of functions for the advanced user: Overview of key-operator functions Quality Control Preventive maintenance schedule Cleaning the exterior Cleaning the cooling air flow holes Print head cleaning Troubleshooting checklists... -
Page 48: Overview Of Key-Operator Functions
The key-operator menus make it possible to use the Drystar 4500 advanced functions. These functions are described in detail in the Drystar 4500 Reference manual. For general information on the functions of the keys on the Drystar 4500, refer to ‘The user interface’... -
Page 49: Quality Control
In order to establish and maintain consistent image quality, a regular evaluation of the image quality is advised. The Drystar 4500 contains an automatic QC feature that has been designed to comply with the grayscale reproduction constancy test, according to the international standard IEC 1223-2-4. - Page 50 SER MANUAL Establishing the reference values and verifying image quality After installation of a new Drystar 4500 and before initial use you must establish Quality Control aim values. These values will be used as the base line for comparison when daily Quality Control is done. These values should be determined again after major service, repair or software update.
- Page 51 Mid density • High density • The densitometer of the Drystar 4500 is calibrated at installation. Authorized service personnel should recalibrate the densitometer annually or after major service or repair. To establish the daily operating levels, proceed as follows: Press the Key-operator key to enter the Key-operator mode.
- Page 52 Drystar 4500 Reference manual and ‘Preventive maintenance schedule’ on page 61, or call your local Agfa service organization. Record the density levels on the Drystar 4500 Chart 1 (‘Determination of the operating levels’). Refer to ‘Quality Control Charts’ on page 77.
- Page 53 RYSTAR SER MANUAL Record the respective aim (average) values as the ‘Operating levels’ on the Drystar 4500 Charts 2a and 2b (‘daily Drystar 4500 control chart’). Refer to ‘Quality Control Charts’ on page 77. The calculated ‘Operating levels’ should be as follows:...
- Page 54 4500 U RYSTAR SER MANUAL Establishing the image geometry reference values To establish the image geometry reference values, proceed as follows: Print the QC test image or use the previously printed test image. You should obtain an image looking like this (without the dimensions A and B): QC test image Max (100%) Max (100%)
- Page 55 SER MANUAL Record these values as reference dimensions A on the Drystar 4500 ref and Chart 4 (‘Drystar 4500 Geometric Consistency Control Chart’). Refer to ‘Quality Control Charts’ on page 77. These charts will be used for the annual quality test. For more information, refer to ‘Performing the Annual QC tests’...
- Page 56 54) and the upper circle (refer to item 2 on the ‘QC test image’ on page 54). Record these values at the top of the Drystar 4500 Chart 3 (Drystar 4500 Artifacts and Spatial Resolution Control Chart). Refer to ‘Quality Control Charts’ on page 77.
- Page 57 Performing the daily QC test This test must be performed every day before any clinical film can be processed. Turn on the Drystar 4500 and wait at least for 15 minutes. Refer to ‘Switching on the Drystar 4500’ on page 26.
- Page 58 Default densitometer e.g. Macbeth TR924 Record the low, mid and high density values on the Drystar 4500 Charts 2A and 2B (Drystar 4500 Daily Density Control Chart’). Also record the date and time of the test on the charts and on the QC test images. Refer to ‘Quality Control...
- Page 59 2 on the ‘QC test image’ on page 54). Record these values on the Drystar 4500 Chart 3 (Drystar 4500 Artifacts and Spatial Resolution Control Chart). In case of significant artifacts, insufficient spatial resolution or failure of any other recommended QC tests, the cause of the problem must be identified, and corrective action must be taken before the Drystar 4500 can be used for any further clinical imaging.
- Page 60 We strongly recommend using a 30 cm (12 inch) machinist scale with 0.5 mm divisions (1/64 inch). Record these values as measured distances A and B on Chart 4 (‘Drystar 4500 Geometric Consistency Control Chart’). Compare the measured A and B dimensions with the reference dimension...
-
Page 61: Preventive Maintenance Schedule
• Do not touch the resistor line of the print head. • Always switch off the Drystar 4500 and disconnect the power cord from • the outlet before carrying out any maintenance work inside the printer. Film jam removal or cleaning the printer head can be done without switching the power off. -
Page 62: Cleaning The Exterior
4500 U RYSTAR SER MANUAL Cleaning the exterior Switch off the Drystar 4500 by following the procedure as described in ‘Switching off the Drystar 4500’ on page 28. Remove the power plug from the socket. Remove the network cable. Wipe the exterior of the printer with a clean, soft, damp cloth. -
Page 63: Cleaning The Cooling Air Flow Holes
4500 U RYSTAR SER MANUAL Cleaning the cooling air flow holes Switch off the Drystar 4500 by following the procedure as described in ‘Switching off the Drystar 4500’ on page 28. Remove the power plug from the socket. Remove the network cable. -
Page 64: Print Head Cleaning
‘Maintaining image quality and resolving image quality problems’ on page of the Drystar 4500 Reference manual. Press the Key-operator key to enter the Key-operator mode. Press the Down key five times, followed by the Confirm key to select ‘Calibration’. - Page 65 4500 U RYSTAR SER MANUAL Open the front cover by pulling its handle. Locate and check on sight the print head resistor line. Be careful not to touch the print head resistor line. 2801E EN 20050215 Advanced operation (key-operator mode)
- Page 66 4500 U RYSTAR SER MANUAL Clean the print head resistor line. Gently pass over the resistor line a few times with a lint free cloth slightly moistened with Isopropyl alcohol or Ethanol. Do this in only one direction, i.e. from left to right, without lifting the cloth.
-
Page 67: Troubleshooting Checklists
SER MANUAL Troubleshooting checklists The table below lists some general problems which can occur when working with the Drystar 4500. Refer to the appropriate pages of the Drystar 4500 Reference manual. The Drystar 4500 does not print. • (Ref. Action Refer to man.) - Page 68 4500 U RYSTAR SER MANUAL The quality of the printed images is bad (printing remains possible). • (Ref. Action Refer to man.) Page ‘Maintaining image quality and resolving image quality problems’ ‘White dots or lines appear in the Resolve film quality problems transport direction’...
-
Page 69: Appendix A: Equipment Information Sheet
Appendix Equipment information sheet... -
Page 70: Specifications
4500 U RYSTAR SER MANUAL Specifications Product description Type of product Printer Commercial name Drystar 4500 Original seller/manufacturer Agfa-Gevaert N.V. Labelling TÜV-, cULus-Certification Mark, CE-marking CCC Mark A#Sharp Mark Dimensions • Unpacked: width 55, length 72, height 92 Dimensions (approx. values in cm) •... - Page 71 4500 U RYSTAR SER MANUAL Network connectivity RJ45 twisted pair for 10/100Base-TX; Ethernet / connectors Serial RS232 connection FTP, Telnet, HTTP, SNMP, SMTP, LPD, Network protocols (TCP/IP services) Helios DICOM (Default) Image formats TIFF Postscript Optional Power consumption - heat dissipation During operation 350 W In standby...
- Page 72 Direct thermal printing Reliability Estimated product life (if regularly serviced and maintained > 5 years and > 150,000 films according to Agfa instructions) Service interventions Max. 2 interventions / 3 years Earthquake (standard) Meets the CA requirements Imaging Array - Diagnostic area 10”...
-
Page 73: Viewing The System Info Area On A Film
The System info area contains info about: Printer: (serial number, densitometer info, film counts, software version, • etc.), Controller (image source, date, time, etc.). • For more detailed information, refer to the Drystar 4500 Service documentation. 2801E EN 20050215 Equipment information sheet... -
Page 74: Options And Accessories
Options and accessories Accessory Mobile installation kit The default installation kit allows you to use the Drystar 4500 in a van, or to use it in unstable environment. Safe transportation is ensured by two fixation bars that lock the Drystar 4500 to its location (see illustration below). -
Page 75: Connectivity
Drystar 4500 is a Dicom printer and can therefore be connected to all modalities supporting Dicom. Although, to ensure optimal operation and image quality, Agfa has made the effort to test and release the Drystar 4500 with most of the modalities on the market. For the complete list or if you want to check on a specific modality, contact your Agfa representative. - Page 76 4500 U RYSTAR SER MANUAL Equipment information sheet 2801E EN 20050215...
- Page 77 Appendix Quality Control Charts...
- Page 78 4500 U RYSTAR SER MANUAL Chart 1 Drystar 4500: Determination of Operating Levels Imager Type: __________ Serial #: _________________ Date ____________________ Film Type: ____________ Emulsion #: ______________ Densitometer Internal: _________________ (default selection) Step 1: Print QC Test images on five consecutive days. Record the optical densities measurements in the tables below.
- Page 79 4500 U RYSTAR SER MANUAL Chart 2A Drystar 4500 Daily Density Control Chart Imager Type: __________ Serial #: _____________ Film Type:____________ Emul #:___________ Densitometer Internal: ____________________ (default selection) Da te : Initia ls: Upper Control limit = Low Density +0.05...
- Page 80 4500 U RYSTAR SER MANUAL Chart 2B Drystar 4500 Daily Density Control Chart Imager Type: __________ Serial #: _____________ Film Type:____________ Emul #:___________ Densitometer Internal: ____________________ (default selection) Upper Control limit = +0.20 High Density High Density Aim Lower Control Limit = -0.20...
- Page 81 4500 U RYSTAR SER MANUAL Chart 3 Drystar 4500 Artifacts and Spatial Resolution Control Chart Test Frequency: Weekly Drystar 4500 Serial # _____________ Initial Reference Test Date Initial Reference Artifacts Initial Reference Dot Visibility Initial Reference Low Contrast Month Artifacts...
- Page 82 4500 U RYSTAR SER MANUAL Chart 4 Drystar 4500 Geometric Consistency Control Chart Test Frequency: Annually or as required Drystar 4500 Serial # ______________ Reference Dimensions Measured Dimensions Consistency Aspect Ratio Date: Date: Reference Dimensions Measured Dimensions Consistency Aspect Ratio...
- Page 83 4500 U RYSTAR SER MANUAL 2801E EN 20050215 Quality Control Charts...
- Page 84 Printed in Belgium Published by Agfa-Gevaert N.V., B-2640 Mortsel-Belgium 2801E EN 20050215...
Need help?
Do you have a question about the Drystar 4500 and is the answer not in the manual?
Questions and answers