Advertisement
Quick Links
Operating and
Installation Instructions
Ceiling Fan
Model No. /
E48HP
E48GP
Net Weight /
Net Weight /
Complies with
IMDA Standards
DA108995
• E48HP
• E48GP
(E48HP) : 5.2 kg
(E48GP) : 5.5 kg
Operating and
Installation Instructions
Ceiling Fan
Thank you for purchasing this KDK product.
Before operating this product, please read the instructions
carefully, and save this manual for future use.
Contents
KDK
2 - 3
6
7
8 - 13
14 - 19
Back Cover
4 - 5
6
7
8 - 13
14 - 19
Advertisement

Related Manuals for KDK E48HP


Summary of Contents for KDK E48HP
-
Page 1: Table Of Contents
Model No. / Operating and E48HP Installation Instructions Ceiling Fan E48GP Thank you for purchasing this KDK product. Before operating this product, please read the instructions carefully, and save this manual for future use. Contents Safety precautions 2 - 3... -
Page 2: Safety Precautions
Safety precautions Always follow these instructions To avoid the possibility of causing injury to users or damage to properties, please follow all the explanations written below. This symbol denotes an action that is COMPULSORY. This symbol denotes an action that is PROHIBITED. WARNING A state that may be caused by the mishandling of products, which, if not avoided, may lead to the possibility of death or serious injury of users. - Page 3 Safety precautions Always follow these instructions CAUTION To avoid the possibility of causing injury to Avoid fi xing inside dome ceiling. users or damage to properties, please follow Can cause unstable air fl ow and affect Ceiling Fan to all the explanation written in this manual. The wobble.
- Page 4 (250-300 N•cm) (MCB)
-
Page 6: Maintenance
Maintenance Check the Ceiling Fan condition annually. If a problem occurs, stop using the Ceiling Fan. Then refer to authorized dealer. Check point: Loosened screws, safety wire condition, motor shaft damage, etc. Ensure the Safety Switch is in good condition. If a problem occurs, stop using the Ceiling Fan. -
Page 7: Name Of Parts
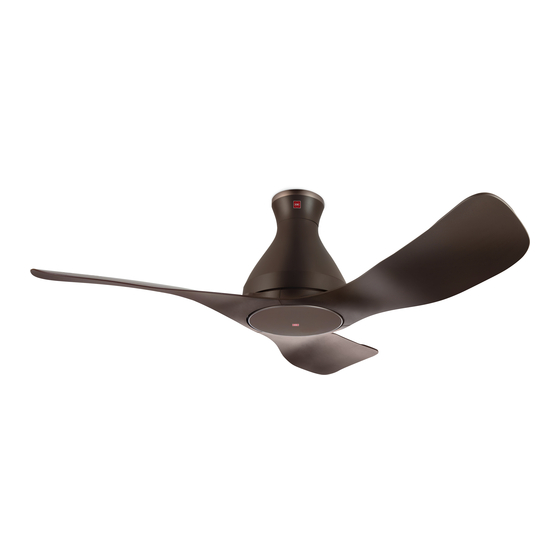
Name of parts • E48HP Carl Bolt Plug / Plain Washer / Spring Washer / Hexa Nut / • E48GP Parts piece(s) ……………………………………………………… 2 Upper Canopy …………………………………………… 2 ……………………………………………………… 2 Lower Canopy …………………………………………… 2 ………………………………………………… 1 Motor Unit ………………………………………………… 1 ……………………………………………………... -
Page 8: How To Install
How to install ■ ■ Install the Ceiling Hook Make 4 holes on the concrete ceiling. Drill hole ø 6.5 mm (depth 30 mm) for Carl Bolt Plug Drill 3 holes ø 10.5 mm (depth 45 mm) for Carl Bolt Plug Use blower to remove dust in the holes. - Page 9 How to install ■ ■ Install to Ceiling Remove the supplied Bolt , Nut , Cotter Pin and Pulley Ensure that the Hanger Base is not loosen. 20 N For reference, the Hanger Base can sustain 20 N. Place Pulley on the Hanger Base 1500-1800 N•cm Tighten the Pulley Set Plate...
- Page 10 Brown (Live) / Ferrite Core / Blue (Neutral) / LED Circuit PCB Assy / Green•Yellow (Earth) / • Sub PCB Assy / E48HP Wiring diagram / Litar pendawaian / Ceiling Fan / DC Motor / Safety Switch / Terminal / Source /...
- Page 11 How to install Connecting to the power supply / Only direct connection to wall switch is allowed. Please refer to fi gure below. Blue (Neutral) / Green•Yellow (Earth) / Rated voltage is mentioned on product. / Double poles single throw switch •...
- Page 12 How to install Assemble the Blade Assembly towards the Motor Unit Tighten the Blade Assembly fi rmly with the Blade Screws provided. 250-300 N•cm Use 2 screws for one Blade Assembly. For reference, tightening torque is 250-300 N•cm. Ensure the Blade Assembly screw hole is center with the Motor Unit screw hole.
- Page 13 How to install ■ ■ Installing the Upper Canopy Remove the Screw (2 pieces) from Upper Canopy Align and insert the Fixing Rib of Upper Canopy into the Slot of Lower Canopy Check the gap between the Upper Canopy ceiling is approximately 5 mm or more. The gap can be adjusted by fi...
-
Page 14: How To Use
How to use ■ ■ Before use Remove the Battery Cover of Remote Control Insert the Batteries (2 pieces AAA / R03 / LR03). AAA / R03 / LR03). • “+” “-” position should match. ˙ “+” “-” Close the Battery Cover ■... - Page 15 How to use ■ ■ Remote Control coverage > 1 m > 2.3 m The fi gure above shows the best coverage area (W) around 8 m. The ideal ceiling height (H) is 4 m. The Remote Control must be pointed to the direction of the Ceiling Fan when in use.
- Page 16 LIGHT SPEED WARM LIGHT NIGHT REVERSE REVERSE OFF/ON LIGHT • E48HP • E48GP OFF/ON Button OFF/ON Press to activate or stop the Ceiling Fan. “ON” - Short beeping sound. “ON” - “OFF” - Long beeping sound. “OFF” - ‘+’ SPEED Button ‘+’...
- Page 17 How to use ■ ■ Fan Speed Control Fan Speed can be adjusted by Remote Control. This fan is equipped with MEMORY FUNCTION to restore user’s last setting whenever fan is switched on. “+” “-” Press and hold “+” or “-” button to increase or decrease the speed gradually until reaching the desired condition.
- Page 18 How to use ■ ■ LED Color Temperature The color temperature of the LED light can be changed and adjusted by Remote Control. White Color “WHITE” ( Press and hold “WHITE” Color button to adjust the White color temperature gradually. “WARM”...
- Page 19 How to use ■ ■ Additional Ceiling Fan feature (Operate through App only) Download the App “KDK Ceiling Fan” to use below “KDK Ceiling Fan” App features. 1. Sleep mode Ceiling Fan speed and timer will gradually reduce until the fan is off.
-
Page 20: Specifi Cations
• Do not expose yourself continuously to direct wind from the • Ceiling Fan. It can cause discomfort. Printed in Malaysia KDK Company, Division of PES Head Office: 4017, Takaki-cho, Kasugai, Aichi, Japan. E48HP8001AM © KDK Company, Division of PES 2022 M0722-1082...
Need help?
Do you have a question about the E48HP and is the answer not in the manual?
Questions and answers