Advertisement
Quick Links
Application Instructions
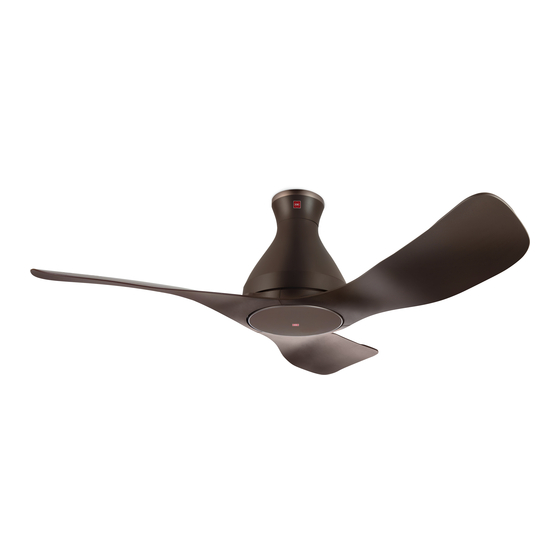
Ceiling Fan
Model No. /
E48HP
E48GP
Complies with
IMDA Standards
DA108995
Application Instructions
Ceiling Fan
Thank you for purchasing this KDK
product.
Before operating this product, please read the
instructions carefully, and save this manual for
future use.
Contents
KDK
2 - 3
4 - 5
5 - 10
11 - 12
13 - 25
26
27 - 30
2 - 3
4 - 5
5 - 10
11 - 12
13 - 25
26
27 - 30
Advertisement

Related Manuals for KDK E48HP


Summary of Contents for KDK E48HP
-
Page 1: Table Of Contents
Application Instructions Ceiling Fan Model No. / Application Instructions E48HP Ceiling Fan E48GP Thank you for purchasing this KDK product. Before operating this product, please read the instructions carefully, and save this manual for future use. Contents System Overview 2 - 3... -
Page 2: System Overview
Operating System is below Android 6 or iOS 12. • The Network Adaptor is designed specifi cally as a terminal for “KDK Ceiling Fan” ˙ “KDK Ceiling Fan” App. • The Wi-Fi network coverage must reach the ceiling fan ˙ Wi-Fi installation location. - Page 3 LIGHT SPEED WARM LIGHT NIGHT REVERSE REVERSE OFF/ON LIGHT • E48HP • E48GP OFF/ON Button OFF/ON Press to activate or stop the Ceiling Fan. “ON” - Short beeping sound. “ON” - “OFF” - Long beeping sound. “OFF” - ‘+’ SPEED Button ‘+’...
-
Page 4: How To Prepare For Setup
Android 6 iOS 12 • Open Play Store. / Play Store • Open App Store. / App Store • Search for “KDK Ceiling Fan” App. / “KDK Ceiling • Search for “KDK Ceiling Fan” App. / “KDK Ceiling Fan” Fan”... -
Page 5: How To Connect Product To Home Network
Login with Panasonic ID / Panasonic ID • For new user, press “Register” to register account. / “Register” • For registered user, login using your Panasonic ID and password. / Panasonic ID ■ Note / • If enter wrong password several times, it will be locked for about an hour or something. - Page 6 Long press the Remote Control button for 5 seconds. The Wi-Fi ceiling fan should start making beep sound and enter Wi-Fi setting mode. “Yes” “No” Press “Yes” if the buzzer is beeping. Otherwise, press “No” to repeat from beginning step. Two methods to connect product to network: 1 WPS Wi-Fi Method 1 WPS (Wi-Fi Protected Setup)
- Page 7 Connecting product to network Method 1 WPS (Wi-Fi 1 WPS (Wi-Fi Protected Setup) Press the “Speed +” button on the Remote Control. Make “Speed +” sure the beep sound has changed pattern. Press “Yes” if the “Yes” “No” buzzer is beeping. Otherwise, press “No” and refer to note. “Yes”...
- Page 8 2 AP ( Connecting product to network Method 2 AP (Access Point) • Continue from page 6 Method 2. If the WPS function is not available, connect the ceiling fan through manual setting. “Next” Ensure that the smart devices are connected to the desired network.
- Page 9 Press the “Speed -” button on the Remote Control. Make “Speed -” sure the beep sound is change pattern. Then press “Yes”. “Yes” “No” Otherwise, press “No”. Wi-Fi “Join” Wi-Fi For certain smart devices which prompt for Wi-Fi “Ceiling-Fan-wirelessAP” connection, press “Join” or select “Ceiling-Fan-wirelessAP” Wi-Fi from the Wi-Fi list.
- Page 10 Please ensure the SSID is correct. SSID Enter the password of Wi-Fi router. Then, press “Connect”. Wi-Fi “Connect” Confi rm that beeping changes to a 5-second long beep. “Yes” Then, press “Yes”. Otherwise, press “No”. “No” Only for iOS : iOS: Connect smart devices connection back to the Wi-Fi router.
-
Page 11: How To Register Product To Smart Devices
Product registration in the App ■ ■ Note : “KDK Ceiling Fan” • Products need to be registered before using “KDK Ceiling Fan” App. “Registration” Select one product to register by pressing “Registration”. Press “Yes” if the buzzer is beeping. Otherwise, press “No”... - Page 12 Confi rm that beeping changes to a 5-second long beep. After that, beeping should stop. “Yes” “No” Then press “Yes”. Otherwise, press “No”. ■ ■ Note : • This may take up to a few minutes. When registration page appear, type the Product name, “Register”...
-
Page 13: How To Use
How to use Use the “KDK Ceiling Fan” App “KDK Ceiling Fan” Press button to open the Main Menu. Main Menu will display. • Connected product - To check the product status. • Connected product - • Group - To check grouping status. - Page 14 Group Group Select designated product that like to group together. The “Edit group” group name can be changed under “Edit group”. Help Help For any inquiries, on Help page, user can access to “Help” Frequently Asked Question, Instruction manual, Terms of service, Copyright information and view the App version as well.
- Page 15 Main Screen setting / Refresh - Update the ceiling fan status. / Notifi cation - Warning message about the ceiling fan. / Group section - Group registered in the account. / All Control - Control all products in the group simultaneously.
- Page 16 Fan Setting / Light Setting* / Schedule function / Fan setting / Light setting / Timer setting / Light On/Off / Scene setting / Fan On/Off / Night Light mode / Fan speed selection / Light adjustment / Yuragi function On/ Off...
- Page 17 Group Control Setting • User can control all registered ceiling fans with one operation. “All Control” Press “All Control” button at main page. Choose the Fan or Light* setting (can choose to set Group control with fan only or light only or both). Press the “Operation”...
- Page 18 Scene Setting* (continue from page 17) • User can customize scene setting. Press light setting. Adjust the light setting according to preference. Press the scene setting. “Overwrite preset” Press “Overwrite preset”. Select one of the scene setting to be replaced. •...
- Page 19 Timer Setting • Timer setting is only applicable for fan function. To set the ON timer ■ ■ Note : • ON Timer can only be activated when ceiling fan is OFF. “ ” Press timer function button “ ”. Set the required hours and minutes for the fan to turn ON.
- Page 20 SLEEP MODE function • When the SLEEP MODE is enabled, the fan speed and timer will gradually reduce until the fan is turned off . • The operation pattern of SLEEP MODE: Fan reduces two speeds after every two hours (minimum speed 1), until ■...
- Page 21 Add Schedule Setting ■ ■ Note: • Ceiling fan can have up to 42 schedules only. “ ” Press the schedule button “ ”. “Add new schedule” Press “Add new schedule”. “ ” (If already has schedule, press “ ” at the top right of the screen) Select the day and time to operate the schedule.
- Page 22 Add Schedule Setting (continue from page 21) Select melody. (Melody selection only shows up after set “Fan - with operation” or “Light - with operation”) “Done” Then, press “Done”. “Save” Press “Save” to confi rm. “Yes” Press “Yes” to complete the settings. Edit Schedule Setting Press the schedule button “...
- Page 23 Copy schedule (to other day) “ ” “Edit” Select schedule button “ ” and press “Edit”. Choose the desired schedule to copy. “Copy” Press “Copy” at the bottom of the screen. “Copy” Choose the day you want to paste the copied setting, then press “Copy”...
- Page 24 Copy schedule (to other fan) Select schedule button “ ” and press “Edit”. “ ” “Edit” Press “Copy all”. “Copy all” Choose the product that you want to copy. Choose the product that you want to paste the copied “Back” setting, then press “Back”.
- Page 25 Delete Schedule Setting Press the schedule button “ ”. “ ” Press “Edit”. “Edit” “ ” Press “ ” button to select which schedule to delete. Press “Delete” button. “Delete” Press “Done”. “Done” Press “Save”. “Save” Press “Yes”. “Yes” ■ Note / •...
-
Page 26: How To Cancel Registration Of Ceiling Fan
How to cancel registration of ceiling fan ■ Note: ■ • After done below steps, the ceiling fan will be deleted from all App accounts that have been registered and the schedule settings will be cleared. If the fan is rotating, turn off using remote control. “Wi-Fi”... -
Page 27: Copyright
Legal Entity authorized to submit on behalf of the copyright owner. Contact information: For the purposes of this defi nition, “submitted” means any form of electronic, verbal, or KDK Fans Malaysia Customer Service. written communication sent to the Licensor or its representatives, including but not limited lwIP... - Page 28 Copyright You may add Your own copyright statement to Your modifi cations and may provide 3. Neither the name(s) of the above-listed copyright holder(s) nor the names of its additional or diff erent license terms and conditions for use, reproduction, or distribution contributors may be used to endorse or promote products derived from this software without of Your modifi...
- Page 29 Copyright We protect your rights with two steps: (1) copyright the software, and (2) off er you this c) Accompany it with the information you received as to the off er to distribute license which gives you legal permission to copy, distribute and/or modify the software. corresponding source code.
- Page 30 Copyright which is copyrighted by the Free Software Foundation, write to the Free Software Foundation; we sometimes make exceptions for this. Our decision will be guided by the two goals of preserving the free status of all derivatives of our free software and of promoting the sharing and reuse of software generally.
- Page 31 Memo...
- Page 32 Printed in Malaysia KDK Company, Division of PES Head Office: 4017, Takaki-cho, Kasugai, Aichi, Japan. E48HP8002AM © KDK Company, Division of PES 2022 M0722-1082...
Need help?
Do you have a question about the E48HP and is the answer not in the manual?
Questions and answers