Table of Contents
Advertisement
Quick Links
Advertisement
Table of Contents

Related Manuals for Bosch HRG6769.6


Summary of Contents for Bosch HRG6769.6
- Page 1 Built-in oven HRG6769.6 [en] Instruction manual Built-in oven...
-
Page 3: Table Of Contents
Table of contents [ e n ] I n s t r u c t i o n m a n u a l B u i l t - i n o v e n Intended use ......4 Time-setting options . -
Page 4: Intended Use
Children must not play with, on, or around the replacement parts and services can be found at appliance. Children must not clean the www.bosch-home.com and in the online shop www.bosch-eshop.com appliance or carry out general maintenance unless they are at least 15 years old and are being supervised. -
Page 5: Important Safety Information
Important safety information Water in a hot cooking compartment may Risk of scalding! (Important safety ■ create hot steam. Never pour water into the information cooking compartment when the cooking compartment is hot. G eneral information Warning – Risk of injury! I m p o r t a n t s a f e t y i n f o r m a t i o n Scratched glass in the appliance door may Warning –... -
Page 6: Meat Thermometer
Important safety information Hot steam is generated in the cooking Warning – Risk of harm to health! ■ compartment. Do not reach into the The cleaning function heats up the cooking cooking compartment during any operation compartment to a very high temperature so with steam. -
Page 7: Causes Of Damage
Causes of damage Inserting accessories: depending on the appliance ]Causes of damage ■ model, accessories can scratch the door panel when closing the appliance door. Always insert the accessories into the cooking compartment as far as G eneral information C a u s e s o f d a m a g e they will go. -
Page 8: Environmental Protection
Environmental protection Open the appliance door as infrequently as possible 7Environmental protection ■ when the appliance is in use. Y our new appliance is particularly energy-efficient. E n v i r o n m e n t a l p r o t e c t i o n Here you can find tips on how to save even more energy when using the appliance, and how to dispose of your appliance properly. -
Page 9: Getting To Know Your Appliance
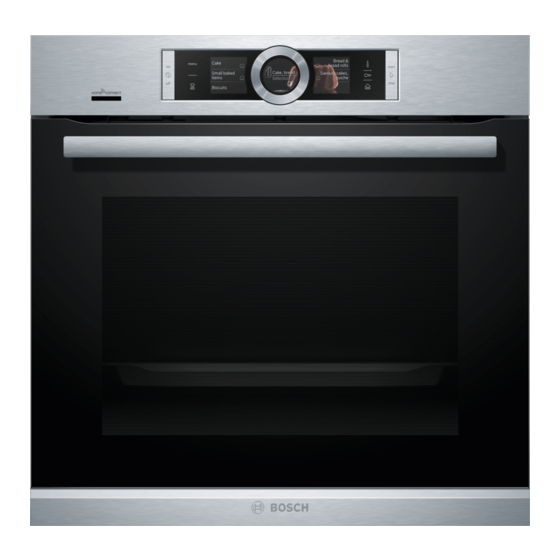
Getting to know your appliance Control panel *Getting to know your In the control panel, you can use the various buttons, appliance touch fields, touch-screen displays and the rotary selector to set the different appliance functions. The current settings are shown on the display. I n this section, we will explain the indicators and G e t t i n g t o k n o w y o u r a p p l i a n c e controls. -
Page 10: Display
Getting to know your appliance Rotary selector Temperature display You can use the rotary selector to change the setting After the operation has started, the current cooking values shown on the display. compartment temperature is displayed graphically on the display. You can also use the rotary selector to scroll through the selection lists on the touch-screen displays. -
Page 11: Types Of Heating
Getting to know your appliance Home Connect Assistant This function allows you to connect Basic settings You can change your appliance's your oven with a mobile device. basic settings to suit your needs. ~ "Home Connect" ~ "Basic settings" on page 27 on page 25 -------- Types of heating... -
Page 12: Steam
Getting to know your appliance Keeping warm * 60-100 °C For keeping cooked food warm. Preheat ovenware 30-70 °C For preheating ovenware. * Possible to use steam for this type of heating (operation only possible when the water tank is full) -------- Default values For each heating type, the appliance specifies a default... -
Page 13: Accessories
Accessories When using shelf positions 4 and 5, always insert the _Accessories accessory between the two guide bars for the shelf position. Y our appliance is accompanied by a range of Accessories can be pulled out approximately halfway A c c e s s o r i e s accessories. -
Page 14: Optional Accessories
Accessories Example in the picture: Universal pan Profi pan For preparing large quantities. Lid for the Profi pan The lid turns the Profi pan into a Profi roasting dish. Pizza tray For pizzas and large round cakes. Grill tray, Pyrolytic Use for grilling in place of the wire rack or as a splatter guard.Only use in the universal pan. -
Page 15: Before Using For The First Time
Before using for the first time With HomeConnect KBefore using for the first You can apply the initial settings on the appliance or time with Home Connect on your mobile device. Touch the "With Home Connect" text field. B efore you can use your new appliance, you must Follow the instructions in the "Home Connect"... -
Page 16: Operating The Appliance
Switching on the appliance Press the ÿ On/Off button to switch on the appliance. The Bosch logo appears on the display, followed by the selection list for the types of heating. In the basic settings, you can specify which... -
Page 17: Setting The Type Of Heating And Temperature
Steam Setting the type of heating and temperature corresponding default temperature appears on the display. If the "Types of heating" operating mode has not been selected, touch the "Types of heating" text field in the When you change the type of heating, the other Note: menu. -
Page 18: Steam Baking - Steam-Assisted Cooking
Steam The operation continues without adding steam. Control panel Note: You will hear a humming or clicking noise when opening the control panel. These noises are caused by Reheating the control panel being pushed out. They are normal operating noises. With the "Reheating U"... -
Page 19: Filling The Water Tank
Steam Touch the "Dough proving" text field. Notes The temperature is in focus. If your water is very hard, we recommend that you ■ Set the temperature using the rotary selector. use softened water. Touch the "Duration" text field and set the duration. If you use only softened water, you can set your ■... -
Page 20: After Every Steam Operation
Steam Refilling the water tank Cleaning the drip tray Allow the appliance to cool down. Notes Steam-assisted operations continue without adding Open the appliance door. ■ steam. Soak up the water in the drip trough ‚ with a sponge If the water tank runs dry during the operation with cloth and wipe it carefully (figure ■... -
Page 21: Time-Setting Options
Time-setting options Turn the rotary selector to set the cooking time. Drying the cooking compartment by hand The end time is calculated automatically. Allow the appliance to cool down. Remove any food remnants from the walls of the cooking compartment. Dry the cooking compartment with a sponge. -
Page 22: Setting The Timer
Time-setting options Setting the timer Applying settings The end of the cooking time can be delayed by a The timer runs alongside other settings. You can set it maximum of 23 hours and 59 minutes. at any time, even if the appliance is switched off. It has its own audible signal so that you can tell whether it is Example in the picture: It is 10:00, the set cooking time the timer or a cooking time which has elapsed. -
Page 23: Meat Thermometer
Meat thermometer Meat: For large pieces of meat, insert the meat probe at @Meat thermometer an angle from above as far as it will go into the meat. For relatively thin pieces of meat, insert the meat probe from the side at the thickest point. T he meat thermometer makes accurate cooking M e a t t h e r m o m e t e r possible. -
Page 24: Setting The Core Temperature
Meat thermometer Setting the core temperature Warning – Risk of burns! The cooking compartment, accessories and meat The meat thermometer must be inserted into the socket thermometer become very hot. Always use oven gloves on the left-hand side of the cooking compartment. to remove hot accessories and the meat thermometer from the cooking compartment. -
Page 25: Childproof Lock
Childproof lock The red bar next to the text field identifies the setting Food Core temperature in that is currently selected. °C Its corresponding value is shown on the display. Joint of veal, shoulder 75-80 Turn the rotary selector to change the value as required. -
Page 26: Power Cut
Sabbath mode FSabbath mode Operation after switching Main menu Types of heating* Steam W ith the Sabbath mode, a cooking time of up to 74 S a b b a t h m o d e Assist hours can be set. You can keep the food in the cooking compartment warm without having to switch the oven Night-time darkening Switched off*... -
Page 27: Home Connect
Home Connect Follow the instructions in the Home Connect app. oHome Connect Remote Start T his appliance is Wi-Fi-capable and can be remotely H o m e C o n n e c t controlled using a mobile device. To start and operate your appliance via the Home Connect app, you will need to activate remote start. -
Page 28: Remote Diagnostics
Home Connect app. down. Keep children at a safe distance. Declaration of Conformity Area Cleaning Robert Bosch Hausgeräte GmbH hereby declares that Appliance exterior the appliance which features Home Connect is in Stainless steel Hot soapy water: accordance with the basic requirements and the other... -
Page 29: Keeping The Appliance Clean
Cleaning agent Door panels Hot soapy water: Water tank Hot soapy water: Clean with a dish cloth and then dry with a soft Clean with a dish cloth and rinse thoroughly to cloth. remove residual detergent. Do not use a glass scraper or a stainless steel Then dry with a soft cloth. -
Page 30: Cleaning Function
Cleaning function When using the cleaning function, you can clean an .Cleaning function accessory at the same time, e.g. the universal pan or the baking tray. Remove any coarse food remnants manually before starting the cleaning function. Slide the Y our appliance has the "Pyrolytic self cleaning" and C l e a n i n g f u n c t i o n accessory in at level 2. -
Page 31: Descaling
Cleaning function Press the l Start/Stop button to start. First rinsing cycle (approx. 9–12 minutes), then ■ The cooking time counts down on the display. The empty and refill the water tank heating line does not appear for the cleaning Second rinsing cycle (approx. -
Page 32: Rails
Rails Clean the rails with cleaning agent and a sponge. For First rinsing cycle stubborn deposits of dirt, use a brush. Open the control panel. Remove the water tank, rinse thoroughly, fill with Attaching the rails water and reinsert. The rails only fit on the right or the left side. The pull-out Close the control panel. -
Page 33: Removing The Door Cover
Appliance door The hinges on the appliance door move when Open the appliance door fully. Fold both locking ■ opening and closing the door, and you may be levers closed again (figure " trapped. Keep your hands away from the hinges. Removing the appliance door Open the appliance door fully and push it in the direction of the appliance. -
Page 34: Removing And Installing The Door Panels
Appliance door Removing and installing the door panels Fitting the door on the appliance When fitting the intermediate panel, make sure that the To facilitate cleaning, you can remove the glass panels arrow is in the top right of the panel and that it aligns from the appliance door. -
Page 35: Trouble Shooting
Trouble shooting Rectifying faults yourself 3Trouble shooting You can often easily rectify technical faults on the appliance yourself. I f a fault occurs, there is often a simple explanation. T r o u b l e s h o o t i n g If a dish does not turn out exactly as you wanted, you Before calling the after-sales service, please refer to the can find many tips and instructions for preparation at... -
Page 36: Maximum Operating Time
Trouble shooting The "Fill water tank" message The panel is open Close the panel appears even though the water tank The water tank is not clicked Click the water tank into place is full into place ~ "Steam" on page 17 Faulty sensor Call the after-sales service The water tank has fallen off. -
Page 37: Customer Service
Customer service 4Customer service PDishes O ur after-sales service is there for you if your appliance Y ou can use the "Assist" operating mode to prepare a C u s t o m e r s e r v i c e D i s h e s needs to be repaired. -
Page 38: Selecting A Dish
Dishes Meat thermometer Categories Food For some food, you can also use the meat Vegetables thermometer. Once you have inserted the meat Menu thermometer into the appliance, the food that is suitable Reheat, crisp up for it will be displayed. You can change the interior Baked goods temperature of the cooking compartment and the core Side dishes... -
Page 39: Applying Settings For Dishes
Tested for you in our cooking studio Applying settings for dishes JTested for you in our You will be guided through the entire setting process for cooking studio your chosen food. Use the rotary selector to scroll through the individual H ere, you can find a selection of dishes and the ideal levels. - Page 40 Tested for you in our cooking studio Steam-assisted baking is only possible on one level. baking tins/dishes and using top/bottom heating, slide in the tin/dish at level 1. Some food turns out better if it is baked in several stages. These dishes are indicated in the table. The baking tins must be resistant to heat and steam for use in steam-assisted baking.
- Page 41 Tested for you in our cooking studio Types of heating used: The levels of steam intensity are indicated as numbers < 4D hot air in the table: ■ % Top/bottom heating ■ 1 = Low & Intensive heat ■ ■ 2 = Medium ■...
- Page 42 Tested for you in our cooking studio Dish Accessories/cookware Shelf posi- Heating Tempera- Steam in- Cooking tion function ture in °C tensity time in mins. Plaited loaf, savarin Baking tray 160-170 25-35 Plaited loaf, savarin Baking tray 150-160 25-35 < Swiss roll Baking tray 180-200*...
- Page 43 Tested for you in our cooking studio Dish Accessories/cookware Shelf posi- Heating Tempera- Steam in- Cooking tion function ture in °C tensity time in mins. Macaroons, 2 levels Universal pan + baking tray 90-110 25-45 < Macaroons, 3 levels Baking trays + universal pan 5+3+1 90-110 30-45...
-
Page 44: Bread And Rolls
Tested for you in our cooking studio Bread and rolls The baking tins must be resistant to heat and steam for use in steam-assisted baking. Your appliance offers you a range of heating types for Greaseproof paper baking bread and rolls. You can find the ideal settings Only use greaseproof paper that is suitable for the for many dishes in the settings tables. - Page 45 Tested for you in our cooking studio Types of heating used: The levels of steam intensity are indicated as numbers < 4D hot air in the table: ■ % Top/bottom heating ■ 1 = Low 7 Circulated air grilling ■ ■...
-
Page 46: Pizza, Quiche And Savoury Cakes
Tested for you in our cooking studio Dish Accessories Shelf posi- Type of Tempera- Grill Steam in- Cooking tion heating ture in °C setting tensity time in mins. Toast Toast with topping, 4 slices Wire rack 190-210 10-15 Toast with topping, 12 slices Wire rack 230-250 10-15... - Page 47 Tested for you in our cooking studio Preheating is necessary for selected food, and this is Types of heating used: indicated in the table. Do not place your food or < 4D hot air ■ accessories into the cooking compartment until it has % Top/bottom heating ■...
-
Page 48: Bakes And Soufflés
Tested for you in our cooking studio Bakes and soufflés The baking tins/dishes must be resistant to heat and steam for use in steam-assisted cooking. Your appliance offers a range of heating types for preparing bakes and soufflés. You can find the ideal Recommended setting values settings for many dishes in the settings tables. -
Page 49: Poultry
Tested for you in our cooking studio Bakes & soufflés Accessories/cookware Shelf posi- Type of Tempera- Steam in- Cooking tion heating ture in °C tensity time in mins. Soufflé Ovenproof dish 170-180 30-40 < Soufflé Individual moulds 170-190 65-75 Use uncovered cookware. Cookware must be heat- and Poultry steam-resistant. - Page 50 Tested for you in our cooking studio The individual pieces should be approximately equal in Poultry will turn out particularly crispy and brown if ■ size. you baste it towards the end of the roasting time with butter, salted water or orange juice. A general rule: the larger the poultry is, the lower the cooking temperature and the longer the cooking time.
-
Page 51: Meat
Tested for you in our cooking studio Dish Accessories/cookware Shelf posi- Type of Tempera- Grill Steam in- Cooking tion heating ture in °C setting tensity time in mins. Turkey thigh, with bone, 1 kg Wire rack 180-200 80-100 Turkey thigh, with bone, 1 kg Wire rack 170-180 80-100... - Page 52 Tested for you in our cooking studio and juicy. Place the food to be grilled directly onto the oven, you can reduce the indicated cooking times by wire rack. several minutes. Use tongs to turn the pieces of food you are grilling. If You can find information on roasts and default values you pierce the meat with a fork, the juices will run out for weights in the table.
- Page 53 Tested for you in our cooking studio Dish Accessories/cookware Shelf posi- Type of Tempera- Grill Steam in- Cooking tion heating ture in °C setting tensity time in mins. Pork steaks, 2 cm thick Wire rack 16-20 Pork medallions, 3 cm thick (pre- Wire rack 8-12 heat oven for 5 mins.)
-
Page 54: Fish
Tested for you in our cooking studio Fish When stewing, add two to three tablespoons of liquid and a little lemon juice or vinegar into the cookware. Your appliance offers you a range of heating types for Very hot steam may escape when opening the lid after preparing fish. -
Page 55: Vegetables And Side Dishes
Tested for you in our cooking studio Types of heating used: The levels of steam intensity are indicated as numbers < 4D hot air in the table: ■ % Top/bottom heating ■ 1 = Low 7 Circulated air grilling ■ ■... -
Page 56: Yogurt
Tested for you in our cooking studio Types of heating used: The levels of steam intensity are indicated as numbers < 4D hot air in the table: ■ ( Grill, large area ■ 1 = Low $ Pizza setting ■ ■... - Page 57 Tested for you in our cooking studio Tinplate baking tins, ceramic dishes or glass dishes Accessories prolong baking time, and the cake will not brown so Ensure that you always use suitable accessories and evenly. that they are placed in the oven the right way around. Greaseproof paper Wire rack Only use greaseproof paper that is suitable for the...
-
Page 58: Acrylamide In Foodstuffs
Tested for you in our cooking studio Dish Accessories/cookware Shelf posi- Type of Tempera- Cooking tion heating ture in °C time in mins. Bread rolls, fresh Baking tray 180-200 20-30 Meat Joint of pork without rind, e.g. neck, 1.5 kg Cookware, uncovered 180-190 120-140... -
Page 59: Drying
Tested for you in our cooking studio Type of heating used: . Slow cooking ■ Dish Cookware Shelf posi- Heating Searing time Tempera- Cooking tion function in mins ture in °C time in mins Poultry Duck breast, medium rare, 300 g each Cookware, uncovered 45-60 Chicken breast fillet, 200 g each, well Cookware, uncovered... -
Page 60: Preserving
Tested for you in our cooking studio will be and the more aromatic the dried food will Recommended setting values remain. Setting ranges are indicated for this reason. In the table, you can find settings for drying various foodstuffs. The temperature and cooking time are If you wish to dry additional foodstuffs, you should use dependent on the type, moisture, ripeness and similar foodstuffs in the table as a reference. -
Page 61: Setting
Tested for you in our cooking studio Type of heating used: < 4D hot air ■ Preserving Cookware Shelf posi- Type of Tempera- Cooking time in mins. tion heating ture in °C Vegetables, e.g. carrots 1-litre preserving jars 160-170 Before it starts bubbling:30-40 <... -
Page 62: Defrosting
Tested for you in our cooking studio Dish Accessories/cookware Shelf posi- Type of Step Tempera- Cooking tion heating ture in °C time in mins. Multigrain bread Bowl Dough fer- 35-40 25-40 mentation Universal pan Final fermen- 35-40 10-20 tation Bread rolls Bowl Dough fer- 35-40... -
Page 63: Keeping Warm
Tested for you in our cooking studio Type of heating used: U Reheating ■ Dish Accessories/cookware Shelf posi- Type of Tempera- Cooking tion heating ture in °C time in mins. Vegetables, chilled 1 kg Cookware, uncovered 120-130 15-25 250 g Cookware, uncovered 120-130 5-15... - Page 64 Tested for you in our cooking studio Types of heating used: Fatless sponge cake Fatless sponge cake on two levels: vertically stack < 4D hot air ■ springform cake tins in an offset manner on the wire % Top/bottom heating ■...
- Page 68 *9001584022* 9001584022 000819...
Need help?
Do you have a question about the HRG6769.6 and is the answer not in the manual?
Questions and answers