Table of Contents
Advertisement
Quick Links
Advertisement
Table of Contents

Related Manuals for Plockmatic BOOKLET MAKER Pro 30


Summary of Contents for Plockmatic BOOKLET MAKER Pro 30
- Page 1 BOOKLET MAKER Pro 30 and RCT 30 Operating Instruction Stapler Folder Reference Read this manual carefully before you use this product and keep it handy for future reference. For safety, please follow the instructions in this manual. Part no: 122-106738...
- Page 2 Warning: This is a Class A product. In a domestic environment this product may cause radio interference in which case the user may be required to take adequate measures. The product (System) which is connected to this machine will be class A Note The domestic environment is an environment where the use of broadcast radio and television recievers may be expected within a distance of 10 m of the apparatus concerned.
- Page 3 Introduction This manual contains instructions on the operation and maintenance of this machine. To get maximum versatility from this machine all operators should carefully read and follow the instructions in this manual. Keep this manual in a handy place near the machine. Please read the Safety Information before using this machine.
- Page 4 Safety Information When using this machine, following safety precautions should always be followed. Safety during operation WARNING: • To avoid hazardous situations like for instance electric shock or danger while exposed to moving, rotating or cutting devices, do not remove any covers, guards or screws other than those specified in this manual.
- Page 5 General safety, continued CAUTION: • The machine and its peripherals must be installed and maintained by a customer service repre- sentative who has completed the training course on those models. • Always follow all warnings marked on, or supplied with, the equipment. • When you disconnect the power plug from the wall outlet, always pull the plug (not the cable).
- Page 6 Page intentionally blank.
-
Page 7: Table Of Contents
TABLE OF CONTENTS What You Can Do With This Machine ..................11 Guide To Components ........................13 Booklet Maker ............................13 Options ............................16 Cover Feeder ............................. 16 Trimmer ..............................17 Square Folder ............................. 19 Control Panel ..........................27 1. Basics ....................29 Turning On / Off the Main Power ....................29 Booklet Maker, Cover Feeder, Trimmer and Square Folder ............... - Page 8 Air Separation ............................. 49 Double Sheet Detection ..........................49 Stacker Full Detection ..........................50 Service access ............................50 4. Jobs ....................51 Storing and deleting jobs ......................51 Storing a new Job ............................51 Recalling a Job ............................52 5. Clearing Misfeed(s) ................. 53 Clearing misfeed(s) ........................53 General ...............................
- Page 9 7. REMARKS ..................69 Do’s And Don’ts ..........................69 Where to put Your Machine ......................70 Machine environment ..........................70 Power connection ............................70 Access to machine ............................. 71 Maintaining Your Machines ......................72 Booklet Maker ............................72 Oil Clinchers and Stapler Heads ..................72 Cover Feeder .............................
- Page 10 Page intentionally blank.
-
Page 11: What You Can Do With This Machine
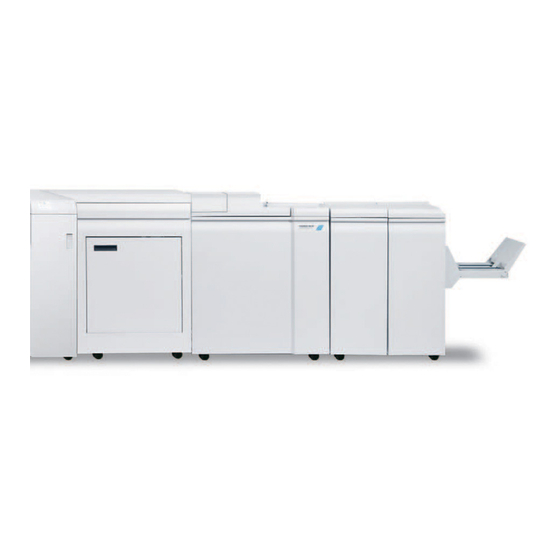
What You Can Do With This Machine CF30 Cover Feeder (optional) TR30 Trimmer (optional) SQF30 Square Folder (optional) RCT 30 Belt Stacker BM30 Booklet Maker The RCT 30, Booklet Maker BM30, Trimmer TR30, Square Folder SQF30 and Cover Feeder (CF300) forms a booklet making system that works online with the Printer. The print-outs are transported through the RCT 30 (optional) prior to entering the Booklet Maker. - Page 12 The BM30 Booklet making system is controlled from a single control panel on the Booklet Maker. The control panel has only four buttons which will allow you to easily set up, adjust and operate the complete system. The buttons are multi functional, meaning that the function of each button depends on the information displayed.
-
Page 13: Guide To Components
Guide To Components Booklet Maker Infeed assembly Main power switch Docking assembly Belt Stacker Hand feed cover Belt Stacker cover Top cover Control panel... - Page 14 Booklet Maker, continues Connections Fold stop gate POW SQF30 COM Copier Terminator/ Stacker Terminator COM TR30 Main Power Interlock jumper Interlock jumper/ POW TR30...
- Page 15 Booklet Maker, continues Stapler heads Stapler release latches Staple cartridges Staple detection leads Cartridge locking levers Hand feeding positioning labels...
-
Page 16: Options
Options Cover Feeder Paper orientation label Loading capacity mark Paper separator pad (also see Front side guide page 60) Air nozzle (2x) Feed roller assembly Jam clearance baffle Rear side guide... -
Page 17: Trimmer
Trimmer Top cover Trim bin Base Connections Stacker COM BM30 Power from Terminator/ BM30 Com SQF30... - Page 18 Trimmer, continues The Trimmer interior has parts that you will come in contact with if a misfeed occurs. Trimmer, top view Set counter Infeed roller shaft Trimmer stop Trimmer fan Outfeed latch Upper knife Exit compressing brackets Infeed latch Transport belt...
-
Page 19: Square Folder
Square Folder Top cover Trim bin Base Connections Terminator COM SQF30 POW SQF30 Stacker... - Page 20 Square Folder, continues The Square Folder interior has parts that you will come in contact with if a misfeed occur. Square Folder, top view, Upper feed belts in lifted up Lower feed belts Upper feed belts...
- Page 21 RCT 30 Top cover Infeed slot Upstream docking assembly Slide door...
- Page 22 RCT 30, continues Outfeed slot Trim waste transport Waste container Connections Downstream docking assembly...
- Page 23 RCT 30, continues Connections bracket COM Copier Terminator Terminator / COM TR30 Main power...
- Page 24 RCT 30, continues Operator, side top cover Infeed Section “A” Main switch Bleed trimmer circular knives Outfeed section “D”...
- Page 25 RCT 30, continues Latch handle, slide Bleed trimmer registration adjustment Creaser registration adjustment Waste chute(s)
- Page 26 RCT 30, continues Rotator Coarse registration, section “B” Fine registration, section “C” Creaser tools...
-
Page 27: Control Panel
Control Panel The Ready screen. When the system power is switched on the Ready screen will be shown. Here you will find information showing the actual set up. From this screen you can also access other screens, that will help you operate the complete Pro 30 Booklet making system. - Page 28 The Processing screen. This screen is shown when the machine is busy working. If the machine is used in off-line mode you do not have to wait for the Ready screen before handfeeding the next set. When the printer has cycled down in the middle of a set for any reason (load stock, refill etc.) the processing screen will be shown until the printer has completed the set/job.
-
Page 29: Basics
1. Basics Turning On / Off the Main Power Booklet Maker, Cover Feeder, Trimmer and Square Folder Plug the Booklet Maker and RCT 30 (optional) Power cords into the wall outlet. Cover Feeder (optional), Trimmer (optional) and Square Folder (optional) are powered from the Booklet Maker. -
Page 30: Check Staples, Staple Cartridge And Stapler Head
Check staples, Staple cartridge and stapler head Removing stapler head Open the top cover. Remove the set of paper. Disconnect the staple indication lead (A) from the socket. Hold the stapler head in place, press the release latch (B) to release the rear end of the stapler head and lift up this end. -
Page 31: Installing Stapler Head, Staple Cartridge / Clearing Staple Jam
Installing stapler head, staple cartridge / clearing staple jam Look inside stapler head for jammed staples in the area of the staple actuator. Remove staples if any. Position the stapler head on the edge of a firm surface (for example the top of a table). While securely holding the head, actuate the Stapler up and down through full travel. -
Page 32: Consumables
Consumables To reorder staples, please use following part numbers XNA 8R3838 XE 8R3839... -
Page 33: Emptying The Trim Bin
Emptying the trim bin Remove the trim bin by lifting it and pulling it out. trim bin, no Square Folder installed trim bin, with Square Folder installed... - Page 34 Page intentionally blank.
-
Page 35: 2. Making Booklets
2. Making Booklets Changing settings General procedure Changing of settings can be performed in two ways. Temporary, which means that the changes will remain until a new job is loaded or permanent, which means that the changes will be stored as a job. This job can later be recalled. Procedure for temporary changes: From the Ready screen, select the option you wish to change and press the [Change] button. -
Page 36: Selecting Standard Paper Sizes, Continues
Selecting standard paper sizes, continues If a RCT 30 is installed there is a selection of ready made job setups to facilitate quick and easy setup to process oversizes to nominal sizes. These are named with the suffix T like in SRA3T, SRA4T, 12”x18”T and 9”x12”T. The assumption for 12”x18T is that 12”x18” is printed and that it should be cut down to 11x17 which in turn results in a finished booklet of 8.5” x 11”. The assumption for 9”x12T is that 9”x12”... -
Page 37: Stapling
Stapling Selecting stapling On or Off From the Ready screen, select Staple and press the [Change] button. If stapling was On, the first choice will be Off and vice versa. Select On or Off with the [arrow] button and press the [OK] button. Trimming Selecting trimming On or Off From the Ready screen, select Trim and press the [Change] button. -
Page 38: Adjusting The Cutting Margin
Adjusting the cutting margin Select Trim and press the [Change] button. Select Trim length and press the [OK] button. Press the [+] or [-] buttons to fine adjust in increments of 0.5 mm or 0.02 inches. The trimmed booklet size and waste are displayed. Press the [OK] button to confirm. Covers Selecting Cover Feeder Mode From the Ready screen, select Cover and press the [Change] button. -
Page 39: Loading Covers
Selecting Cover Feeder Mode, continues The Purge mode is used when you want to completely empty the Cover Feeder from covers. Remove all cover sheets from the bin. Select Purge and press the [Run] button. The prefed cover sheet will now be fed into the Booklet Maker to the stapling area, but without being stapled. -
Page 40: Square Folding
Square Folding General The Square Folder has six different settings. It can be set to [Auto], [Mode 1], [Mode 2], [Mode 3], [Mode 4] or [Off]. In [Auto] mode, the Booklet Maker detects how many sheets there are in the booklet, and automatically set the Square Folder to the correct mode. -
Page 41: Rct 30
RCT 30 Rotator - Selecting On or Off From the Ready screen, select Rotator and press the [Change] button. Select if you want the Rotator to be On or Off. If rotator was Off, the first choice will be On and vice versa. When turned On the Rotator enables more sheets being run through in a shorter time. - Page 42 Creaser - Selecting Creaser Mode continues Choose either Fine or Coarse tool depending on how heavy the stock is. Normally Fine is selected for cover sheets less than 120 gsm (gsm= grams per square meter). The Crease Offset (whether Fine or Coarse) is initially set to the center (0.0 mm).
-
Page 43: Creaser - Selecting On Or Off
Creaser - Selecting On or Off If you want to turn the Creaser off select Off and press [Ok] to confirm. If Creaser was Off, the first choice will be Off and vice versa. Select On or Off with the [arrow] button and press the [OK] button. Bleed Trimmer - Selecting On or Off From the Ready screen, select Bleedt Trim and press the [Change] button. - Page 44 Bleed Trimmer - Selecting Bleed Trim Mode continues Width In collects its default value from the width of the Booklet Maker. Width In will most likely need to be changed if a new size is entered in the Booklet Maker. If you want to change the Width In value simply use the [+] or [-] buttons.
- Page 45 Bleed Trimmer - Selecting Bleed Trim Mode continues Change the Image Offset value with the [+] or [-] buttons and press the [OK] button to confirm. When pressing the [+] button the image will be closer to IB. When pressing the [-] button the image will be closer to OB. If you want to turn the Bleed Trimmer off select Off and press [Ok] to confirm.
-
Page 46: Bleed Trimmer - Bleed Trim Conflict
Bleed Trimmer - Bleed Trim Conflict *Bleed Trim Conflict* The trimmer of cut must be in-between 5 – 30mm. This is determined by the settings of 3 parameters: -The Width of the Booklet makers “Size” parameter -The “Width In” parameter. -The “Image Offset” parameter. Every time any one of these parameters is changed, the resulting of cut is re-calculated. -
Page 47: Tools
3. Tools The Tools Screen The Tools screen. From the Ready screen, press the [Tools] button to get to the Tools screen. Here you will find all the necessary tools for troublefree operation. Units From this screen you can change units, between millimeters and inches. Select Units with the [arrow] button and press the [OK] button. Select the millimeters or inch units and then press the [OK] button. -
Page 48: Language
Software version, continues Select the module in the system for which you want to check the software version and press the [OK] button. This screen will show software version(s) in the selected module. Language From this screen you can change the language in the user interface. -
Page 49: Air Separation
Air Separation From this screen you can increase or decrease the Air separation. This screen will only be shown if a Cover Feeder is present. Select Air separation with the [arrow] button and press the [OK] button. You might want to increase the Air flow when running thick, heavy covers. Set the desired speed in increments of 10% with the [+] or [-] buttons and press the [OK] button. -
Page 50: Stacker Full Detection
Stacker Full Detection From this screen you can turn the Stacker full det. On or Off. Select Stacker full det. with the [arrow] button and press the [OK] button. Select if you want the Stacker full det. to be On or Off. Press the [OK] button to confirm. -
Page 51: Jobs
4. Jobs Storing and deleting jobs The Booklet Maker has a maximum storage capacity of 10 different jobs. It is not possible to delete jobs, therefore when you need to store a new job, an old job must be overwritten. To make temporary changes in the actual job settings or temporary changes of a stored job, see section 2. -
Page 52: Recalling A Job
Storing a new Job, continues To store the job, press the [Save] button. If you want to run the actual job, press the [Load] button. The booklet maker will then automatically setup that specific job and return to the Ready screen. Recalling a Job To recall a stored job press the [Jobs] button from the Ready screen to enter the Jobs screen. -
Page 53: Clearing Misfeed(S)
5. Clearing Misfeed(s) Clearing misfeed(s) General If a misfeed condition should occur, it is indicated on the Booklet Maker display. The message “Clear Misfeed(s)”, an error code and the location of the misfeed is displayed. See examples below. Misfeeds in the Booklet Maker are indicated as area A, B or C and by the error code 40- XXXX. -
Page 54: Booklet Maker
Booklet Maker Clearing misfeed(s) Inside the Booklet Maker To clear a misfeed indicated in Area A or B Open the top cover. Remove misfed sheets. Close the top cover. To clear a misfeed indicated in Area C Open the top cover. Close top cover. -
Page 55: Clearing Misfeed In Input Area
Clearing misfeed(s), continues Clearing misfeed in input area Open Top Cover. Manually pull the spring supported paper guides apart. Remove the misfed sheets. Close Top Cover. -
Page 56: Trimmer
Trimmer Clearing misfeed(s) The upper trimmer blade on the trimmer is protected by a knife protection plate that moves away during the cutting stroke. Jams can occur in the input area or the exit area. WARNING: Never put fingers or other parts of the body between the upper and lower trimmer knives. Clearing misfeed in input area Raise the infeed roller shaft (A) by lifting latch (B). -
Page 57: Clearing Misfeed In Exit Area
Clearing misfeed(s), continues Clearing misfeed in exit area Lift the exit compressing brackets (A). Secure them under the latch (B). Remove the misfed sheets from the exit area. After the misfed sheets are removed, lift up the latch (B) and place the compressing brackets in operating position. -
Page 58: Cover Feeder
Cover Feeder Clearing misfeed(s) in vertical transport area Open the Hand Feed Cover. Lift the jam clearance baffle (A). Remove the misfed cover. Put the jam clearance baffle back in normal position. -
Page 59: Square Folder
Square Folder Clearing misfeed(s) Inside the Square Folder Open the top cover. Lift up both upper feed belts (A). Note Press the green dots (B) on the latches to release. Remove the misfeeds. Place the upper feed belts in normal position. Close the top cover. -
Page 60: Rct 30
RCT 30 Clearing misfeed(s) in the paper path Infeed “A” area and exit “D” area Open the top cover. Lift up “A” (A) and “D” (B) baffles if needed. Remove any misfeed(s). Lower “A” and “D” baffles to normal position Misfeed(s) in the trimmer area are rolled out by rotating the rubber surfaced pinch roller (C). Close the top cover. -
Page 61: Rotator, Registration And Creaser Area
Rotator, registration and creaser area Open the slide door (A). Unlatch and pull out the slide (B). Open “B” (C) and “C” (D) baffles if needed. Remove any misfeed(s). Push in and latch the slide. Always remove any residual waste from waste channel and waste belt before closing the slide door. - Page 62 Page intentionally blank.
-
Page 63: Troubleshooting
6. Troubleshooting Fault codes General If frequent input jams are experienced please check paper curl and decurler adjustments in printer operator guide. When there is a misfeed or fault condition in the booklet maker system, a message will be displayed on the Booklet Maker. In case there is a problem that can be rectified by the operator, a fault code and an explanation will be displayed. Fault codes that can be rectified by the operator: BM30 40-XXXX... -
Page 64: General Fault Codes
General fault codes Clear Misfeed(s) In general, fault codes indicate a misfeed condition. When a misfeed occurs, the message “Clear Misfeed(s)”, a code and the jam area will be displayed. See section 5. Clearing Misfeeds, for how to clear a misfeed. Close cover(s) When the message “Close Cover(s)”... -
Page 65: Booklet Maker Fault Codes
Booklet maker fault codes Check staples This message will be displayed when a staple cartridge is empty or when stapling could not be performed. Check in the following order: – If a staple cartridge is empty, replace according to section 1. Basics. –... -
Page 66: Trim Bin Full
Trim bin full This message will be displayed when the trim bin is full or when a trim strip, due to static electricity, is prevented from falling down into the trim bin. Empty the trim bin and remove loose trim strips from inside the Trimmer. See section 1. Basics for how to remove the trim bin. Close trimmer belts This message will be displayed when the belts at the outfeed area of the Trimmer is not in correct position. -
Page 67: Square Folder Fault Codes
Square Folder fault codes Feed errors If feed errors occur, the feed belts needs to be cleaned or the pressure on the upper feed belts needs to be increased. To clean the feed belts, see section 7, REMARKS Maintaining Your Machine. To increase the pressure on the upper feed belts follow this procedure. Open the top cover. -
Page 68: Rct 30 Fault Codes
RCT 30 fault codes Adjustment errors 44-9001, Bleed Trim Conflict Shreds outside the interval 5 - 30 mm. The trimmer of cut must be in-between 5 - 30 mm. This is determined by the combined settings of 3 parameters: - The Width of the Booklet Maker “Size” parameter - The “Width In”... -
Page 69: Remarks
7. REMARKS Do’s And Don’ts • Always follow all warnings marked on, or supplied with, the equipment. • Always exercise care in moving or relocating the equipment. Caution: • Unplug the power cord from the wall outlet and machine before you move or relocate the equipment. • Do not remove the covers or guards that are fastened with screws. • Do not override or bypass electrical or mechanical interlock devices. • Do not operate the equipment if you notice unusual noises or odors. Disconnect the powercord from the power source and call your authorized technician to correct the problem. -
Page 70: Where To Put Your Machine
Where to put Your Machine Machine environment • Always locate the equipment on a solid support surface with adequate strength for the weight of the machine. • Always keep magnets and all devices with strong magnetic fields away from the machine. If the place of installation is air-conditioned or heated, do not place the machine where it will be: •... -
Page 71: Access To Machine
Access to machine Place the machine near the power source, providing clearance as shown. 1. Left: more than 400 mm / 15 3/4” (off-line use). 2. Rear: more than 555 mm / 21 7/8” 3. Right: more than 400 mm / 15 3/4”. 4. -
Page 72: Maintaining Your Machines
Maintaining Your Machines Never attempt any maintenance function that is not specifically described in this documentation. Booklet Maker Oil Clinchers and Stapler Heads The clinchers must be oiled every 20 000 stapling cycles to avoid mechanical breakdown. Stapling area, view from infeed close-up of clincher close-up of close-up of clincher... - Page 73 Open the top cover. Put a couple of drops of oil in each clincher (A). To get rid of excessive oil: Push down clincher (B) lever a couple of times. Push down clincher lever (B) while wiping of excessive oil with a dry cloth. Run a few blank booklets.
-
Page 74: Cover Feeder
Cover Feeder Cleaning feed rollers and paper separator pad The feed rollers need to be cleaned regularly when in use, and if the unit has not been used for a period of time. How often this should be done, depends on the paper type and print quality. An increasing number of misfeeds, or double feeds, is one indication of the need to clean the Feed Rollers. -
Page 75: Square Folder
Square Folder Cleaning feed belts The feed belts need to be cleaned regularly when in use, and if the unit has not been used for a period of time. How often this should be done, depends on the paper type and print quality. An increasing number of misfeeds is one indication of the need to clean the feed belts. -
Page 76: Rct 30
RCT 30 The feed rollers and paper path need to be cleaned regularly when in use, and if the unit has not been used for a period of time. How often this should be done depends on the paper type and print quality. An increasing number of misfeeds is one indication of the need to clean the feed roller, paper path and/or the sensors. -
Page 77: Cleaning The Fixing Rollers (3X)
Cleaning the paper path transportation nip rollers (4x) continues Nip rollers Cleaning the fixing rollers (3x) WARNING! Do not put your fingers within knife protections. Doing so may result in injury. Also clean the idler rollers Fixing rollers Knife protections... -
Page 78: Cleaning The Registration Cross Roller (4X)
Cleaning the the fixing rollers (3x) continues Fixing rollers Cleaning the registration cross roller (4x) Cleaning of the friction tires is done from within the registration sub-frame. Registration cross rollers Cleaning friction tires... -
Page 79: Cleaning The Rotator Rollers (2X)
Cleaning the rotator rollers (2x) Also clean the idler rollers Rotator rollers Cleaning the paper path sensors (5x) WARNING! Do not put your fingers within knife protections. Doing so may result in injury. Outfeed sensor Infeed sensor Knife protections... - Page 80 Cleaning the paper path sensors (5x) continues Rotator sensor Registration sensor...
-
Page 81: Cleaning Of Creaser Tools (2X)
Cleaning the paper path sensors (5x) continues Creaser sensor Cleaning of creaser tools (2x) After a period of time toner and paper dust may leave residuals in the grooves of the tool. These grooves need to be cleaned periodically to restore creasing performance. Grooves on both sides of the tool... -
Page 82: Adjustment Of Bleed Trimmer Registration Angle (Parallell Cut)
Adjustment of Bleed Trimmer registration angle (parallell cut) Adjustment of Bleed Trimmer registration angle (trimmer cut parallel to registration (OB) edge) Turn the knurled screw in desired direction. Counter nut and set screw Reference scale... -
Page 83: Adjustment Of Creaser Registration Angle
Adjustment of Creaser registration angle Adjustment of Creaser registration angle Loosen the star shaped knob. Turn the knurled eccentric in the desired direction. Tighten the star shaped knob again. Knurled eccentric Alignment marks Star shaped knob... - Page 84 Page intentionally blank.
-
Page 85: Specification
8. Specification Machine Specifications Booklet Maker BM30 Major Specifications Specifications Remarks Speed (Online usage) Maintains engine speed Actual speed in number of book- lets (per min / hour) depends on number of sheets per booklet. Maximum Speed 1440 booklets / hour (A4 / 8.5x11”) 720 booklets / hour (A3 / 11x17”) Standard Paper Sizes A4, A3, 8.5x11”, 8.5x14”, 11x17”, SRA3,... -
Page 86: Cover Feeder Cf30 (Optional)
Cover Feeder CF30 (optional) Specifications Remarks Maximum Speed Same as BM30 Standard Paper Sizes Same as BM30 Paper Weight (Minimum) 70 gsm / 18 lb Bond Paper Weight (Maximum) 250 gsm / 67 lb Bond Cover Feeder Capacity 20 mm (approx 200 sheets of 80 gsm paper) 13/16”... -
Page 87: Square Folder Sqf30 (Optional)
Square Folder SQF30 (optional) Specifications Remarks Speed Same as BM30 Standard Paper Sizes Same as BM30 Paper Weight (Minimum) Same as BM30 Paper Weight (Maximum) Same as BM30 Input / Output Sheets Same as BM30 Input / Output Sheets Same as BM30 Off-line Use Possible (Together with Booklet maker &... -
Page 88: Rct 30 (Optional)
RCT 30 (optional) Specifications Remarks Speed Same as BM30 Standard Paper Sizes Same as BM30 Paper Size Minimum (Out) Same as BM30 Paper Size Maximum (Out) Same as BM30 Paper Width Maximum (In) 330 mm / 13” Paper Weight (Minimum) Same as BM30 Paper Weight (Maximum) Same as BM30... -
Page 89: System Certifications
System Certifications The system complies with the following directives: EU Directive 2006/95/EC Low Voltage Directive EU Directive 2004/108/EC EMC Directive, Class A equipment EU Directive 2002/95/EC RoHS Directive EU Directive 2002/96/EC WEEE Directive Turkey RoHS Regulation of May 30, 2008 China RoHS, Standards SJ/T 11363-2006 and SJ/T 11364-2006 Certification Description Certification Body... -
Page 90: Pro30 System Set Size Guide
PRO30 System Set Size Guide Note Paper size 1. For cover jobs, deduct 2 sheets. <A3 >A3 2. Area coverage: Low = Text only Grain direction Grain direction High = Pictures Short Long Short Long Full = Maximum coverage Area coverage Area coverage Area coverage Area coverage... -
Page 91: Index
INDEX Making Booklets 35 Misfeed(s) clearing 53 Access to machine 71 Air Separation, adjusting 49 Options 16 Basics 29 The Please wait screen 28 Bleed Trimmer The Processing screen 28 selecting mode 43 Turning On / Off the Main Power 29 Bleed Trim Conflict 46 Paper Size setting 35...
Need help?
Do you have a question about the BOOKLET MAKER Pro 30 and is the answer not in the manual?
Questions and answers