Table of Contents
Advertisement
Quick Links
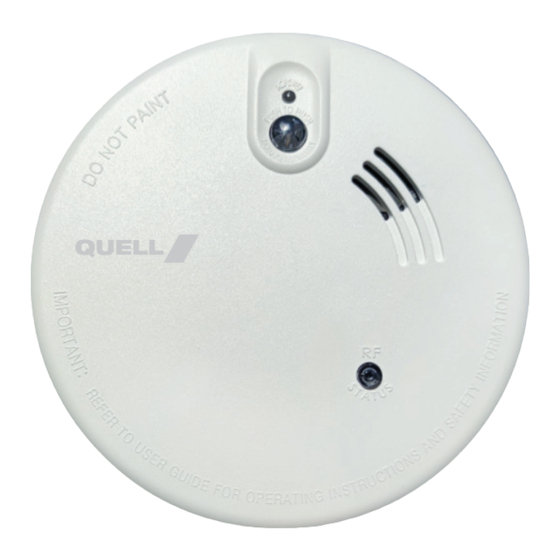
PHOTOELECTRIC SMOKE ALARM
WITH RF INTERCONNECT
240V AC, 50Hz, 15mA max, 9V back up, Standalone
or Interconnected (46 units maximum)
User Manual
Model: Q2300W
Tested and Approved
to Australian
Standard AS 3786:2014
You do NOT need a home wi-fi system to use these units.
Multiple wireless units create their own independent wireless RF
interconnect network.
Photoelectric smoke alarms are designed to detect visible particles
(associated with slow smouldering fires).
©2022 Carrier. All Rights Reserved.
P/N: 240025
1378-7203-00 04/22
Advertisement
Table of Contents

Related Manuals for Quell Q2300W


Summary of Contents for Quell Q2300W
- Page 1 WITH RF INTERCONNECT 240V AC, 50Hz, 15mA max, 9V back up, Standalone or Interconnected (46 units maximum) User Manual Model: Q2300W Tested and Approved to Australian Standard AS 3786:2014 You do NOT need a home wi-fi system to use these units.
-
Page 2: Table Of Contents
.............28 Thank you for purchasing this smoke alarm. It is an important part of your family’s home safety plan. You can trust Quell to provide the highest quality safety products. Please take a few minutes to thoroughly read this user guide, and save it for future reference. -
Page 3: Product Features
1. Product Features Model Q2300W is powered from a 240V AC supply, and has a DC battery back-up source. AC/DC smoke alarms ensure protection in the event of a power failure. • Hush feature silences unwanted alarms for up to 10 minutes. -
Page 4: Product Specifications
Up to any combination of 23 other Smoke And Heat Alarms alarm models. Compatible Models include: Q2300, Q2300LL, Q2300W Wireless Interconnecting up to any combination of 23 QUELL Smoke Alarms wireless smoke alarms models. Compatible models are Q2300W and Q4000 Series Wireless Range At least100m line of sight. -
Page 5: Recommended Locations For Alarms
3. Recommended Locations for Alarms This alarm must only be wired to a 240VAC 50Hz sine wave supply. Laws on smoke alarms vary from state to state and you should be aware of what the requirements are in your state - for more information please refer to your local fire emergency services or state regulations. - Page 6 3. Recommended Locations for Alarms DINING KITCHEN BEDROOM BEDROOM ROOM LIVING ROOM BEDROOM BEDROOM HALL BEDROOM Smoke Alarms for Minimum Protection LIVING KITCHEN ROOM Smoke Alarms for Additional Protection Not within 3m of cooking appliances BASEMENT SINGLE FLOOR PLAN MULTIPLE FLOOR PLAN Figure 1A Figure 1B HALL...
- Page 7 3. Recommended Locations for Alarms Figure 2A 300 mm MINIMUM CEILING DO NOT INSTALL BEST PLACEMENT ACCEPTABLE PLACEMENT SIDE WALL 500 mm NOT IN THIS AREA 1000 mm DEAD AIR ANYWHERE IN THIS AREA DO NOT INSTALL CEILING APEX...
- Page 8 3. Recommended Locations for Alarms • When mounting the alarm on a sloping ceiling, it should not exceed 1500mm away from the apex. The spacing of additional alarms, if any, should be based on a horizontal distance measurement, not a measurement along the slope of the ceiling (see Figure 2B ) Figure 500 mm...
-
Page 9: Locations To Avoid
3. Recommended Locations for Alarms Mobile Home Installation: For Well Insulated Mobile Homes Install alarms as recommended on the previous pages. In mobile homes that are not well insulated extreme heat or cold can be transfered through poorly insulated walls and roofs. This may create a thermal barrier which can prevent the smoke from reaching an alarm mounted on the ceiling. -
Page 10: Installation
• When alarms are hardwired interconnected, all hardwire interconnected units must be powered from a single AC circuit. • A maximum of 24 Quell safety devices may be hardwire interconnected in a multiple station arrangement. The hardware interconnect system should not exceed the interconnect limit of 24 units. - Page 11 FIGURE 3 “INTERCONNECT WIRING DIAGRAM” FUSE OR CIRCUIT BREAKER (Active Side of AC Line) (Intercon- nection Line) (Neutral side of AC Line) Q2300W Q2300LL Q2300 Interconnect Interconnect Interconnect Smoke Alarm Smoke Alarm Smoke Alarm...
- Page 12 5. Installation Note: The Q2300W alarm will not require the I/C terminal to be use. To connect all wireless alarm use only the Active and Neutral lines, do not connect to the I/C terminal. See diagram below. FUSE OR CIRCUIT BREAKER...
- Page 13 5. Installation • For concealed cable applications where the cable is running through the wall space or roof space, and the cable will enter from the rear of the alarm base: 1. It may be necessary to remove the outer sheath prior to securing the base to the ceiling.
-
Page 14: Mounting Instructions
6. Mounting Instructions Battery Activation See Battery replacement (page 23) for battery installation. • To activate the battery, pull out the battery pull tab. NOTE : If the battery compartment is empty, the alarm cannot mount on the mounting base. •... -
Page 15: Activation And Rf Interconnect Network
7. Activation and RF Interconnect Network This model is capable of wireless interconnecting with Q2300W models in domestic residential applications. When one RF interconnect unit sounds an alarm, all other compatible RF units in the RF interconnect network will alarm. Follow the steps in section 5.1 to interlink up to 24 units in your network. -
Page 16: Setting Up An Rf Interlink Network
15 by pulling out battery seconds after joining minutes after yellow battery tab on the network. last unit joins. the rest of Q2300W smoke alarms. They will automatically join the open network. Step 4 Pick Any Connected Amber LED stops... -
Page 17: Adding A Smoke Alarm To An Existing Rf Interlink Networks
7.2 Adding A Smoke Alarm To An Existing RF Interlink Network At some point, you might want to add another smoke alarm unit to your existing RF interlink network for additional protection, or to replace an old unit. Follow the steps in the following table. User Input Detector Timeout... -
Page 18: Resetting
* If you have problems connecting the Q2300W alarm to a wireless network. * If a Q2300W is consistently out of range, and needs to be removed from the wireless network. * If you decide to transfer a Q2300W from your network to another wireless network. - Page 19 8. Wireless FAQs Answer What happens if Units will search for a network for 15 minutes units are powered after which all units will go into Standby and the up for the first time LEDs will be turned off. but no buttons are To retry, press the RF button twice quickly to pressed? re-enter Join Mode.
-
Page 20: Wireless Faqs
8. Wireless FAQs Answer What happens Nothing within 30min. After 30 min, push if the Host RF button twice, and then push/hold RF drops from the button for approx 4 seconds. Unit is reset. network and Push RF button twice to reopen network and comes back rejoin. -
Page 21: Operation And Test
9. Operation And Test Operation The smoke alarm is operating once AC power is applied, new battery is installed and testing is complete. When the smoke alarm senses smoke, the horn will sound a loud (85db) pulsating alarm( 3 beeps repeating). There are three LED indicators. - Page 22 AND ACTION. LOCATE FUNCTIONS If the Q2300W are interlinked in a network, if one smoke alarm activates (initiating unit) other units will activate. For interlinked network of smoke alarms, only by pressing the HUSH button on the initiating smoke alarm will hush all the smoke alarms in the network.
-
Page 23: Visual And Audible Indications
10. Visual And Audible Indications The following tables describes visual and audible indications the unit may emit during normal operation. Audible Action/ Mode Indications Indications Note: Green LED None AC Mains power Normal steady ON is present. Normal Red LED None flashes every 5 minutes 20... -
Page 24: Nuisance Alarms And Hush Function
Hush repeatedly until the air has been cleared of the condition causing the alarm. If an alarm occurs in an interconnected system of Quell units: • Pushing the Hush button on the initiating alarm (Red LED flashing every second) will silence that alarm and all compatible interconnected units. - Page 25 12. Battery Replacement Alarm removal Press down resist tab on mounting base, and then release the alarm from mounting base. (see Figure 6) Press down the resist tab Mounting Release Base alarm from mounting base FIGURE 6 Battery Installation and Replacement: After the alarm has been removed you can replace the battery.
-
Page 26: Battery Replacement
12. Battery Replacement USE ONLY THE FOLLOWING 9VOLT REPLACEMENT BATTERIES: Alkaline type: ENERGIZER 522; DURACELL MN1604 or MX1604 Lithium type: FDK CP-V9Ju; ULTRALIFE U9VL-J-P Note: Weekly testing is recommended Warning! Use only the batteries specified. Use of different batteries may have a detrimental effect on the alarm. Exposure to temperature extremes and / or high humidity may reduce battery life. -
Page 27: Limitations Of Smoke Alarms
Home fires develop in different ways and are often unpredictable. For maximum protection, subject to applicable legal requirements in each State and Territory, Quell recommends that both ionisation and photoelectric alarms be installed. Loose batteries, where fitted, must be of the specified type, in good condition and installed properly. -
Page 28: Good Safety Habits
15. Good Safety Habits DEVELOP AND PRACTICE A PLAN OF ESCAPE: • Install and maintain fire extinguishers on every level of the home and in the kitchen, basement and garage. Know how to use a fire extinguisher prior to an emergency. •... -
Page 29: What To Do When The Alarm Sounds
16. What To Do When The Alarm Sounds • Leave immediately by your escape plan. Every second counts, so don’t waste time getting dressed or picking up valuables. • While leaving, don’t open any inside door without first feeling its surface. -
Page 30: Warranty & Contact Details
10 years from the date of purchase. To the extent permitted by law, Quell agrees to repair or replace (at our discretion) any defective product on presentation of the proof of purchase. - Page 31 When returning the product, please ensure it is properly packaged so that no damage occurs during transit. Any postage and packaging expenses required to return the product to Quell will be at your cost. Please provide the original or a copy of the proof of purchase. Also, please make sure you have included an explanation of the problem.
Need help?
Do you have a question about the Q2300W and is the answer not in the manual?
Questions and answers