
Related Manuals for Swift STELLAR 1 Series


Summary of Contents for Swift STELLAR 1 Series
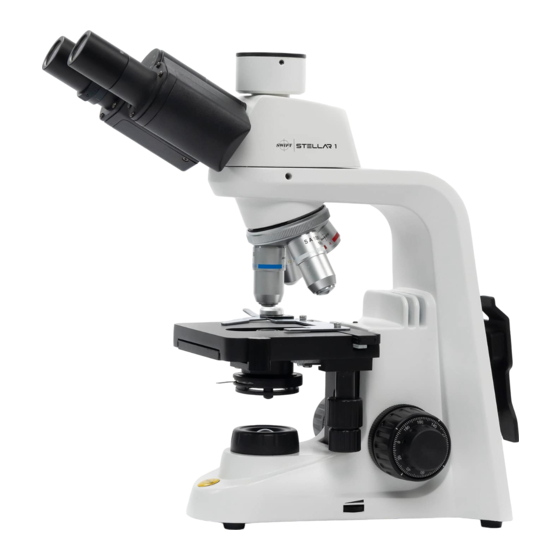
- Page 1 STELLAR 1 SERIES Biological Microscope Instruction Manual SHOP.SWIFTOPTICAL.COM M TEC LIMITED...
- Page 2 We are constantly endeavouring to improve our instruments and to adapt them to the requirements of modern research techniques and testing methods. This involves modification to the mechanical structure and optical design of our instruments. Therefore, all descriptions and illustrations in this instruction manual, including all specifications are subject to change without notice.
- Page 3 Microscope terminology diaphragm. Abbe Condenser A two-lens sub-stage condenser Magnification located below the stage of a The number of times by which the microscope and functions to size of the image exceeds the original collect light and direct it onto object.
- Page 4 Diopter Adjustment parallel lines on the object. The adjustment of the eyepiece Resolution of an instrument to provide accommodation for the eyesight The result of displaying fine details in differences of individual an image observers. Total Magnification Depth of Focus The total magnification of a microscope The axial depth of the space on is the individual magnifying power of...
-
Page 5: Table Of Contents
Table of contents Nomenclature Setting up the instrument Operating Enviroment III Assembling the microscope 1. Verifying input voltage 2. Illumination 3. Mechanical stage 4. Objectives 5. Condenser 6. Eyepiece tube 7. Eyepieces 8. Filters IV Usage of microscope compoents 1. Illumination brightness adjustment 2. -
Page 6: I Nomenclature
I. Nomenclature Eyepiece Photo Port Diopter Binocular Adjustment Ring Eyepiece Tube Revolving Nosepiece Eyepiece Tube Objective Clamp Screw Specimen Holder lever Stage Coarse Focus Knob Condenser Aperture lever Fine Focus Knob Filter Holder Stage X-Y Travel Knob Brightness Indicator Light Intensity Control Slide Storage Power Cord Hanger Objective Color Ring... -
Page 7: Setting Up The Instrument
II. Setting up the instrument Avoid placing the instrument in locations exposed to direct sunlight, dust, vibration, high temperature and high humidity. Operating environment Indoor use ● Altitude: Max 2000 meters ● Ambient temperature: 15°C to 35°C ● Maximum relative humidity: 75% for temperature up to 31°C decreasing ●... -
Page 8: Mechanical Stage
3.3V 1W, color temperature 5300K ~ 6000K LED Power connection: Take out power adapter from the power adapter compartment on the rear of microscope and power cord from the styrofoam packaging box. Connect the Type-C socket of the of the power cord to the inlet on the rear of the microscope base. -
Page 9: Objectives
specimen by sliding it on the stage from the front toward the rear. After setting the specimen, return the specimen holding lever gently Remove specimen holder for fast hand scanning of slides ● 4. Objectives Objectives are installed in revolving nosepiece. If necessary to reinstall, ●... -
Page 10: Usage Of Microscope Compoents
Set the power switch on the rear of microscope to position “I” (ON) ● The brightness indicator of Swift Logo in the front of microscope base will ● light up. When the light intensity control wheel is turned anti-clockwise to high ●... -
Page 11: Diopter Adjustment
● This adjustment will enable the user to observe the specimen with both eyes. 3. Diopter adjustment ● Diopter adjustment compensates for the differences in vision between the left and right eyes. In addition to making observation through both eyes easier, this adjustment also reduces the extent to which focusing is lost when the objective magnification is changed. -
Page 12: Use Of Parfocal Guide Line
and right of the microscope stand. ● The direction of vertical movement of the stage corresponds to the turning direction of the focus knobs. ● One rotation of the fine focus knob moves the stage 0.34mm. The graduation on the fine focus knob is 3.4 microns. Never attempt either of the following actions, since doing so will damage the focusing mechanism: - Rotate the left and right knob while holding the other. -
Page 13: Stage Upper Limit Stop Adjustment
reduce the torque, turn the ring in the direction opposite to that indicated by the arrow. 7. Stage upper limit stop adjustment (Upper Stage Limit is preset at the factory; please only adjust if necessary) The Stage Upper Limit stop marks the stage position at which the ●... -
Page 14: Use Of Darkfield Darkfield
an aperture diaphragm closed down to 2/3 of the maximum value. Color Coded Condenser Aperture Diaphragm Turning down the diaphragm will lower the resolution and brightness but ● The aperture diaphragm is coded in color ranges to quickly locate increase the contrast and depth of focus. ●... - Page 15 Insert the phase contrast slide into condenser slot until it clicks into ● position. For example, a 10x Ph1 objective with Ph1 phase slide. Remove the eyepieces and replace them with the centring telescope. ● Bring the centering telescope into focus, so that the black ring of ●...
-
Page 16: Photomicrographic Procedure
V. Photomicrographic procedure Use of eyepiece/C-mount dual-purposes adapter (Included) ● Loosen the set screw of photo port by the provided hexagon wrench and remove the dustproof cap. The adapter can be used as a standard 1X C-mount for the C-mount camera. - Page 17 Use of standard C-mount adapter (Optional) ● Screw the adapter onto the camera. Loosen the set screw of photo port by the provided hexagon wrench and remove the dustproof cap. Insert the camera and adapter into the opening of the photo port and tighten the set screw.
-
Page 18: Using Of Oil Immersion Objectives
● and are to be immersed in oil between the specimen and the front of the objective. The immersion oil supplied by Swift is synthetic, non-fluorescing and non- ● resining oil, with a refractive index of 1.515 Normally, cover glass must be used with oil immersion objectives with a ●... -
Page 19: Maintenance And Storage
2. Never attempt to dismantle any parts other than described in this manual. If you notice any malfunction, contact your nearest Swift representative. B. Cleaning the microscope 1. - Page 20 Proper handling of the microscope will ensure years of trouble free ● service. If repair becomes necessary, please contact your Swift agency or our ● Technical Service direct. Note: If equipment is used in a manner not specified by the manufacturer, the ●...
- Page 21 iii. Disconnect the LED connection cables from the power supply socket and remove the LED board. iv. Install the new LED. Take out a qualified LED board and reverse action steps as above. ● When installing the LED board, do not touch the glass surface of the bulb with bare fingers.
-
Page 22: Troubleshooting Table
VIII. Troubleshooting table As you use your microscope, you may occasionally experience a problem. The troubleshooting table below contains the majority of frequently encountered problems and the possible causes. Optical Problem Lamp not installed properly Condenser not mounted correctly Condenser is set too low Vignetting or uneven brightness in the field of view or field of view Aperture diaphragm closed too far... - Page 23 Slide is upside down High magnification objectives strike the specimen when changing over Cover glass is too thick from low to high magnification Eyepiece diopter not adjusted Insufficient parfocality of objectives Eyepiece diopter not adjusted Magnification or field of view of left and right eyepieces differ No cohesion of binocular image Interpupillary distance not adjusted...
-
Page 24: Quality Warranty
● cover light bulbs, batteries, fuses, or electrical cords. All warranties start from the original date of purchase. Swift provides the repair or replacement of warrantied parts for free, including labor, during the warranty period. Proof of original purchase is required. Buyers are responsible for shipping to and from our warehouse for warranty services. - Page 25 Appendix 1: Product specification Model Stellar 1-B Stellar 1-T Stellar 1 Pro-B Stellar 1 Pro-T Finite optical system Color corrected infinity optical system Optical System Trinocular, light Trinocular, light Observation Binocular, Binocular, 30° distribution 50:50, distribution 50:50, Tube 30° inclined inclined 30°...
- Page 26 Appendix 2: Product configuration Stellar Stellar Stellar 1 Stellar 1 Stellar 1 Stellar 1 Stellar 1 -B-BD -T-BD -B-Ph -T-Ph ● ● ● Binocular(Finite) Head Tube ● ● ● Trinocular(Finite) ● ● ● ● ● ● WF10X ○ ○...
- Page 27 Stellar 1 Stellar 1 Stellar 1 Stellar 1 Stellar 1 Stellar 1 Stellar 1 Pro Pro-B Pro-T Pro-B-BD Pro-T-BD Pro-B-PH Pro-T-PH Binocular(Infinity) ● ● ● Head Tube Trinocular(Infinity) WF10X Eyepiece WF16X WF25X Nosepiece Quadruple S Plan Infinity 4X, 10X, 40X, 100X SA Plan Infinity 4X, Objective 10X, 40X, 100X...
- Page 28 Shop.swiftoptical.com Eu.swiftmicroscopes.com © 2021 Swift Optical Instruments, Inc. All rights reserved. Swift is a registered trademark and service mark of Swift Optical Instruments, Inc. The trademarks is the property of its owner. Design Change: The manufacturer reserves the right to make changes in instrument design in accordance with scientific and mechanical progress, without notice and without obligation.
Need help?
Do you have a question about the STELLAR 1 Series and is the answer not in the manual?
Questions and answers