Advertisement
Adapter VESA M VESA Mount Kit
Instruction Manual
Model: STAND- STAND-VAD1 VAD-VAD11
Email: help@vivo-us.com
Live chat: www.vivo-us.com
Call: 1-800-371-5654
-
Scan the QR code with your mobile device or follow the link
to helpful videos and specifications related to this product.
https Requir : STAND- / /vivo us Requir . com/pr VESA M o ducts Requir / s Requir t and vad1
-
Tools Requir Requir VESA M e d: STAND-
phillips screwdriver
Package Contents Requir
A (x4)
B (x4)
Bracket Arm Arm
" L" Suppo Support Arm
E (x8)
F (x8)
M4 Nut Arm
M4 Washer
As Requir s Requir e mbly Steps Steps Requir
Pr VESA M e As Requir s Requir e mbly Steps
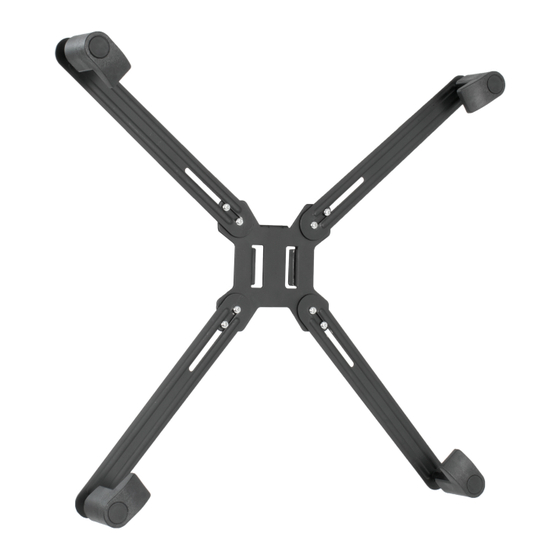
Attach Supports (B) to Bracket Arms (A) using M6
monitor screws (G or H) depending on monitor
thickness. Do not tighten.
Option A
Install arms to your VESA mount in
one of the three patterns shown
(depending on the size and shape
of your monitor) using M4x12
Bolts (D), Washers (F), and Nuts (E).
Tighten nuts and screws using a
wrench and screwdriver
respectively for only the lower two
Bracket Arms (A) at this time.
-
C (x4)
D-VAD1 (x8)
Plast Arm i c Cover
M4x12
G (x4)
H (x4)
M6x50
M6x75
-
Step 1
1
Advertisement
Table of Contents

Related Manuals for Vivo STAND-VAD1 VAD-VAD11


Summary of Contents for Vivo STAND-VAD1 VAD-VAD11
- Page 1 Scan the QR code with your mobile device or follow the link to helpful videos and specifications related to this product. https Requir : STAND- / /vivo us Requir . com/pr VESA M o ducts Requir / s Requir t and vad1 Tools Requir Requir VESA M e d: STAND-...
- Page 2 With all supports facing up, place monitor on lower two “L” Supports (B) and tighten lower two screws. Slide top two bracket For more VIVO products, check out our arms down until the supports rest on the website at monitor. Remove the monitor and tighten the nuts for the top two bracket arms.
Need help?
Do you have a question about the STAND-VAD1 VAD-VAD11 and is the answer not in the manual?
Questions and answers